一、基本说明
中国北方某高校16级课程设计硬件部分设计的基本思路:
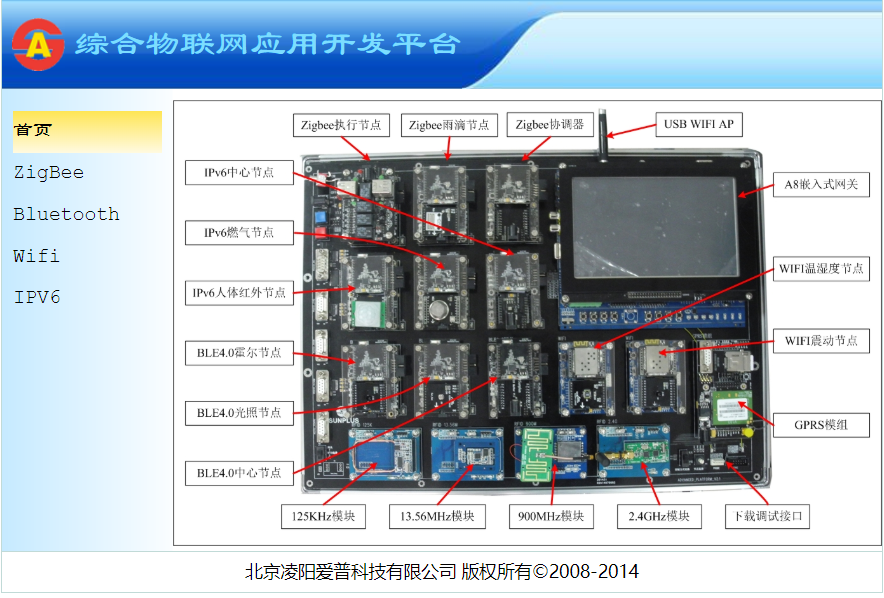
本次课设使用的是开发箱的Zigbee模块(屏幕左面的6个模块)和arm板(右上角屏幕做WiFi数据传输)实现Zigbee组建网状网络,采集传感器数据并通过arm板外接usb无线网卡将数据传到pc,最后对url中的json格式传感器数据进行解析得到我们想要的数据并存入数据库。
二、Zigbee组建网状网络
使用IAR对对应模块烧写ZStack-CC2530-r200代码
(Github链接[https://github.com/bobo-0oer/ZStack-CC2530-r200.git])
选择不同模块烧写以后会自动组建网络(根据信号的强弱各节点选择信号较强的路由器或协调器进行组网)烧写过程就不多BB了。
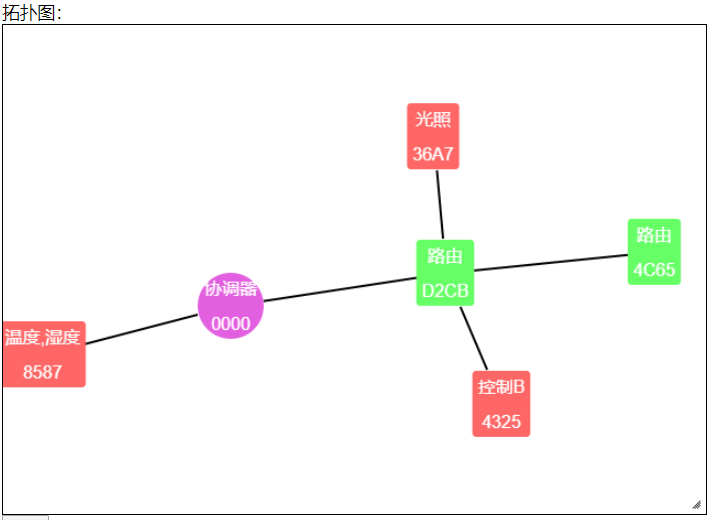
值得注意的是:如图所示的就是网状网,不过其各节点的连线代表的只是数据传输的路径,而不是只有显示为网状才叫网状网。现在如果关闭其中一个节点(除协调器)其他模块会自行重新组建网络进行数据传输,完成指定功能。
自此,Zigbee组建网状网络已经完成。
三、Wifi数据传输
这一部分主要使用arm板,其里面自带Qt程序可以作为实验箱上数据传输的服务器,多用户提供多个API接口:
请自行更换IP地址
- http://192.168.10.130/topo.html为Zigbee网络拓扑展示
- http://192.168.10.130/cgi-bin/topology2.cgi为拓扑信息的json格式数据
- http://192.168.10.130/cgi-bin/node.cgi为json格式的传感器数据
- http://192.168.10.130/cgi-bin/send_node.cgi目测为控制部分使用,我也不太清楚这个干什么。。。
实验箱上WiFi传输信息的配置和应用:
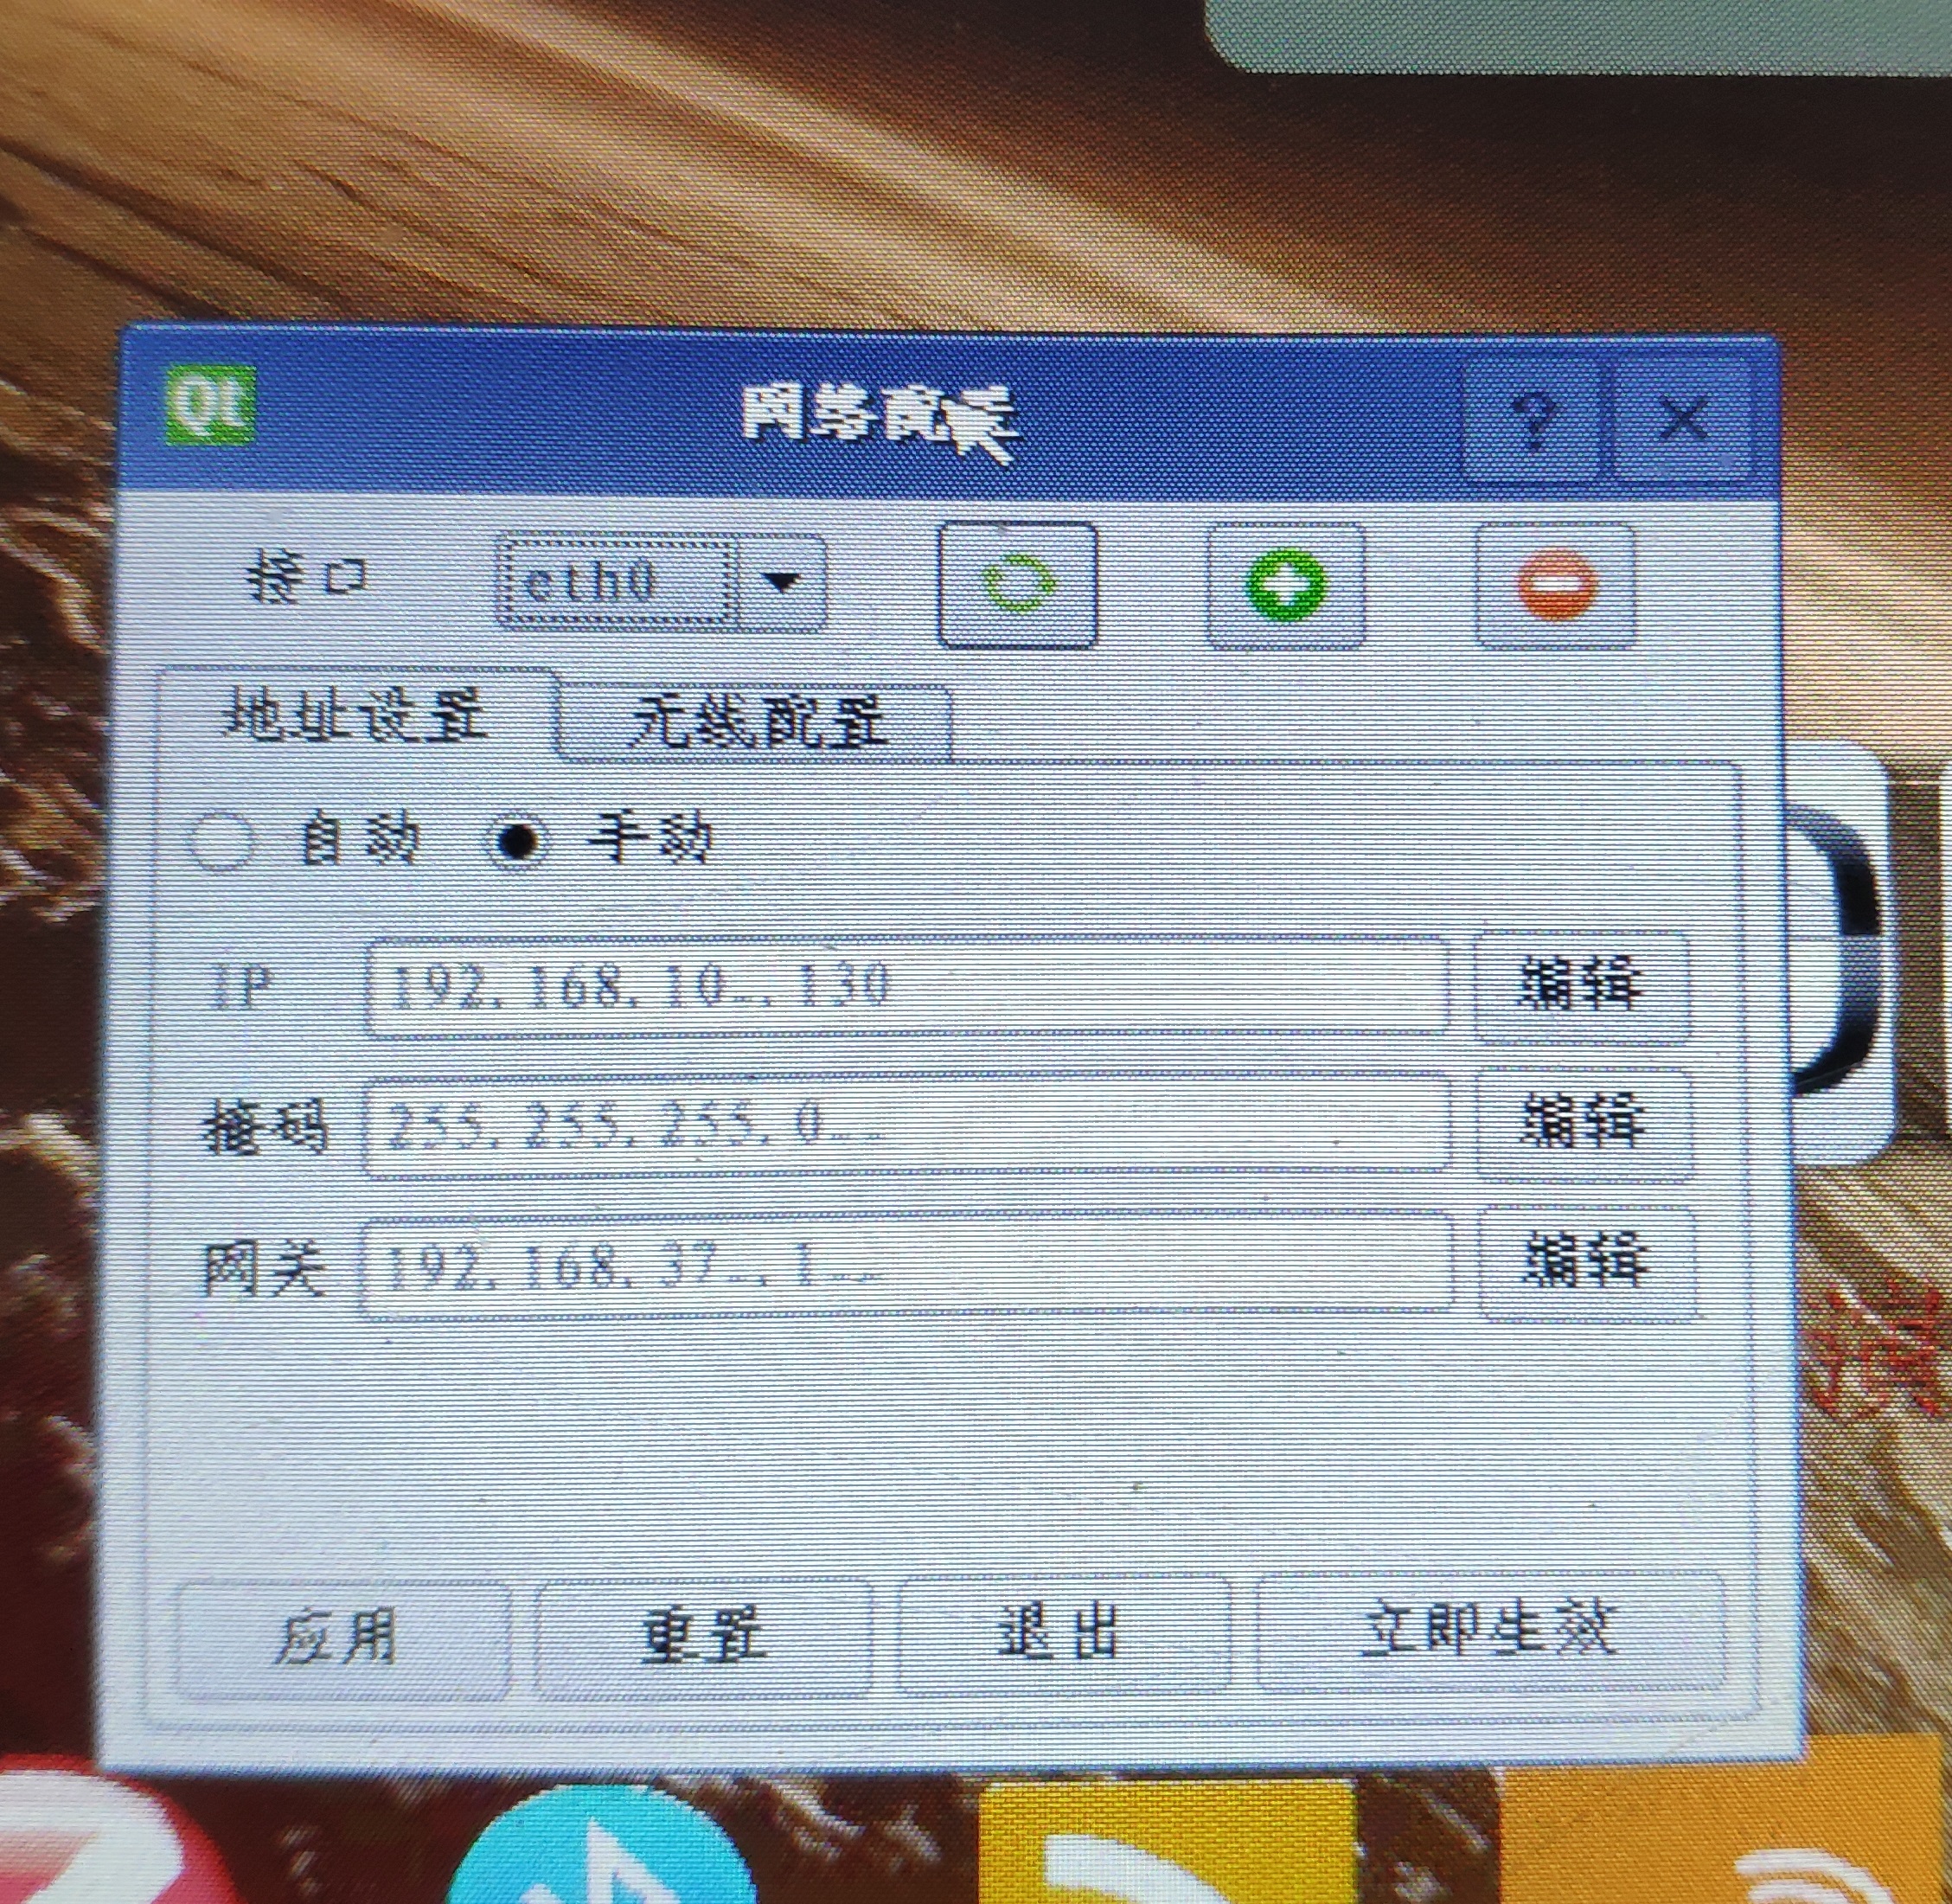
地址设置选择手动,配置好IP、子网掩码、网关后点应用接着点立即生效
此时屏幕右下角会显示出你的IP地址,打开WiFi可以看到你的热点名称(前提是插了usb无线网卡)…用pc连接热点,之后打开上面的网址会得到你想要的信息。
自此WiFi数据传输部分也基本结束。
四、python解析json数据并存入数据库
先上代码:
import json
import time
import urllib.request
import pymysql


def get_record(url):
    resp = urllib.request.urlopen(url)
    HardwareData = json.loads(resp.read())

    nowTime=time.strftime("%H:%M:%S")
    # print("当前时间为:" + nowTime)

    for counter in HardwareData:
        # print(counter['macAddr'])
        if counter['macAddr']=='DCE15305004B1200':
            print("协调器工作正常!")
        elif counter['macAddr']=='1DE25305004B1200':
            print("路由1工作正常!")
        elif counter['macAddr']=='56DD5305004B1200':
            print("路由2工作正常!")
        elif counter['macAddr']=='3DE25305004B1200':
            temperature=counter['funcList'][0]
            humidity=counter['funcList'][1]
            print("温度为:", temperature['data'])
            print("湿度为:", humidity['data'])
        elif counter['macAddr']=='DBDD5305004B1200':
            # print(counter['funcList'])
            illumination=counter['funcList'][0]
            # print(illumination['data'])
            print("光照强度为:", illumination['data'])
        elif counter['macAddr'] == 'AD625305004B1200':
            print("控制节点工作正常!")
        else:
            print("网络连接错误,请重试!")

    # print(temperature['data'], humidity['data'],illumination['data'])

    db = pymysql.connect("localhost", "root", "050014", "zigbee")
    cursor = db.cursor()
    sql = "INSERT INTO zigbeedata(time, temperature, humidity, illumination)VALUES('%s','%s','%s','%s')" % (
        nowTime, temperature['data'], humidity['data'], illumination['data'])
    cursor.execute(sql)
    db.commit()
    print("存入数据库成功!")


if __name__ == '__main__':
    while True:
        print(get_record('http://192.168.10.130/cgi-bin/node.cgi'))
        time.sleep(5)
写这段代码的基本思路为:
- 从http://192.168.10.130/cgi-bin/node.cgi获取通过WiFi传输回来的json格式的传感器数据
if __name__ == '__main__':
    while True:
        print(get_record('http://192.168.10.130/cgi-bin/node.cgi'))
        time.sleep(5)
写一个死循环,只要执行一次循环就会向网页请求一次数据,这样就可以解决网页端不会自己刷新数据的问题了
time.sleep(5):作用就是每5秒执行一次循环
2.接收json格式的数据

3. json数据解析思路
我们可以看到在上图中每一条数据有:
nwkAddr属性,为其网络地址,会在每次重新连接时改变
parAddr属性,为其父节点地址,也会随着拓扑结构的改变而改变
macAddr属性,为其网络地址,只要没人偷你的zigbee芯片,绝对不会变
funcList属性,为每个节点的信息及数据
 if counter['macAddr']=='DCE15305004B1200':
            print("协调器工作正常!")
        elif counter['macAddr']=='1DE25305004B1200':
            print("路由1工作正常!")
        elif counter['macAddr']=='56DD5305004B1200':
            print("路由2工作正常!")
        elif counter['macAddr']=='3DE25305004B1200':
            temperature=counter['funcList'][0]
            humidity=counter['funcList'][1]
            print("温度为:", temperature['data'])
            print("湿度为:", humidity['data'])
        elif counter['macAddr']=='DBDD5305004B1200':
            # print(counter['funcList'])
            illumination=counter['funcList'][0]
            # print(illumination['data'])
            print("光照强度为:", illumination['data'])
        elif counter['macAddr'] == 'AD625305004B1200':
            print("控制节点工作正常!")
        else:
            print("网络连接错误,请重试!")
因此这个循环使用每个节点的物理地址作为获取数据的依据
其次json格式数据本质就是一个列表,在python中只需要对列表的操作即可提取到想要的数据
4.数据存入数据库
 db = pymysql.connect("localhost", "root", "050014", "zigbee")
    cursor = db.cursor()
    sql = "INSERT INTO zigbeedata(time, temperature, humidity, illumination)VALUES('%s','%s','%s','%s')" % (
        nowTime, temperature['data'], humidity['data'], illumination['data'])
    cursor.execute(sql)
    db.commit()
    print("存入数据库成功!")
配置数据库,将需要的数据存入就OK了。
运行截图: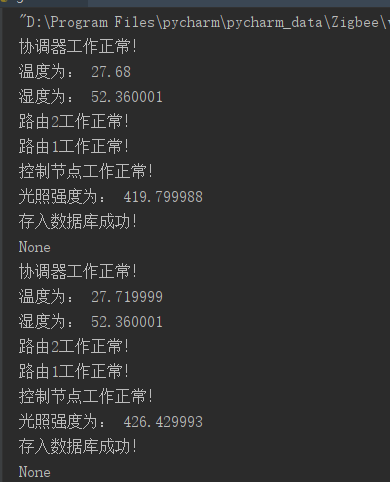
数据库截图:
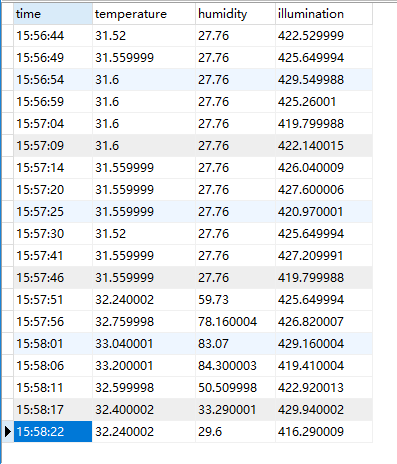
之后需要使用传感器数据的时候只需要从数据库取出来就行了!
希望对大家有一定帮助!最后祝大家考研顺利!
最后
以上就是腼腆棉花糖最近收集整理的关于Zigbee组网及基于WiFi的传感器数据获取一、基本说明二、Zigbee组建网状网络三、Wifi数据传输四、python解析json数据并存入数据库的全部内容,更多相关Zigbee组网及基于WiFi内容请搜索靠谱客的其他文章。


发表评论 取消回复