1、简介
在001中,D2D绘制的代码直接放在了对话框类中,实际使用过程中,通常是继承CWnd来实现显示窗口,因此本例子实现在CWnd子类中采用D2D进行绘制,并测试FPS,后续会与GDI和GDI+的绘制帧率进行对比。
2、实现
背景绘制渐变色,每隔10个像素绘制水平和垂直直线,中间绘制矩形和填充矩形,然后随机绘制 1000个圆,最后绘制字符串“你好,Direct 2D!”。
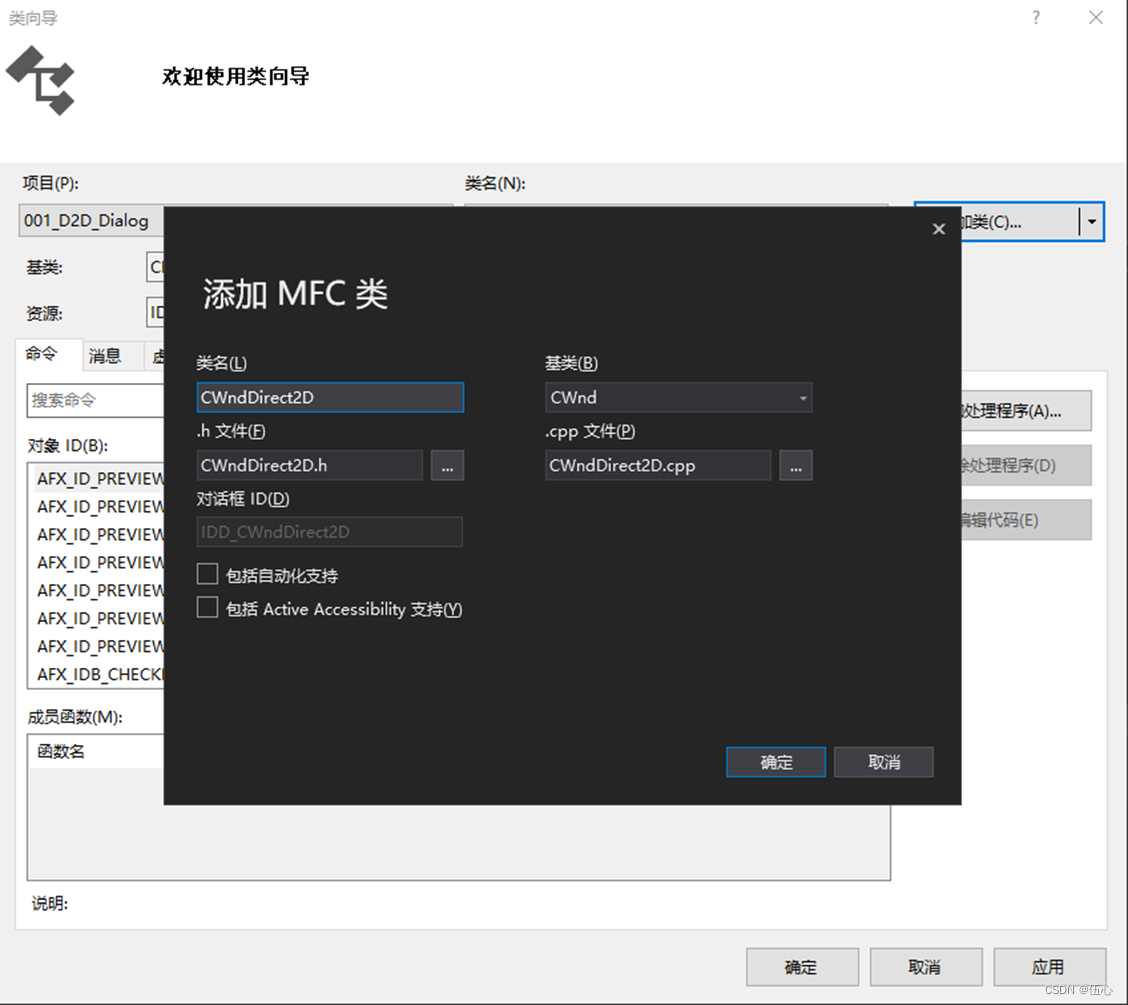
继承CWnd类生成子类 CWndDirect2D,在类向导中,添加类=》MFC类,在弹出框中添加类名称,本例子为CWndDirect2D
在头文件中添加成员变量
private:
CD2DTextFormat* m_pTextFormat;
CD2DSolidColorBrush* m_pBlackBrush;
CD2DSolidColorBrush* m_pLightSlateGrayBrush;
CD2DSolidColorBrush* m_pCornflowerBlueBrush;
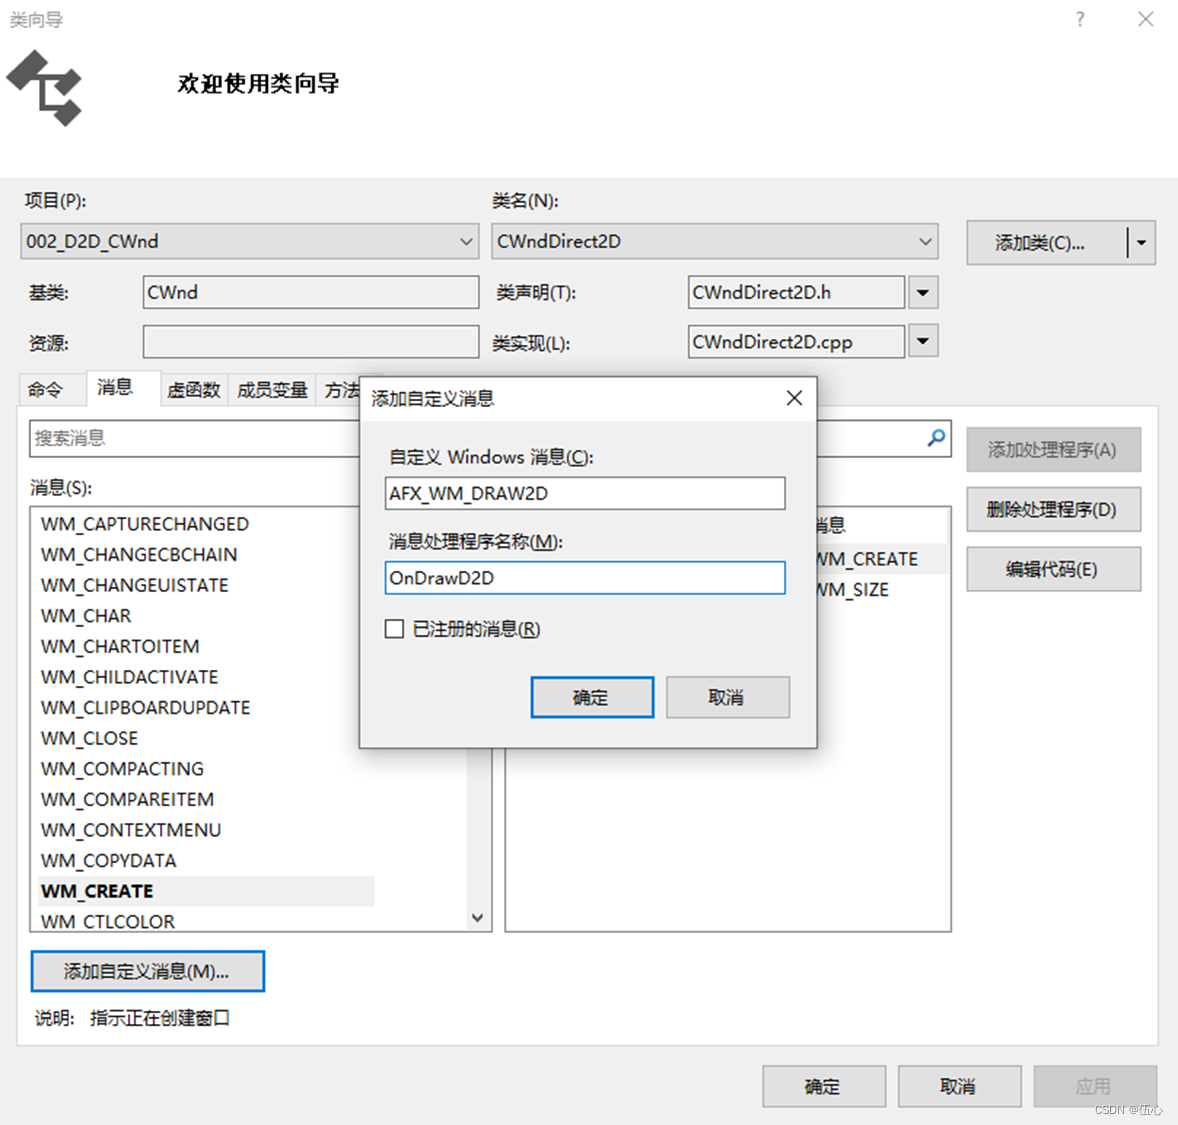
CD2DLinearGradientBrush* m_pLinearGradientBrush;然后给CWndDirect2D类添加三个消息函数,分别为Create、Size、和自定义的Draw2D,如下打开类向导,选择CWndDirect2D类,然后分别添加上述三个消息,具体如下:
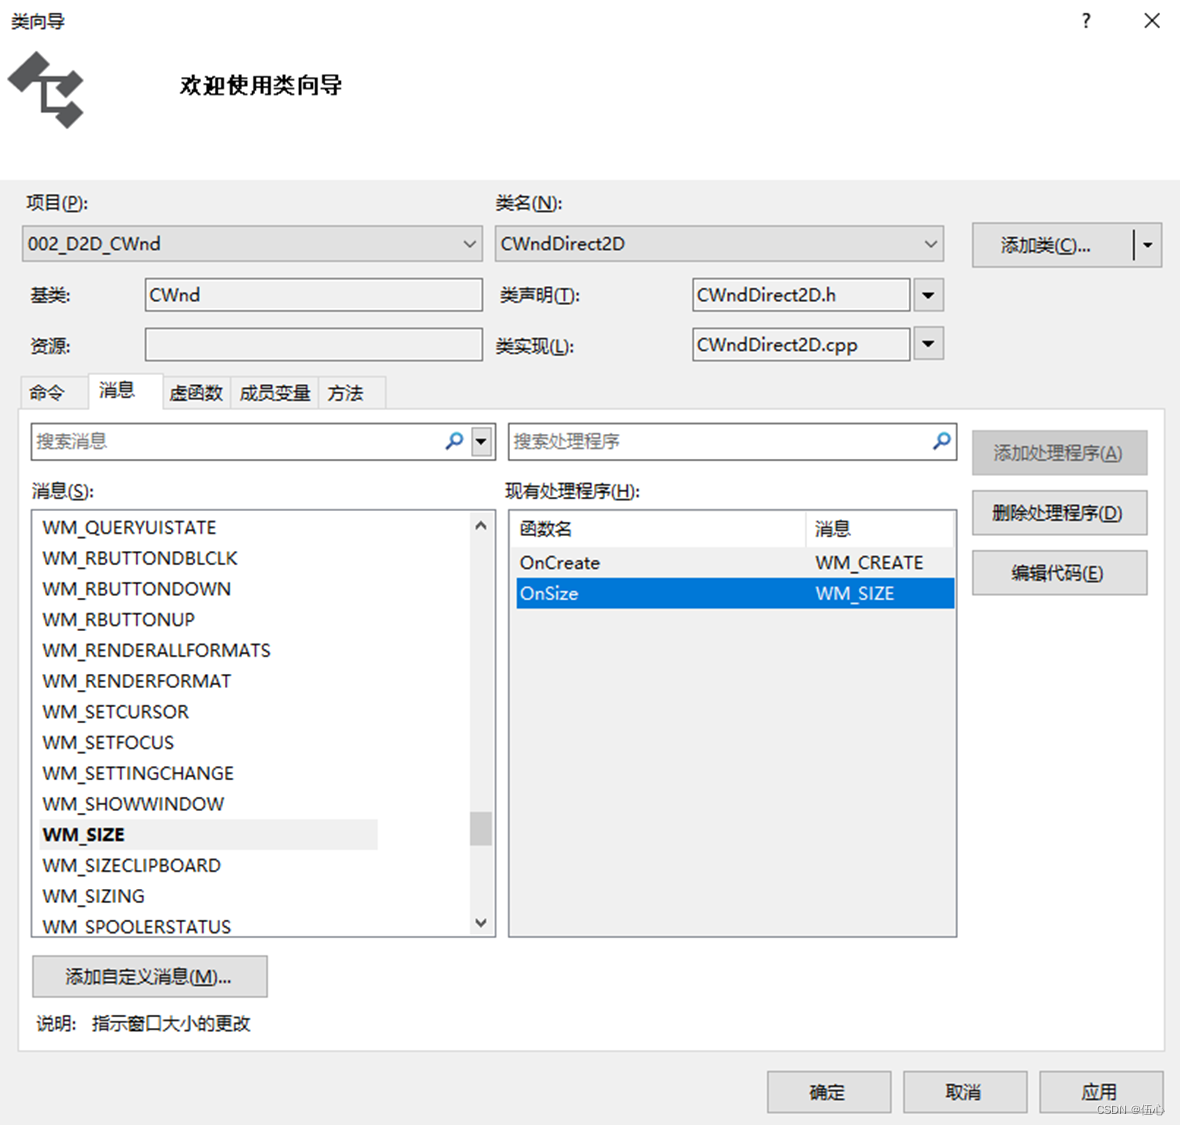
ON_WM_CREATE()
ON_WM_SIZE()
ON_REGISTERED_MESSAGE(AFX_WM_DRAW2D, &CWndDirect2D::OnDrawD2D)
具体添加过程为:
其中在CREATE中开启D2D,并初始化相关变量:如下代码所示:
int CWndDirect2D::OnCreate(LPCREATESTRUCT lpCreateStruct)
{
if (CWnd::OnCreate(lpCreateStruct) == -1)
return -1;
// TODO:
在此添加您专用的创建代码
// Enable D2D support for this window:
this->EnableD2DSupport();
if (!IsD2DSupportEnabled())
return -1;
// Initialize D2D resources:
m_pBlackBrush = new CD2DSolidColorBrush(GetRenderTarget(), D2D1::ColorF(D2D1::ColorF::Black));
m_pLightSlateGrayBrush = new CD2DSolidColorBrush(GetRenderTarget(), D2D1::ColorF(D2D1::ColorF::LightSlateGray));
m_pCornflowerBlueBrush = new CD2DSolidColorBrush(GetRenderTarget(), D2D1::ColorF(D2D1::ColorF::CornflowerBlue));
m_pTextFormat = new CD2DTextFormat(GetRenderTarget(), _T("Verdana"), 50);
m_pTextFormat->Get()->SetTextAlignment(DWRITE_TEXT_ALIGNMENT_CENTER);
m_pTextFormat->Get()->SetParagraphAlignment(DWRITE_PARAGRAPH_ALIGNMENT_CENTER);
D2D1_GRADIENT_STOP gradientStops[2];
gradientStops[0].color = D2D1::ColorF(D2D1::ColorF::White);
gradientStops[0].position = 0.f;
gradientStops[1].color = D2D1::ColorF(D2D1::ColorF::Indigo);
gradientStops[1].position = 1.f;
m_pLinearGradientBrush = new CD2DLinearGradientBrush(GetRenderTarget(), gradientStops, ARRAYSIZE(gradientStops), D2D1::LinearGradientBrushProperties(D2D1::Point2F(0, 0), D2D1::Point2F(0, 0)));
return 0;
}
在OnSize中添加渐变背景的范围,如下:
void CWndDirect2D::OnSize(UINT nType, int cx, int cy)
{
CWnd::OnSize(nType, cx, cy);
// TODO: 在此处添加消息处理程序代码
m_pLinearGradientBrush->SetEndPoint(CPoint(cx, cy));
}
在Draw2D中添加绘制代码:
afx_msg LRESULT CWndDirect2D::OnDrawD2D(WPARAM wParam, LPARAM lParam)
{
LARGE_INTEGER start_counter, end_counter, counters, nFreq;
CHwndRenderTarget* pRenderTarget = (CHwndRenderTarget*)lParam;
//CHwndRenderTarget* pRenderTarget = (CHwndRenderTarget*)m_pRenderTarget;
QueryPerformanceFrequency(&nFreq);
QueryPerformanceCounter(&start_counter);
ASSERT_VALID(pRenderTarget);
CRect rect1;
GetClientRect(rect1);
pRenderTarget->FillRectangle(rect1, m_pLinearGradientBrush);
D2D1_SIZE_F rtSize = pRenderTarget->GetSize();
// Draw a grid background.
int width = static_cast<int>(rtSize.width);
int height = static_cast<int>(rtSize.height);
for (int x = 0; x < width; x += 10)
{
pRenderTarget->DrawLine(
D2D1::Point2F(static_cast<FLOAT>(x), 0.0f),
D2D1::Point2F(static_cast<FLOAT>(x), rtSize.height),
m_pLightSlateGrayBrush,
0.5f
);
}
for (int y = 0; y < height; y += 10)
{
pRenderTarget->DrawLine(
D2D1::Point2F(0.0f, static_cast<FLOAT>(y)),
D2D1::Point2F(rtSize.width, static_cast<FLOAT>(y)),
m_pLightSlateGrayBrush,
0.5f
);
}
// Draw two rectangles.
D2D1_RECT_F rectangle1 = D2D1::RectF(
rtSize.width / 2 - 50.0f,
rtSize.height / 2 - 50.0f,
rtSize.width / 2 + 50.0f,
rtSize.height / 2 + 50.0f
);
D2D1_RECT_F rectangle2 = D2D1::RectF(
rtSize.width / 2 - 100.0f,
rtSize.height / 2 - 100.0f,
rtSize.width / 2 + 100.0f,
rtSize.height / 2 + 100.0f
);
// Draw a filled rectangle.
pRenderTarget->FillRectangle(&rectangle1, m_pLightSlateGrayBrush);
// Draw the outline of a rectangle.
pRenderTarget->DrawRectangle(&rectangle2, m_pCornflowerBlueBrush);
for (int i = 0; i < 1000; ++i)
{
FLOAT left = rand() % width;
FLOAT top = rand() % height;
FLOAT radius = rand() % 200;
CD2DEllipse ellipse(CD2DRectF(left, top, left + radius, top + radius));
CD2DSolidColorBrush brush(pRenderTarget, D2D1::ColorF(rand() % 100 / 100.f, rand() % 100 / 100.f, rand() % 100 / 100.f, 100));
pRenderTarget->DrawEllipse(ellipse, &brush);
//pRenderTarget->FillEllipse(ellipse, &brush);
}
pRenderTarget->DrawText(_T("你好 Direct 2D!"), rect1, m_pBlackBrush, m_pTextFormat);
//pRenderTarget->DrawBitmap();
QueryPerformanceCounter(&end_counter);
counters.QuadPart = end_counter.QuadPart - start_counter.QuadPart;
start_counter = end_counter;
LONGLONG fps = nFreq.QuadPart / counters.QuadPart;
//wchar_t buf[100];
//swprintf_s(buf,sizeof(buf),_T("counts:%lldn"), counters.QuadPart);
CString str;
str.Format(_T("%i"), fps);
str += "n";
OutputDebugString(_T("FPS:") + str);
return TRUE;
}
完成
3、效果与帧率

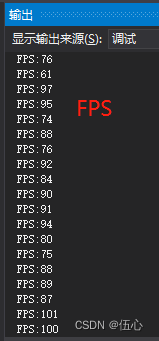
Debug模式下的FPS
4、总结
动态拖拽测试FPS,结果显示FPS能够稳定在80以上,偶尔为70多帧(Debug模式下)。下一步准备与GDI和GDI+的绘制速度进行对比。

最后
以上就是忧虑铃铛最近收集整理的关于002:CWnd类中采用D2D绘制,并测试帧率的全部内容,更多相关002:CWnd类中采用D2D绘制内容请搜索靠谱客的其他文章。
本图文内容来源于网友提供,作为学习参考使用,或来自网络收集整理,版权属于原作者所有。


发表评论 取消回复