一、需求
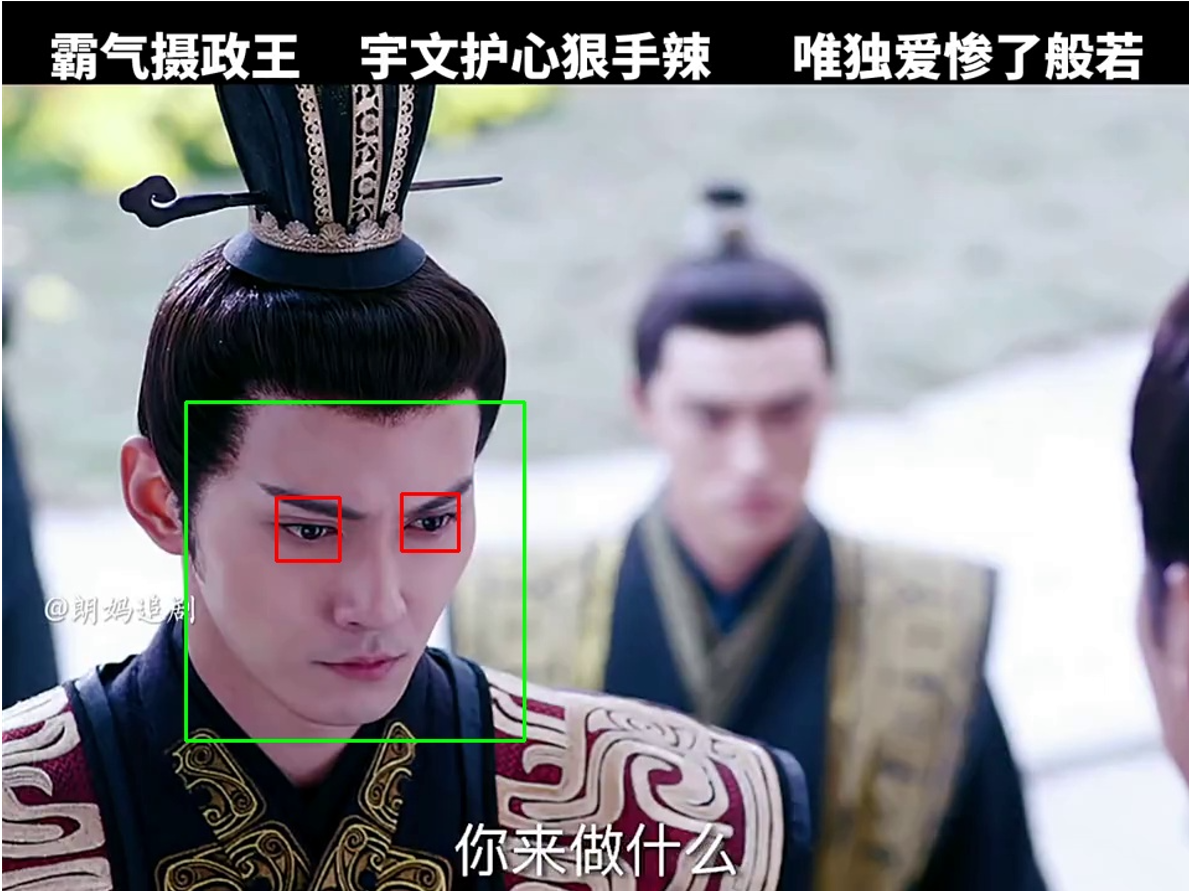
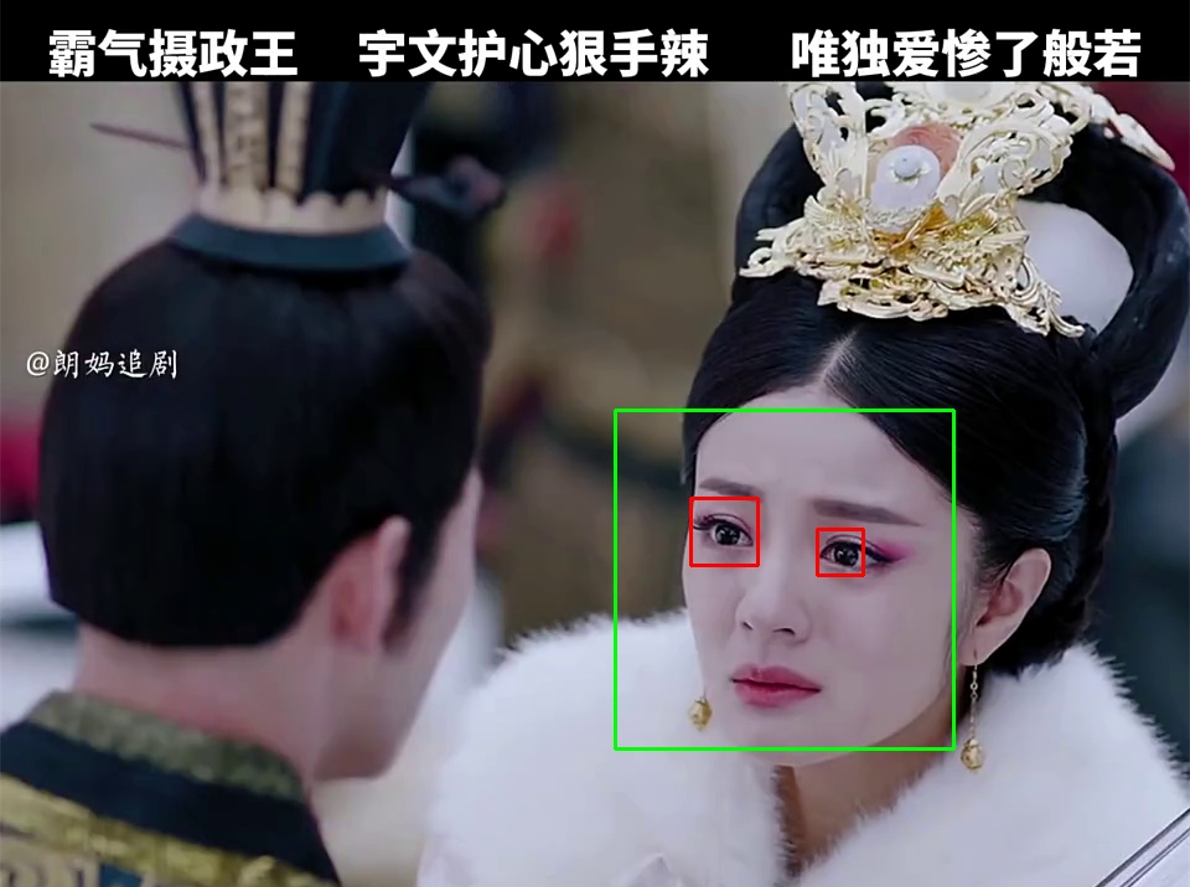
- 将视频中有人脸的图片保存在本地
- 人脸和眼睛范围需要用方框标注突出显示
二、分析
使用在GitHub已有的检测人脸项目 opencv2检测人脸项目
- 流程
- 读取视频文件
- 读取当前秒视频的图像。(注:为了节省时间,读取视频的图像是一秒一秒读,而不是一帧一帧读)
- 用GitHub项目已有检测人脸代码检测视频当前秒的图像是否人脸,并用方框标识
- 将图片保存在本地
三、代码
VideoImgTest.py
import traceback
from face import FaceDetect
import cv2
import os

savePath = 'faceimg/'
faceModel = FaceDetect()
def GetVideoFaceImg(pathName):
    try:
        floderName = pathName.split('/')[-1].split('.')[0] # 用视频文件名作为文件夹名
        csavePath = savePath + floderName # 完整路径
        if not os.path.exists(csavePath):# 创建文件夹
            os.mkdir(csavePath)
        csavePath += '/'
        vidcap = cv2.VideoCapture(pathName)# 读取视频
        fps = vidcap.get(cv2.CAP_PROP_FPS) # 视频的fps帧率
        framNum = vidcap.get(7) #视频文件的总帧数
        rate = vidcap.get(5) # 帧速率
        duration = framNum // rate # 获取视频时长
        sec = 0 # 当前是多少秒
        fid = 0 # 图片开头名
        while sec < duration:
            vidcap.set(cv2.CAP_PROP_POS_FRAMES, sec * fps) # 定1位视频的第sec秒
            suc, image = vidcap.read() # 读取当前秒的图片
            if suc: # 读取image成功
                res = faceModel.detect(image) # 开始检测人脸
                if res:
                    # 保存成图片
                    filename = csavePath + str(fid) + '.jpg' # 文件名
                    cv2.imwrite(filename, image)# 保存到本地
                    fid += 1
                    print(filename, '保存成功')
            sec += 1 # 每次前进1秒
    except:
        traceback.print_exc()
    finally:
        vidcap.release()

if __name__ == '__main__':
    videoPath = 'E:/AllWorkSpace1/Pytharm/pythonProjectPaWeb/TestOpenCv/Video/'
    videonames = ['1.mp4', '2.mp4', '3.mp4', '4.mp4']
    for n in videonames:
        GetVideoFaceImg(videoPath + n)
face.py
import cv2
def detectFace(img, cascade):
    rects = cascade.detectMultiScale(img, scaleFactor=1.5, minNeighbors=5)
    if len(rects) == 0:
        return []
    return rects

class FaceDetect(object):
    def __init__(self):
        # 正脸
        self.front_fn = 'haarcascades/haarcascade_frontalface_default.xml'
        # 侧脸
        self.profile_fn = 'haarcascades/haarcascade_profileface.xml'
        # 眼睛
        self.profile_fn = 'haarcascades/haarcascade_eye.xml'
        # 读取分类器,CascadeClassifier下面有一个detectMultiScale方法来得到矩形
        self.frontCascade = cv2.CascadeClassifier(self.front_fn)
        self.profileCascade = cv2.CascadeClassifier(self.profile_fn)
        self.eyeCascade = cv2.CascadeClassifier(self.profile_fn)
        return

    def detect(self, img):
        # 转换为灰度图
        gray = cv2.cvtColor(img, cv2.COLOR_BGR2GRAY)
        # 直方图均衡处理
        gray = cv2.equalizeHist(gray)
        # 通过分类器得到rects
        rects = detectFace(gray, self.frontCascade)
        if len(rects) == 0:
            # 侧脸检测
            rects = detectFace(gray, self.profileCascade)
        if len(rects) != 0:
            for (x, y, w, h) in rects:
                # 绘制脸部方框
                cv2.rectangle(img, (x, y), (x + w, y + h), (0, 255, 0), 2)
                faceColorImg = img[y : y + int(h * 0.5), x : x + w]# 人脸原图,h * 0.5是因为眼睛检测不准确,避免检测把嘴巴也当成眼睛
                faceGray = gray[y : y + int(h * 0.5), x : x + w]# 人脸灰度图
                # 检测完人脸再检测眼睛,可以过滤掉部分人脸模糊的图片
                eyes = self.eyeCascade.detectMultiScale(faceGray)# 检测眼睛
                if len(eyes) != 0:
                    # 绘制眼睛方框
                    for (e_x, e_y, e_w, e_h) in eyes:
                        cv2.rectangle(faceColorImg, (e_x, e_y), (e_x + e_w, e_y + e_h), (0, 0, 255), 2)  # 绘制眼睛方框
                    return True
        return False
四、运行结果


五、细节:解决保存有人脸模糊的图片问题
- 解决思路
采用双层检测,先检测人脸后,再人脸的基础上检测是否有眼睛,再保存即可。 - 正如face.py,以下部分所写
...
        if len(rects) != 0:
            for (x, y, w, h) in rects:
                # 绘制脸部方框
                cv2.rectangle(img, (x, y), (x + w, y + h), (0, 255, 0), 2)
                faceColorImg = img[y : y + int(h * 0.5), x : x + w]# 人脸原图,h * 0.5是因为眼睛检测不准确,避免检测把嘴巴也当成眼睛
                faceGray = gray[y : y + int(h * 0.5), x : x + w]# 人脸灰度图
                # 检测完人脸再检测眼睛,可以过滤掉人脸模糊的图片
                eyes = self.eyeCascade.detectMultiScale(faceGray)# 检测眼睛
                if len(eyes) != 0:
                    # 绘制眼睛方框
                    for (e_x, e_y, e_w, e_h) in eyes:
                        cv2.rectangle(faceColorImg, (e_x, e_y), (e_x + e_w, e_y + e_h), (0, 0, 255), 2)  # 绘制眼睛方框
                    return True
        return False
最后
以上就是搞怪西装最近收集整理的关于Python OpenCV 保存视频中有人脸的图片的全部内容,更多相关Python内容请搜索靠谱客的其他文章。
本图文内容来源于网友提供,作为学习参考使用,或来自网络收集整理,版权属于原作者所有。


发表评论 取消回复