大家好,我是杂烩君。
嵌入式大杂烩周记主要是一些实用项目学习分享,每周一篇,每篇一个主题。
内容主要来源于我们之前收集的资料:
https://gitee.com/zhengnianli/EmbedSummary
本期主角:cola_os
cola_os是一个300多行代码实现的多任务管理的OS,在很多MCU开发中,功能很简单,实时性要求不强,任务多了管理不当又很乱。
如果使用RTOS显得太浪费,这时候可以尝试使用使用cola_os这类基于软件定时器实现的时间片轮询框架。
仓库链接:
https://gitee.com/schuck/cola_os
license:MulanPSL-1.0(木兰宽松许可证, 第1版)。
cola_os是一份简洁明了的代码,包含很多有用的编程思想,值得通读。下面我们一起来学习一下:
cola_os的分析及使用
其实关于cola_os其实我们前几天的推文中也有做介绍。今天我们再一起来完整地梳理一遍。
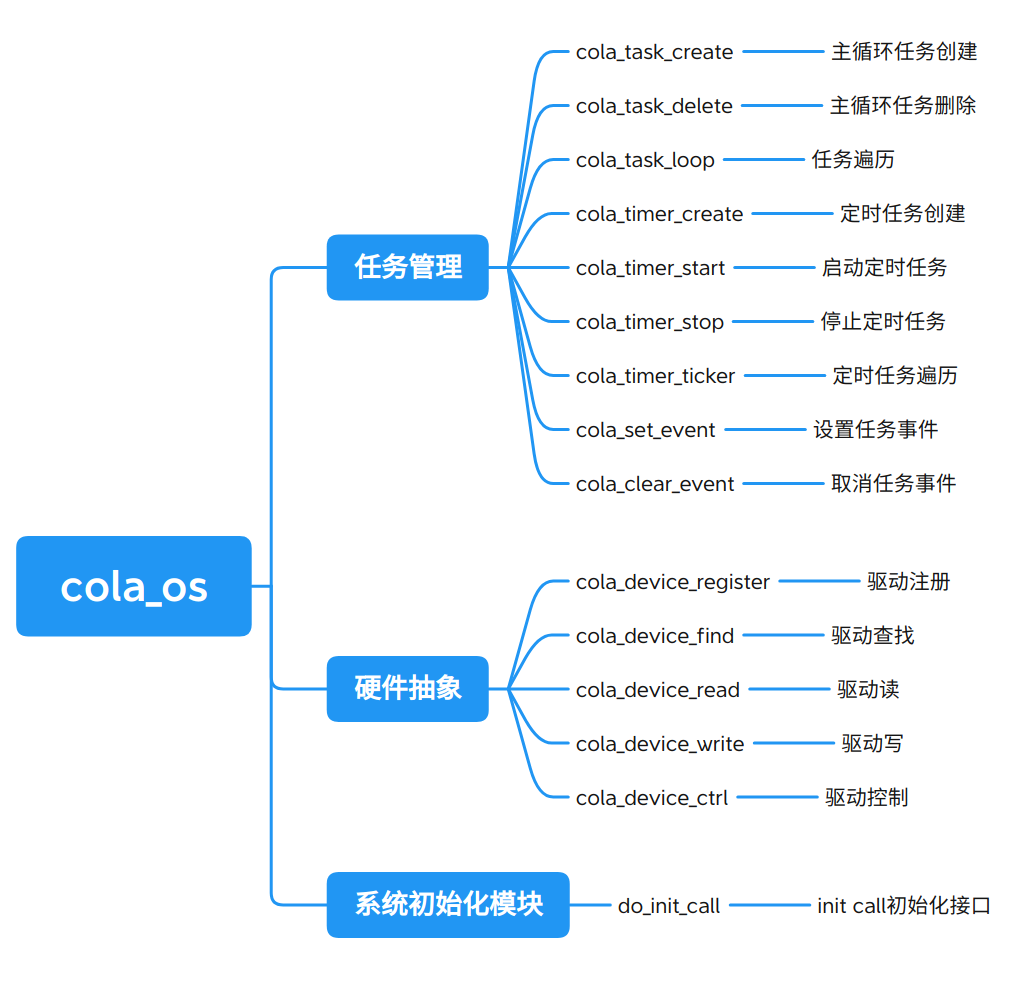
cola_os目前的内容如:
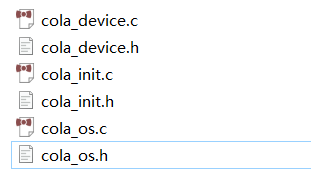
1、cola_os
cola_os就是cola_os的任务管理模块。任务使用链表进行管理,其数据结构如:
typedef void (*cbFunc)(uint32_t event);

typedef struct task_s
{
    uint8_t     timerNum;    //定时编号
    uint32_t    period;      //定时周期
    bool        oneShot;     //true只执行一次
    bool        start;       //开始启动
    uint32_t    timerTick;   //定时计数
    bool        run;         //任务运行标志
    bool        taskFlag;    //任务标志是主任务还是定时任务
    uint32_t    event;       //驱动事件
    cbFunc      func;        //回调函数
    struct task_s *next;
}task_t;
每创建一个任务吗,就是往任务链表中插入一个任务节点。
其创建任务的方法有两种:
-
创建主循环任务
-
创建定时任务
两种方式创建,都是会在while(1)循环中调度执行任务函数。
我们可以看看cola_task_loop任务遍历函数,这个函数最终是要放在主函数while(1)中调用的。其内容如:
void cola_task_loop(void)
{
    uint32_t events;
    task_t *cur  = task_list;
    OS_CPU_SR cpu_sr;

    while( cur != NULL )
    {
        if(cur->run)
        {
            if(NULL !=cur->func)
            {
                events = cur->event;
                if(events)
                {
                    enter_critical();
                    cur->event = 0;
                    exit_critical();
                }
                cur->func(events);
            }
            if(TASK_TIMER == cur->taskFlag)
            {
                enter_critical();
                cur->run = false;
                exit_critical();
            }
            if((cur->oneShot)&&(TASK_TIMER == cur->taskFlag))
            {
               cur->start = false;
            }
        }
        cur = cur->next;
    }
}
两种方式创建的任务都会在cur->func(events);被调用。不同的就是:遍历执行到定时任务时,需要清掉定时相关标志。
其中,events作为任务函数的参数传入。从cola_task_loop可以看到,事件并未使用到,events无论真还是假,在执行任务函数前,都被清零了。events的功能应该是作者预留的。
创建任务很简单,比如创建一个定时任务:
static task_t timer_500ms;

//每500ms执行一次
static void timer_500ms_cb(uint32_t event)
{
    printf("task0 running...n");
}

cola_timer_create(&timer_500ms, timer_500ms_cb);
cola_timer_start(&timer_500ms, TIMER_ALWAYS, 500);
cola_os是基于软件定时器来进行任务调度管理的,需要一个硬件定时器提供时基。比如使用系统滴答定时器,配置为1ms中断一次。
在1ms中断中不断轮询判断定时计数是否到达定时时间:
void SysTick_Handler(void)
{
  cola_timer_ticker();
}

void cola_timer_ticker(void)
{
    task_t *cur  = task_list;
    OS_CPU_SR cpu_sr;
    while( cur != NULL )
    {
        if((TASK_TIMER == cur->taskFlag)&& cur->start)
        {
            if(++cur->timerTick >= cur->period)
            {
                cur->timerTick = 0;
                if(cur->func != NULL)
                {
                    enter_critical();
                    cur->run = true;
                    exit_critical();
                }
            }
        }
        cur = cur->next;
    }
}
如果到了则将标志cur->run置位,在while大循环中的cola_task_loop函数中如果检测到该标志就执行该任务函数。
2、cola_device
cola_device是硬件抽象层,使用链表来管理各个设备。其借鉴了RT-Thread及Linux相关驱动框架思想。大致内容如:
数据结构如:
typedef struct cola_device  cola_device_t;

struct cola_device_ops
{
    int  (*init)   (cola_device_t *dev);
    int  (*open)   (cola_device_t *dev, int oflag);
    int  (*close)  (cola_device_t *dev);
    int  (*read)   (cola_device_t *dev, int pos, void *buffer, int size);
    int  (*write)  (cola_device_t *dev, int pos, const void *buffer, int size);
    int  (*control)(cola_device_t *dev, int cmd, void *args);

};

struct cola_device
{
    const char * name;
    struct cola_device_ops *dops;
    struct cola_device *next;
};
硬件抽象层的接口如:
/*
    驱动注册
*/
int cola_device_register(cola_device_t *dev);
/*
    驱动查找
*/
cola_device_t *cola_device_find(const char *name);
/*
    驱动读
*/
int cola_device_read(cola_device_t *dev,  int pos, void *buffer, int size);
/*
    驱动写
*/
int cola_device_write(cola_device_t *dev, int pos, const void *buffer, int size);
/*
    驱动控制
*/
int cola_device_ctrl(cola_device_t *dev,  int cmd, void *arg);
首先,在驱动层注册好设备,把操作设备的函数指针及设备名称插入到设备链表中:
static cola_device_t led_dev;

static void led_gpio_init(void)
{
    GPIO_InitTypeDef GPIO_InitStructure;
    RCC_AHBPeriphClockCmd(RCC_AHBPeriph_GPIOC, ENABLE);
    GPIO_InitStructure.GPIO_Pin = PIN_GREENLED;
    GPIO_InitStructure.GPIO_Mode = GPIO_Mode_OUT;
    GPIO_InitStructure.GPIO_Speed = GPIO_Speed_50MHz;
    GPIO_InitStructure.GPIO_OType = GPIO_OType_PP;
    GPIO_InitStructure.GPIO_PuPd = GPIO_PuPd_NOPULL;
    GPIO_Init(PORT_GREEN_LED, &GPIO_InitStructure);
    LED_GREEN_OFF;
}

static int led_ctrl(cola_device_t *dev, int cmd, void *args)
{
    if(LED_TOGGLE == cmd)
    {
        LED_GREEN_TOGGLE;
    }
    else
    {

    }
    return 1;
}


static struct cola_device_ops ops =
{
    .control = led_ctrl,
};

static void led_register(void)
{
    led_gpio_init();
    led_dev.dops = &ops;
    led_dev.name = "led";
    cola_device_register(&led_dev);
}
cola_device_register函数如:
int cola_device_register(cola_device_t *dev)
{
    if((NULL == dev) || (cola_device_is_exists(dev)))
    {
        return 0;
    }

    if((NULL == dev->name) ||  (NULL == dev->dops))
    {
        return 0;
    }
    return device_list_inster(dev);
}
驱动注册好设备之后,应用层就可以根据设备名称来查找设备是否被注册,如果已经注册则可以调用设备操作接口操控设备。比如创建一个定时任务定时反转led:
void app_init(void)
{
    app_led_dev = cola_device_find("led");
    assert(app_led_dev);
    cola_timer_create(&timer_500ms,timer_500ms_cb);
    cola_timer_start(&timer_500ms,TIMER_ALWAYS,500);
}

static void timer_500ms_cb(uint32_t event)
{
    cola_device_ctrl(app_led_dev,LED_TOGGLE,0);
}
3、cola_init
cola_init是一个自动初始化模块,模仿Linux的initcall机制。RT-Thread也有实现这个功能:
一般的,我们的初始化在主函数中调用,如:
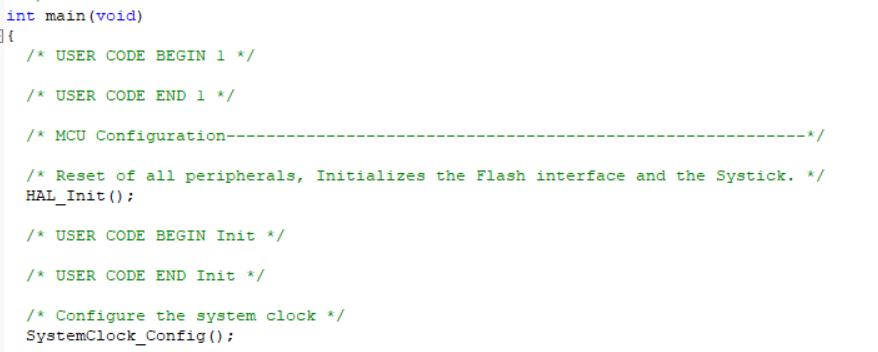
有了自动初始化模块,可以不在主函数中调用,例如:
void SystemClock_Config(void)
{
}
pure_initcall(SystemClock_Config);
这样也可以调用SystemClock_Config。pure_initcall如:
#define __used __attribute__((__used__))
typedef void (*initcall_t)(void);
#define __define_initcall(fn, id)
static const initcall_t __initcall_##fn##id __used
__attribute__((__section__("initcall" #id "init"))) = fn;
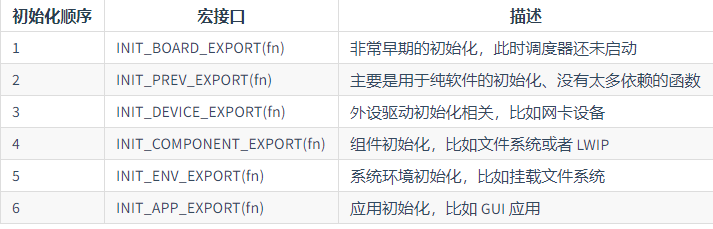
#define pure_initcall(fn) __define_initcall(fn, 0) //可用作系统时钟初始化
#define fs_initcall(fn) __define_initcall(fn, 1) //tick和调试接口初始化
#define device_initcall(fn) __define_initcall(fn, 2) //驱动初始化
#define late_initcall(fn) __define_initcall(fn, 3) //其他初始化在cola_init中,首先是调用不同顺序级别的__define_initcall宏来把函数指针fn放入到自定义的指定的段中。各个需要自动初始化的函数放到指定的段中,形成一张初始化函数表。
__ attribute __ (( __ section __)) 关键字就是用来指定数据存放段。
do_init_call函数在我们程序起始时调用,比如在bsp_init中调用:
void bsp_init(void)
{
    do_init_call();
}
do_init_call里做的事情就是遍历初始化函数表里的函数:
void do_init_call(void)
{
    extern initcall_t initcall0init$$Base[];
    extern initcall_t initcall0init$$Limit[];
    extern initcall_t initcall1init$$Base[];
    extern initcall_t initcall1init$$Limit[];
    extern initcall_t initcall2init$$Base[];
    extern initcall_t initcall2init$$Limit[];
    extern initcall_t initcall3init$$Base[];
    extern initcall_t initcall3init$$Limit[];

    initcall_t *fn;

    for (fn = initcall0init$$Base;
            fn < initcall0init$$Limit;
            fn++)
    {
        if(fn)
            (*fn)();
    }

    for (fn = initcall1init$$Base;
            fn < initcall1init$$Limit;
            fn++)
    {
        if(fn)
            (*fn)();
    }

    for (fn = initcall2init$$Base;
            fn < initcall2init$$Limit;
            fn++)
    {
        if(fn)
            (*fn)();
    }

    for (fn = initcall3init$$Base;
            fn < initcall3init$$Limit;
            fn++)
    {
        if(fn)
            (*fn)();
    }
}
这里有 initcall0init $$ Base 及 initcall0init Limit这几个initcall_t类型的函数指针数组的声明。它们事先是调用__define_initcall把函数指针fn放入到自定义的指定的段.initcall0init、.initcall1init、.initcall2init、.initcall3init。
initcall0init$$Base与initcall0init$$Limit按照我的理解就是各个初始化函数表的开始及结束地址。从而实现遍历:
for (fn = initcall0init$$Base;
            fn < initcall0init$$Limit;
            fn++)
    {
        if(fn)
            (*fn)();
    }
例如RT-Thread里的实现也是类似的:
volatile const init_fn_t *fn_ptr;

    for (fn_ptr = &__rt_init_rti_board_start; fn_ptr < &__rt_init_rti_board_end; fn_ptr++)
    {
        (*fn_ptr)();
    }
关于init自动初始化机制大致就分析这些。
cola_os包含有cola_os任务管理、cola_device硬件抽象层及cola_init自动初始化三大块,这三块内容其实可以单独抽出来学习、使用。
4、cola_os的使用
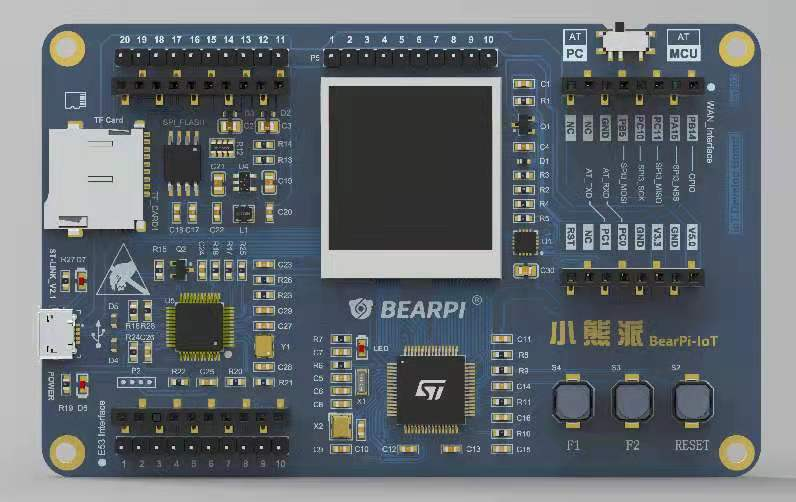
下面我们基于小熊派IOT开发板来简单实践实践。
我们创建两个定时任务:
-
task0任务:定时500ms打印一次。
-
task1任务:定时1000ms打印一次。
main.c:
/* Private variables ---------------------------------------------------------*/
static task_t timer_500ms;
static task_t timer_1000ms;
/* USER CODE END PV */

/* Private function prototypes -----------------------------------------------*/
void SystemClock_Config(void);

/* USER CODE BEGIN PFP */
/* Private function prototypes -----------------------------------------------*/

/* USER CODE END PFP */

/* USER CODE BEGIN 0 */

//每500ms执行一次
static void timer_500ms_cb(uint32_t event)
{
    printf("task0 running...n");
}

//每1000ms执行一次
static void timer_1000ms_cb(uint32_t event)
{
    printf("task1 running...n");
}

int main(void)
{
  /* USER CODE BEGIN 1 */

  /* USER CODE END 1 */

  /* MCU Configuration----------------------------------------------------------*/

  /* Reset of all peripherals, Initializes the Flash interface and the Systick. */
  HAL_Init();

  /* USER CODE BEGIN Init */

  /* USER CODE END Init */

  /* Configure the system clock */
//  SystemClock_Config();

  /* USER CODE BEGIN SysInit */

  /* USER CODE END SysInit */

  /* Initialize all configured peripherals */
  MX_GPIO_Init();
  MX_DMA_Init();
  MX_USART1_UART_Init();
  /* USER CODE BEGIN 2 */
  printf("微信公众号:嵌入式大杂烩rn");
  printf("cola_os test!rn");

  cola_timer_create(&timer_500ms,timer_500ms_cb);
  cola_timer_start(&timer_500ms,TIMER_ALWAYS,500);
  cola_timer_create(&timer_1000ms,timer_1000ms_cb);
  cola_timer_start(&timer_1000ms,TIMER_ALWAYS,1000);

  /* USER CODE END 2 */

  /* Infinite loop */
  /* USER CODE BEGIN WHILE */
  while (1)
  {

  /* USER CODE END WHILE */

  /* USER CODE BEGIN 3 */
    cola_task_loop();
  }
  /* USER CODE END 3 */

}

/**
  * @brief System Clock Configuration
  * @retval None
  */
void SystemClock_Config(void)
{

  RCC_OscInitTypeDef RCC_OscInitStruct;
  RCC_ClkInitTypeDef RCC_ClkInitStruct;
  RCC_PeriphCLKInitTypeDef PeriphClkInit;

    /**Initializes the CPU, AHB and APB busses clocks
    */
  RCC_OscInitStruct.OscillatorType = RCC_OSCILLATORTYPE_MSI;
  RCC_OscInitStruct.MSIState = RCC_MSI_ON;
  RCC_OscInitStruct.MSICalibrationValue = 0;
  RCC_OscInitStruct.MSIClockRange = RCC_MSIRANGE_6;
  RCC_OscInitStruct.PLL.PLLState = RCC_PLL_ON;
  RCC_OscInitStruct.PLL.PLLSource = RCC_PLLSOURCE_MSI;
  RCC_OscInitStruct.PLL.PLLM = 1;
  RCC_OscInitStruct.PLL.PLLN = 40;
  RCC_OscInitStruct.PLL.PLLP = RCC_PLLP_DIV7;
  RCC_OscInitStruct.PLL.PLLQ = RCC_PLLQ_DIV2;
  RCC_OscInitStruct.PLL.PLLR = RCC_PLLR_DIV2;
  if (HAL_RCC_OscConfig(&RCC_OscInitStruct) != HAL_OK)
  {
    _Error_Handler(__FILE__, __LINE__);
  }

    /**Initializes the CPU, AHB and APB busses clocks
    */
  RCC_ClkInitStruct.ClockType = RCC_CLOCKTYPE_HCLK|RCC_CLOCKTYPE_SYSCLK
                              |RCC_CLOCKTYPE_PCLK1|RCC_CLOCKTYPE_PCLK2;
  RCC_ClkInitStruct.SYSCLKSource = RCC_SYSCLKSOURCE_PLLCLK;
  RCC_ClkInitStruct.AHBCLKDivider = RCC_SYSCLK_DIV1;
  RCC_ClkInitStruct.APB1CLKDivider = RCC_HCLK_DIV1;
  RCC_ClkInitStruct.APB2CLKDivider = RCC_HCLK_DIV1;

  if (HAL_RCC_ClockConfig(&RCC_ClkInitStruct, FLASH_LATENCY_4) != HAL_OK)
  {
    _Error_Handler(__FILE__, __LINE__);
  }

  PeriphClkInit.PeriphClockSelection = RCC_PERIPHCLK_USART1;
  PeriphClkInit.Usart1ClockSelection = RCC_USART1CLKSOURCE_PCLK2;
  if (HAL_RCCEx_PeriphCLKConfig(&PeriphClkInit) != HAL_OK)
  {
    _Error_Handler(__FILE__, __LINE__);
  }

    /**Configure the main internal regulator output voltage
    */
  if (HAL_PWREx_ControlVoltageScaling(PWR_REGULATOR_VOLTAGE_SCALE1) != HAL_OK)
  {
    _Error_Handler(__FILE__, __LINE__);
  }

    /**Configure the Systick interrupt time
    */
  HAL_SYSTICK_Config(HAL_RCC_GetHCLKFreq()/1000);

    /**Configure the Systick
    */
  HAL_SYSTICK_CLKSourceConfig(SYSTICK_CLKSOURCE_HCLK);

  /* SysTick_IRQn interrupt configuration */
  HAL_NVIC_SetPriority(SysTick_IRQn, 0, 0);
}
pure_initcall(SystemClock_Config);
SysTick_Handler:
void SysTick_Handler(void)
{
  /* USER CODE BEGIN SysTick_IRQn 0 */

  /* USER CODE END SysTick_IRQn 0 */
  cola_timer_ticker();
  HAL_IncTick();
  HAL_SYSTICK_IRQHandler();
  /* USER CODE BEGIN SysTick_IRQn 1 */

  /* USER CODE END SysTick_IRQn 1 */
}
编译、下载、运行:

从运行结果可以看到,task1的定时周期是task0的两倍,符合预期。
本文代码工程可在本公众号后台回复关键词:cola_os测试 ,即可获取。
以上就是本次的分享,文章如有错误,欢迎指出,谢谢!
咱们下期见~
最后
以上就是俊逸紫菜最近收集整理的关于嵌入式大杂烩周记 | 第 4 期:cola_os的全部内容,更多相关嵌入式大杂烩周记内容请搜索靠谱客的其他文章。


发表评论 取消回复