1.创建一个Spring Initializr项目 选择性勾选开发工具中的lombok 以及Web中的Spring Web,关系型数据库中的Mybatis Framework,WySQL driver
2.导入依赖
 <dependencies>
        <dependency>
            <groupId>org.springframework.boot</groupId>
            <artifactId>spring-boot-starter-web</artifactId>
        </dependency>
        <dependency>
            <groupId>com.baomidou</groupId>
            <artifactId>mybatis-plus-boot-starter</artifactId>
            <version>3.4.2</version>
        </dependency>

        <dependency>
            <groupId>mysql</groupId>
            <artifactId>mysql-connector-java</artifactId>
            <scope>runtime</scope>
        </dependency>
        <dependency>
            <groupId>org.projectlombok</groupId>
            <artifactId>lombok</artifactId>
            <optional>true</optional>
        </dependency>
        <dependency>
            <groupId>org.springframework.boot</groupId>
            <artifactId>spring-boot-starter-test</artifactId>
            <scope>test</scope>
            <exclusions>
                <exclusion>
                    <groupId>org.junit.vintage</groupId>
                    <artifactId>junit-vintage-engine</artifactId>
                </exclusion>
            </exclusions>
        </dependency>


        <dependency>
            <groupId>org.springframework.boot</groupId>
            <artifactId>spring-boot-starter-aop</artifactId>
        </dependency>

        <dependency>
            <groupId>com.baomidou</groupId>
            <artifactId>mybatis-plus-generator</artifactId>
            <version>3.5.3</version>
            <scope>test</scope>
        </dependency>
        <dependency>
            <groupId>org.apache.velocity</groupId>
            <artifactId>velocity-engine-core</artifactId>
            <version>2.1</version>
            <scope>test</scope>
        </dependency>

        <dependency>
            <groupId>io.springfox</groupId>
            <artifactId>springfox-swagger2</artifactId>
            <version>2.9.2</version>
        </dependency>
        <dependency>
            <groupId>io.springfox</groupId>
            <artifactId>springfox-swagger-ui</artifactId>
            <version>2.9.2</version>
        </dependency>

        <!--    参数校验    -->
        <dependency>
            <groupId>org.hibernate.validator</groupId>
            <artifactId>hibernate-validator</artifactId>
            <version>6.1.5.Final</version>
        </dependency>

        <!--hutool依赖-->
        <!--字符串检查,雪花算法生成订单号,复制对象实体类,等等工具-->
        <dependency>
            <groupId>cn.hutool</groupId>
            <artifactId>hutool-all</artifactId>
            <version>5.8.5</version>
        </dependency>


        <dependency>
            <groupId>org.apache.shiro</groupId>
            <artifactId>shiro-core</artifactId>
            <version>1.4.1</version>
        </dependency>
        <dependency>
            <groupId>org.slf4j</groupId>
            <artifactId>jcl-over-slf4j</artifactId>
            <version>1.5.6</version>
        </dependency>
        <dependency>
            <groupId>commons-logging</groupId>
            <artifactId>commons-logging</artifactId>
            <version>1.0</version>
        </dependency>
        <dependency>
            <groupId>org.springframework</groupId>
            <artifactId>spring-jdbc</artifactId>
            <version>5.2.8.RELEASE</version>
        </dependency>
        <dependency>
            <groupId>com.alibaba</groupId>
            <artifactId>druid</artifactId>
            <version>1.1.22</version>
        </dependency>
        <dependency>
            <groupId>mysql</groupId>
            <artifactId>mysql-connector-java</artifactId>
            <version>5.1.48</version>
        </dependency>
        <dependency>
            <groupId>org.projectlombok</groupId>
            <artifactId>lombok</artifactId>
            <version>1.18.12</version>
        </dependency>
        <dependency>
            <groupId>org.apache.shiro</groupId>
            <artifactId>shiro-spring-boot-web-starter</artifactId>
            <version>1.4.1</version>
        </dependency>
    </dependencies>
3.在application.yml中修改配置
server:
  port: 8081
spring:
  datasource:
    driver-class-name: com.mysql.jdbc.Driver
    url: jdbc:mysql://127.0.0.1:3306/class81-shiro?characterEncoding=utf8&useSSL=false&serverTimezone=UTC
    password: 54188
    username: root
  jackson:
    date-format: yyyy-MM-dd HH:mm:ss
    time-zone: GMT+8
  mvc:
    format:
      date: yyyy-MM-dd HH:mm:ss


mybatis-plus:
  configuration:
    log-impl: org.apache.ibatis.logging.slf4j.Slf4jImpl
    map-underscore-to-camel-case: true
  type-aliases-package: com.woniuxy.demo.model
  mapper-locations: classpath*:/mappers/**/*.xml


logging:
  level:
    com.woniuxy.demo: debug

shiro:
  loginUrl:/login.html
4.在test文件中使用代码生成器,生成将数据库中的表转为java代码
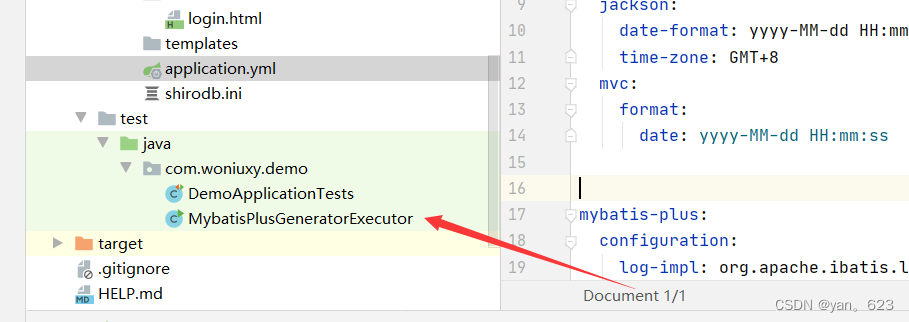
public class MybatisPlusGeneratorExecutor {

    public static final String JDBC_URL = "jdbc:mysql://127.0.0.1:3306/class81-shiro?characterEncoding=utf8&useSSL=false&serverTimezone=UTC";
    public static final String JDBC_USER = "root";
    public static final String JDBC_PASSWORD = "54188";
    public static final String AUTHOR = "Lucas";

    public static final String PARENT_PACKAGE = "com.woniuxy";
    public static final String MODULE_NAME = "demo";

    public static final String TABLE_PREFIX = "";

    public static void main(String[] args) {
        String projectPath = System.getProperty("user.dir") + "/src/main/";
        String javaPath = projectPath + "/java";
        String resourcePath = projectPath + "/resources/mappers";

        FastAutoGenerator.create(JDBC_URL,
                JDBC_USER,
                JDBC_PASSWORD)
                .globalConfig(builder -> {
                    builder.author(AUTHOR)// 设置作者
                            .dateType(DateType.ONLY_DATE)
                            .disableOpenDir()
                            .enableSwagger()
                            .outputDir(javaPath); // 指定输出目录


                })
                .packageConfig(builder -> {
                    builder.parent(PARENT_PACKAGE) // 设置父包名
                            .moduleName(MODULE_NAME) // 设置父包模块名
                            .entity("model")//设置实体类包名
                            .mapper("dao")//设置mapper包名

                            .pathInfo(Collections.singletonMap(OutputFile.xml, resourcePath)); // 设置mapperXml生成路径
                })
                .strategyConfig(
                        builder -> {
                            builder.addInclude(scanner("要生成的表名")) // 设置需要生成的表名
                                    .addTablePrefix(TABLE_PREFIX)
                                    .serviceBuilder()
                                    .formatServiceFileName("%sService")
                                    .controllerBuilder()
                                    .enableRestStyle()

                            ;


                            // 设置过滤表前缀
                        })
                .templateEngine(new VelocityTemplateEngine()) // 使用Freemarker引擎模板,默认的是Velocity引擎模板
                .execute();

    }

    public static List<String> scanner(String tip) {
        Scanner scanner = new Scanner(System.in);
        StringBuilder help = new StringBuilder();
        help.append("请输入" + tip + ",用英文逗号分隔:");
        System.out.println(help.toString());
        if (scanner.hasNext()) {
            String ipt = scanner.next();
            if (StringUtils.isNotEmpty(ipt)) {
                return Arrays.asList(StringUtils.split(ipt, ","));
            }
        }
        throw new MybatisPlusException("请输入正确的" + tip + "!");
    }
}
5.创建一个SecurityConfig的shiro配置类。
@Configuration
public class SecurityConfig {

    @Bean  //往容器中注入一个Realm域 认证器和授权器最后都会进入此接口
    public Realm shiroRealm(){
        return new ShiroRealm();
    }

    @Bean
    public ShiroFilterChainDefinition shiroFilterChainDefinition(){
        DefaultShiroFilterChainDefinition sfcd = new DefaultShiroFilterChainDefinition();

        sfcd.addPathDefinition("/","anon");
        sfcd.addPathDefinition("/login","anon");
        sfcd.addPathDefinition("/login.html","anon");
        sfcd.addPathDefinition("/css/**","anon");
        sfcd.addPathDefinition("/js/**","anon");
        sfcd.addPathDefinition("/images/**","anon");
        sfcd.addPathDefinition("/fonts/**","anon");
        sfcd.addPathDefinition("/html/**","anon");  //以上为自动放行的资源

        sfcd.addPathDefinition("/logout","logout");//此请求走logout过滤器。

        sfcd.addPathDefinition("/**","user"); //其他请求皆走user过滤器

        return sfcd;
    }

    @Bean
    public static DefaultAdvisorAutoProxyCreator getDefaultAdvisorAutoProxyCreator(){
        DefaultAdvisorAutoProxyCreator defaultAdvisorAutoProxyCreator=new DefaultAdvisorAutoProxyCreator();

        /**
         * setUsePrefix(false)用于解决一个奇怪的bug。在引入spring aop的情况下。
         * 在@Controller注解的类的方法中加入@RequiresRole等shiro注解,会导致该方法无法映射请求,导致返回404。
         * 加入这项配置能解决这个bug
         */
        defaultAdvisorAutoProxyCreator.setUsePrefix(true);
        return defaultAdvisorAutoProxyCreator;
    }

}
6.创建上速操作中往容器中注入的shirpRealm类 继承AuthorizingRealm类
@Slf4j
public class ShiroRealm extends AuthorizingRealm {

    @Resource
    private UserMapper userMapper;

    @Resource
    private RoleMapper roleMapper;

    @Resource
    private PermissionMapper permMapper;

    @Override   //进行角色验证以及授权验证
    protected AuthorizationInfo doGetAuthorizationInfo(PrincipalCollection principals) {
        User user = (User) principals.getPrimaryPrincipal();//获得用户信息

        //查找该用户所有的角色
        List<Role> roleList = roleMapper.selectByUserId(user.getUserId());
        Set<String> strRoles = roleList.stream()
                .map(r -> r.getRoleName())
                .collect(Collectors.toSet());//java 8 Stream可查找到此方法。
        List<String> permissions = new ArrayList<>();
        if(roleList.size()>0) {
            //查找该用户所有的权限
            permissions =  permMapper.selectPermInRoleIds(roleList);

        }
        SimpleAuthorizationInfo authzInfo = new SimpleAuthorizationInfo();
        //authzInfo对象的StringPermissions和Roles属性是权限验证结果 是一个set<String>类型的集合,因为以上操作中需要将查询到的结果转为set<String>类型
        authzInfo.setStringPermissions(new HashSet<>(permissions));
        authzInfo.setRoles(strRoles);
        return authzInfo;
    }

    @Override  //执行认证操作 查询该用户是否存在,若存在则认证成功
    protected AuthenticationInfo doGetAuthenticationInfo(AuthenticationToken token) throws AuthenticationException {
        log.info("执行ShiroRealm#doGetAuthenticationInfo {}",token);
        Object username = token.getPrincipal();

        QueryWrapper<User> qw = new QueryWrapper<>();
        qw.eq("user_name",username);
        User user = userMapper.selectOne(qw);

        return new SimpleAuthenticationInfo(user,user.getUserPassword(),getClass().getName());
//将查询到的结果注入SimpleAuthenticationInfo类中,该类中的带参构造方法中,会将用户id,以及用户名注入PrincipalCollection类的principals对象中。用户角色验证和授权验证
    }
}
7.在资源文件夹中创建ini文件
#声明一个自定义的的realm
customRealm=com.woniuxy.demo.ShiroRealm
#将realm注入到securityManager中
securityManager.realms=$customRealm
8.controller层编写接口
@RestController
@Slf4j
public class LoginController {
@PostMapping("/login")
public String login(String username,String password){
Subject subject = SecurityUtils.getSubject();
subject.login(new UsernamePasswordToken(username,password));
return "success";
}
@GetMapping("/pay")
public String pay(){
return "success";
}
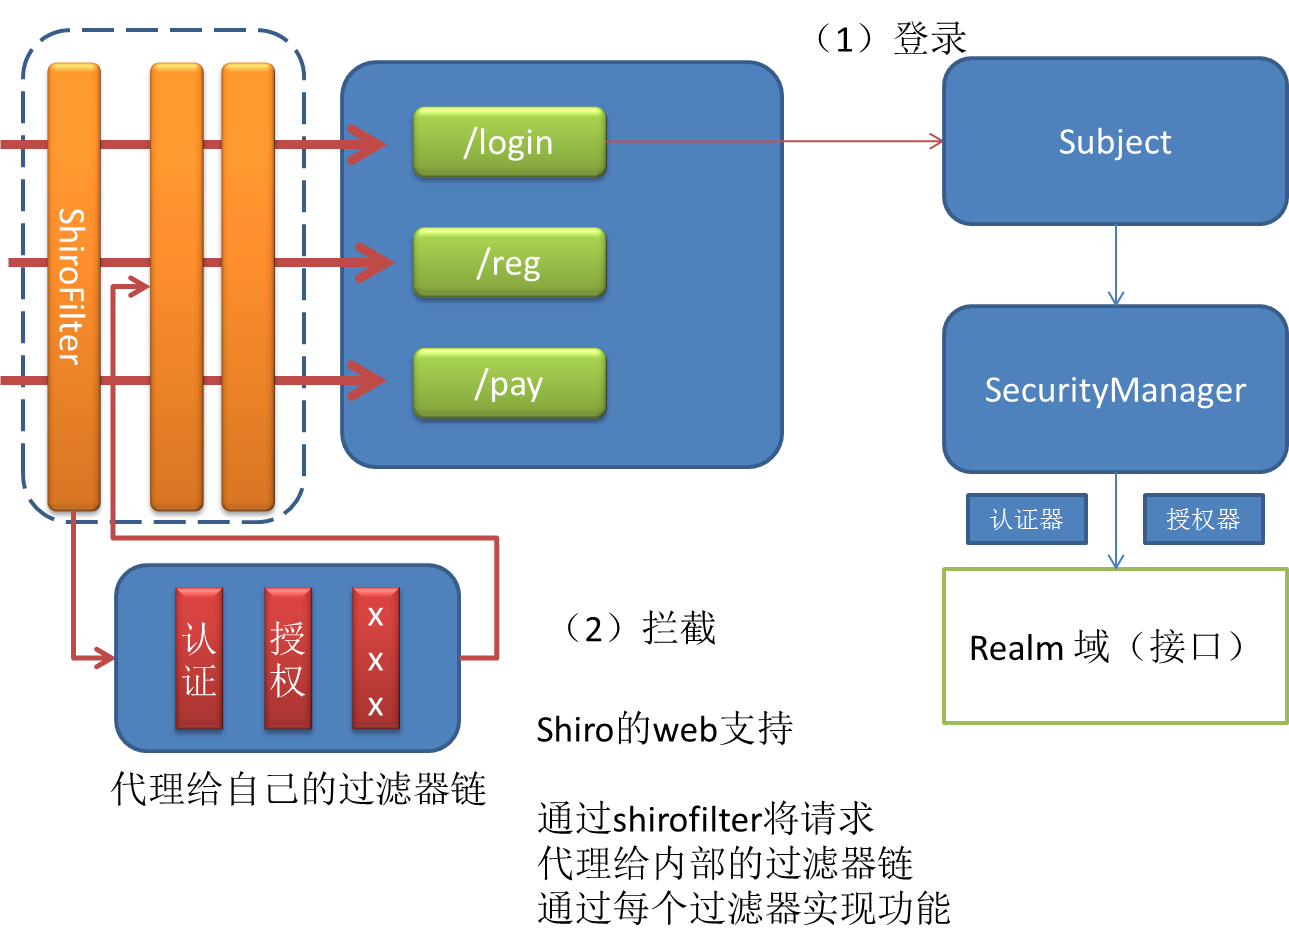
}subject:主体,可以是用户也可以是程序,主体要访问系统,系统需要对主体进行认证、授权。
securityManager:安全管理器,主体进行认证和授权都是通过securityManager进行。
realm:域,领域,相当于数据源,通过realm存取认证、授权相关数据。
认证执行流程
1、通过ini配置文件创建securityManager
2、调用subject.login方法主体提交认证,提交的token
3、securityManager进行认证。
4、securityManager调用realm(给realm传入token) 去ini配置文件中查询用户信息
5、Realm根据输入的token从 shiro.ini查询用户信息,根据账号查询用户信息(账号和密码)
如果查询到用户信息,就给securityManager返回用户信息(账号和密码)
如果查询不到,就给securityManager返回null
6、securityManager接收认证信息
如果返回的认证信息是null,抛出异常
如果返回的认证信息不是null(说明realm找到了用户),对realm返回用户密码
和 token中的密码 进行对比,如果不一致抛出异常
授权执行流程
1.认证成功,realm将查询到的用户信息传入principals
2.调用realm的授权方法doGetAuthorizationInfo,将principals作为参数传入
3.从principals中通过getPrimaryPrincipal()方法获得用户
4.从数据库中查询该用户所有的角色,再用查询到的角色id查询角色的所有授权信息
5.利用SimpleAuthorizationInfo中的setStringPermissions和setRoles方法进行角色和授权信息的比对,如果没有角色信息或权限则抛出异常。
最后
以上就是妩媚毛衣最近收集整理的关于使用MybatisPlus实现ShiroRealm1.创建一个Spring Initializr项目 选择性勾选开发工具中的lombok 以及Web中的Spring Web,关系型数据库中的Mybatis Framework,WySQL driver2.导入依赖3.在application.yml中修改配置4.在test文件中使用代码生成器,生成将数据库中的表转为java代码 5.创建一个SecurityConfig的shiro配置类。6.创建上速操作中往容器中注入的shirpRealm类 继承的全部内容,更多相关使用MybatisPlus实现ShiroRealm1.创建一个Spring内容请搜索靠谱客的其他文章。


发表评论 取消回复