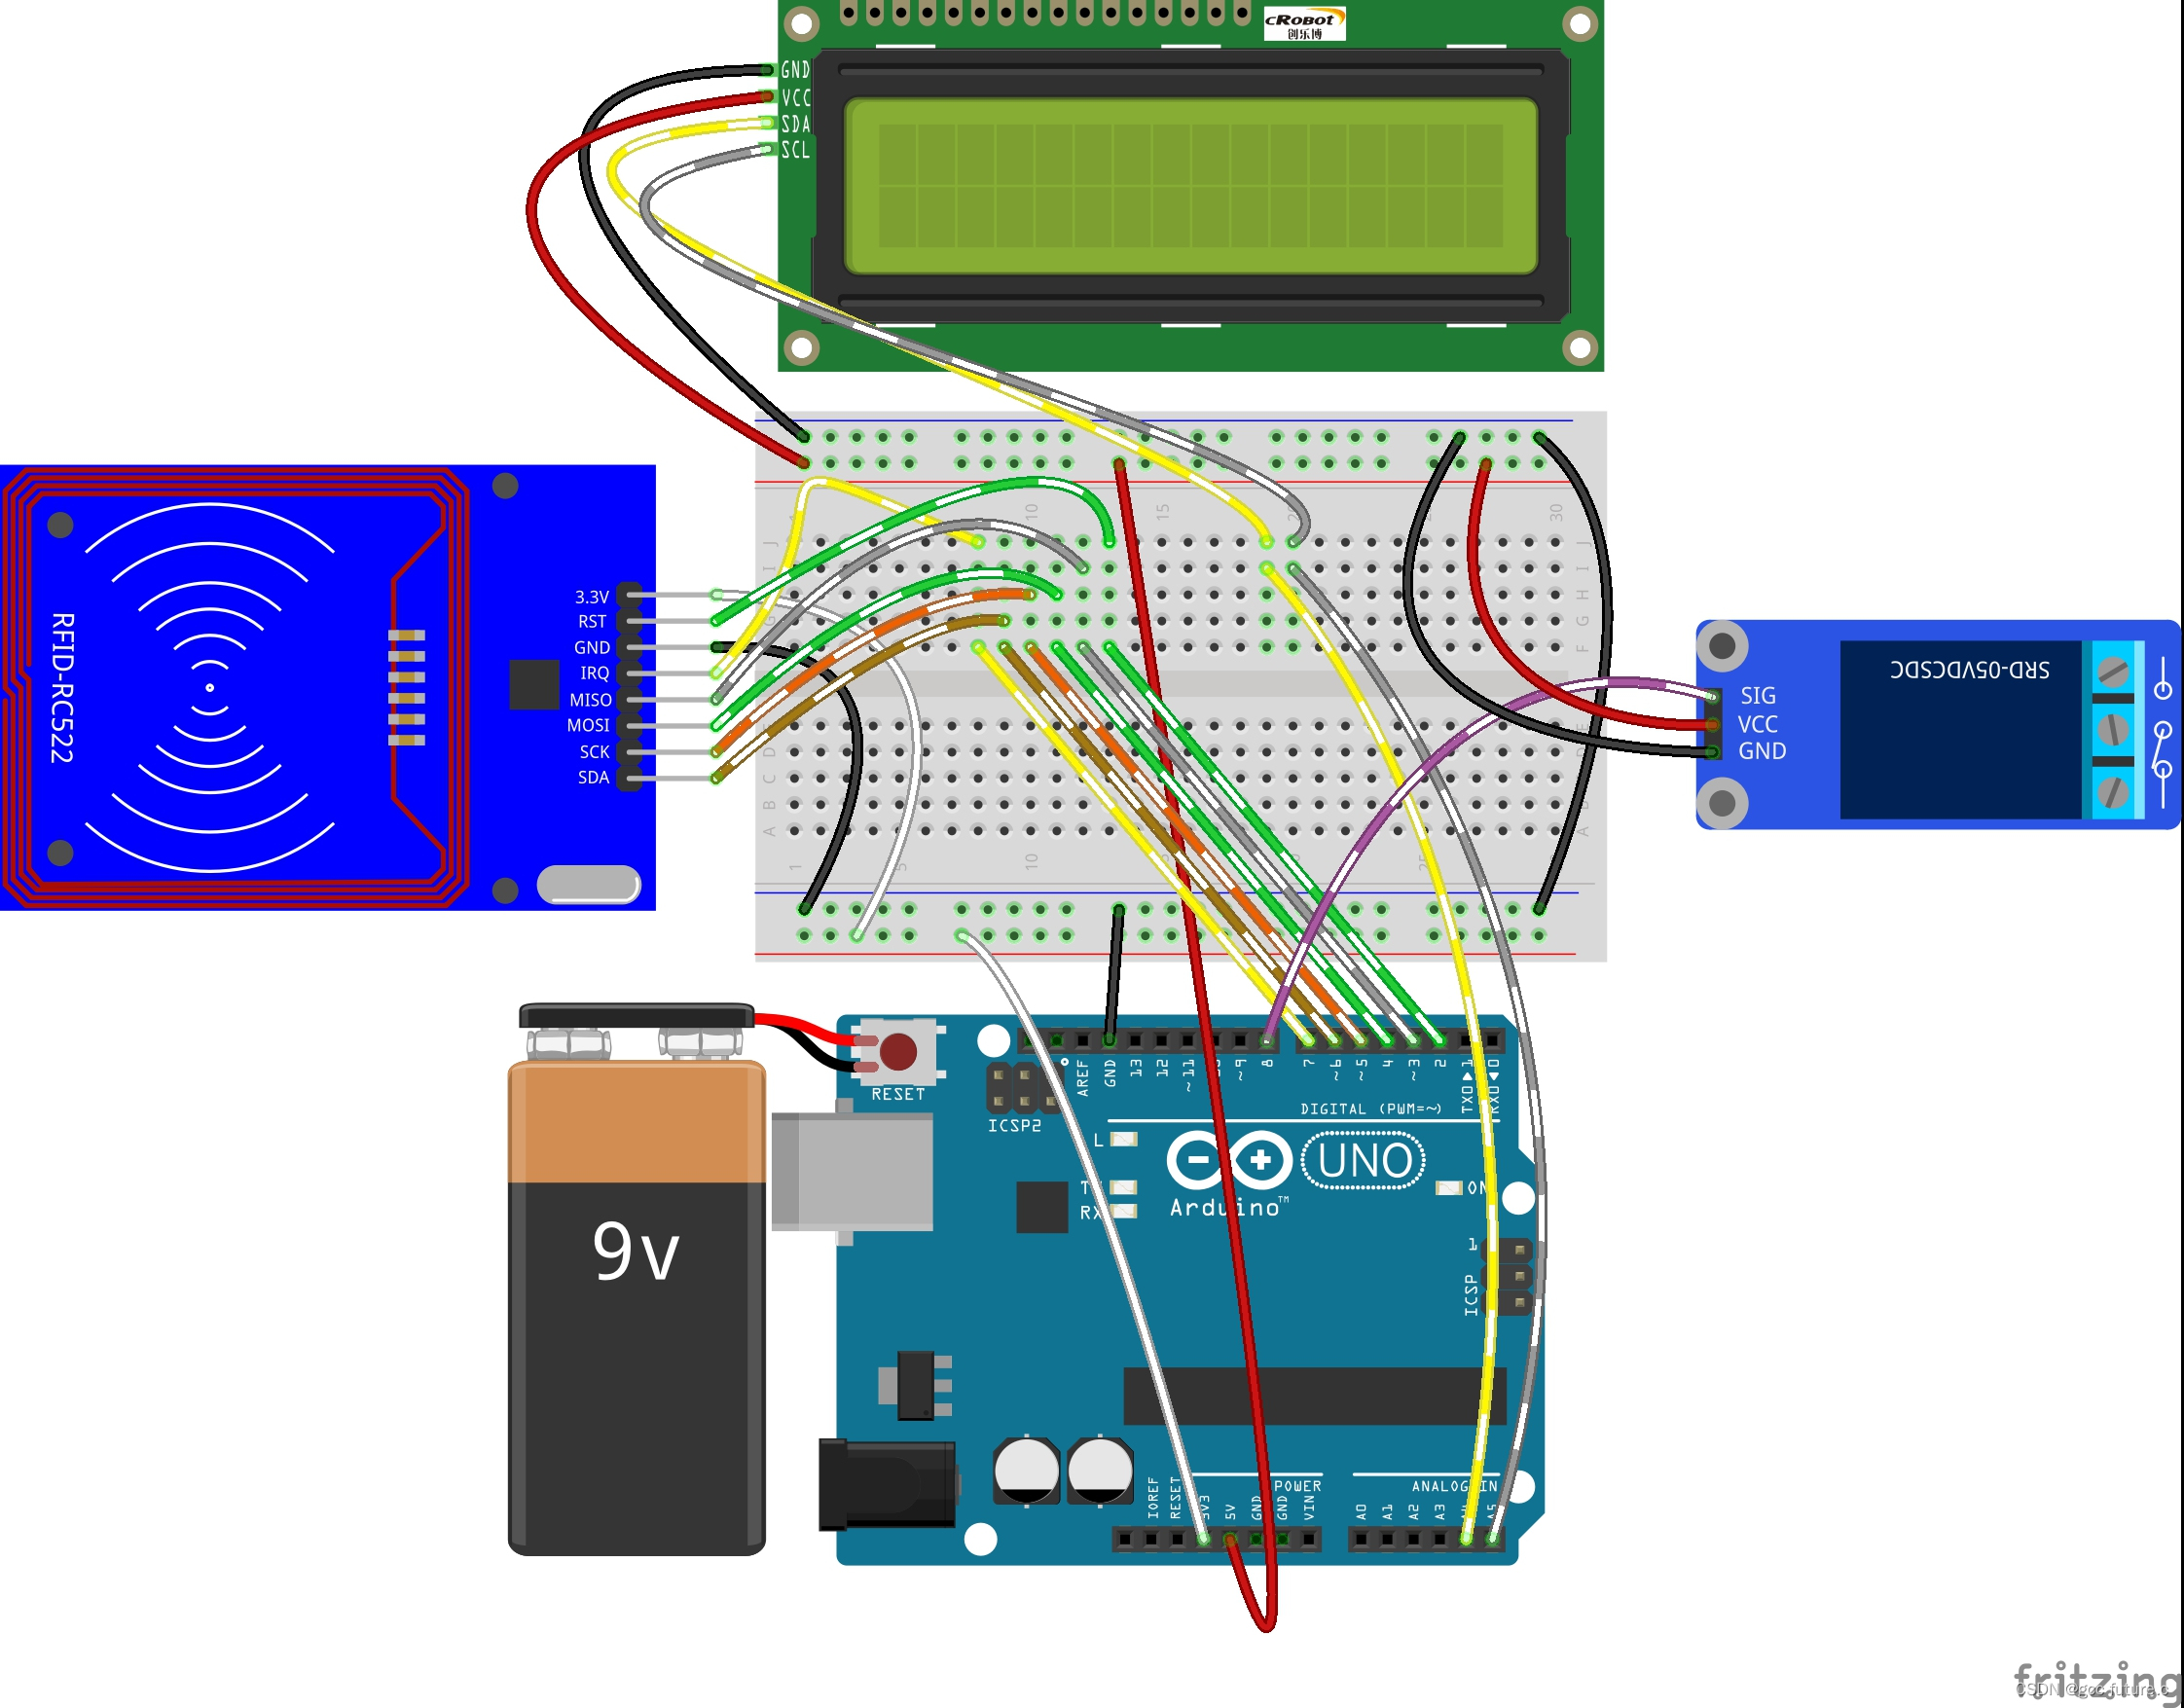
一、实物连接

二、代码实现
#include"rfid.h"
#include <LiquidCrystal_I2C.h>
#include <Wire.h>
LiquidCrystal_I2C lcd(0x27,16,2);
RFID rfid; //create a variable type of RFID
#define relayPin 8  //relay module attach to pin8

uchar serNum[5]; // array to store your ID

void setup()
{
  lcd.init(); //initialize lcd
  lcd.backlight(); //turn on the backlight
  Serial.begin(9600);
  rfid.begin(7, 5, 4, 3, 6, 2);//rfid.begin(IRQ_PIN,SCK_PIN,MOSI_PIN,MISO_PIN,NSS_PIN,RST_PIN)
  delay(100);
  rfid.init(); //initialize the RFID
  pinMode(relayPin, OUTPUT);  //set relayPin as OUTPUT
  digitalWrite(relayPin,HIGH); //and high level
  //Serial.begin(9600);
  lcd.setCursor(0,0);
  lcd.print("    Welcome!    "); //print"    Welcome!    "
  delay(2000);//delay 2s

}
void loop()
{
  uchar status;
  uchar str[MAX_LEN];
   // Search card, return card types
  status = rfid.request(PICC_REQIDL, str);
  if (status != MI_OK)
  {
    return;
  }
  // Show card type
  rfid.showCardType(str);
  //Prevent conflict, return the 4 bytes Serial number of the card
  status = rfid.anticoll(str);

  if (status == MI_OK)
  {
    //Serial.print("The card's number is: ");
    lcd.setCursor(0,0);
    lcd.print(" ID: ");
    memcpy(serNum, str, 5);
    rfid.showCardID(serNum);//show the card ID
    // Serial.println();

    // Check people associated with card ID 8F3D0329
    uchar* id = serNum;
    if( id[0]==0x8F && id[1]==0x3D && id[2]==0x03 && id[3]==0x29 )
    {
      digitalWrite(relayPin,LOW);
      // Serial.println("Hello Dannel!");
      lcd.setCursor(0,1);
      lcd.print(" Hello Dannel! ");
      delay(2000);
      lcd.clear();
      digitalWrite(relayPin,HIGH);
    }
    //if the card id is AB8058A3,then relay connect
    else if(id[0]==0xAB && id[1]==0x80 && id[2]==0x58 && id[3]==0xA3)
    {
      digitalWrite(relayPin,LOW);
      //Serial.println("Hello Arduino");
      lcd.setCursor(0,1);
      lcd.print("Hello Arduino");
      delay(2000);
      lcd.clear();
      digitalWrite(relayPin,HIGH);
    }
    else
    {
      //Serial.println("Hello unkown guy!");
      lcd.setCursor(0,1);
      lcd.print("Hello unkown guy");
      delay(2000);
      lcd.clear();
    }
  }
  lcd.setCursor(0,0);
  lcd.print("    Welcome!    ");
  delay(2000);
  rfid.halt(); //command the card into sleep mode
}
最后
以上就是老实汉堡最近收集整理的关于arduino控制RFID门禁卡一、实物连接二、代码实现的全部内容,更多相关arduino控制RFID门禁卡一、实物连接二、代码实现内容请搜索靠谱客的其他文章。
本图文内容来源于网友提供,作为学习参考使用,或来自网络收集整理,版权属于原作者所有。


发表评论 取消回复