本文实例为大家分享了android自定义手表效果的具体代码,供大家参考,具体内容如下
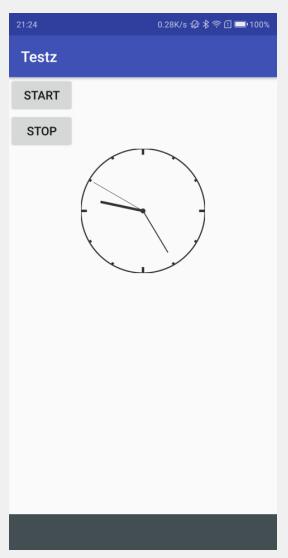
1.效果图:
2.布局
<?xml version="1.0" encoding="utf-8"?>
<LinearLayout xmlns:android="http://schemas.android.com/apk/res/android"
 xmlns:app="http://schemas.android.com/apk/res-auto"
 xmlns:tools="http://schemas.android.com/tools"
 android:layout_width="match_parent"
 android:layout_height="match_parent"
 android:orientation="vertical"
 >

 <Button
  android:id="@+id/btn_start"
  android:layout_width="wrap_content"
  android:layout_height="wrap_content"
  android:text="start" />
 .

 <Button
  android:id="@+id/btn_stop"
  android:layout_width="wrap_content"
  android:layout_height="wrap_content"
  android:text="stop" />

 <ImageView
  android:id="@+id/iv_clock"
  android:layout_width="wrap_content"
  android:layout_height="wrap_content"
  android:layout_gravity="center"
  android:src="@mipmap/ic_launcher" />
</LinearLayout>
3.自定义view,显示
package com.example.administrator.testz;


import android.graphics.Bitmap;
import android.graphics.Canvas;
import android.graphics.Color;
import android.graphics.Paint;
import android.os.AsyncTask;
import android.support.v7.app.AppCompatActivity;
import android.os.Bundle;
import android.view.View;
import android.widget.Button;
import android.widget.ImageView;

import java.util.Calendar;

/**
 * 优化方案:
 * 表盘课绘制一次
 * 在分线程中进行加载
 */
public class MainActivity extends AppCompatActivity implements View.OnClickListener {
 private Button btnStart, btnStop;
 private ImageView mClockImageView;
 Bitmap.Config config = Bitmap.Config.ARGB_8888;
 int width = 500;
 int height = 500;

 private Calendar mCalendar;
 private int mHour, mMinute, mSecond;
 private float mDegrees;
 private float length;

 private boolean mIsRunning;

 @Override
 protected void onCreate(Bundle savedInstanceState) {
  super.onCreate(savedInstanceState);
  setContentView(R.layout.activity_main);

  btnStart = (Button) findViewById(R.id.btn_start);
  btnStop = (Button) findViewById(R.id.btn_stop);
  btnStop.setOnClickListener(this);
  btnStart.setOnClickListener(this);

  mClockImageView = (ImageView) findViewById(R.id.iv_clock);
  mClockImageView.setImageBitmap(drawClock());

 }

 /**
  * 画表盘
  */
 private Bitmap drawClockFace() {
  Bitmap bm = Bitmap.createBitmap(width, height, config);

  Canvas canvas = new Canvas(bm);
  Paint paint = new Paint();
  paint.setAntiAlias(true); //锯齿
  paint.setStyle(Paint.Style.STROKE); // 空心
  paint.setStrokeWidth(5);
  paint.setColor(Color.parseColor("#333333"));

  // 外层圆
  canvas.drawCircle(width / 2, height / 2, width / 2, paint);

  // 內层圆 --》圆心
  paint.setStyle(Paint.Style.FILL);
  canvas.drawCircle(width / 2, height / 2, 10, paint);

  // 循环画刻度(旋转画刻度)
  for (int i = 0; i < 12; i++) {
   if (i % 3 == 0) {
    paint.setStrokeWidth(10);
    canvas.drawLine(width / 2, 0, width / 2, 24, paint);
    canvas.rotate(30, width / 2, height / 2);
   } else {
    canvas.drawLine(width / 2, 0, width / 2, 10, paint);
    canvas.rotate(30, width / 2, height / 2);
   }
  }


  return bm;
 }

 private Bitmap drawClock() {
  Bitmap bm = drawClockFace();

  Canvas canvas = new Canvas(bm);

  Paint paint = new Paint();
  paint.setAntiAlias(true);
  paint.setColor(Color.parseColor("#333333"));

  mCalendar = Calendar.getInstance();
  mHour = mCalendar.get(Calendar.HOUR);
  mMinute = mCalendar.get(Calendar.MINUTE);
  mSecond = mCalendar.get(Calendar.SECOND);

  //画小时指针
  paint.setStrokeWidth(10);
  mDegrees = mHour * 30 + mMinute / 2;
  length = (width / 2) * 0.7f;
  canvas.save();
  canvas.rotate(mDegrees, width / 2, height / 2);
  canvas.drawLine(width / 2, height / 2, width / 2, height - (height / 2) - length, paint);
  canvas.restore();
//  canvas.rotate(360 - mDegrees, width / 2, height / 2);

  //画分钟指针
  paint.setStrokeWidth(4);
  mDegrees = mMinute * 6 + mSecond / 10;
  length = (width / 2) * 0.78f;
  canvas.save();
  canvas.rotate(mDegrees, width / 2, height / 2);
  canvas.drawLine(width / 2, height / 2, width / 2, height - (height / 2) - length, paint);
  canvas.restore();
//  canvas.rotate(360 - mDegrees, width / 2, height / 2);

  //画分钟指针
  paint.setStrokeWidth(2);
  mDegrees = mSecond * 6;
  length = (width / 2) * 0.92f;
  canvas.save();
  canvas.rotate(mDegrees, width / 2, height / 2);
  canvas.drawLine(width / 2, height / 2, width / 2, height - (height / 2) - length, paint);
  canvas.restore();

  return bm;
 }

 @Override
 public void onClick(View v) {
  switch (v.getId()) {
   case R.id.btn_start:
    mIsRunning = true;
    new ClockTask().execute("");
    break;
   case R.id.btn_stop:
    mIsRunning = false;
    break;
  }
 }

 @Override
 protected void onDestroy() {
  super.onDestroy();
  mIsRunning = false;
 }

 private class ClockTask extends AsyncTask<Object, Object, Object> {

  @Override
  protected Object doInBackground(Object... objects) {
   while (mIsRunning) {
    publishProgress("");
    try {
     Thread.sleep(1000);
    } catch (InterruptedException e) {
     e.printStackTrace();
    }
   }
   return null;
  }

  @Override
  protected void onProgressUpdate(Object... values) {
   super.onProgressUpdate(values);
   mClockImageView.setImageBitmap(drawClock());
  }
 }


}
点击运行就可以了,这样手机就可以当手表用了,真的神奇。
以上就是本文的全部内容,希望对大家的学习有所帮助,也希望大家多多支持靠谱客。
最后
以上就是冷酷小猫咪最近收集整理的关于android自定义手表效果的全部内容,更多相关android自定义手表效果内容请搜索靠谱客的其他文章。
本图文内容来源于网友提供,作为学习参考使用,或来自网络收集整理,版权属于原作者所有。


发表评论 取消回复