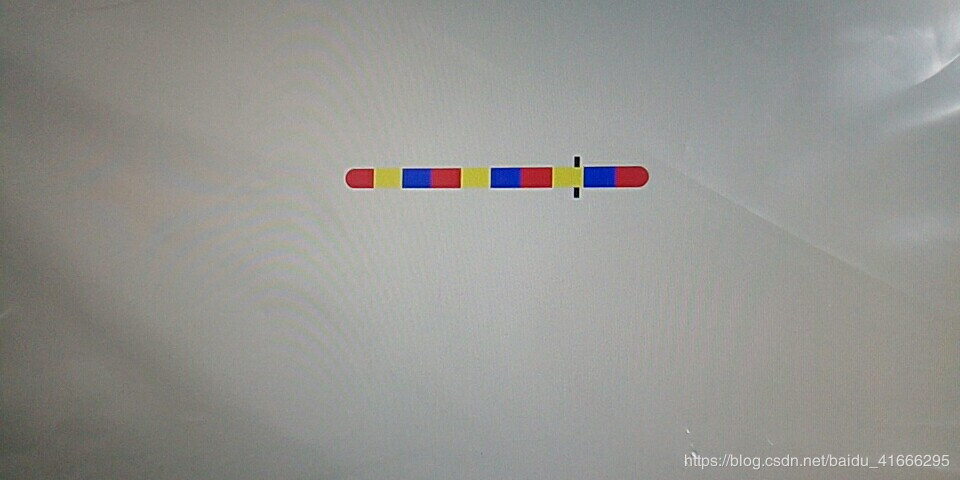
在最近的开发工作中,要实现一个调色板的进度条,SeekBar要分成10段显示不同颜色,功夫不负有心人,终于实现了这个功能,下面分享给大家
示例图:
1.自定义SeekBar
import android.content.Context;
import android.graphics.Canvas;
import android.graphics.Color;
import android.graphics.Paint;
import android.graphics.Rect;
import android.os.Build;
import android.util.AttributeSet;
import android.widget.SeekBar;

/**
 *
 * @time 2020/6/4 18:32
 * <p>
 * 类描述:自定义多颜色的SeekBar
 */
public class MulticolourSeekBar extends SeekBar {

 /**
 * 画笔
 */
 private Paint mMulticlourPaint;

 /**
 * 刻度线的个数,等分数等于刻度线的个数加1
 */
 private int mMulticlourCount = 9;

 /**
 * 每条刻度线的宽度
 */
 private int mMulticlourWidth = 2;

 /**
 * 刻度线的颜色
 */
 private int mMulticlourColor = Color.WHITE;

 /**
 * 滑块上面是否要显示刻度线
 */
 private boolean isShowTopOfThumb = false;

 public MulticolourSeekBar(Context context) {
 super(context);
 init();
 }

 public MulticolourSeekBar(Context context, AttributeSet attrs) {
 super(context, attrs);
 init();
 }

 public MulticolourSeekBar(Context context, AttributeSet attrs, int defStyleAttr) {
 super(context, attrs, defStyleAttr);
 init();
 }

 /**
 * 初始化
 */
 private void init() {
 //创建绘制刻度线的画笔
 mMulticlourPaint = new Paint();
 mMulticlourPaint.setColor(mMulticlourColor);
 mMulticlourPaint.setAntiAlias(true);

 //Api21及以上调用,去掉滑块后面的背景
 if (Build.VERSION.SDK_INT >= Build.VERSION_CODES.LOLLIPOP) {
  setSplitTrack(false);
 }
 }

 /**
 * 重写onDraw方法绘制刻度线
 *
 * @param canvas
 */
 @Override
 protected synchronized void onDraw(Canvas canvas) {
 super.onDraw(canvas);

 //极限条件校验
 if (getWidth() <= 0 || mMulticlourCount <= 0) {
  return;
 }

 //获取每一份的长度
// int length = (getWidth() - getPaddingLeft() - getPaddingRight() - mMulticlourCount * mMulticlourWidth) / (mMulticlourCount + 1);
 int length = (getWidth() - getPaddingLeft() - getPaddingRight()) / (mMulticlourCount + 1);
 //计算刻度线的顶部坐标和底部坐标
 int rulerTop = getHeight() / 2 - getMinimumHeight() / 2;
 int rulerBottom = rulerTop + getMinimumHeight();

 //获取滑块的位置信息
 Rect thumbRect = null;
 if (getThumb() != null) {
  thumbRect = getThumb().getBounds();
 }
 //绘制刻度线
// for (int i = 1; i <= mMulticlourCount; i++) {
//  //计算刻度线的左边坐标和右边坐标
//  int rulerLeft = i * length + getPaddingLeft();
//  int rulerRight = rulerLeft + mMulticlourWidth;
//
//  //判断是否需要绘制刻度线
//  if (!isShowTopOfThumb && thumbRect != null && rulerLeft - getPaddingLeft() > thumbRect.left && rulerRight - getPaddingLeft() < thumbRect.right) {
//  continue;
//  }
//
//  //进行绘制
//  canvas.drawRect(rulerLeft, rulerTop, rulerRight, rulerBottom, mMulticlourPaint);
// }
 for (int i = 0; i <= mMulticlourCount; i++) {
  int left = getPaddingLeft() + i * length;
  int right = left + length;
  if (i % 3 == 0) {
  mMulticlourPaint.setColor(Color.RED);
  } else if (i % 3 == 1) {
  mMulticlourPaint.setColor(Color.YELLOW);
  } else {
  mMulticlourPaint.setColor(Color.BLUE);
  }
  if (i == 0) {
  canvas.drawCircle(getPaddingLeft() + 10, 20, 10, mMulticlourPaint);
  left += 10;
  canvas.drawRect(left, 10, right, 30, mMulticlourPaint);
  } else if (i == mMulticlourCount) {
  right -= 10;
  canvas.drawRect(left, 10, right, 30, mMulticlourPaint);
  canvas.drawCircle(right, 20, 10, mMulticlourPaint);
  } else {
  canvas.drawRect(left, 10, right, 30, mMulticlourPaint);
  }
 }
 }

 /**
 * 设置刻度线的个数
 *
 * @param mRulerCount
 */
 public void setRulerCount(int mRulerCount) {
 this.mMulticlourCount = mRulerCount;
 requestLayout();
 }

 /**
 * 设置刻度线的宽度,单位(px)
 *
 * @param mRulerWidth
 */
 public void setRulerWidth(int mRulerWidth) {
 this.mMulticlourWidth = mRulerWidth;
 requestLayout();
 }

 /**
 * 设置刻度线的颜色
 *
 * @param mRulerColor
 */
 public void setRulerColor(int mRulerColor) {
 this.mMulticlourColor = mRulerColor;
 if (mMulticlourPaint != null) {
  mMulticlourPaint.setColor(mRulerColor);
  requestLayout();
 }
 }

 /**
 * 滑块上面是否需要显示刻度线
 *
 * @param isShowTopOfThumb
 */
 public void setShowTopOfThumb(boolean isShowTopOfThumb) {
 this.isShowTopOfThumb = isShowTopOfThumb;
 requestLayout();
 }
}
2.activity_main.xml
<?xml version="1.0" encoding="utf-8"?>
<android.support.constraint.ConstraintLayout xmlns:android="http://schemas.android.com/apk/res/android"
 xmlns:app="http://schemas.android.com/apk/res-auto"
 xmlns:tools="http://schemas.android.com/tools"
 android:layout_width="match_parent"
 android:layout_height="match_parent"
 tools:context=".MainActivity">

 <com.xinrui.view.MulticolourSeekBar
 android:id="@+id/seek_bar"
 android:layout_width="350px"
 android:layout_height="wrap_content"
 android:background="@null"
 android:maxHeight="20px"
 android:minHeight="20px"
 android:max="100"
 android:progress="5"
 android:progressDrawable="@drawable/shape_progress_drawable"
 android:thumb="@drawable/shape_thumb_icon"
 android:thumbOffset="-2px"
 app:layout_constraintBottom_toBottomOf="parent"
 app:layout_constraintEnd_toEndOf="parent"
 app:layout_constraintStart_toStartOf="parent"
 app:layout_constraintTop_toTopOf="parent" />

</android.support.constraint.ConstraintLayout>
3.shape_progress_drawable.xml
<?xml version="1.0" encoding="utf-8"?>
<layer-list xmlns:android="http://schemas.android.com/apk/res/android">
 <item android:id="@android:id/background">
 <shape>
  <solid android:color="#e1e8f0" />
  <size android:height="8px" />
  <corners android:radius="8px" />
 </shape>
 </item>

 <item android:id="@android:id/progress">
 <clip>
  <shape>
  <gradient
   android:endColor="@android:color/transparent"
   android:startColor="@android:color/transparent" />
  <size android:height="8px" />
  <corners android:radius="8px" />
  </shape>
 </clip>
 </item>
</layer-list>
4.shape_thumb_icon.xml
<?xml version="1.0" encoding="utf-8"?>
<shape xmlns:android="http://schemas.android.com/apk/res/android"
 android:shape="rectangle">

 <size
 android:width="5px"
 android:height="40px" />

 <solid android:color="@android:color/widget_edittext_dark" />
</shape>
总结
到此这篇关于Android 自定义SeekBar 实现分段显示不同背景颜色的文章就介绍到这了,更多相关Android 自定义SeekBar 背景颜色内容请搜索靠谱客以前的文章或继续浏览下面的相关文章希望大家以后多多支持靠谱客!
最后
以上就是含糊枕头最近收集整理的关于Android 自定义SeekBar 实现分段显示不同背景颜色的示例代码的全部内容,更多相关Android内容请搜索靠谱客的其他文章。
本图文内容来源于网友提供,作为学习参考使用,或来自网络收集整理,版权属于原作者所有。


发表评论 取消回复