最近写课设,因为是新手,实现起来比较麻烦。所以写下此笔记,免得我以后忘记了。
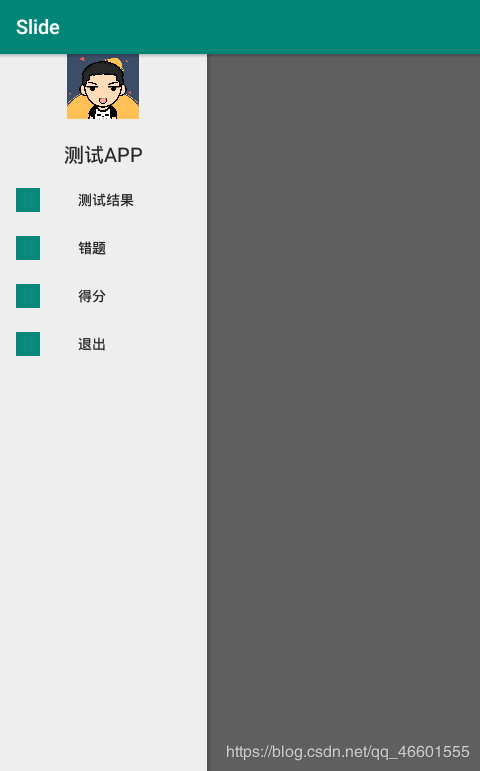
附图片:
//主页面的布局
activity_main.xml:
<?xml version="1.0" encoding="utf-8"?>
<android.support.v4.widget.DrawerLayout xmlns:android="http://schemas.android.com/apk/res/android"
  xmlns:tools="http://schemas.android.com/tools"
  xmlns:qpp="http://schemas.android.com/apk/res-auto"
  android:id="@+id/drawer_layout"
  android:layout_width="match_parent"
  android:layout_height="match_parent"
  android:fitsSystemWindows="true"
  tools:openDrawer="start">
  <TextView
    android:layout_width="wrap_content"
    android:layout_height="wrap_content"
    android:text="Hello World!"
     />

  <android.support.design.widget.NavigationView
    android:id="@+id/nav_view"
    android:layout_width="207dp"
    android:layout_height="match_parent"
    android:layout_gravity="left"
    android:fitsSystemWindows="true"
    qpp:headerLayout="@layout/stumenu1"
    qpp:menu="@menu/stumenu1" />

</android.support.v4.widget.DrawerLayout>
头部的布局(放入layout)
stumenu1.xml:
<?xml version="1.0" encoding="utf-8"?>
<!--学生左滑后界面-->
<android.support.constraint.ConstraintLayout
  xmlns:android="http://schemas.android.com/apk/res/android"
  xmlns:tools="http://schemas.android.com/tools"
  android:layout_width="match_parent"
  android:layout_height="match_parent">

  <LinearLayout xmlns:android="http://schemas.android.com/apk/res/android"
    android:orientation="vertical"
    android:layout_width="match_parent"
    android:layout_height="match_parent"
    android:gravity="center"
    >

    <ImageView
      android:id="@+id/person"
      android:layout_width="72dp"
      android:layout_height="72dp"
      android:layout_marginTop="75dp"
      android:src="@drawable/student"
      />
    <TextView
      android:id="@+id/stutv"
      android:layout_width="wrap_content"
      android:layout_height="wrap_content"
      android:textSize="20sp"
      android:layout_marginTop="20dp"
      android:textColor="#282525"
      android:text="测试APP"/>

  </LinearLayout>

</android.support.constraint.ConstraintLayout>
菜单的布局:(放在menu文件夹)
stumenu1
<?xml version="1.0" encoding="utf-8"?>
<menu xmlns:android="http://schemas.android.com/apk/res/android"
  xmlns:app="http://schemas.android.com/apk/res-auto">
  <group
    android:checkableBehavior="single">
    <item
      android:id="@+id/result"
      android:icon="@drawable/ic_launcher_background"
      android:checkable="true"
      android:title=" 测试结果"/>

  <item
    android:id="@+id/w1"
    android:icon="@drawable/ic_launcher_background"

    android:title=" 错题"/>
  <item
    android:id="@+id/s1"
    android:icon="@drawable/ic_launcher_background"
    android:title=" 得分"/>

  <item
    android:id="@+id/exit"
    android:icon="@drawable/ic_launcher_background"
    android:title=" 退出"/>
  </group>
</menu>
MainActivity.java:
package com.example.cholewu.slide;

import android.content.Intent;
import android.support.annotation.NonNull;
import android.support.design.widget.NavigationView;
import android.support.v4.widget.DrawerLayout;
import android.support.v7.app.AppCompatActivity;
import android.os.Bundle;
import android.view.MenuItem;
import android.widget.Toast;

public class MainActivity extends AppCompatActivity {

  @Override
  protected void onCreate(Bundle savedInstanceState) {
    super.onCreate(savedInstanceState);
    setContentView(R.layout.activity_main);

    //左滑菜单
    initView();
  }
  private void initView() {

    //实现左右滑动
    final DrawerLayout drawer = (DrawerLayout) findViewById(R.id.drawer_layout);
    //菜单控件
    final NavigationView nv = findViewById(R.id.nav_view);
    nv.setItemIconTintList(null);

    nv.setNavigationItemSelectedListener(new NavigationView.OnNavigationItemSelectedListener() {
      @Override
      public boolean onNavigationItemSelected(@NonNull MenuItem item) {

        switch (item.getItemId()){
          case R.id.exit:
            //跳转到退出页面
            Toast.makeText(MainActivity.this,"你已退出登录!",Toast.LENGTH_SHORT).show();
            Intent intent=new Intent();
            intent.setClass(MainActivity.this,Exit.class);
            startActivity(intent);
            item.setChecked(true);
            break;
        }

        item.setCheckable(true);//设置可选项
        item.setChecked(true);//设置被选中
        drawer.closeDrawers();//关闭菜单栏
        return true;
      }

    });
  }
}
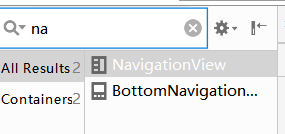
(注意:如果直接复制代码的话,android.support.design.widget.NavigationView可能会出错,需要自己在design那里布局,如果出错,可以看看以下NavigationView右边是否有下载图案,点击下载就行了)
总结
到此这篇关于Android studio有关侧滑的实现的文章就介绍到这了,更多相关Android studio有关侧滑的实现内容请搜索靠谱客以前的文章或继续浏览下面的相关文章希望大家以后多多支持靠谱客!
最后
以上就是无限白云最近收集整理的关于Android studio有关侧滑的实现代码的全部内容,更多相关Android内容请搜索靠谱客的其他文章。
本图文内容来源于网友提供,作为学习参考使用,或来自网络收集整理,版权属于原作者所有。


发表评论 取消回复