本篇文章主要介绍了微信小程序开发之圆形菜单 仿建行圆形菜单实例,具有一定的参考价值,有需要的可以了解一下。
建行APP首页有个圆形菜单.仿了个玩具出来.

功能介绍:
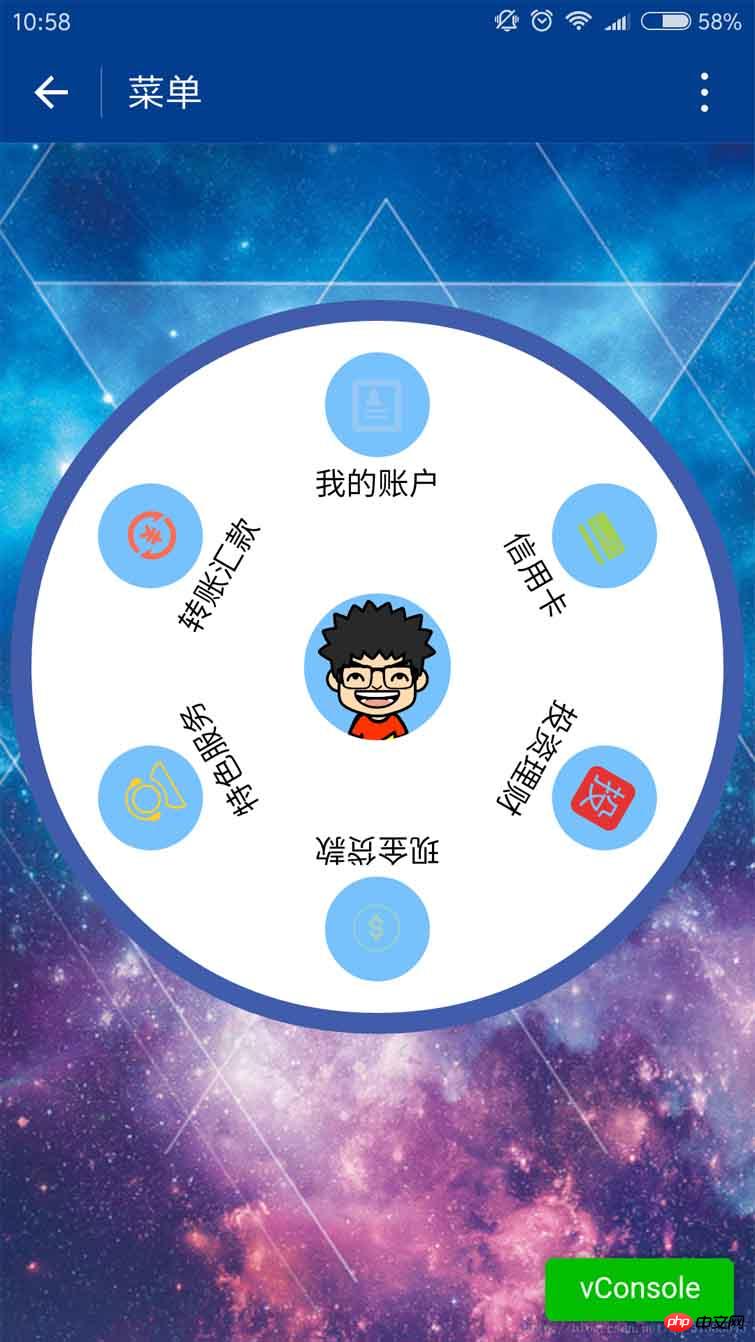
1.一个圆形背景.六个item菜单.中间是微信用户的头像;
2.触摸滚动.速度较小时,随手指滚动,手指抬起,滚动停止;速度较大时,随手指滚动,手指抬起,还会自动滚动一段时间;
上一张真机截图:
上代码:
1.index.js
var app = getApp()
Page({
 data: {
  userInfo: {},
  menuList: {},//菜单集合
  animationData: {},
  startPoint: {},//触摸开始
  dotPoint: {},//圆点坐标
  startAngle: 0,//开始角度
  tempAngle: 0,//移动角度
  downTime: 0,//按下时间
  upTime: 0,//抬起时间
  // isRunning: false,//正在滚动
 },
 onLoad: function () {
  var that = this
  //调用应用实例的方法获取全局数据
  app.getUserInfo(function (userInfo) {
   //更新数据
   that.setData({
    userInfo: userInfo,
   })
  })
  wx.getSystemInfo({
   success: function (res) {
    var windowWidth = res.windowWidth * 0.5;
    that.setData({
     //圆点坐标,x为屏幕一半,y为半径与margin-top之和,px
     //后面获取的触摸坐标是px,所以这里直接用px.
     dotPoint: { clientX: windowWidth, clientY: 250 }
    })
   }
  })
 },
 onReady: function (e) {
  var that = this;
  app.menuConfig = {
   menu: [
    { 'index': 0, 'menu': '我的账户', 'src': '../images/account.png' },
    { 'index': 1, 'menu': '信用卡', 'src': '../images/card.png' },
    { 'index': 2, 'menu': '投资理财', 'src': '../images/investment.png' },
    { 'index': 3, 'menu': '现金贷款', 'src': '../images/loan.png' },
    { 'index': 4, 'menu': '特色服务', 'src': '../images/service.png' },
    { 'index': 5, 'menu': '转账汇款', 'src': '../images/transfer.png' }
   ]
  }
  // 绘制转盘
  var menuConfig = app.menuConfig.menu,
   len = menuConfig.length,
   menuList = [],
   degNum = 360 / len // 文字旋转 turn 值
  for (var i = 0; i < len; i++) {
   menuList.push({ deg: i * degNum, menu: menuConfig[i].menu, src: menuConfig[i].src });
   console.log("menu:" + menuConfig[i].menu)
  }
  that.setData({
   menuList: menuList
  });
 },
 // 菜单拖动的三个方法
 buttonStart: function (e) {
  this.setData({
   startPoint: e.touches[0]
  })
  var x = this.data.startPoint.clientX - this.data.dotPoint.clientX;
  var y = this.data.startPoint.clientY - this.data.dotPoint.clientY;
  var startAngle = Math.asin(y / Math.hypot(x, y)) * 180 / Math.PI;
  this.setData({
   startAngle: startAngle
  })

 },
 buttonMove: function (e) {
  //获取滑动时的时间
  var downTime = Date.now();
  this.setData({
   downTime: downTime
  })
  var that = this;
  var endPoint = e.touches[e.touches.length - 1]
  //根据触摸位置计算角度
  var x = endPoint.clientX - this.data.dotPoint.clientX;
  var y = endPoint.clientY - this.data.dotPoint.clientY;
  var moveAngle = Math.asin(y / Math.hypot(x, y)) * 180 / Math.PI
  var quadrant = 1;
  if (x >= 0) {
   quadrant = y >= 0 ? 4 : 1;
  } else {
   quadrant = y >= 0 ? 3 : 2;
  }
  var tempAngle = 0;
  // 如果是一、四象限,则直接end角度-start角度,角度值都是正值
  if (quadrant == 1 || quadrant == 4) {
   tempAngle += moveAngle - this.data.startAngle;
  } else
  // 二、三象限,色角度值是负值
  {
   tempAngle += this.data.startAngle - moveAngle;
  }
  var menuConfig = app.menuConfig.menu;
  var menuList = [];
  for (var i = 0; i < this.data.menuList.length; i++) {
   menuList.push({ deg: this.data.menuList[i].deg + tempAngle, menu: menuConfig[i].menu, src: menuConfig[i].src });
  }
  this.setData({
   menuList: menuList
  })
  //重置开始角度
  this.setData({
   startPoint: e.touches[e.touches.length - 1]
  })
  var endX = this.data.startPoint.clientX - this.data.dotPoint.clientX;
  var endY = this.data.startPoint.clientY - this.data.dotPoint.clientY;
  var startAngle = Math.asin(endY / Math.hypot(endX, endY)) * 180 / Math.PI;
  this.setData({
   startAngle: startAngle,
   tempAngle: tempAngle
  })
 },
 buttonEnd: function (e) {
  // 计算,每秒移动的角度
  var that = this;
  var upTime = Date.now();
  var angleSpeed = this.data.tempAngle * 1000 / (upTime - this.data.downTime);
  if (Math.abs(angleSpeed) < 100) {
   //速度小于100时,停止滚动
   return
  } else {
   //速度大于100时,自动滚动
   if (angleSpeed > 0) {
    if (angleSpeed > 500) angleSpeed = 500
    var animationRun = wx.createAnimation({
     duration: 2000,
     //ease-out结束时减速
     timingFunction: 'ease-out'
    })
    that.animationRun = animationRun
    animationRun.rotate(angleSpeed).step()
    that.setData({
     animationData: animationRun.export(),
    })
   }
   else {
    if (angleSpeed < -500) angleSpeed = -500
    angleSpeed = Math.abs(angleSpeed);
    var animationRun = wx.createAnimation({
     duration: 2000,
     // ease-out结束时减速
     timingFunction: 'ease-out'
    })
    that.animationRun = animationRun
    animationRun.rotate(-angleSpeed).step()
    that.setData({
     animationData: animationRun.export(),
    })
   }
  }
 }
})登录后复制
2.index.wxml
<view class="circle-out">
 <view class="circle-in">
  <image class="userinfo-avatar" src="{{userInfo.avatarUrl}}"></image>
  <view class="menu-list" catchtouchmove="buttonMove" catchtouchstart="buttonStart" catchtouchend="buttonEnd">
   <view class="menu-item" wx:for="{{menuList}}" wx:key="unique" animation="{{animationData}}">
    <view class="menu-circle-item" style="-webkit-transform: rotate({{item.deg}}deg);" data-menu="{{item.menu}}">
     <image class="image-style" src="{{item.src}}"></image>
    </view>
    <view class="menu-circle-text-item" style="-webkit-transform: rotate({{item.deg}}deg);">
     <text class="text-style">{{item.menu}}</text>
    </view>
   </view>
  </view>
 </view>
</view>登录后复制
3.index.wxss
page {
 background-image: url('http://ac-ejx0nsfy.clouddn.com/ac767407f474e1c3970a.jpg');
 background-attachment: fixed;
 background-repeat: no-repeat;
 background-size: cover;
}

.circle-out {
 margin: 75px auto;
 position: relative;
 width: 350px;
 height: 350px;
 border-radius: 50%;
 background-color: #415cab;
}

.userinfo-avatar {
 width: 70px;
 height: 70px;
 border-radius: 50%;
 position: absolute;
 top: 0;
 bottom: 0;
 left: 0;
 right: 0;
 margin: auto;
}

/**子控件的透明度等于父控件透明度*子控件透明度,父控件的opacity设置后,
所以子控件opacity设置为1依然无效,必须分离开
*/

.circle-in {
 position: absolute;
 width: 330px;
 height: 330px;
 border-radius: 50%;
 top: 0;
 bottom: 0;
 left: 0;
 right: 0;
 margin: auto;
 background-color: #fff;
}

/**菜单*/

.menu-list {
 position: absolute;
 left: 0;
 top: 0;
 width: inherit;
 height: inherit;
}

.menu-item {
 position: absolute;
 left: 0;
 top: 0;
 width: 100%;
 height: 100%;
 font-weight: 500;
}

.menu-circle-item {
 -webkit-transform-origin: 50% 150px;
 transform-origin: 50% 150px;
 margin: 0 auto;
 margin-top: 15px;
 position: relative;
 height: 50px;
 width: 50px;
 background-color: #77c2fc;
 text-align: center;
 border-radius: 50%;
}

.image-style {
 height: 25px;
 width: 25px;
 color: #f00;
 margin: 12.5px auto;
}

.text-style {
 margin: 5px auto;
 font-size: 15px;
}

/***/

.menu-circle-text-item {
 -webkit-transform-origin: 50% 100px;
 transform-origin: 50% 100px;
 margin: 0 auto;
 position: relative;
 height: 25px;
 width: auto;
 text-align: center;
}登录后复制
js注释补充:
获取手指抬起时的角速度

1.获取角度.借图说话.
Math.sqrt( x * x + y * y )是斜边长,乘以 sin a 就是 y 的长度;
获取a的角度:Math.asin(y / Math.hypot(x, y) ;
[ hypot是x * x + y * y ]
2.根据角度差计算角速度
var angleSpeed = this.data.tempAngle * 1000 / (upTime - this.data.downTime);
登录后复制3.当角速度小于100的时候触摸滑动停止,不自动滚动;大于100时,自动滚动.我这里用动画,有个问题:很难把握动画持续时间和速度的关系.总感觉不够流畅.我表示不能忍.
4.分象限的问题.看看代码就知道了.主要是根据up时的触摸点相对于圆点的X轴差值来计算.大于0就是一四象限.小于0就是二三象限.
以上就是本文的全部内容,希望对大家的学习有所帮助,更多相关内容请关注PHP中文网!
相关推荐:
微信小程序制作首页的实现
关于微信小程序中chooseImage选择图片或者拍照
微信小程序实现导航栏选项卡的效果
以上就是微信小程序开发圆形菜单(仿建行圆形菜单)的详细内容,更多请关注靠谱客其它相关文章!

最后
以上就是炙热火最近收集整理的关于微信小程序开发圆形菜单(仿建行圆形菜单)的全部内容,更多相关微信小程序开发圆形菜单(仿建行圆形菜单)内容请搜索靠谱客的其他文章。


发表评论 取消回复