产品需求
开完产品需求会议,遇到了一个需求,首先页面分成两栏布局,左侧展示数据组件,支持拖拽排序,点击按钮清除组件。右侧支持将组件的缩略图拖拽至左侧生成一个新的组件。
思路
对于动态生成组件来说每一次都要是生成全新的一个组件,那么就可以把 组件放进函数当中 return。在JSX中调用函数,每次调用函数都会返回一个全新的组件。这对React来说非常简单,但是对于Vue来说,直接将组件返回是不可能的。尽管这个 return 写法不适合Vue,但是我们不可否认,思路是非常正确的,所以我们应该考虑一个别的写法。至于动态的生成组件,我们必须以数据来驱动组件的生成。对于拖拽组件的排序,直接使用拖拽库就OK了!!
面临的问题
- 拖拽库的选择
- 如何生成组件
- 以数据驱动动态生成组件
拖拽库的选择
拖拽库在这里我选择的是项目中存在的一个拖拽库 Vue.Draggable 点这里链接查看 Start 14.9K 蛮不错的。如果你们的Vue项目中没有用到这个拖拽库,你们可以自行参考本片文章的设计思路。
如何生成组件
在这里我使用的是 Vue.extend() 不清楚如何使用的小伙伴请在官方文档中查看过后再来学习这篇文章 Vue.extend 。 接下来我们创建一个js文件,用来书写创建组件的代码。
生成组件
/* generateComponents.js 文件名 */

import Vue from "vue";

// 想要动态生成的组件,先引入这个文件。
import components1 from "./components/TestCom1.vue";
import components2 from "./components/TestCom2.vue";

// 将组件的名称和组件做一个对应Map
const comMap = {
  components1,
  components2,
};

// 接收生成组件需要的组件名称,和想要传递给组件的
// props, 和 事件
const ReturnNewCom = function ({ props, on }) {
  const {
    comItem: { name },
  } = props;
  const newComponent = Vue.extend({
    render(createElement) {
      // 使用传进来的组件name来决定渲染哪一个组件。
      return createElement(comMap[name], {
        props,
        on,
      });
    },
  });
  return new newComponent();
};

export default ReturnNewCom;
组件
在这里我们书写两个组件,用来演示这个Demo,分别为components1.vue,components2.vue。
/*components1.vue*/
<template>
  <div class="widget-wrapper">
    <header class="header">{{ comDetail.name }}--{{ comDetail.id }}</header>
    <h1>查询条件:{{ queryObj }}</h1>
    <button @click="handleDelete">清除</button>
  </div>
</template>
<script>
export default {
  data() {
    return {
      comDetail: this.comItem,
      _queryObj: this.queryObj,
    };
  },
  props: {
    comItem: {
      type: Object,
      default() {
        return {
          id: 0,
          name: "",
        };
      },
    },
    queryObj: {
      // 可以接收父组件传递的晒选条件,必须是Object
      type: Object,
      default() {
        // 定义默认的查询条件。
        return {
          num: 0,
        };
      },
    },
  },
  watch: {
    comItem(val) {
      this.comDetail = val;
      return val;
    },
    queryObj(val) {
      this._queryObj = val;
      return val;
    },
  },
  created() {
    console.log("data -> this.comItem", this.comItem);
  },
  methods: {
    handleDelete() {
      // 删除组件方法
      this.$el.remove();
      // 调用父组件的函数。修改父组件中的 leftComList 数组的数据。
      this.$emit("handleDelete", this.comDetail);
    },
  },
};
</script>
<style scoped>
.widget-wrapper {
  background: #ff7b7b;
  border-radius: 12px;
  overflow: hidden;
  width: 200px;
}
.header {
  height: 50px;
  padding: 0 15px;
}
</style>
其实components2.vue文件中的代码和components1.vue文件的代码类似,唯一不同的地方就是背景颜色不一样。
以数据驱动动态组件的生成
接下来就得使用Vue.Draggable 这个拖拽库进行拖拽和数据的修改。 我们可以直接在App.vue文件中直接书写。
/* App.vue */
<template>
  <div class="dragCom">
    <h1>{{ leftComList }}</h1>
    <button @click="queryObj.num++">改变查询条件</button>
    <div class="body">
      <div class="left">
        <draggable class="left" :list="leftComList" :group="'people'">
          <div
            ref="comBody"
            v-for="({ name, id }, index) in leftComList"
            :key="id"
            class="comCard"
          >
            <!-- 循环 leftComList 数组,利用数据来渲染组件,
            将动态生成的数组添加到这个DOM元素当中。 -->
            {{
              handleAddCom({
                props: { comItem: { name, id }, queryObj },
                index,
              })
            }}
          </div>
        </draggable>
      </div>
      <div class="right">
        <draggable
          class="dragArea"
          :list="rightComList"
          :group="{ name: 'people', pull: 'clone', put: false }"
          :clone="handleCloneDog"
        >
          <div class="card" v-for="element in rightComList" :key="element.id">
            {{ element.name }}
          </div>
          <!-- 右侧的 卡片 数据, rightComList 数组对象中的name就对应了generateComponents.js
          中的ComMap中的属性 -->
        </draggable>
      </div>
    </div>
  </div>
</template>

<script>
import draggable from "vuedraggable";
import CreateCom from "./generateComponents";
export default {
  components: {
    draggable,
  },
  data() {
    return {
      rightComList: [
        {
          id: Math.random(),
          name: "components1",
        },
        {
          id: Math.random(),
          name: "components2",
        },
      ],
      leftComList: [], // 存储驱动动态生成组件的数据。
      comMap: new Map(), // 主要的作用就是用来记录
      // 组件有没有渲染到 class="comCard" 这个DOM中,
      // 如果渲染了就不能再往进添加子元素了。
      queryObj: {
        // 主要的作用就是向子组件传递查询条件
        num: 0,
      },
    };
  },
  beforeDestroy() {
    // 清除 记录 的数据
    this.comMap.clear();
  },
  methods: {
    handleAddCom({ index, on = {}, props = { comItem: { name: "", id: 0 } } }) {
      const {
        comItem: { id },
      } = props;
      this.$nextTick(() => {
        // 获取该节点的子节点的长度
        const childNodesLength = this.$refs.comBody[index].childNodes.length;
        // 获取comBody 这个DOM 数组的长度
        const comLine = this.$refs.comBody.length;
        if (!this.comMap.get(id)) {
          // 如果没有渲染过组件

          // 1. 调用 CreateCom 方法 创建组件。 并传递 props 和 事件
          const com = CreateCom({
            props,
            on: {
              handleDelete: this.handleDeleteCom,
              ...on,
            },
          });
          // 2. 生成组件
          com.$mount();
          if (childNodesLength === 2) {
            // 如果要添加到两个组件中间。那么就将新生成的组件DOM位置进行修改放到中间。
            // 将最后的组件DOM添加到正确的位置
            this.$refs.comBody.splice(
              index,
              0,
              this.$refs.comBody[comLine - 1]
            );
          }
          // 3. 将生成的组件添加到改DOM中。
          this.$refs.comBody[index].appendChild(com.$el);
          // 4. 记录该组件实现了渲染。
          this.comMap.set(id, true);
        } else {
          // 该位置的组件已经渲染,不需要再次渲染直接返回
          return;
        }
      });
    },
    handleDeleteCom({ id }) {
      // 传递给子组件删除的方法,根据组件的id来删除数据
      const index = this.leftComList.findIndex((item) => item.id === id);
      if (~index) {
        // 如果存在这个id的组件,就删除
        this.leftComList.splice(index, 1);
      }
    },
    handleCloneDog(item) {
      // 给 leftComList 数组添加数据
      return {
        ...item,
        id: Math.random(),
      };
    },
  },
};
</script>

<style>
.dragCom {
  font-family: Avenir, Helvetica, Arial, sans-serif;
  -webkit-font-smoothing: antialiased;
  -moz-osx-font-smoothing: grayscale;
  text-align: center;
  color: #2c3e50;
  margin-top: 60px;
}
.body {
  width: 100%;
  height: 800px;
  display: flex;
  justify-content: space-between;
}
.left {
  flex: 1;
  height: 800px;
  border: 1px solid pink;
}
.right {
  width: 20%;
  height: 800px;
}
.card {
  height: 50px;
  background-color: #40cec7;
  margin: 12px 0;
  font-size: 12px;
  line-height: 50px;
  cursor: pointer;
}
.comCard {
  margin: 12px;
  display: inline-block;
}
</style>
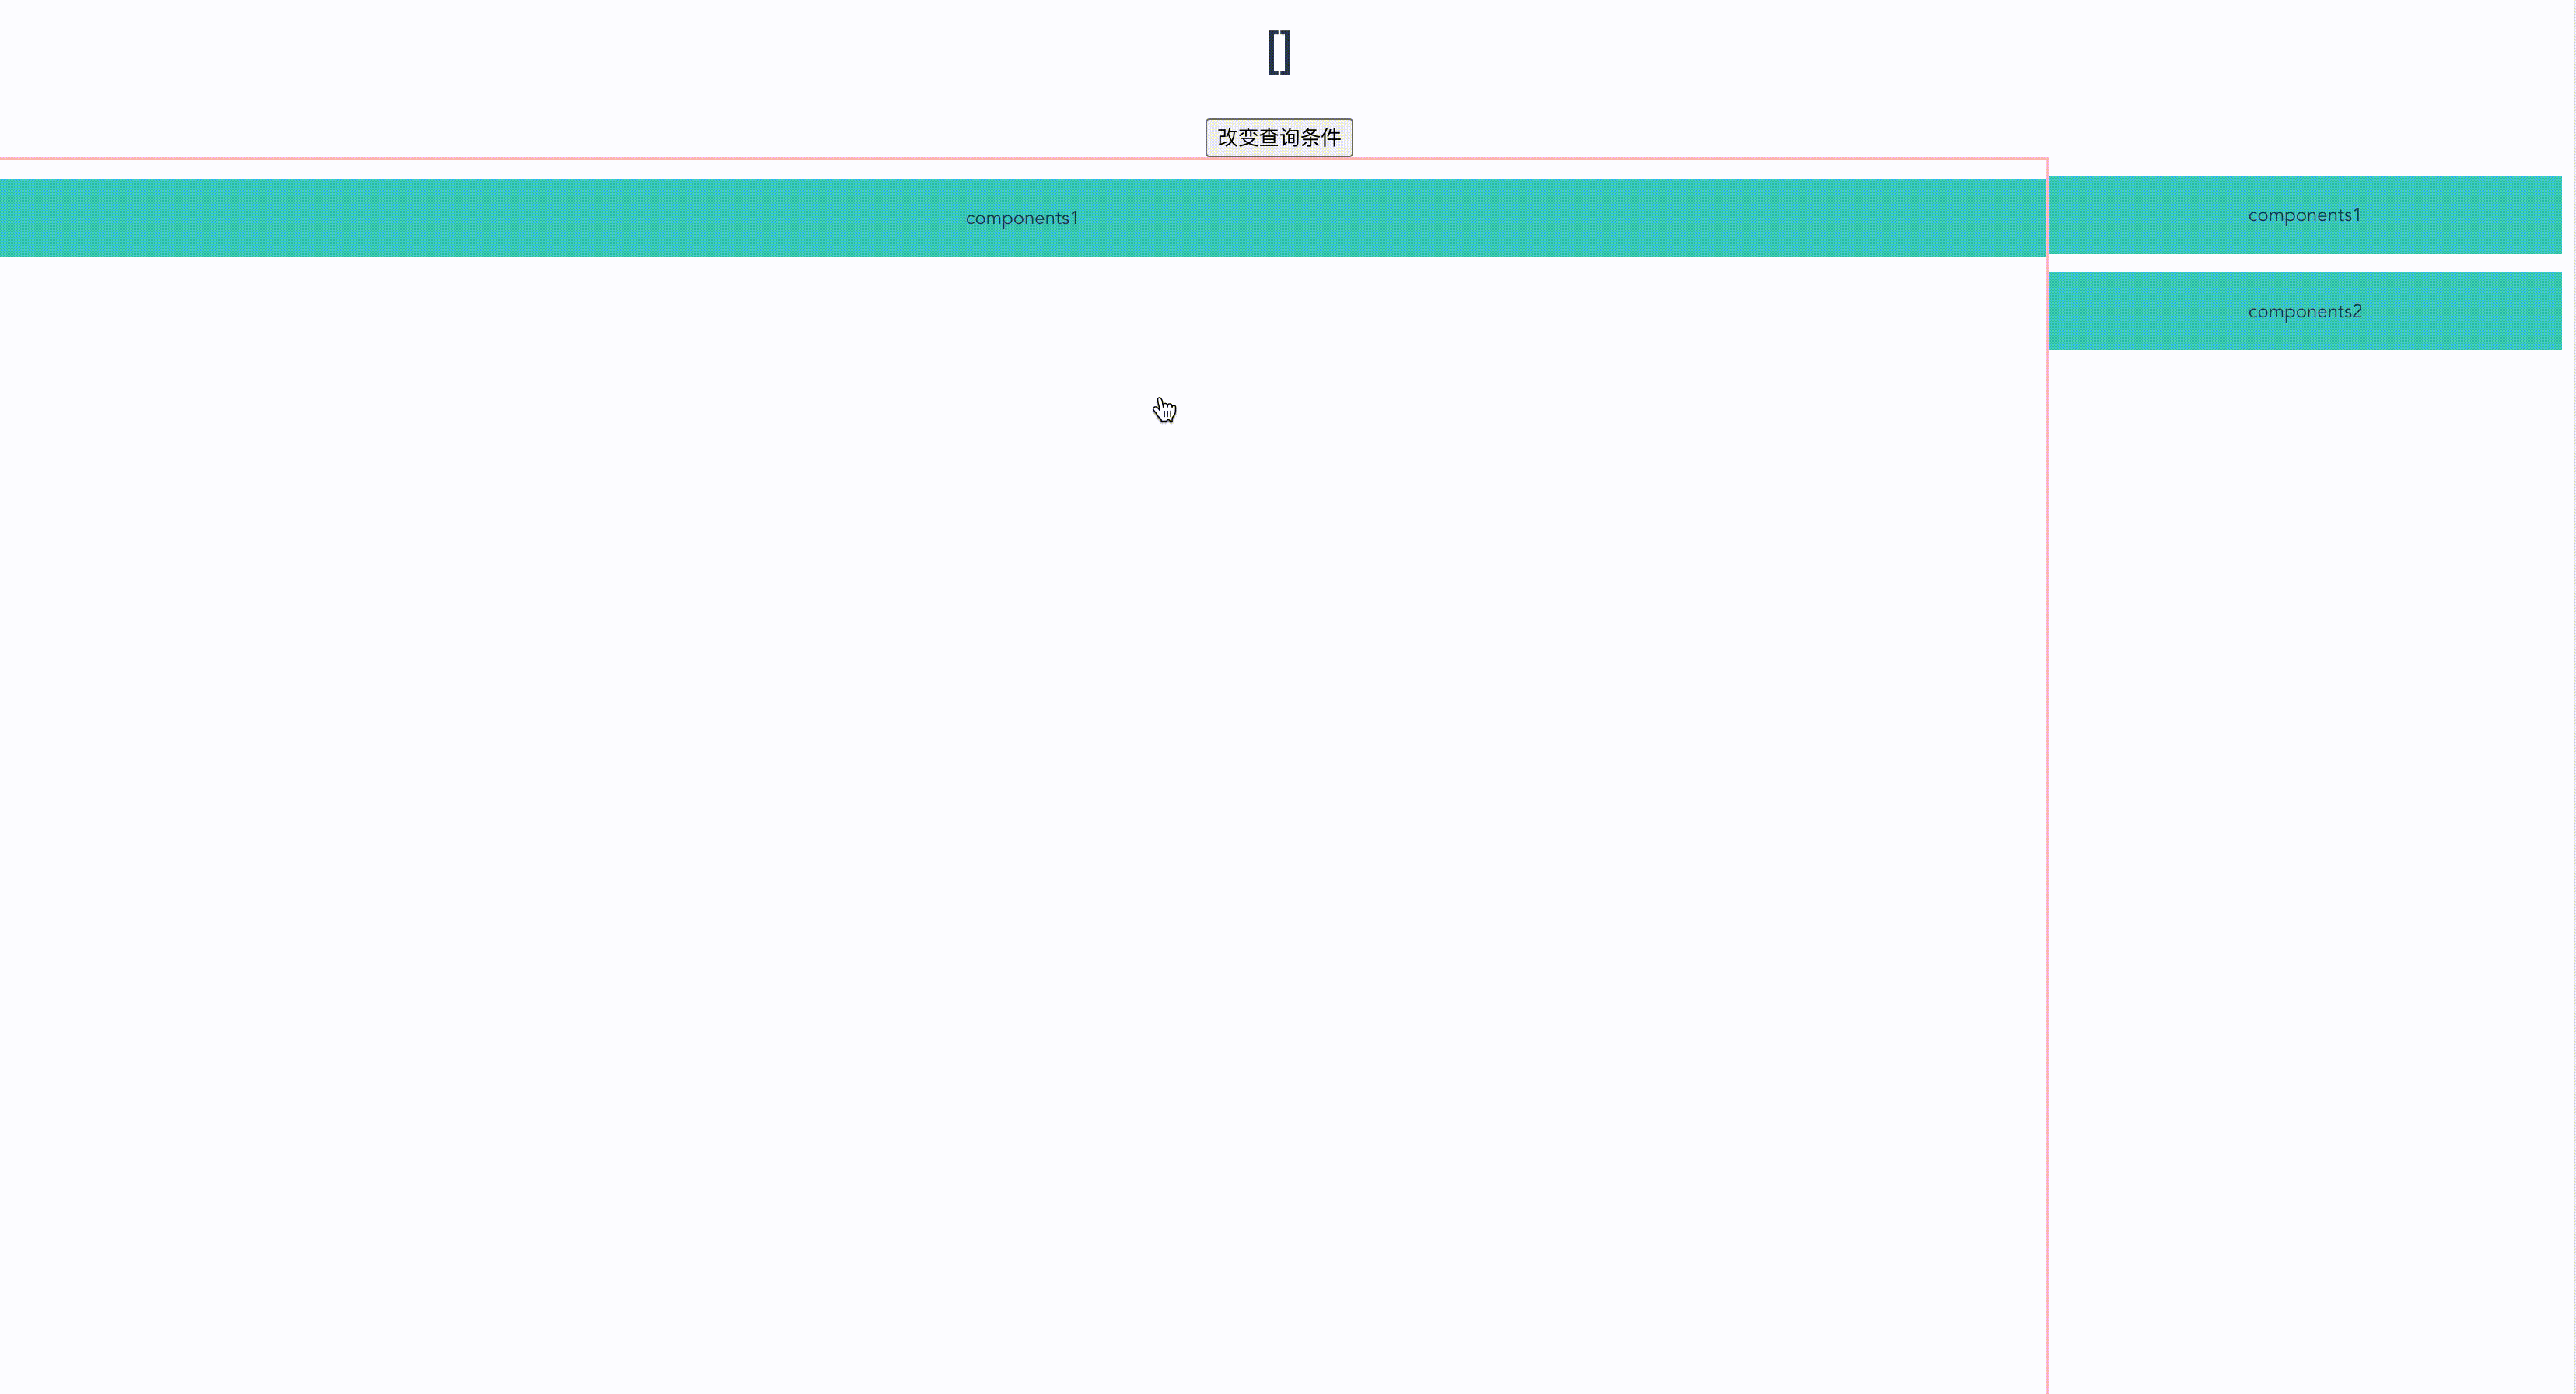
这样就实现了动态的组件渲染和拖拽排序。
效果
源码
想要尝试的同学可以自行下载本文的代码源码github
以上就是vue 实现拖拽动态生成组件的需求的详细内容,更多关于vue拖拽动态生成组件的资料请关注靠谱客其它相关文章!
最后
以上就是乐观水蜜桃最近收集整理的关于vue 实现拖拽动态生成组件的需求的全部内容,更多相关vue内容请搜索靠谱客的其他文章。


发表评论 取消回复