本文实例讲述了JS基于面向对象实现的拖拽库。分享给大家供大家参考。具体如下:
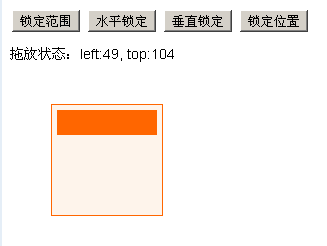
这是一个面向对象的JS拖拽库,可设置水平锁定、垂直锁定、锁定位置、锁定范围等,设定这些范围后,只能在设定的模式下拖动,我觉得这是个挺不错的拖拽实例。
运行效果截图如下:
在线演示地址如下:
http://demo.uoften.com/js/2015/js-mxdx-draw-plug-codes/
具体代码如下:
<!DOCTYPE html PUBLIC "-//W3C//DTD XHTML 1.0 Transitional//EN"
"http://www.w3.org/TR/xhtml1/DTD/xhtml1-transitional.dtd">
<html xmlns="http://www.w3.org/1999/xhtml">
<head>
<meta http-equiv="Content-Type" content="text/html; charset=utf-8" />
<title>拖拽库</title>
<style type="text/css">
div,h2,p{margin:0;padding:0;}
body{font:14px/1.5 arial;}
#box{width:100px;height:100px;background:#fef4eb;padding:5px;margin:50px;border:1px solid #f60;}
#box .title{height:25px;background:#f60;}
#tool{margin-bottom:10px;}
</style>
<script type="text/javascript">
function Drag()
{
 //初始化
 this.initialize.apply(this, arguments)
}
Drag.prototype = {
 //初始化
 initialize : function (drag, options)
 {
  this.drag = this.$(drag);
  this._x = this._y = 0;
  this._moveDrag = this.bind(this, this.moveDrag);
  this._stopDrag = this.bind(this, this.stopDrag);

  this.setOptions(options);

  this.handle = this.$(this.options.handle);
  this.maxContainer = this.$(this.options.maxContainer);

  this.maxTop = Math.max(this.maxContainer.clientHeight, this.maxContainer.scrollHeight) - this.drag.offsetHeight;
  this.maxLeft = Math.max(this.maxContainer.clientWidth, this.maxContainer.scrollWidth) - this.drag.offsetWidth;
  this.limit = this.options.limit;
  this.lockX = this.options.lockX;
  this.lockY = this.options.lockY;
  this.lock = this.options.lock;
  this.onStart = this.options.onStart;
  this.onMove = this.options.onMove;
  this.onStop = this.options.onStop;
  this.handle.style.cursor = "move";
  this.changeLayout();
  this.addHandler(this.handle, "mousedown", this.bind(this, this.startDrag))
 },
 changeLayout : function ()
 {
  this.drag.style.top = this.drag.offsetTop + "px";
  this.drag.style.left = this.drag.offsetLeft + "px";
  this.drag.style.position = "absolute";
  this.drag.style.margin = "0"
 },
 startDrag : function (event)
 {
  var event = event || window.event;
  this._x = event.clientX - this.drag.offsetLeft;
  this._y = event.clientY - this.drag.offsetTop;
  this.addHandler(document, "mousemove", this._moveDrag);
  this.addHandler(document, "mouseup", this._stopDrag);
  event.preventDefault && event.preventDefault();
  this.handle.setCapture && this.handle.setCapture();
  this.onStart()
 },
 moveDrag : function (event)
 {
  var event = event || window.event;
  var iTop = event.clientY - this._y;
  var iLeft = event.clientX - this._x;
  if (this.lock) return;
  this.limit && (iTop < 0 && (iTop = 0), iLeft < 0 && (iLeft = 0), iTop > this.maxTop && (iTop = this.maxTop), iLeft > this.maxLeft && (iLeft = this.maxLeft));
  this.lockY || (this.drag.style.top = iTop + "px");
  this.lockX || (this.drag.style.left = iLeft + "px");
  event.preventDefault && event.preventDefault();
  this.onMove()
 },
 stopDrag : function ()
 {
  this.removeHandler(document, "mousemove", this._moveDrag);
  this.removeHandler(document, "mouseup", this._stopDrag);
  this.handle.releaseCapture && this.handle.releaseCapture();
  this.onStop()
 },
 //参数设置
 setOptions : function (options)
 {
  this.options =
  {
   handle:   this.drag, //事件对象
   limit:   true, //锁定范围
   lock:   false, //锁定位置
   lockX:   false, //锁定水平位置
   lockY:   false, //锁定垂直位置
   maxContainer: document.documentElement || document.body, //指定限制容器
   onStart:  function () {}, //开始时回调函数
   onMove:   function () {}, //拖拽时回调函数
   onStop:   function () {} //停止时回调函数
  };
  for (var p in options) this.options[p] = options[p]
 },
 //获取id
 $ : function (id)
 {
  return typeof id === "string" ? document.getElementById(id) : id
 },
 //添加绑定事件
 addHandler : function (oElement, sEventType, fnHandler)
 {
  return oElement.addEventListener ? oElement.addEventListener(sEventType, fnHandler, false) : oElement.attachEvent("on" + sEventType, fnHandler)
 },
 //删除绑定事件
 removeHandler : function (oElement, sEventType, fnHandler)
 {
  return oElement.removeEventListener ? oElement.removeEventListener(sEventType, fnHandler, false) : oElement.detachEvent("on" + sEventType, fnHandler)
 },
 //绑定事件到对象
 bind : function (object, fnHandler)
 {
  return function ()
  {
   return fnHandler.apply(object, arguments)
  }
 }
};
//应用
window.onload = function ()
{
 var oBox = document.getElementById("box");
 var oTitle = oBox.getElementsByTagName("h2")[0];
 var oSpan = document.getElementsByTagName("span")[0];
 var oDrag = new Drag(oBox, {handle:oTitle, limit:false});
 var aInput = document.getElementsByTagName("input");
 //锁定范围接口
 aInput[0].onclick = function ()
 {
  oDrag.limit = !oDrag.limit;
  this.value = oDrag.limit ? "取消锁定范围" : "锁定范围"
 };

 //水平锁定接口
 aInput[1].onclick = function ()
 {
  oDrag.lockX = !oDrag.lockX;
  this.value = oDrag.lockX ? "取消水平锁定" : "水平锁定"
 };

 //垂直锁定接口
 aInput[2].onclick = function ()
 {
  oDrag.lockY = !oDrag.lockY;
  this.value = oDrag.lockY ? "取消垂直锁定" : "垂直锁定"
 };

 //锁定位置接口
 aInput[3].onclick = function ()
 {
  oDrag.lock = !oDrag.lock;
  this.value = oDrag.lock ? "取消锁定位置" : "锁定位置"
 };

 //开始拖拽时方法
 oDrag.onStart = function ()
 {
  oSpan.innerHTML = "开始拖拽"
 };

 //开始拖拽时方法
 oDrag.onMove = function ()
 {
  oSpan.innerHTML = "left:" + this.drag.offsetLeft + ", top:" + this.drag.offsetTop
 };
 //开始拖拽时方法
 oDrag.onStop = function ()
 {
  oSpan.innerHTML = "结束拖拽"
 };
};
</script>
</head>
<body>
<div id="tool">
<input type="button" value="锁定范围" />
 <input type="button" value="水平锁定" />
 <input type="button" value="垂直锁定" />
 <input type="button" value="锁定位置" />
</div>
<p>拖放状态:<span>未开始</span></p>
<div id="box">
 <h2 class="title"></h2>
</div>
</body>
</html>
希望本文所述对大家的JavaScript程序设计有所帮助。
最后
以上就是伶俐枕头最近收集整理的关于JS基于面向对象实现的拖拽库实例的全部内容,更多相关JS基于面向对象实现内容请搜索靠谱客的其他文章。
本图文内容来源于网友提供,作为学习参考使用,或来自网络收集整理,版权属于原作者所有。


发表评论 取消回复