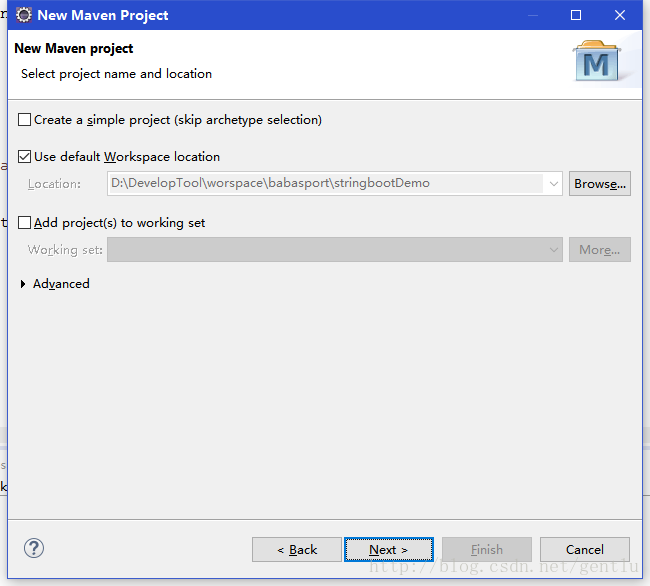
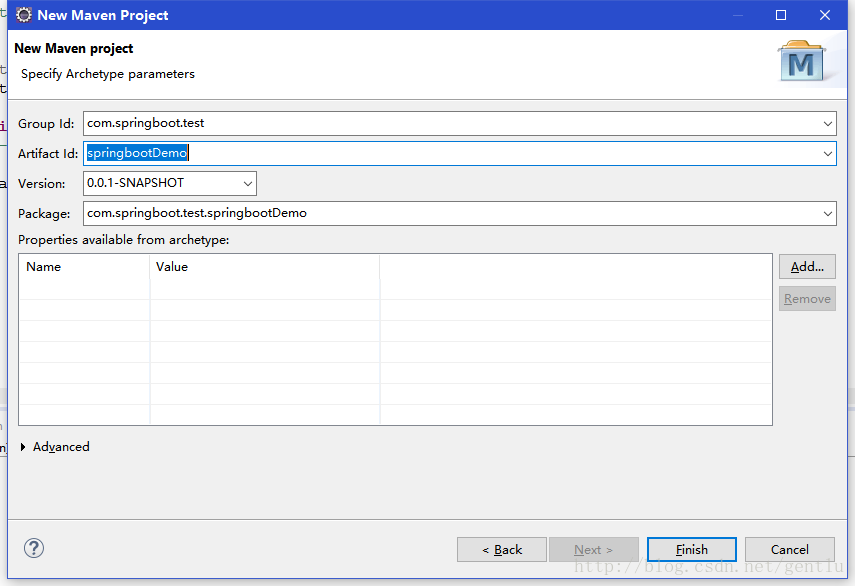
1创建一个maven工程

2编辑pom.xml
<?xml version="1.0" encoding="UTF-8"?>
<project xmlns="http://maven.apache.org/POM/4.0.0" xmlns:xsi="http://www.w3.org/2001/XMLSchema-instance"
  xsi:schemaLocation="http://maven.apache.org/POM/4.0.0 http://maven.apache.org/xsd/maven-4.0.0.xsd">
  <modelVersion>4.0.0</modelVersion>

  <groupId>com.springboot.test</groupId>
  <artifactId>stringbootDemo</artifactId>
  <version>0.0.1-SNAPSHOT</version>
  <packaging>jar</packaging>

  <name>stringbootDemo</name>
  <url>http://maven.apache.org</url>

  <properties>
    <project.build.sourceEncoding>UTF-8</project.build.sourceEncoding>
  </properties>


  <!-- Inherit defaults from Spring Boot -->
    <parent>
        <groupId>org.springframework.boot</groupId>
        <artifactId>spring-boot-starter-parent</artifactId>
        <version>1.4.0.BUILD-SNAPSHOT</version>
    </parent>

    <!-- Add typical dependencies for a web application -->
    <dependencies>

        <dependency>
            <groupId>org.springframework.boot</groupId>
            <artifactId>spring-boot-starter-web</artifactId>
        </dependency>

        <dependency>
          <groupId>junit</groupId>
          <artifactId>junit</artifactId>
          <version>3.8.1</version>
          <scope>test</scope>
        </dependency>

    </dependencies>

    <!-- Package as an executable jar -->
    <build>
        <plugins>
            <plugin>
                <groupId>org.springframework.boot</groupId>
                <artifactId>spring-boot-maven-plugin</artifactId>
            </plugin>
        </plugins>
    </build>

    <!-- Add Spring repositories -->
    <!-- (you don't need this if you are using a .RELEASE version) -->
    <repositories>
        <repository>
            <id>spring-snapshots</id>
            <url>http://repo.spring.io/snapshot</url>
            <snapshots><enabled>true</enabled></snapshots>
        </repository>
        <repository>
            <id>spring-milestones</id>
            <url>http://repo.spring.io/milestone</url>
        </repository>
    </repositories>
    <pluginRepositories>
        <pluginRepository>
            <id>spring-snapshots</id>
            <url>http://repo.spring.io/snapshot</url>
        </pluginRepository>
        <pluginRepository>
            <id>spring-milestones</id>
            <url>http://repo.spring.io/milestone</url>
        </pluginRepository>
    </pluginRepositories>


</project>
3 编制Application.java
package com.springboot.test.stringbootDemo;

import org.springframework.boot.SpringApplication;
import org.springframework.boot.autoconfigure.EnableAutoConfiguration;
import org.springframework.boot.autoconfigure.SpringBootApplication;
import org.springframework.context.annotation.ComponentScan;
import org.springframework.context.annotation.Configuration;

//@SpringBootApplication  //该方式在此配置中不好使,需使用下面三个组件
@Configuration
@ComponentScan
@EnableAutoConfiguration
public class Application {

    public static void main(String[] args) {
        // TODO Auto-generated method stub

        SpringApplication.run(Application.class, args);
    }
}
4 编制Example.java
package com.springboot.test.stringbootDemo;
import org.springframework.boot.autoconfigure.EnableAutoConfiguration;
import org.springframework.web.bind.annotation.PathVariable;
import org.springframework.web.bind.annotation.RequestMapping;
import org.springframework.web.bind.annotation.RestController;
@RestController
@EnableAutoConfiguration
public class Example {
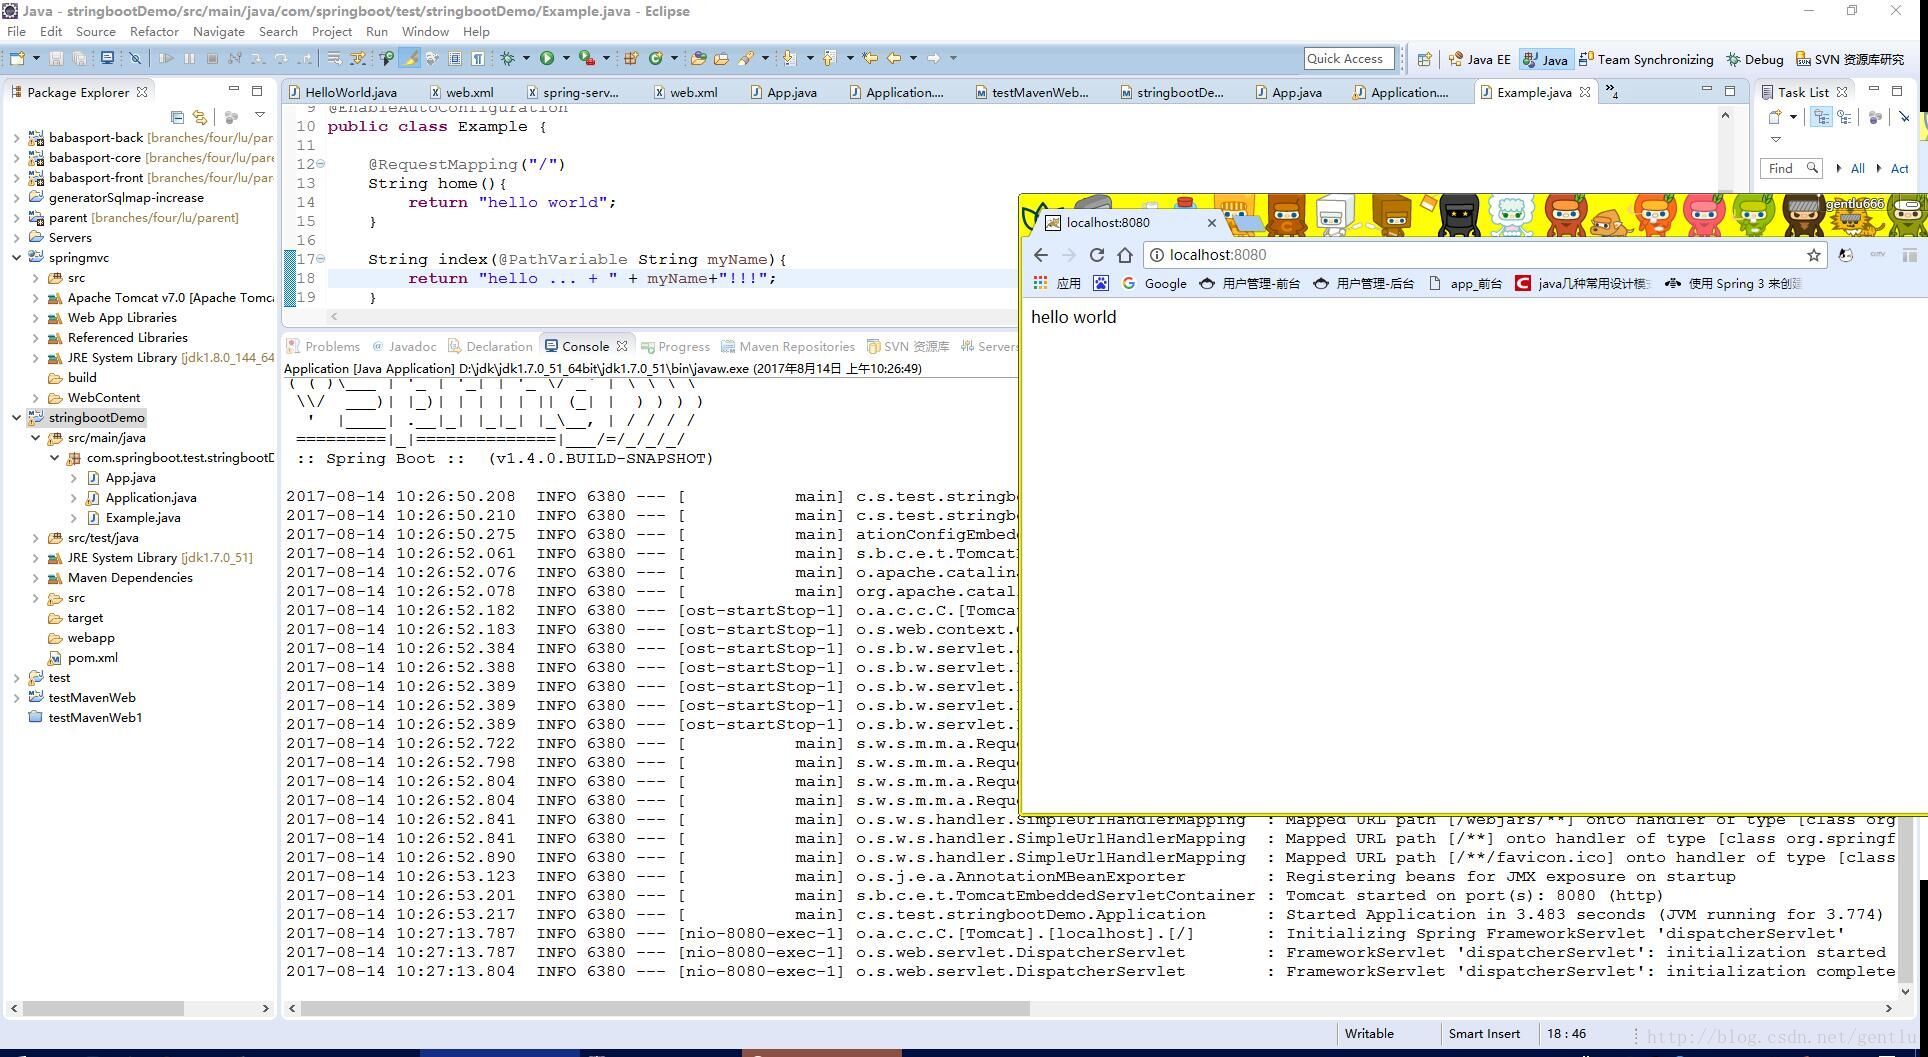
@RequestMapping("/")
String home(){
return "hello world";
}
@RequestMapping("/haha/{myName}")
String index(@PathVariable String myName){
return "hello ... + " + myName+"!!!";
}
}5 选中项目 maven-update
6 选中项目 右键- run as -Java Application—控制台打印springboot启动日志
7 浏览器 输入 localhost:8080 出现

最后
以上就是柔弱蜡烛最近收集整理的关于eclipse中创建springboot demo的全部内容,更多相关eclipse中创建springboot内容请搜索靠谱客的其他文章。
本图文内容来源于网友提供,作为学习参考使用,或来自网络收集整理,版权属于原作者所有。


发表评论 取消回复