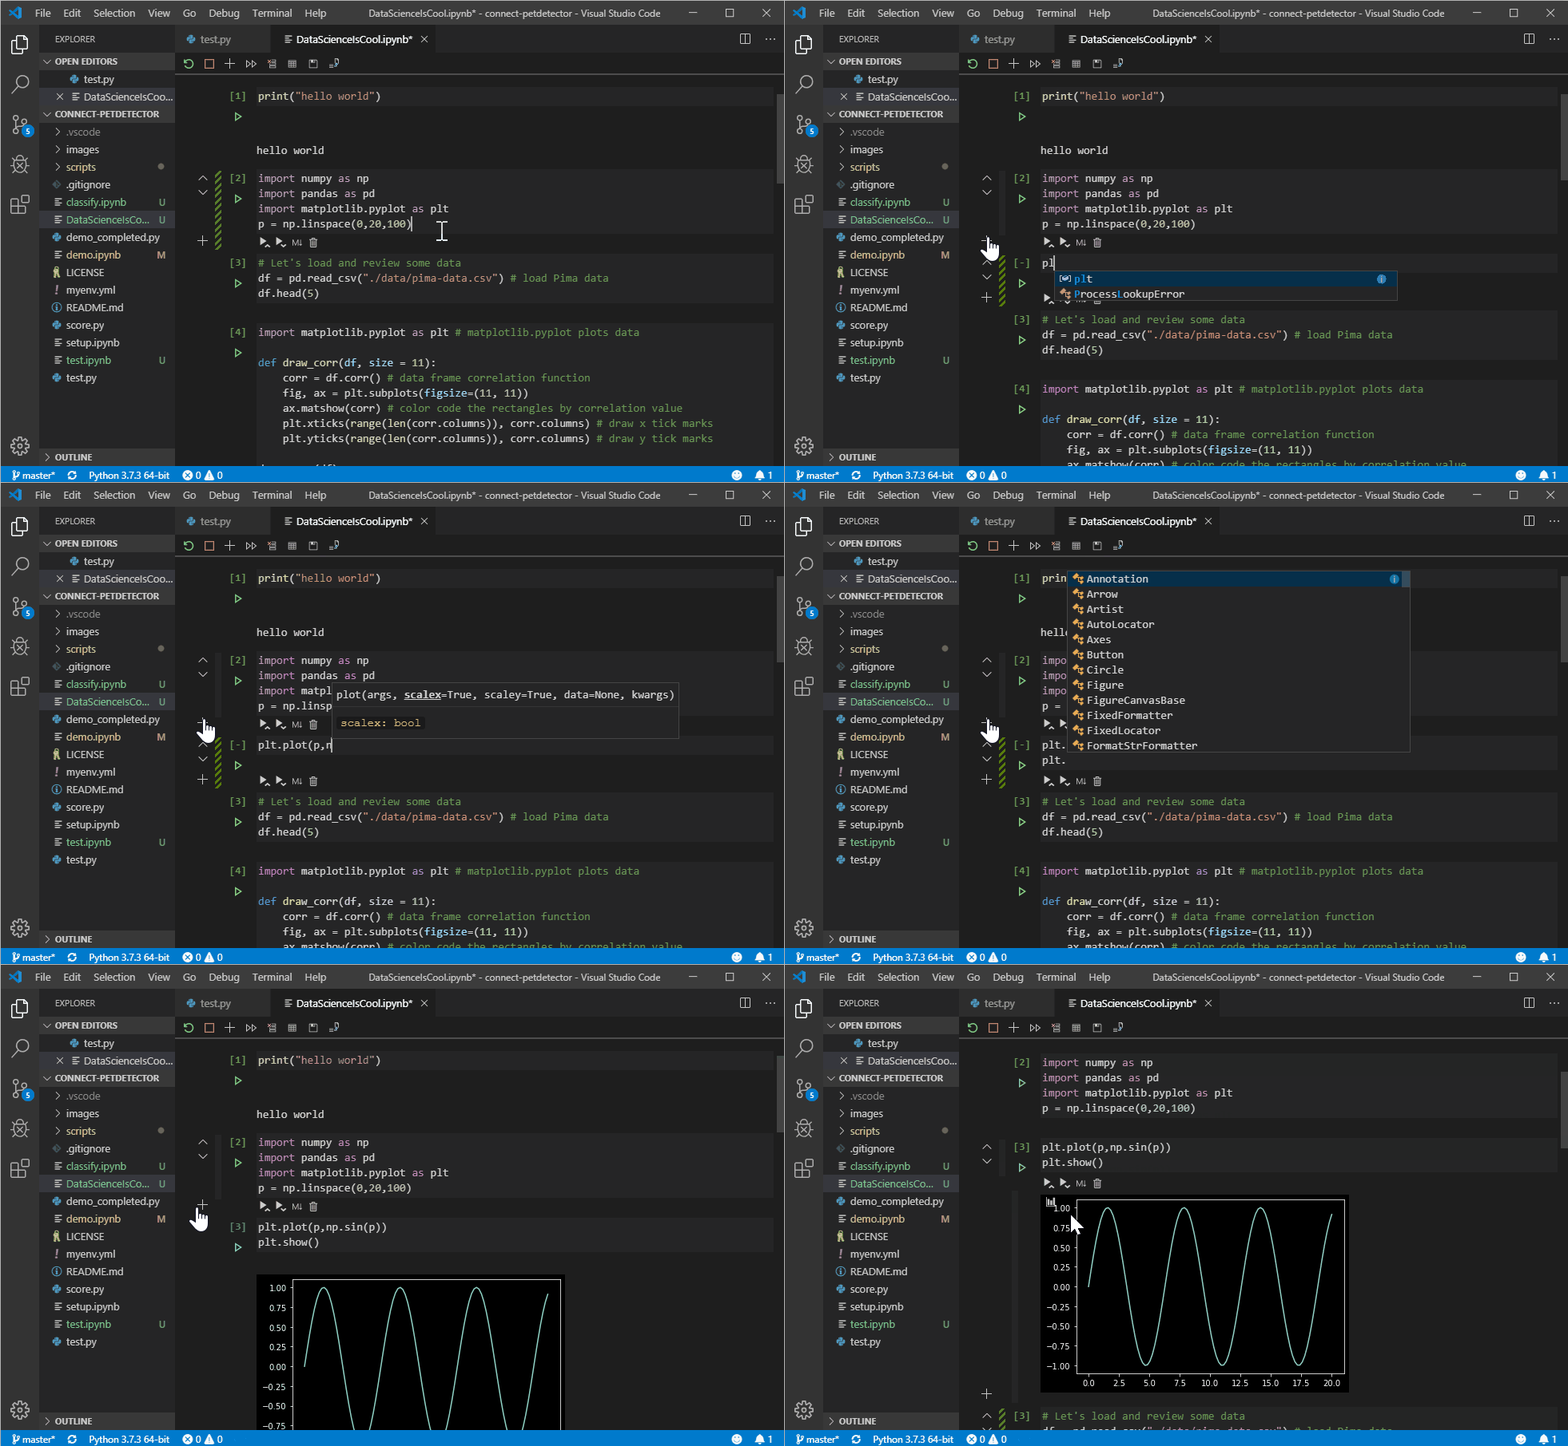
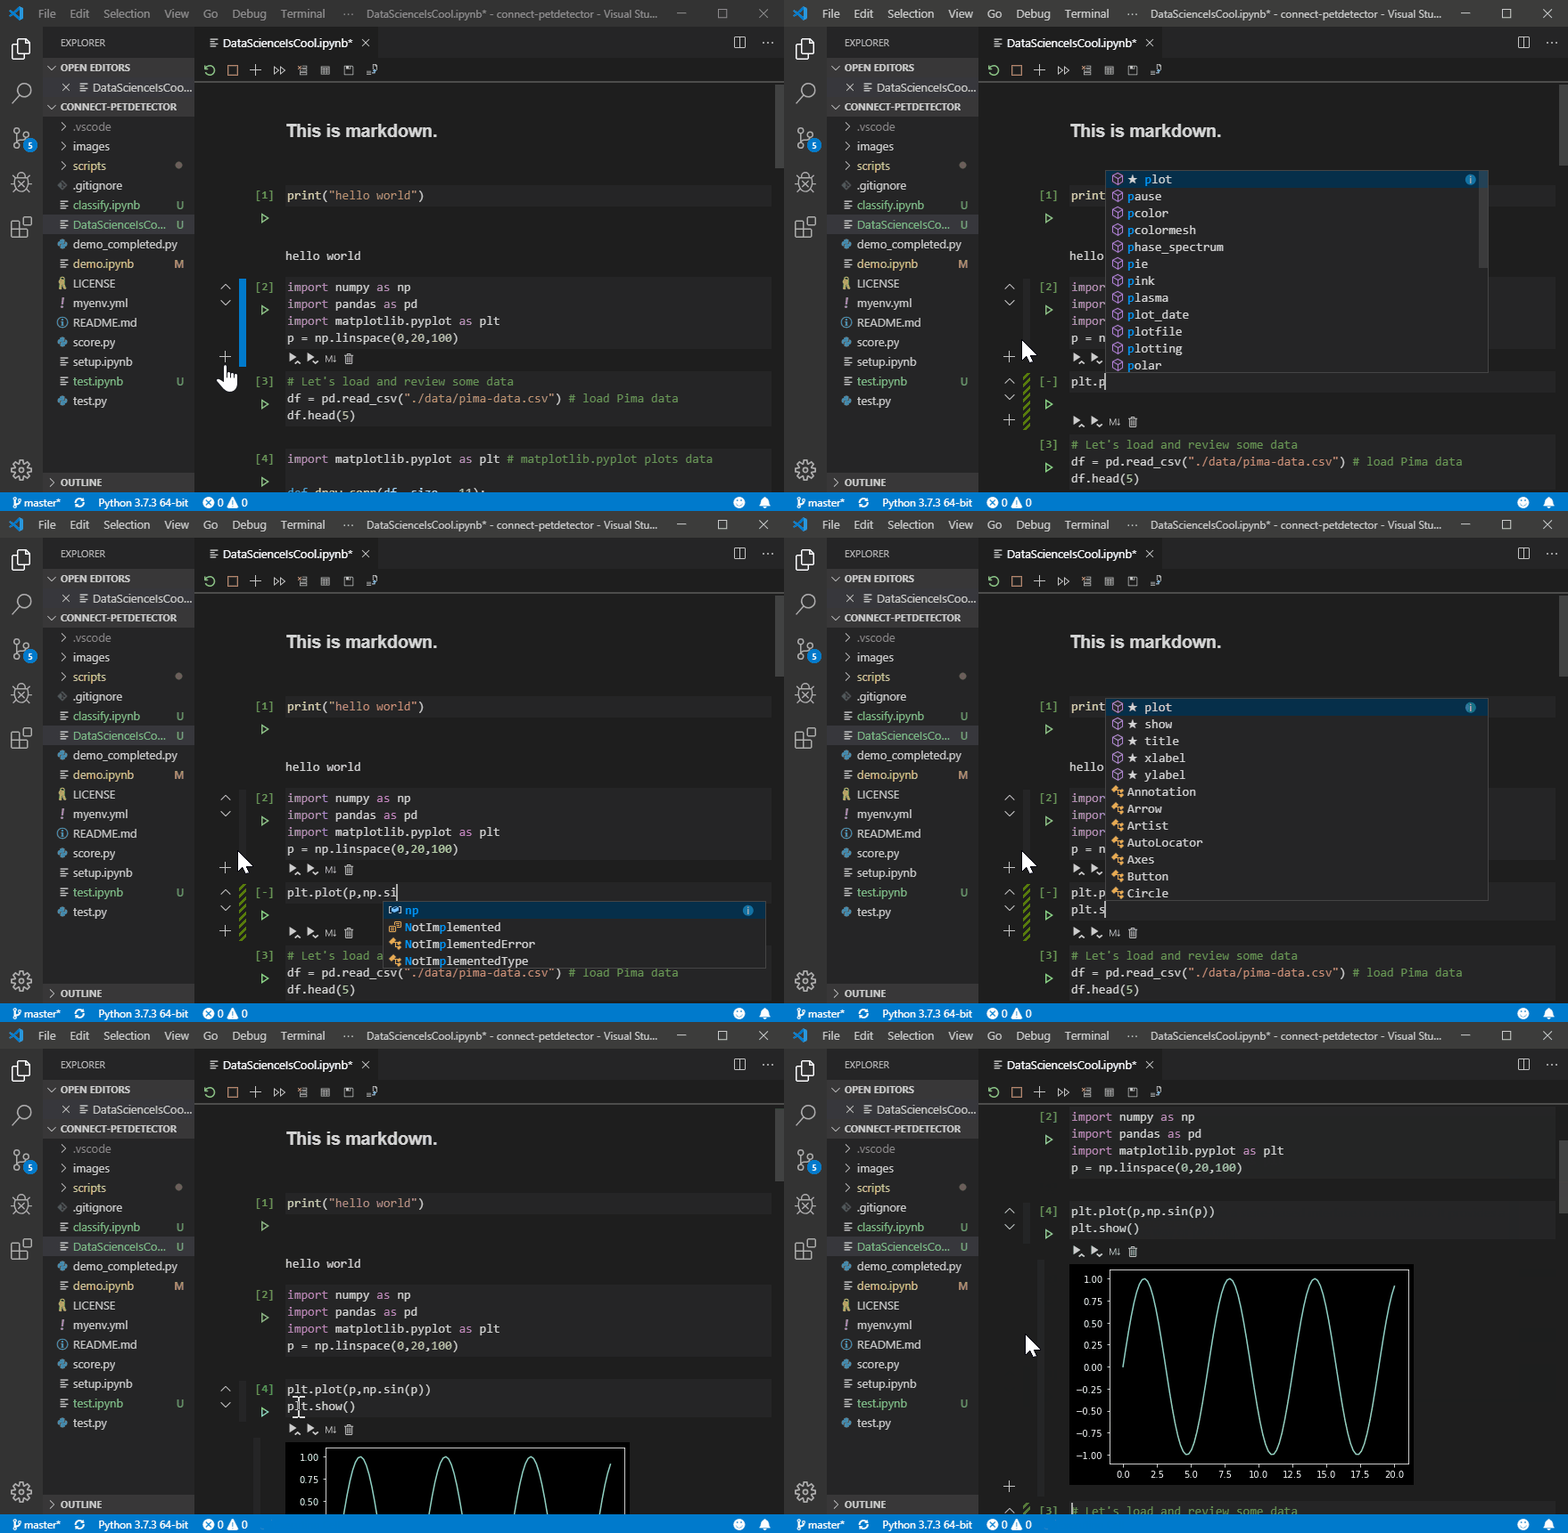
You can manage source control, open multiple files, and leverage productivity features like IntelliSense, Git integration, and multi-file management, offering a brand-new way for data scientists and developers to experiment and work with data efficiently. You can try out this experience today by downloading the latest version of the Python extension and creating/opening a Jupyter Notebook inside VS Code.
您可以管理源代码控制,打开多个文件,并利用IntelliSense,Git集成和多文件管理等生产力功能,从而为数据科学家和开发人员提供了一种全新的方式来有效地试验和处理数据。 您可以通过下载最新版本的Python扩展并在VS Code中创建/打开Jupyter Notebook来尝试这种体验。

Since the initial release of our data science experience in VS Code, one of the top features that users have requested has been a more notebook-like layout to edit their Jupyter notebooks inside VS Code. In the rest of this post we’ll take a look at the new capabilities this offers.
自从我们最初在VS Code中发布数据科学经验以来,用户要求的最重要的功能之一就是在VS Code中编辑笔记本电脑的Jupyter笔记本时采用了更加类似于笔记本的布局。 在本文的其余部分,我们将介绍其提供的新功能。
This article in our blog. 本文在我们的博客中。入门 (Getting Started)
Here’s how to get started with Jupyter in VS Code.
这是VS Code中的Jupyter入门的方法。
- If you don’t already have an existing Jupyter Notebook file, open the VS Code Command Palette with the shortcut CTRL + SHIFT + P (Windows) or Command + SHIFT + P (macOS), and run the «Python: Create Blank New Jupyter Notebook» command. 如果您还没有Jupyter Notebook文件,请使用快捷键CTRL + SHIFT + P(Windows)或Command + SHIFT + P(macOS)打开VS Code命令面板,然后运行«Python:Create Blank New Jupyter笔记本»命令。
- If you already have a Jupyter Notebook file, it’s as simple as just opening that file in VS Code. It will automatically open with the new native Jupyter editor. 如果您已经有了Jupyter Notebook文件,则就像在VS Code中打开该文件一样简单。 它将使用新的本机Jupyter编辑器自动打开。

Once you have a Jupyter Notebook open, you can add new cells, write code in cells, run cells, and perform other notebook actions.
打开Jupyter Notebook后,您可以添加新单元格,在单元格中编写代码,运行单元格以及执行其他笔记本操作。
人工智能辅助自动完成 (AI-Assisted Autocompletion)
As you write code, IntelliSense will give you intelligent code complete suggestions right inside your code cells. You can further supercharge your editor experience by installing our IntelliCode extension to get AI-powered IntelliSense with smarter auto-complete suggestions based on your current code context.
在编写代码时,IntelliSense会在代码单元内部为您提供智能代码完整的建议。 您可以通过安装我们的IntelliCode扩展程序进一步增强您的编辑器体验,从而获得基于AI的IntelliSense,并根据您当前的代码上下文提供更智能的自动完成建议。

变量浏览器 (Variable Explorer)
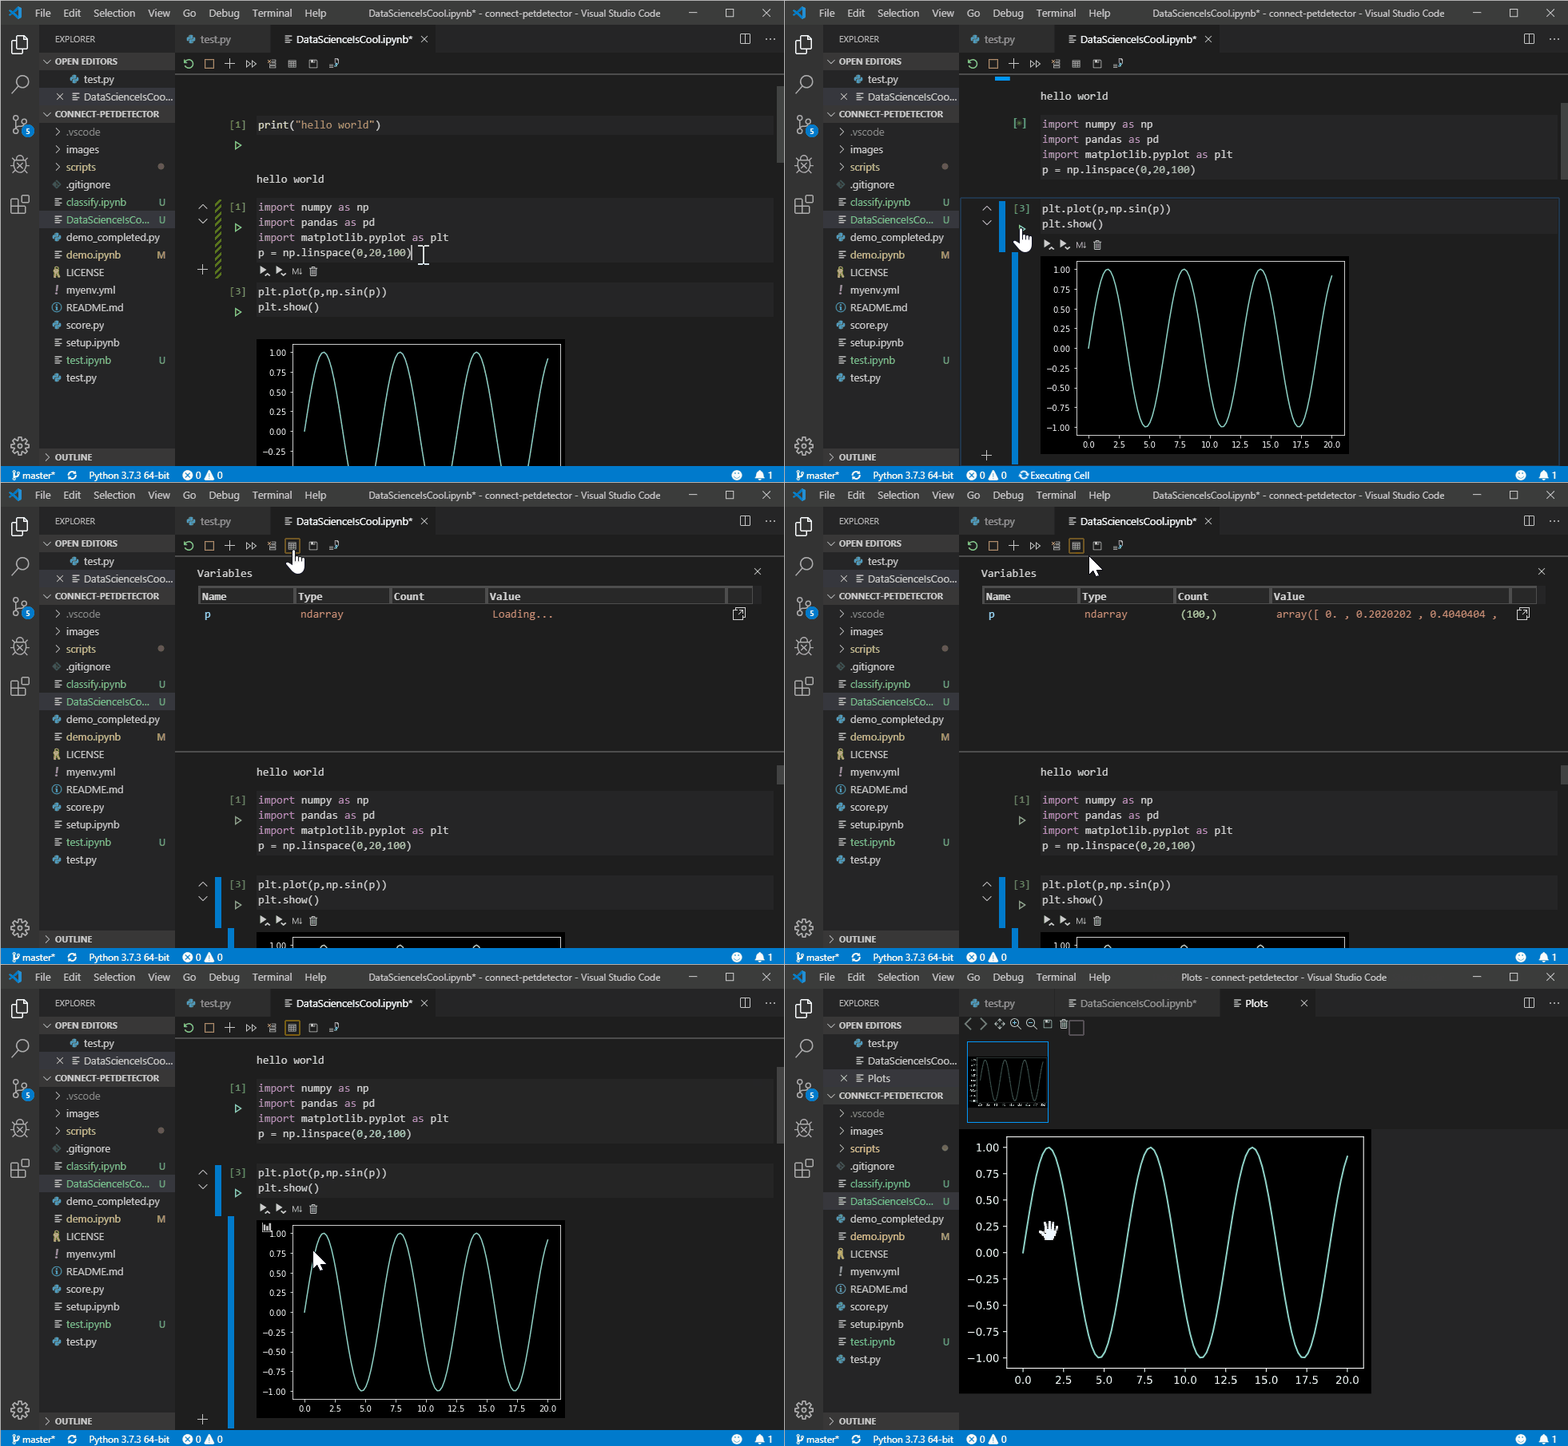
Another benefit of using VS Code is that you can take advantage of the variable explorer and plot viewer by clicking the «Variables» button in the notebook toolbar. The variable explorer will help you keep track of the current state of your notebook variables at a glance, in real-time.
使用VS Code的另一个好处是,您可以通过单击笔记本工具栏中的“变量”按钮来利用变量浏览器和绘图查看器。 变量浏览器将帮助您实时实时跟踪笔记本变量的当前状态。

Now you can explore your datasets, filter your data, and even export plots! Gone are the days of having to type df.head() just to view your data.
现在,您可以浏览数据集,过滤数据,甚至导出图! 只为查看数据而不得不键入df.head()的日子已经一去不复返了。
连接到远程Jupyter服务器 (Connecting To Remote Jupyter Servers)
When a Jupyter notebook file is created or opened, VS Code automatically creates a Jupyter server for you locally by default. If you want to use a remote Jupyter server, it’s as simple as using the «Specify Jupyter server URI» command via the VS Code command palette, and entering in the server URI.
创建或打开Jupyter笔记本文件时,默认情况下,VS Code会自动在本地为您创建Jupyter服务器。 如果要使用远程Jupyter服务器,则就像通过VS Code命令面板使用“指定Jupyter服务器URI”命令并输入服务器URI一样简单。

导出为Python代码 (Exporting as Python Code)
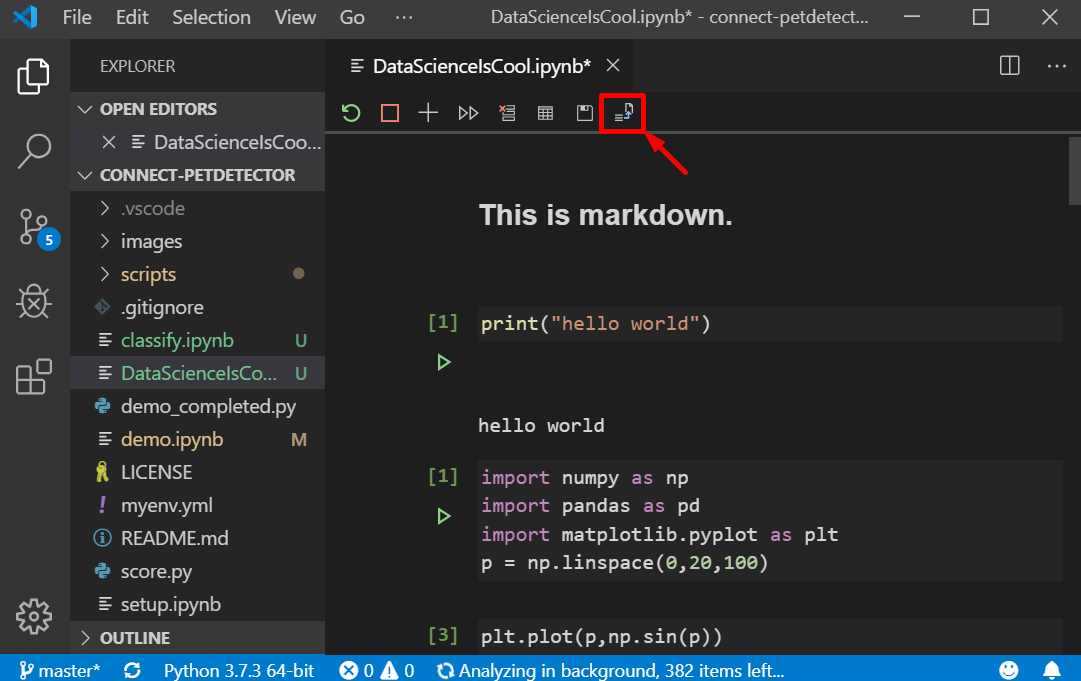
When you’re ready to turn experimentation into production-ready Python code, just simply press the «Convert and Save as Python File» button in the top toolbar and let the Python extension do all the work for you. You can then view that Python code in our existing Python Interactive window and keep on working with the awesome features of the Python extension to further make your code production-ready, such as the integrated debugger, refactoring, Visual Studio Live Share, and Git source control.
当您准备将实验转换为可用于生产的Python代码时,只需按顶部工具栏中的“转换并另存为Python文件”按钮,然后让Python扩展程序为您完成所有工作即可。 然后,您可以在我们现有的Python Interactive窗口中查看该Python代码,并继续使用Python扩展的强大功能来进一步使您的代码可投入生产,例如集成的调试器,重构,Visual Studio Live Share和Git源代码。控制。

调试 (Debugging)
VS Code supports debugging Jupyter Notebooks through using the «Exporting as Python Code» functionality outlined in the previous section. Once you have your code in the Python Interactive window, you can use VS Code’s integrated debugger to debug your code. We are working on bringing cell debugging into the Jupyter editor in a future release so stay tuned!
VS Code通过使用上一部分中概述的“导出为Python代码”功能来支持调试Jupyter Notebook。 将代码放入“ Python交互式”窗口后,您可以使用VS Code的集成调试器来调试代码。 我们正在努力在将来的版本中将单元调试引入Jupyter编辑器,敬请期待!
翻译自: https://habr.com/en/company/microsoft/blog/471162/
最后
以上就是欣喜自行车最近收集整理的关于宣布以VS Code支持Jupyter Notebook的本机编辑的全部内容,更多相关宣布以VS内容请搜索靠谱客的其他文章。


发表评论 取消回复