基于ECS快速搭建Docker环境
- ECS 7天实践训练营
- 前言
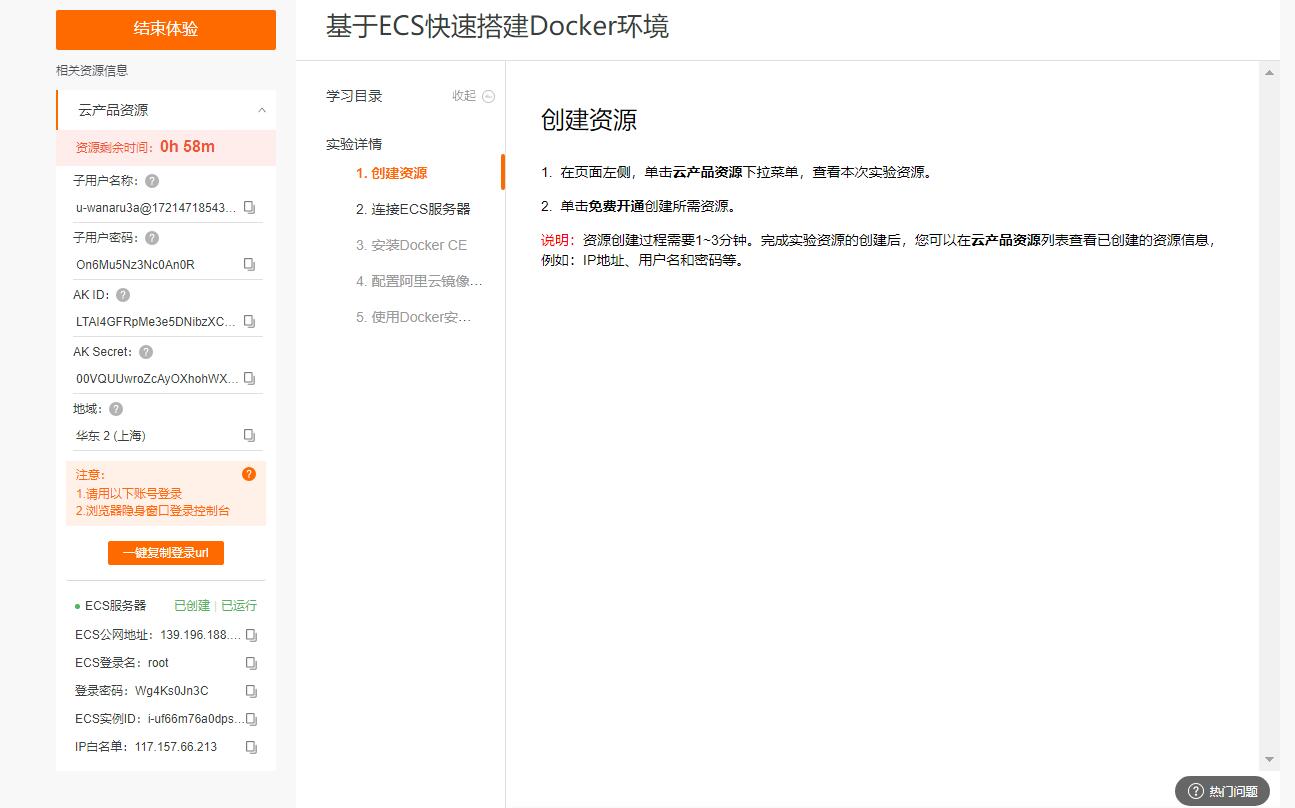
- 一、创建资源
- 二、连接ECS服务器
- 1.CMD连接
- 2.xshell连接
- 三、安装Docker
- 安装Docker的依赖库。
- 添加软件源
- 安装Docker CE
- 启动
- 4.配置阿里云镜像仓库(镜像加速)
- 安装Nginx服务
- 2. 选取最新版的Nginx镜像。
- 3. 查看本地镜像。
- 4. 运行容器。
- 5. 在浏览器地址栏访问Nginx服务
- 总结
ECS 7天实践训练营
前言
一晃眼学计算机已经两年了,但还是停留在小白这个层次,还剩两年就要毕业了,内心慌的一批,现在该开始学习了,希望各位大佬多多指教...一、创建资源
二、连接ECS服务器
1.CMD连接
代码如下(示例):
C:Users20972>ssh root@139.196.188.157
The authenticity of host '139.196.188.157 (139.196.188.157)' can't be established.
ECDSA key fingerprint is SHA256:kfcVkL5FIv2qNtMN6EjXeglNvXEO67OcyRTM2TtZdBI.
Are you sure you want to continue connecting (yes/no)? yes
Warning: Permanently added '139.196.188.157' (ECDSA) to the list of known hosts.
root@139.196.188.157's password:

Welcome to Alibaba Cloud Elastic Compute Service !

[root@iZuf66m76a0dpsis8yda6cZ ~]#
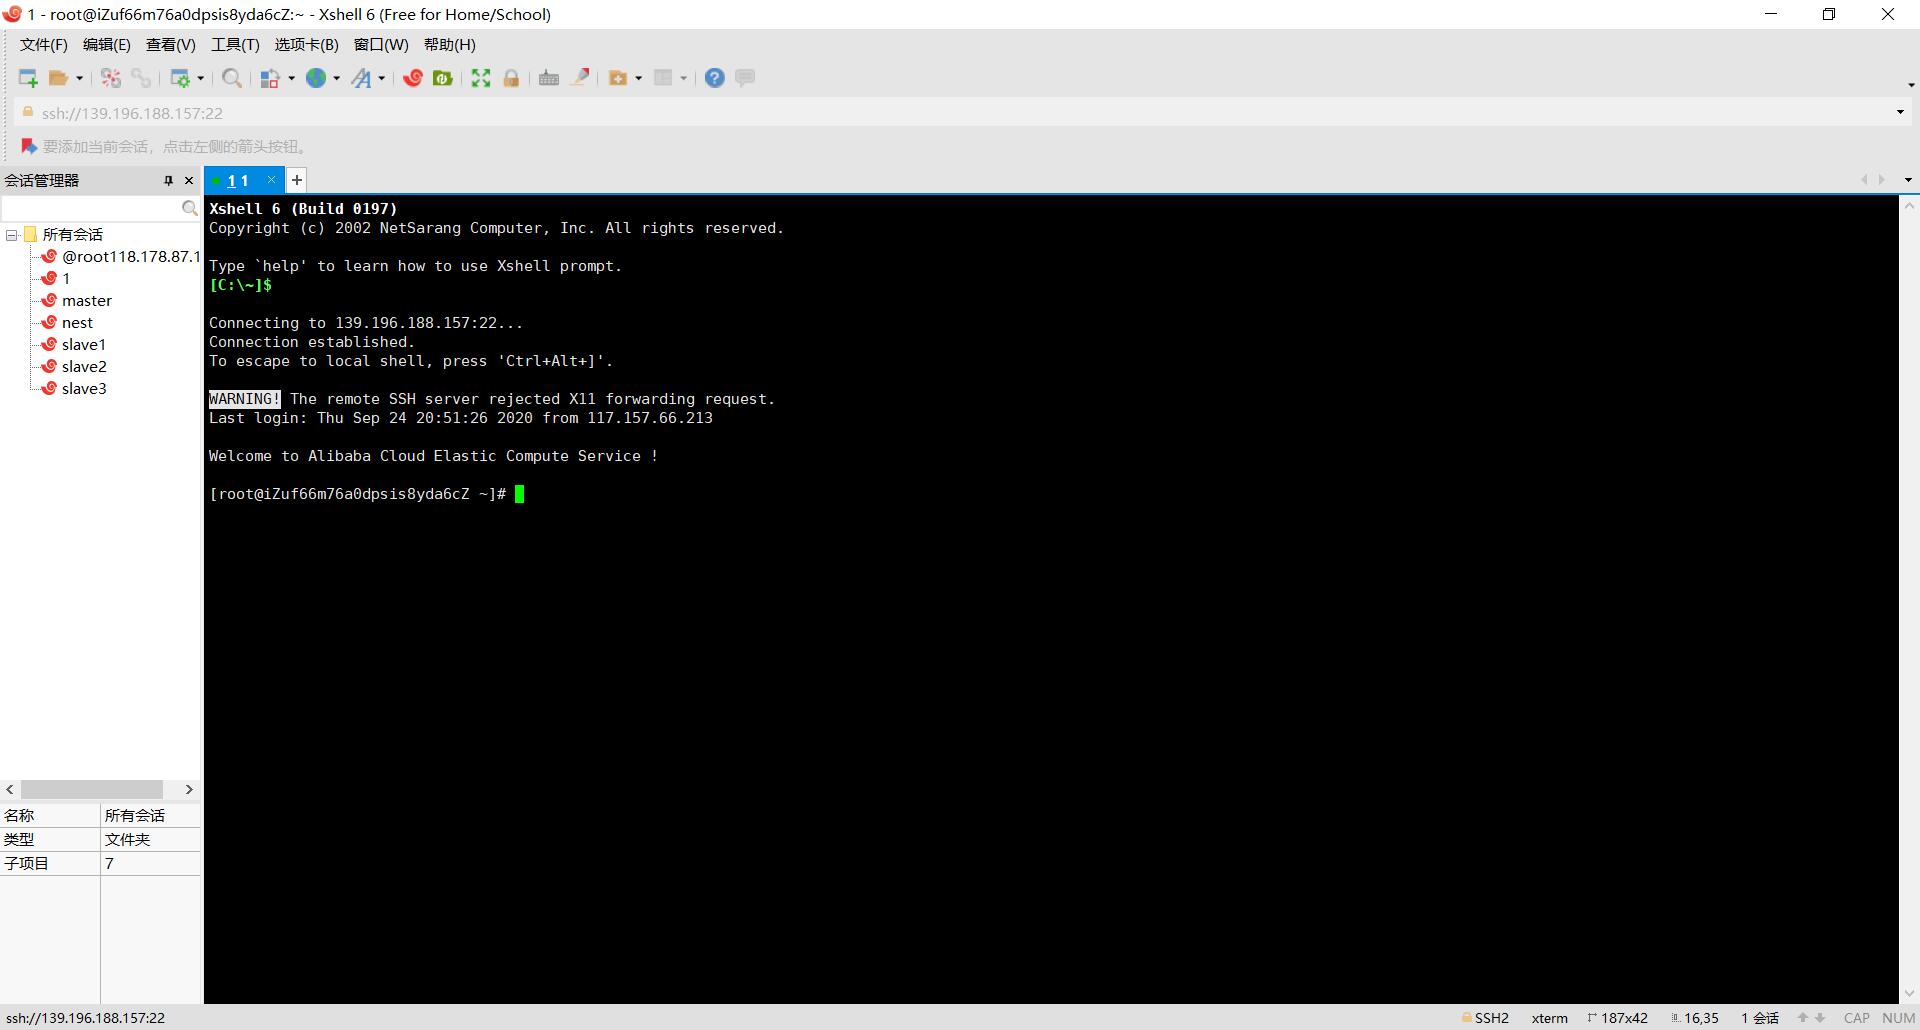
2.xshell连接
三、安装Docker
Docker有两个分支版本:Docker CE和Docker EE
安装Docker的依赖库。
yum install -y yum-utils device-mapper-persistent-data lvm2
Installed: device-mapper-persistent-data.x86_64 0:0.8.5-2.el7
lvm2.x86_64 7:2.02.186-7.el7_8.2
yum-utils.noarch 0:1.1.31-54.el7_8Dependency Installed: device-mapper-event.x86_64
7:1.02.164-7.el7_8.2 device-mapper-event-libs.x86_64
7:1.02.164-7.el7_8.2 libaio.x86_64 0:0.3.109-13.el7
libxml2-python.x86_64 0:2.9.1-6.el7.4 lvm2-libs.x86_64
7:2.02.186-7.el7_8.2 python-chardet.noarch 0:2.2.1-3.el7
python-kitchen.noarch 0:1.1.1-5.el7Dependency Updated: device-mapper.x86_64 7:1.02.164-7.el7_8.2
device-mapper-libs.x86_64 7:1.02.164-7.el7_8.2
libxml2.x86_64 0:2.9.1-6.el7.4Complete!
添加软件源
yum-config-manager --add-repo http://mirrors.aliyun.com/docker-ce/linux/centos/docker-ce.repo
Loaded plugins: fastestmirror adding repo from:
http://mirrors.aliyun.com/docker-ce/linux/centos/docker-ce.repo
grabbing file
http://mirrors.aliyun.com/docker-ce/linux/centos/docker-ce.repo to
/etc/yum.repos.d/docker-ce.repo repo saved to
/etc/yum.repos.d/docker-ce.repo
安装Docker CE
yum makecache fast
yum -y install docker-ce
Dependency Installed: audit-libs-python.x86_64 0:2.8.5-4.el7
checkpolicy.x86_64 0:2.5-8.el7
container-selinux.noarch 2:2.119.2-1.911c772.el7_8
containerd.io.x86_64 0:1.3.7-3.1.el7
docker-ce-cli.x86_64 1:19.03.13-3.el7
libcgroup.x86_64 0:0.41-21.el7
libsemanage-python.x86_64 0:2.5-14.el7
policycoreutils-python.x86_64 0:2.5-34.el7
python-IPy.noarch 0:0.75-6.el7
setools-libs.x86_64 0:3.3.8-4.el7Dependency Updated: policycoreutils.x86_64 0:2.5-34.el7
Complete!
启动
systemctl start docker
4.配置阿里云镜像仓库(镜像加速)
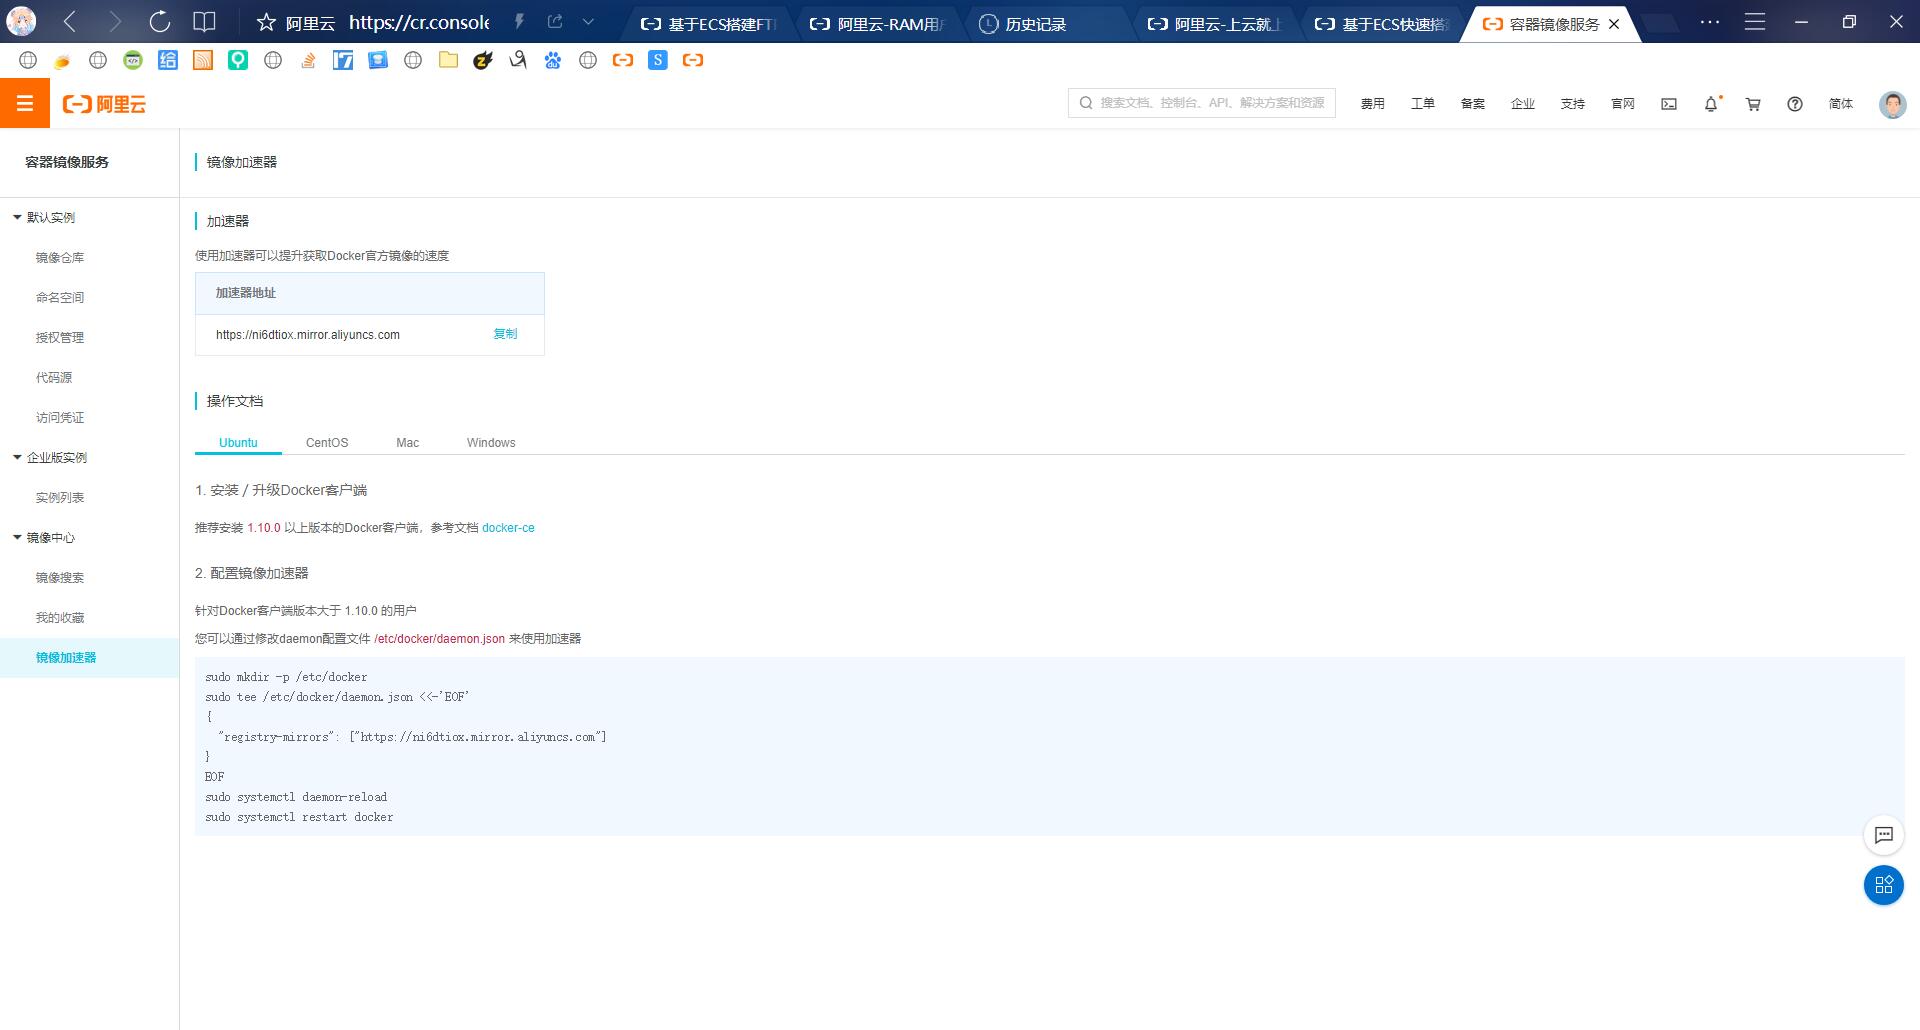
2. 配置Docker的自定义镜像仓库地址。
tee /etc/docker/daemon.json <<-'EOF'
{
  "registry-mirrors": ["https://ni6dtiox.mirror.aliyuncs.com"]
}
EOF
- 重新加载服务配置文件。
sudo systemctl daemon-reload
- 重启Docker服务。
systemctl restart docker
- 检查Docker是否启动
systemctl status docker
● docker.service - Docker Application Container Engine Loaded:
loaded (/usr/lib/systemd/system/docker.service; disabled; vendor
preset: disabled) Active: active (running) since Thu 2020-09-24
21:15:36 CST; 11s ago
Docs: https://docs.docker.com Main PID: 2058 (dockerd)
Tasks: 8 Memory: 39.6M CGroup: /system.slice/docker.service
└─2058 /usr/bin/dockerd -H fd:// --containerd=/run/containerd/containerd.so…Sep 24 21:15:36 iZuf66m76a0dpsis8yda6cZ dockerd[2058]:
time="2020-09-24T21:15:36.6702…c Sep 24 21:15:36
iZuf66m76a0dpsis8yda6cZ dockerd[2058]:
time="2020-09-24T21:15:36.6702…c Sep 24 21:15:36
iZuf66m76a0dpsis8yda6cZ dockerd[2058]:
time=“2020-09-24T21:15:36.6802…” Sep 24 21:15:36
iZuf66m76a0dpsis8yda6cZ dockerd[2058]:
time=“2020-09-24T21:15:36.6828…” Sep 24 21:15:36
iZuf66m76a0dpsis8yda6cZ dockerd[2058]:
time=“2020-09-24T21:15:36.7666…” Sep 24 21:15:36
iZuf66m76a0dpsis8yda6cZ dockerd[2058]:
time=“2020-09-24T21:15:36.8026…” Sep 24 21:15:36
iZuf66m76a0dpsis8yda6cZ dockerd[2058]:
time="2020-09-24T21:15:36.8221…3 Sep 24 21:15:36
iZuf66m76a0dpsis8yda6cZ dockerd[2058]:
time=“2020-09-24T21:15:36.8222…” Sep 24 21:15:36
iZuf66m76a0dpsis8yda6cZ dockerd[2058]:
time=“2020-09-24T21:15:36.8353…” Sep 24 21:15:36
iZuf66m76a0dpsis8yda6cZ systemd[1]: Started Docker Application
Contai… Hint: Some lines were ellipsized, use -l to show in full.
安装Nginx服务
- 查看Docker镜像仓库中Nginx的可用版本。
docker search nginx
NAME DESCRIPTION
STARS OFFICIAL AUTOMATED nginx
Official build of Nginx. 13771
[OK] jwilder/nginx-proxy Automated
Nginx reverse proxy for docker con… 1880
[OK] richarvey/nginx-php-fpm Container running Nginx +
PHP-FPM capable of… 787 [OK]
linuxserver/nginx An Nginx container, brought to you
by LinuxS… 128
tiangolo/nginx-rtmp Docker image with Nginx using the
nginx-rtmp… 92 [OK]
jc21/nginx-proxy-manager Docker container for managing Nginx
proxy ho… 92 bitnami/nginx
Bitnami nginx Docker Image 90
[OK] alfg/nginx-rtmp NGINX, nginx-rtmp-module and
FFmpeg from sou… 76 [OK]
nginxdemos/hello NGINX webserver that serves a
simple page co… 61 [OK]
jlesage/nginx-proxy-manager Docker container for Nginx Proxy
Manager 54 [OK]
nginx/nginx-ingress NGINX Ingress Controller for
Kubernetes 41
privatebin/nginx-fpm-alpine PrivateBin running on an Nginx,
php-fpm & Al… 35 [OK]
schmunk42/nginx-redirect A very simple container to redirect
HTTP tra… 19 [OK]
nginxinc/nginx-unprivileged Unprivileged NGINX Dockerfiles
17
nginx/nginx-prometheus-exporter NGINX Prometheus Exporter
15 centos/nginx-112-centos7
Platform for running nginx 1.12 or building … 14
centos/nginx-18-centos7 Platform for running nginx 1.8 or
building n… 13
raulr/nginx-wordpress Nginx front-end for the official
wordpress:f… 13 [OK]
staticfloat/nginx-certbot Opinionated setup for automatic TLS
certs lo… 12 [OK]
sophos/nginx-vts-exporter Simple server that scrapes Nginx
vts stats a… 7 [OK]
bitwarden/nginx The Bitwarden nginx web server
acting as a r… 7 mailu/nginx
Mailu nginx frontend 7
[OK] bitnami/nginx-ingress-controller Bitnami Docker Image for NGINX
Ingress Contr… 6 [OK]
ansibleplaybookbundle/nginx-apb An APB to deploy NGINX
1 [OK] wodby/nginx
Generic nginx 1
[OK]
2. 选取最新版的Nginx镜像。
docker pull nginx:latest
latest: Pulling from library/nginx d121f8d1c412: Pull complete
ebd81fc8c071: Pull complete 655316c160af: Pull complete
d15953c0e0f8: Pull complete 2ee525c5c3cc: Pull complete Digest:
sha256:c628b67d21744fce822d22fdcc0389f6bd763daac23a6b77147d0712ea7102d0
Status: Downloaded newer image for nginx:latest
docker.io/library/nginx:latest
3. 查看本地镜像。
docker images
REPOSITORY TAG IMAGE ID CREATED
SIZE nginx latest 7e4d58f0e5f3 2
weeks ago 133MB
4. 运行容器。
docker run --name nginx-test -p 8080:80 -d nginx
231dccac72945b61f38d8f50c3c0e682971686786415cf9e5352417b4351c422
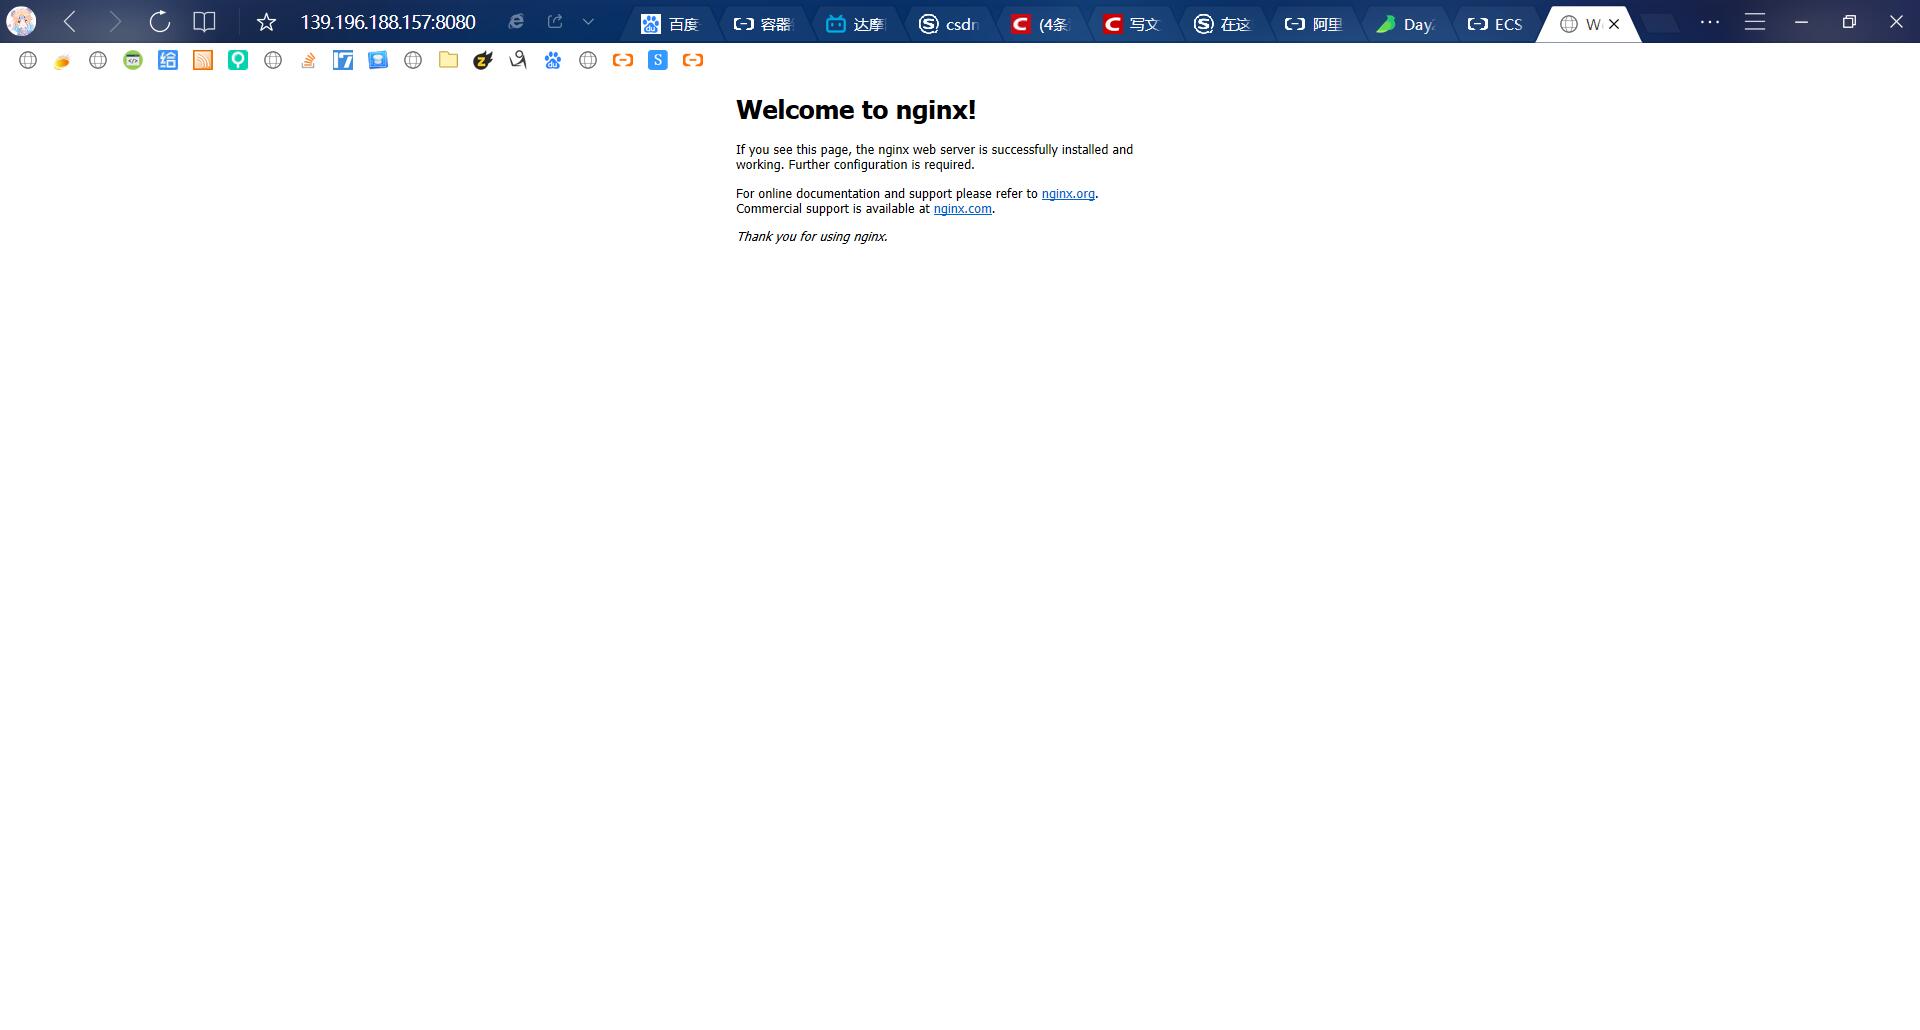
5. 在浏览器地址栏访问Nginx服务
http://<公网ip>:8080
总结
以上就是今天要讲分享的内容,本文仅仅简单介绍了基于ECS快速搭建Docker环境,不足之处请大佬指正最后
以上就是故意自行车最近收集整理的关于基于ECS快速搭建Docker环境前言一、创建资源二、连接ECS服务器三、安装Docker4.配置阿里云镜像仓库(镜像加速)安装Nginx服务总结的全部内容,更多相关基于ECS快速搭建Docker环境前言一、创建资源二、连接ECS服务器三、安装Docker4内容请搜索靠谱客的其他文章。


发表评论 取消回复