关于springboot整合springmvc的源码分析可以参考以下系列文章:
- springboot整合springmvc源码分析(1)--前言
- springboot整合springmvc源码分析(2)--承上启下
- springboot整合springmvc源码分析(3)--直击内容
该源码分析系列文章分如下章节:
- springmvc源码分析(1)-- DispatcherServlet
- springmvc源码分析(2)-- HandlerMapping
- springmvc源码分析(3)-- HandlerAdapter
- springmvc源码分析(3.1)-- HandlerMethodReturnValueHandler
- springmvc源码分析(4)-- ViewResolver
我们这系列文章主要来分析的是关于springmvc的源码
为了方便debug我们这里创建一个springmvc的Controller作为调试用
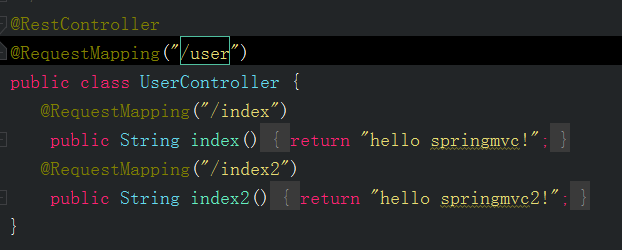
HandlerMapping在springmvc中有好几种实现映射器,这里我只分析比较常用到的一个映射器是RequestMappingHandlerMapping。
基于springboot,所以我们就按springboot的套路开始,直接从MATA-INF/spring.factories文件为入口开始(我们都知道springboot启动后会去加载spring.factories该文件,不懂的可以参考揭密springboot自动装配(2)系列文章);那我们就直接从这里开始吧。
文件内容key为:org.springframework.boot.autoconfigure.EnableAutoConfiguration的其中涉及到web.servlet相关的有如下几个

其中DispatcherServletAutoConfiguration的相关用处在springboot整合springmvc源码分析(3)--直击内容系列内容已经写过,今天我们的主角是WebMvcAutoConfiguration这个配置类,我们进到该配置类可以看到如下关RequestMappingHandlerMapping的载入核心内容,这个也就是我们前面所提到的HandlerMapping处理映射器用来处理通过url返回一个handle

我们直接来看看这个类的继承关系图:
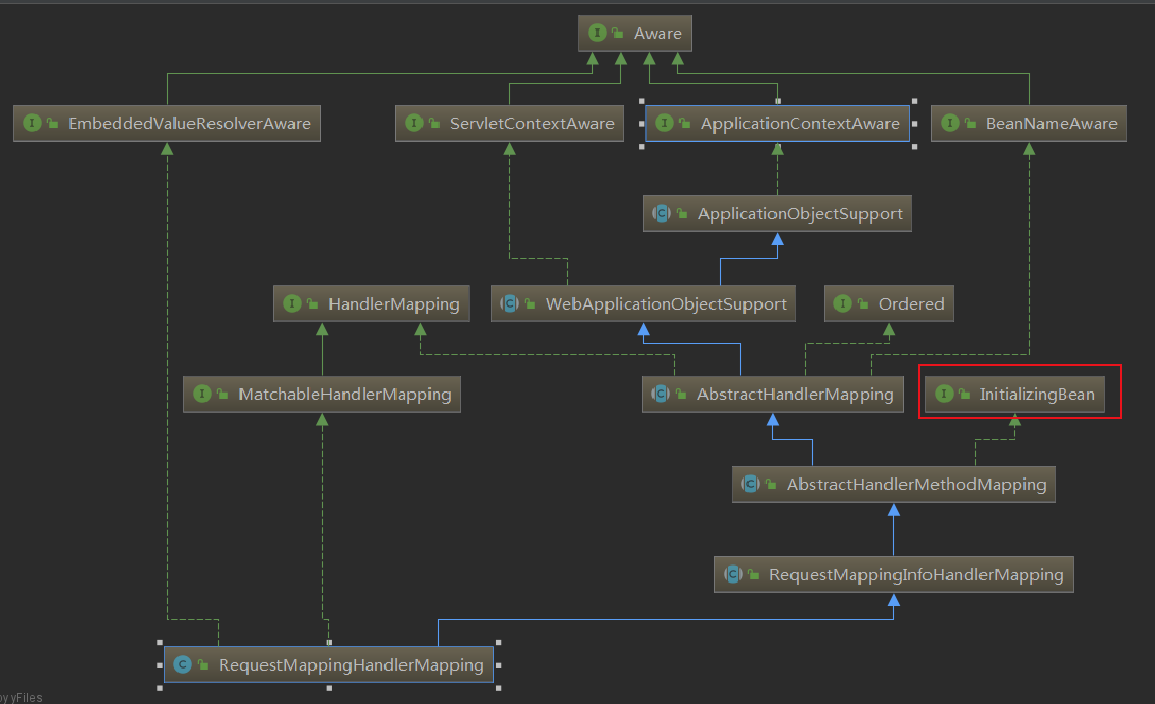
从该图我们可以看到它实现类InitializingBean接口,我们都知道该接口有个afterPropertiesSet()方法,实现它表示将在该类被实例化后会调用到该方法,那我们就从这个实现方法开始:
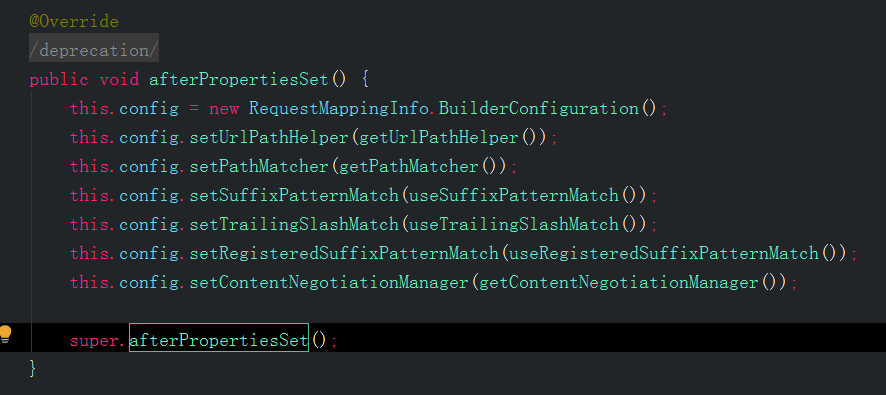
其他细节我们不需要去看,我们直接跳过来到它的父类AbstractHandlerMethodMapping下的afterPropertiesSet实现方法:
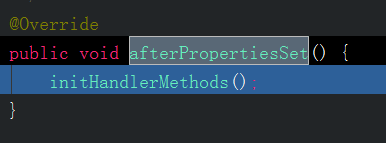
该afterPropertiesSet方法调用到initHandlerMethods
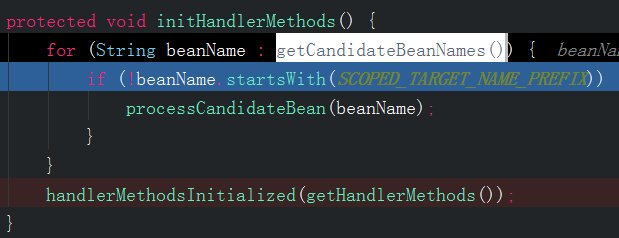
initHandlerMethods方法中主要就是从spring容器中拿出所有beanName然后遍历判断是否有@Controller或@RequestMapping注解到的类,然后通过一系列操作将其mapping信息注册到HandlerMapping,具体我们往下瞧
我们进到processCandidateBean方法瞧下
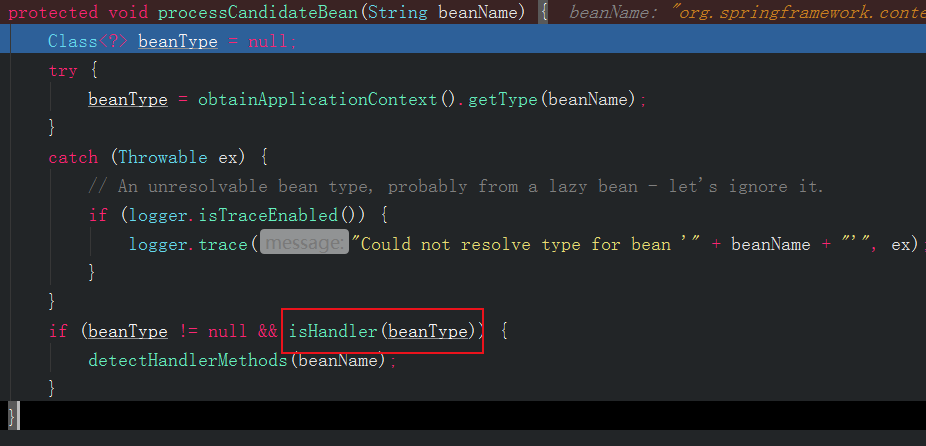
这里面方法有个判断isHandler,我们大概可以猜出应该就是来判断该bean是否含有我们所说的@Controller或@RequestMapping,我们进去瞧一瞧果不其然:

很明显我们前面定义的userController会进入到这里通过判断,所以我们继续跟进该方法:
protected void detectHandlerMethods(Object handler) {
		Class<?> handlerType = (handler instanceof String ?
				obtainApplicationContext().getType((String) handler) : handler.getClass());

		if (handlerType != null) {
			Class<?> userType = ClassUtils.getUserClass(handlerType);
			Map<Method, T> methods = MethodIntrospector.selectMethods(userType,
					(MethodIntrospector.MetadataLookup<T>) method -> {
						try {
							return getMappingForMethod(method, userType);
						}
						catch (Throwable ex) {
							throw new IllegalStateException("Invalid mapping on handler class [" +
									userType.getName() + "]: " + method, ex);
						}
					});
			if (logger.isTraceEnabled()) {
				logger.trace(formatMappings(userType, methods));
			}
			methods.forEach((method, mapping) -> {
				Method invocableMethod = AopUtils.selectInvocableMethod(method, userType);
				registerHandlerMethod(handler, invocableMethod, mapping);
			});
		}
	}
我们先来分析这段代码:
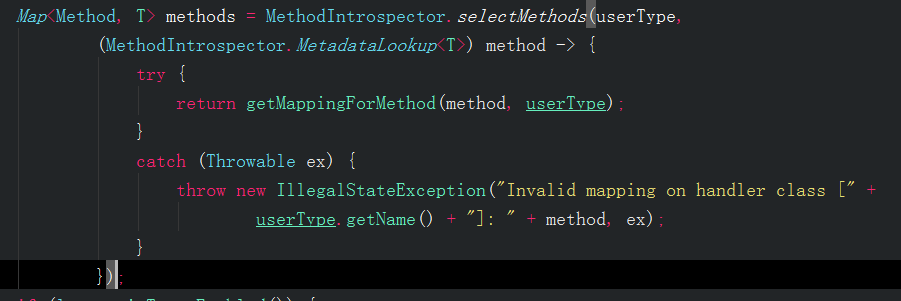
一个函数接口写法,进到MethodIntrospector.selectMethods方法以下是该方法的部分核心代码:

又是一个函数接口写法,进到ReflectionUtils.doWithMethods方法以下是该方法的代码:
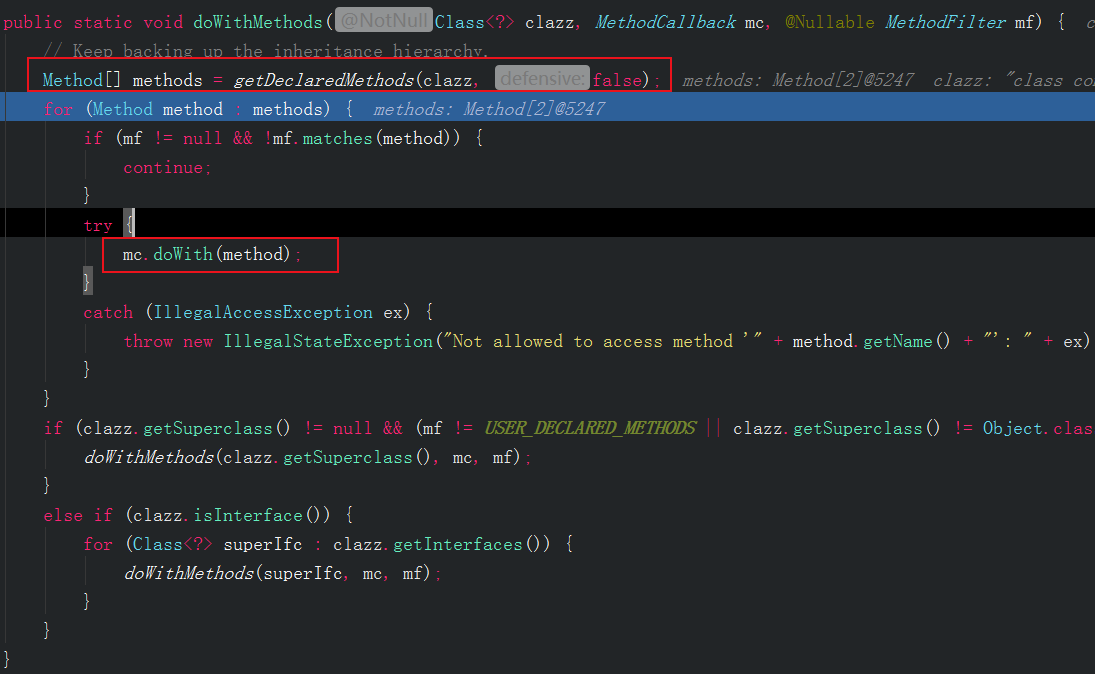
拿出我们传入的userController的所有方法,这里我们当然是可以拿到我们定义的两个方法:

拿出方法后接着遍历调用我们传入的函数接口的dowith,也就是调用回这里:

然后接着调用 metadataLookup.inspect也就是我们传入的函数接口的inspect,也就是这里:
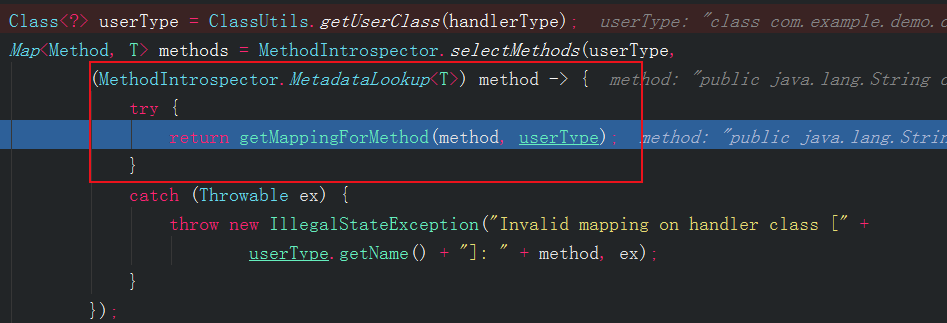
接着调用RequestMappingHandlerMapping.getMappingForMethod方法,这个就是本章的核心所在啦
protected RequestMappingInfo getMappingForMethod(Method method, Class<?> handlerType) {
		RequestMappingInfo info = createRequestMappingInfo(method);
		if (info != null) {
			RequestMappingInfo typeInfo = createRequestMappingInfo(handlerType);
			if (typeInfo != null) {
				info = typeInfo.combine(info);
			}
			String prefix = getPathPrefix(handlerType);
			if (prefix != null) {
				info = RequestMappingInfo.paths(prefix).options(this.config).build().combine(info);
			}
		}
		return info;
	}
调用createRequestMappingInfo获取方法上注解@RequestMapping的信息,然后放入RequestMappingInfo对象返回出去

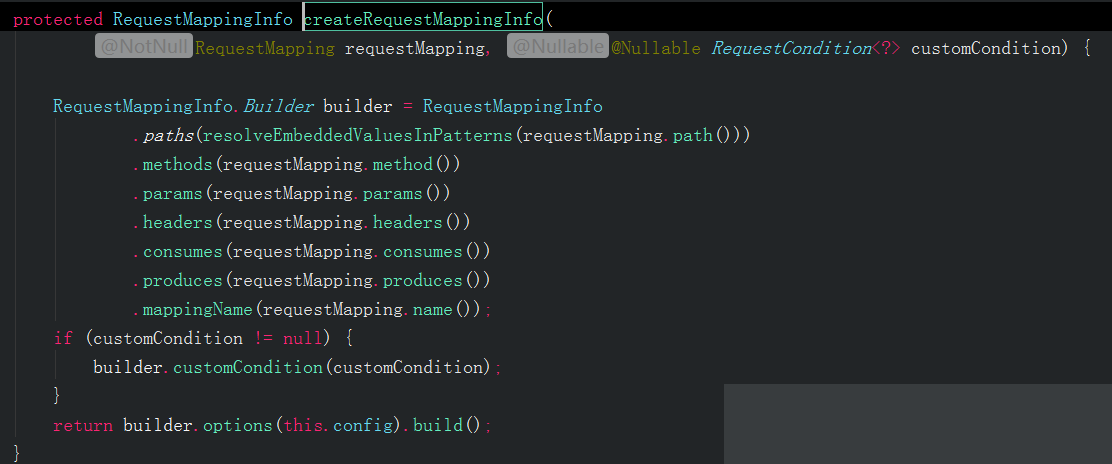
拿到方法的mapping信息之后接着调用createRequestMappingInfo(handlerType)来拿对象上的@RequestMapping注解的mapping信息,然后接着调用typeInfo.combine(info)进行信息的合并,其中就是包含path的合并,方法拿到的url是/index,对象拿到的url是/user,这样将其合并为/user/index的完整调用路径,接着就是getPathPrefix判断是否有需要加前缀的url,有的话也是一样会合并加进去。好了这里的的完整的RequestMappingInfo对象就已经被构建好了,然后返回出去,返回出去后接着回到这里,拿到result:

如上图可知,接着放入一个map里,key为该方法,value为方法的RequestMappingInfo信息,然后将去map返回出去

我们继续回到前面的方法
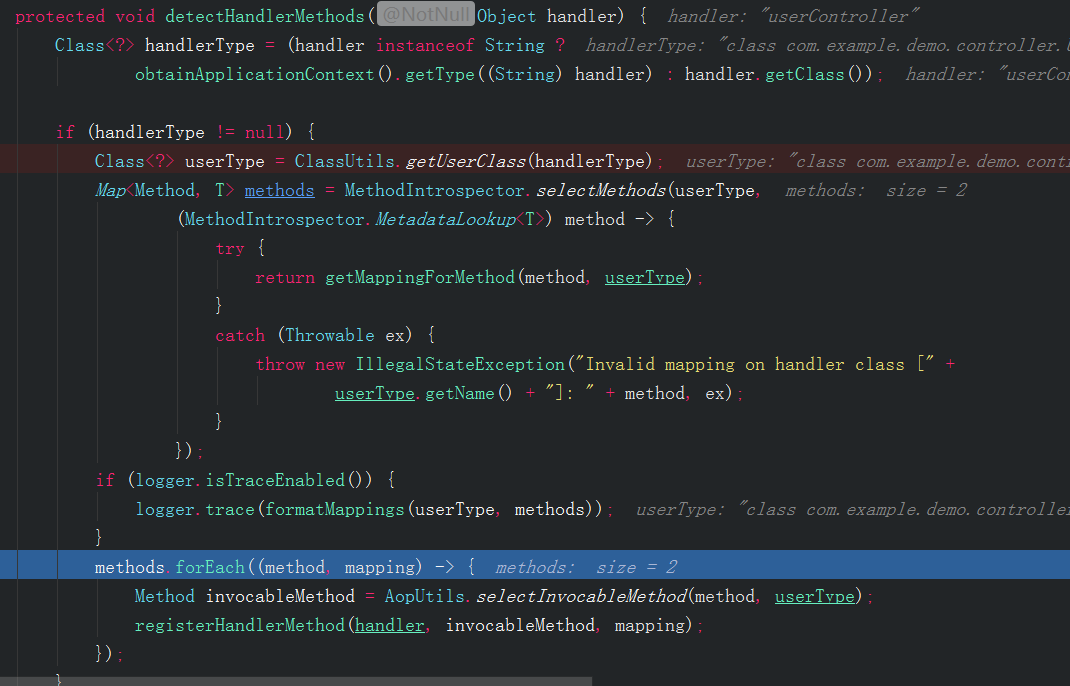
拿到所有方法的RequestMappingInfo的map之后接着就是遍历整个map,然后调用registerHandlerMethod方法进行注册,该方法下调用register:
public void register(T mapping, Object handler, Method method) {
			// Assert that the handler method is not a suspending one.
			if (KotlinDetector.isKotlinType(method.getDeclaringClass()) && KotlinDelegate.isSuspend(method)) {
				throw new IllegalStateException("Unsupported suspending handler method detected: " + method);
			}
			this.readWriteLock.writeLock().lock();
			try {
				HandlerMethod handlerMethod = createHandlerMethod(handler, method);
				validateMethodMapping(handlerMethod, mapping);
				this.mappingLookup.put(mapping, handlerMethod);

				List<String> directUrls = getDirectUrls(mapping);
				for (String url : directUrls) {
					this.urlLookup.add(url, mapping);
				}

				String name = null;
				if (getNamingStrategy() != null) {
					name = getNamingStrategy().getName(handlerMethod, mapping);
					addMappingName(name, handlerMethod);
				}

				CorsConfiguration corsConfig = initCorsConfiguration(handler, method, mapping);
				if (corsConfig != null) {
					this.corsLookup.put(handlerMethod, corsConfig);
				}

				this.registry.put(mapping, new MappingRegistration<>(mapping, handlerMethod, directUrls, name));
			}
			finally {
				this.readWriteLock.writeLock().unlock();
			}
		}
通过handler和method创建一个 HandlerMethod,然后接着放入MappingRegistry.mappingLookup的这个map里面,key为RequestMappingInfo信息,value为HandlerMethod,如下图:

接着获取 RequestMappingInfo的url,将其放入MappingRegistry.urlLookup的map里面,key为url,value为RequestMappingInfo信息,如下图:

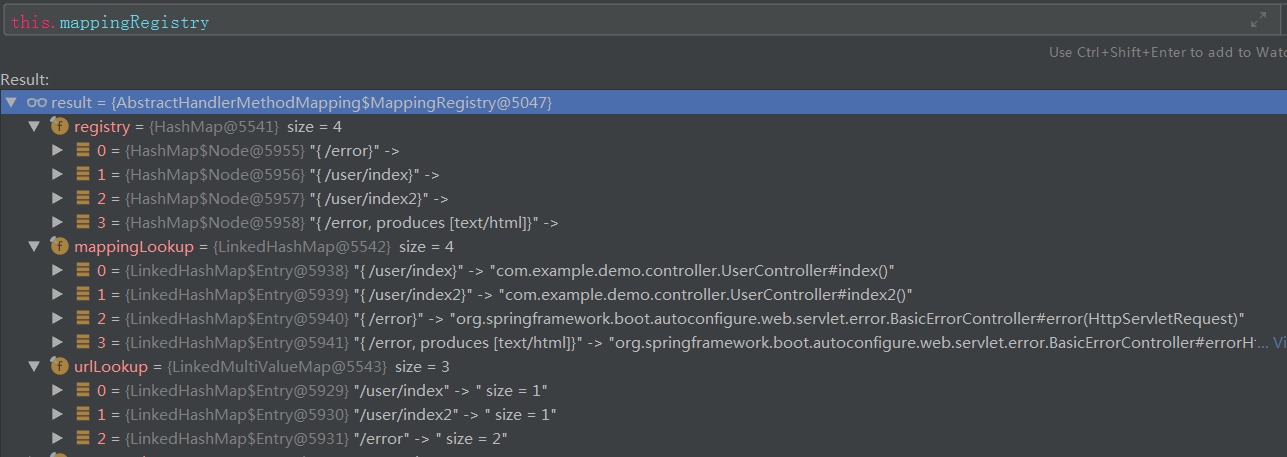
就这样springmvc就已经完成了整个HandlerMapping的注册,用的时候就是通过url去MappingRegistry.mappingLookup拿出RequestMappingInfo信息,然后通过RequestMappingInfo去MappingRegistry.urlLookup拿出HandlerMethod,就如上一章springmvc源码分析(1)-- DispatcherServlet写到的;我们接着回到上一章的内容这里:
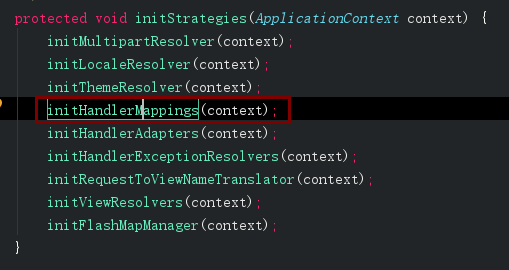
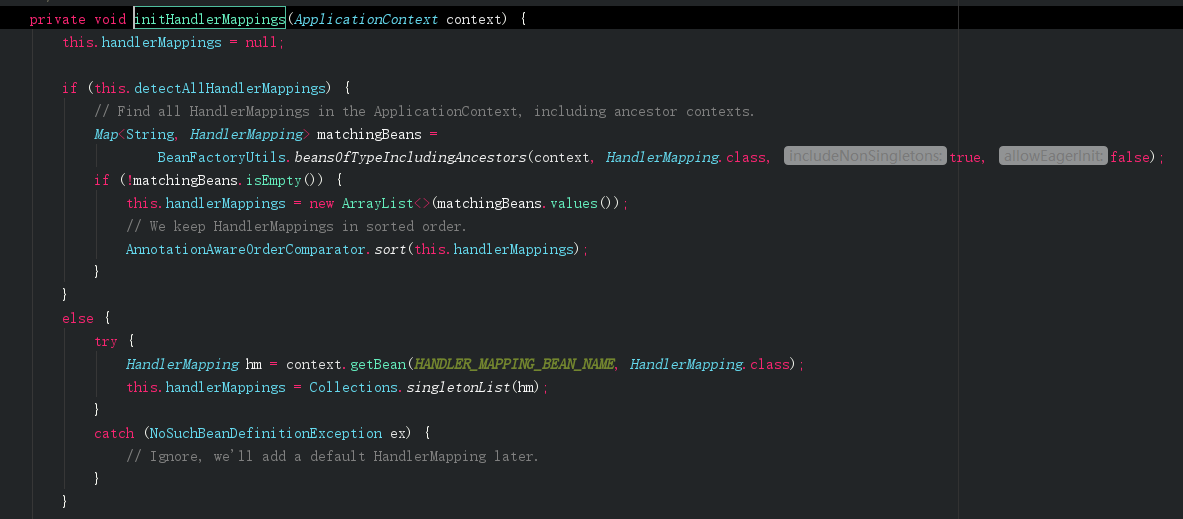
这里就是将查找所有实现了HandlerMapping接口的bean包括我们上面的RequestMappingHandlerMapping的bean放入dispatcherServlet的handlerMappings的list里面供后续选择映射器使用
ok至此,springmvc的HandlerMapping处理器映射器源码来龙去脉就已经搞清楚了。
最后
以上就是舒服含羞草最近收集整理的关于简单直接让你也读懂springmvc源码分析(2)-- HandlerMapping的全部内容,更多相关简单直接让你也读懂springmvc源码分析(2)--内容请搜索靠谱客的其他文章。


发表评论 取消回复