通过JDBCTemplate访问数据库
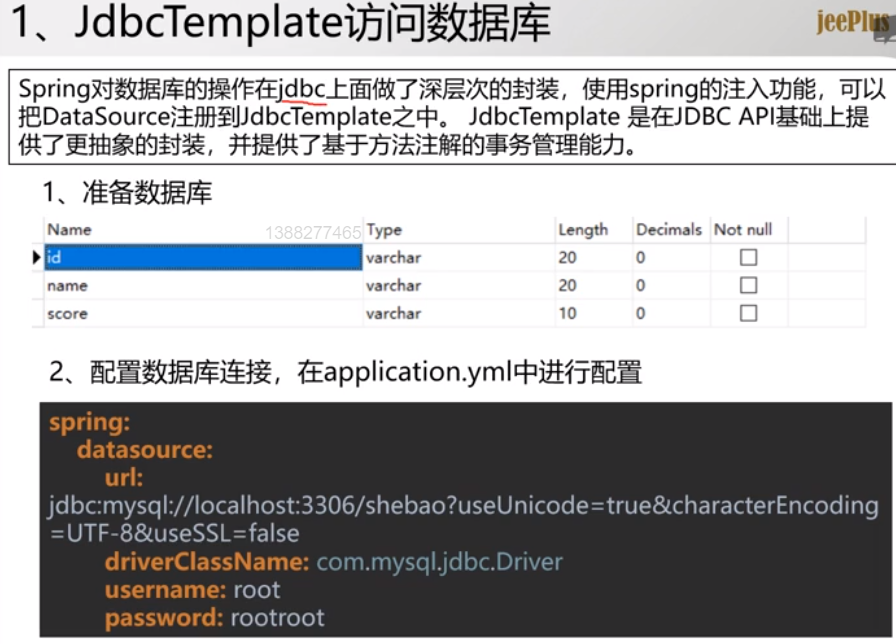
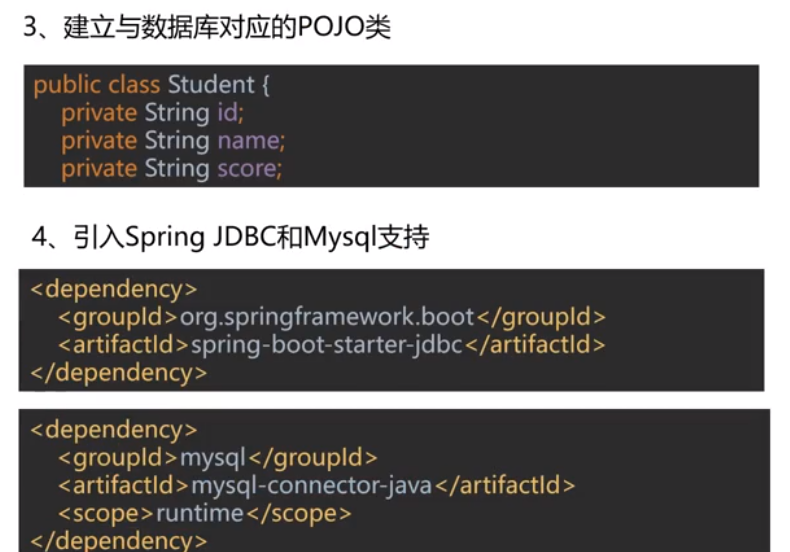
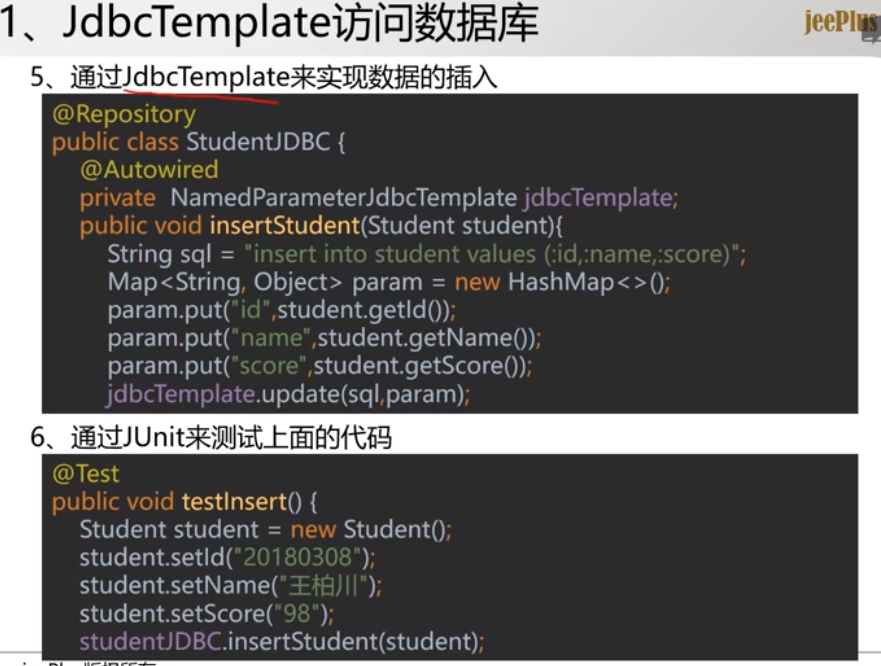
- 示例:
- 引入连接数据库所需的依赖程序包
<!-- Spring JDBC 的依赖包,使用 spring-boot-starter-jdbc 或 spring-boot-starter-data-jpa 将会自动获得HikariCP依赖 -->
 <dependency>
     <groupId>org.springframework.boot</groupId>
     <artifactId>spring-boot-starter-jdbc</artifactId>
 </dependency>
 <!-- MYSQL包 -->
 <dependency>
     <groupId>mysql</groupId>
     <artifactId>mysql-connector-java</artifactId>
 </dependency>
 <!-- 默认就内嵌了Tomcat 容器,如需要更换容器也极其简单-->
 <dependency>
     <groupId>org.springframework.boot</groupId>
     <artifactId>spring-boot-starter-web</artifactId>
 </dependency>
- 定义数据库连接配置,springboot中配置数据库信息可以在application.properties文件中配置,也可以在application.yml文件中配置
-
其实application.yml的功能和application.properties是一样的,不过因为yml文件是树状结构,写起来有更好的层次感,更易于理解,所以很多人都选择了yml文件
-
示例:在resource目录下建立application.properties文件
server.display-name=xmsApp
server.servlet-path=/
server.port=80
spring.datasource.url=jdbc:mysql://localhost:3306/springbootTest?useUnicode=true&characterEncoding=utf-8
spring.datasource.username=root
spring.datasource.password=123456
- 在对应的数据库中准备一个数据表—student

- 在程序中建立对应的实体类—Student
package app.entity;

import java.util.Date;

public class Student {
    private String id;
    private String name;
    private Integer age;

    getter和setter方法...
}
- 创建Controller类,直接在Controller类中进行数据操作,这样做不标准,但只是作为练习
package xie.mao.shu.app.controller;

import org.springframework.beans.factory.annotation.Autowired;
import org.springframework.jdbc.core.JdbcTemplate;
import org.springframework.web.bind.annotation.RequestMapping;
import org.springframework.web.bind.annotation.RestController;
import xie.mao.shu.app.entity.Student;

import java.util.UUID;

@RestController
public class HelloWorldController {
    @Autowired
    private  JdbcTemplate jdbcTemplate;

//    public HelloWorldController(JdbcTemplate jdbcTemplate) {
//        this.jdbcTemplate = jdbcTemplate;
//    }

    @RequestMapping("/hello")
    public String hellworld() {
        Student student = new Student();

        student.setId(UUID.randomUUID().toString());
        student.setAge(22);
        student.setName("xiemaoshu");

        String sql = "  insert into student values(?,?,?)";

        jdbcTemplate.update(sql, student.getId(), student.getName(), student.getAge());

        return "HelloWorld";
    }
}
- 测试访问路径
http://localhost/hello
- 数据库存储数据

通过JPA访问数据库
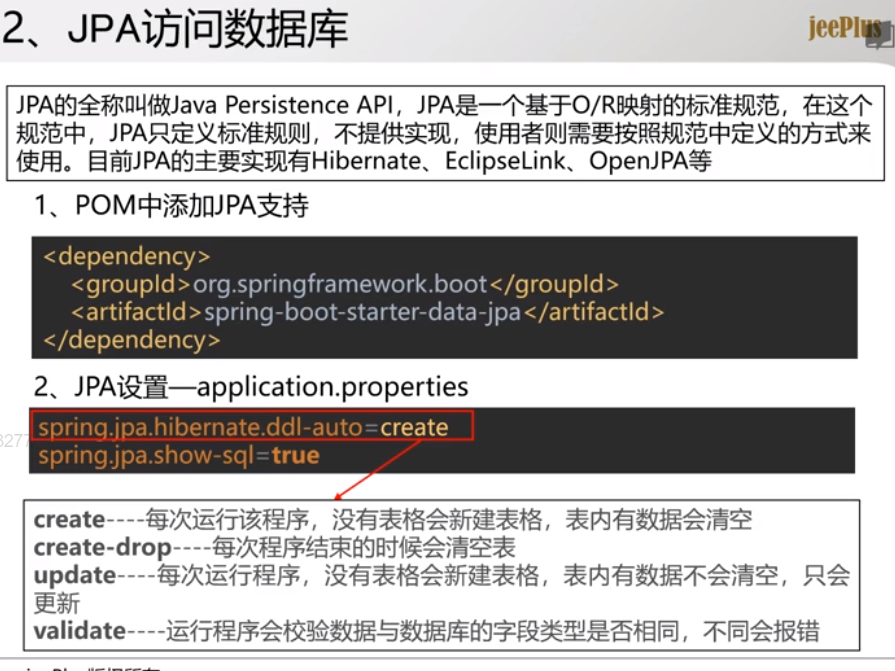
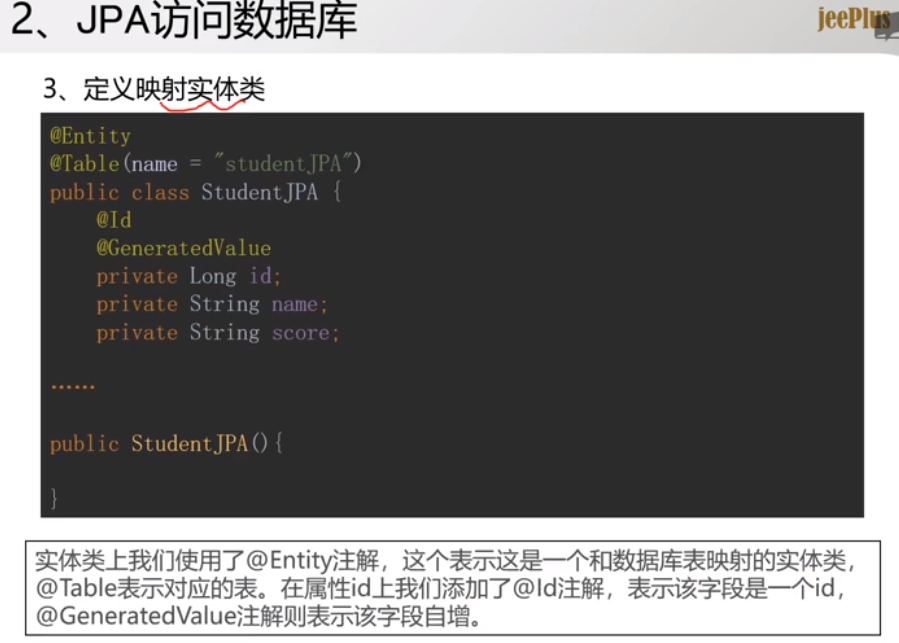
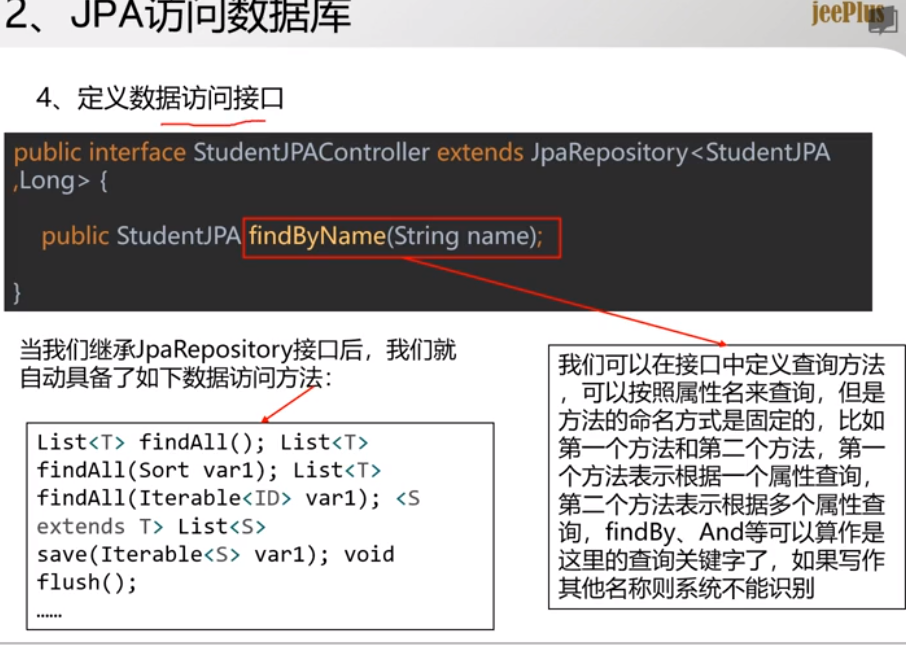
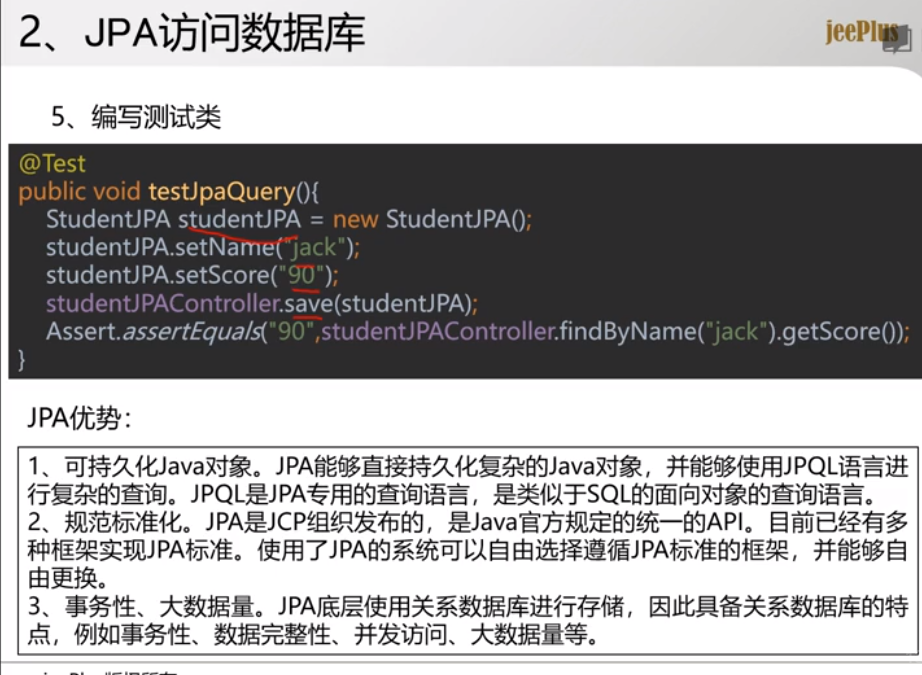
- 示例:通过JPA访问数据库
- 加入JPA依赖
<dependency>
       <groupId>org.springframework.boot</groupId>
       <artifactId>spring-boot-starter-data-jpa</artifactId>
 </dependency>
- 在application.properties配置文件中添加配置
#每次访问数据库时更新数据,如果没有表格会先创建,不会清楚原先的数据
spring.jpa.hibernate.ddl-auto=update
#显示执行的sql语句
spring.jpa.show-sql=true
- 定义实体类
- 要导入的注解类为import javax.persistence.Id;不要导错包了
- 并且如果设置id为自动增长列,则类型应该是Integer类型
package xie.mao.shu.app.entity;


import javax.persistence.Entity;
import javax.persistence.GeneratedValue;
import javax.persistence.Id;
import javax.persistence.Table;
import java.util.Date;

/**
 * 数据库person表的实体类
 *
 * @Entity 该注解用于表明为一个实体类
 * @Table 该注解用于定义数据库中数据表的名称
 * @ID 该注解用于定义某个字段为数据表的主键
 * @GeneratedValue 该注解用于表明该字段为自动增长列
 */
@Entity
@Table(name = "person")
public class Person {
    @Id
    @GeneratedValue
    private Integer id;

    private String name;
    private Integer age;

    private Date createDate;

...getter和setter方法
}
- 定义数据库访问接口,继承JPA提供的JpaRepostory接口,继承该接口的作用为:得到JPA替我们默认实现一些方法.
package xie.mao.shu.app.dao;

import org.springframework.data.jpa.repository.JpaRepository;
import xie.mao.shu.app.entity.Person;

/**
 * 定义Person数据库操作接口,继承自 JpaRepository 接口,用于获取JPA已实现的默认方法
 * JpaRepository<Person,String>
 *     Person参数为对应的实体类类名称,
 *     String为主键字段的数据类型
 *
 *
 *     在操作接口中可以自己定义操作方法
 *     操作方法的命名必须按照JPA规定的格式命名,否则JPA将无法识别
 *
 *     例如第一个 findByName 根据一个字段查询
 *     如果要根据多个字段查询,则应该使用 "And" 连接,例如第三个 findByNameAndAge
 *     public Person findByName(String name);
 *     public Person findById(String id);
 *     public Person findByNameAndAge(String name,Integer id);
 */
public interface PersonDao  extends JpaRepository<Person,String> {
    public Person findByName(String name);
    public Person findById(String id);
    public Person findByNameAndAge(String name,Integer id);
}
- 编写Controller程序类
package xie.mao.shu.app.controller;

import org.springframework.beans.factory.annotation.Autowired;
import org.springframework.jdbc.core.JdbcTemplate;
import org.springframework.web.bind.annotation.RequestMapping;
import org.springframework.web.bind.annotation.RestController;
import xie.mao.shu.app.dao.PersonDao;
import xie.mao.shu.app.entity.Person;
import xie.mao.shu.app.entity.Student;

import java.util.Date;
import java.util.List;
import java.util.UUID;

@RestController
public class HelloWorldController {


    @Autowired
    private PersonDao personDao;

//    public HelloWorldController(JdbcTemplate jdbcTemplate) {
//        this.jdbcTemplate = jdbcTemplate;
//    }

    /**
     * 插入一条数据
     * @return
     */
    @RequestMapping("/addPerson")
    public String addPerson(){
        Person person = new Person();
        person.setName("xiemaoshu");
        person.setAge(22);
        person.setCreateDate(new Date());
        this.personDao.save(person);
        return "true";
    }

    /**
     * 查询所有数据
     * @return
     */
    @RequestMapping("/getPerson")
    public List<Person> getPerson(){
        List<Person> all = personDao.findAll();
        return all;
    }
 }
- 测试路径
- 添加数据
localhost/addPerson

2. 获取所有数据
http://localhost/getPerson

和MyBatis集成访问数据库
- 示例:集成MyBatis进行数据库访问
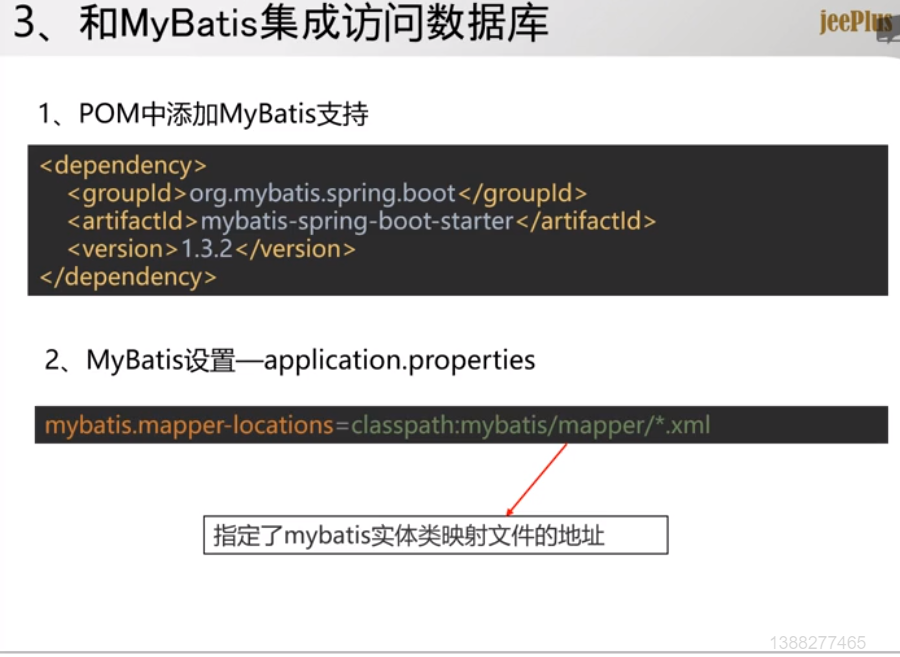
- 加入MyBatis依赖
<dependency>
    <groupId>org.mybatis.spring.boot</groupId>
    <artifactId>mybatis-spring-boot-starter</artifactId>
    <version>1.1.1</version>
</dependency>
- 在配置文件中定义MyBatis实体类映射文件路径
mybatis.mapper-locations=classpath:xie/mao/shu/app/dao/xml/*.xml
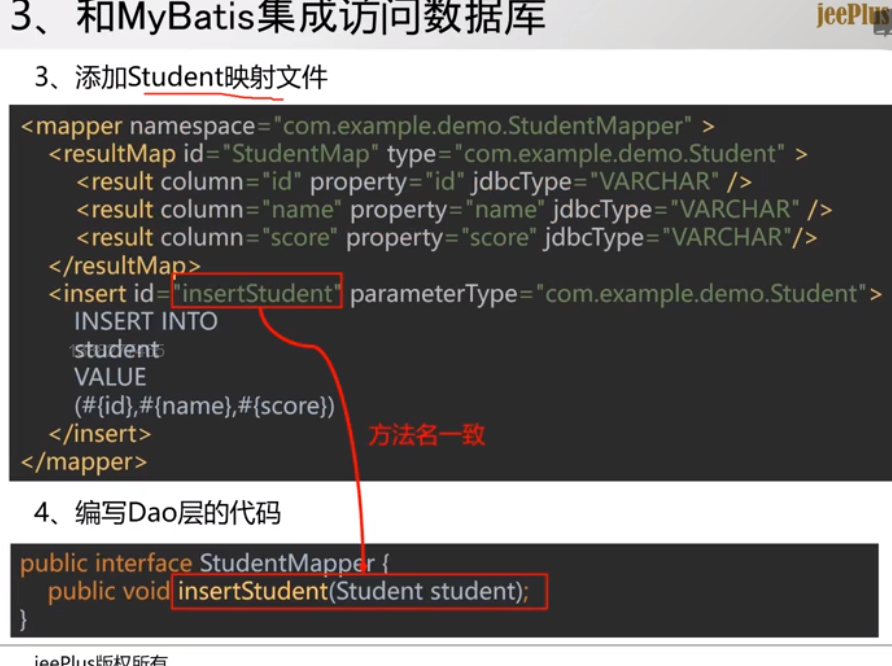
- 定义实体类对应操作接口
package xie.mao.shu.app.dao;

import org.apache.ibatis.annotations.Insert;
import org.springframework.stereotype.Repository;
import xie.mao.shu.app.entity.Person;

@Repository
public interface PersonMapper {
    @Insert("insert into person(age, create_date,name) values(#{age, jdbcType=INTEGER}, #{createDate, jdbcType=DATE},#{name,jdbcType=VARCHAR})")
    public void insertPerson(Person person);
}
- 不编写xml文件,直接使用注解的方式定义sql语句
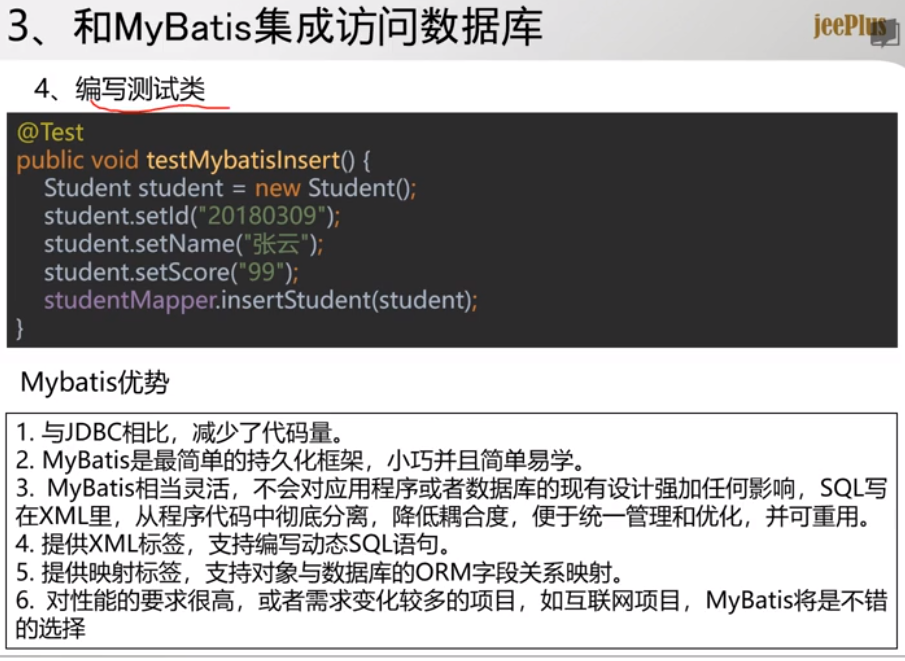
- 编写测试类
package xie.mao.shu.app.dao;

import org.junit.Test;
import org.junit.runner.RunWith;
import org.springframework.beans.factory.annotation.Autowired;
import org.springframework.boot.test.context.SpringBootTest;
import org.springframework.test.context.junit4.SpringRunner;
import xie.mao.shu.app.entity.Person;

import java.util.Date;

@RunWith(SpringRunner.class)
@SpringBootTest
public class PersonMapperTest {
    @Autowired
    private PersonMapper personMapper;

    @Test
    public void insertPerson(){
        Person person = new Person();
        person.setName("xiemaoshu");
        person.setAge(22);
        person.setCreateDate(new Date());
        this.personMapper.insertPerson(person);
    }
}
- 执行测试类,判断数据库中的数据是否有被增加

最后
以上就是傻傻板凳最近收集整理的关于jeeplus+springboot学习笔记---springboot访问数据库的全部内容,更多相关jeeplus+springboot学习笔记---springboot访问数据库内容请搜索靠谱客的其他文章。
本图文内容来源于网友提供,作为学习参考使用,或来自网络收集整理,版权属于原作者所有。


发表评论 取消回复