2.x
下载代码,执行如下命令即可
mvn clean install -DskipTests -Pfast
如果下面的执行,会自己给你下载一个maven,然后用下载的maven(一般不用这种方式,比较慢)
./mvnw clean install -DskipTests -Pfast
我编译过程中出现了一个如下错误
([ERROR] Failed to execute goal org.codehaus.mojo:exec-maven-plugin:1.6.0:exec (gradle) on project spring-boot-gradle-plugin: Command execution failed.: Process exited with an error: 1 (Exit value: 1) -> [Help 1])
按照提示执行了如下命令
mvn clean -rf :spring-boot-gradle-plugin
编译完毕,打开spring-boot-project项目即可(我刚开始直接打开的是spring-boot模块,会报错)
在spring-boot-project模块下面新建一个新的模块即可(包名不要仅为org.springframework.boot,不然会多自动加载很多模块,例如包名为org.springframework.boot.demo即可)
新建模块的pom文件如下
<?xml version="1.0" encoding="UTF-8"?>
<project xmlns="http://maven.apache.org/POM/4.0.0"
xmlns:xsi="http://www.w3.org/2001/XMLSchema-instance"
xsi:schemaLocation="http://maven.apache.org/POM/4.0.0 http://maven.apache.org/xsd/maven-4.0.0.xsd">
<parent>
<groupId>org.springframework.boot</groupId>
<artifactId>spring-boot-parent</artifactId>
<version>${revision}</version>
<relativePath>../spring-boot-parent</relativePath>
</parent>
<modelVersion>4.0.0</modelVersion>
<artifactId>learning-spring-boot</artifactId>
<dependencies>
<dependency>
<groupId>org.springframework.boot</groupId>
<artifactId>spring-boot-starter-web</artifactId>
</dependency>
<dependency>
<groupId>org.springframework.boot</groupId>
<artifactId>spring-boot-starter-test</artifactId>
<scope>test</scope>
</dependency>
</dependencies>
<build>
<plugins>
<plugin>
<groupId>org.springframework.boot</groupId>
<artifactId>spring-boot-maven-plugin</artifactId>
</plugin>
<plugin>
<groupId>org.apache.maven.plugins</groupId>
<artifactId>maven-surefire-plugin</artifactId>
<configuration>
<useSystemClassLoader>false</useSystemClassLoader>
</configuration>
</plugin>
</plugins>
</build>
</project>
启动类如下
@RestController
@SpringBootApplication
public class DemoApplication {
public static void main(String[] args) {
SpringApplication.run(DemoApplication.class, args);
}
@RequestMapping("index")
public String index() {
return "hello world";
}
}
此时能正常访问
之前写的
环境
spring boot版本:spring-boot-2.1.x
jdk版本:jdk1.8
maven版本:3.5.0(刚开始用的不是3.5.0的版本,结果各种报错)
我是从这下载的3.5.0版本的maven
https://archive.apache.org/dist/maven/maven-3/3.5.0/binaries/
编译源码
建议配置阿里云镜像,不然下载各种依赖速度太慢了
配置阿里云Maven镜像库,体验秒下jar包的快感
从GitHub下载源码传送门
进入项目根目录,执行如下命令
mvn clean install -DskipTests -Pfast
如果执行官网提供的命令
./mvnw clean install -DskipTests -Pfast
会先下载一个maven然后执行(我们用本地的就行)

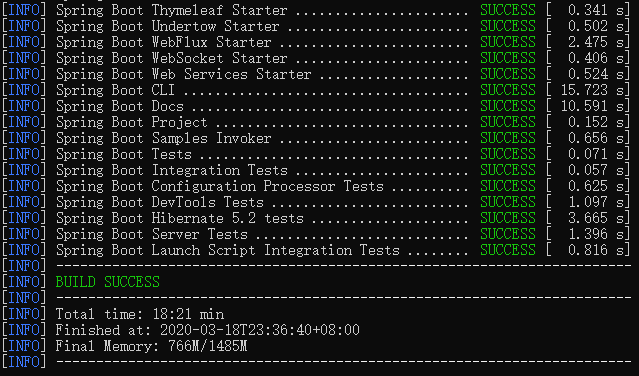
编译成功的话会有如下提示
调试源码
改了一下主项目的pom文件,引入了spring-boot-samples模块,这样我们就能用这个模块来debug源码了
<modules>
<module>spring-boot-project</module>
<!-- Samples are built via the invoker plugin -->
<module>spring-boot-samples</module>
<module>spring-boot-samples-invoker</module>
<module>spring-boot-tests</module>
</modules>
我启动spring-boot-sample-tomcat模块中的main方法
E:springspring-boot-2.1.x>curl http://localhost:8080/
Hello World
终于可以愉快的调试源代码了
参考博客
[0]https://www.javatt.com/p/18140
[1]https://blog.csdn.net/hzygcs/article/details/86102971
最后
以上就是坚定老虎最近收集整理的关于Spring Boot源码编译的全部内容,更多相关Spring内容请搜索靠谱客的其他文章。


发表评论 取消回复