1.下载安装包
2.上传到linux
3.解压:
cd /usr/local/tars

tar -zxvf elasticsearch-5.6.2.tar.gz -C /usr/local
4.新建目录
cd /usr/local/elasticsearch-5.6.2

mkdir data
mkdir logs
5.修改配置文件:
cd /usr/local/elasticsearch-5.6.2/config

vi elasticsearch.yml
修改内容如下:
cluster.name: my-application

node.name: hadoop1

path.data: /usr/local/elasticsearch-5.6.2/data

path.logs: /usr/local/elasticsearch-5.6.2/logs

bootstrap.memory_lock: false
bootstrap.system_call_filter: false

network.host: hadoop1

discovery.zen.ping.unicast.hosts: ["hadoop1"]
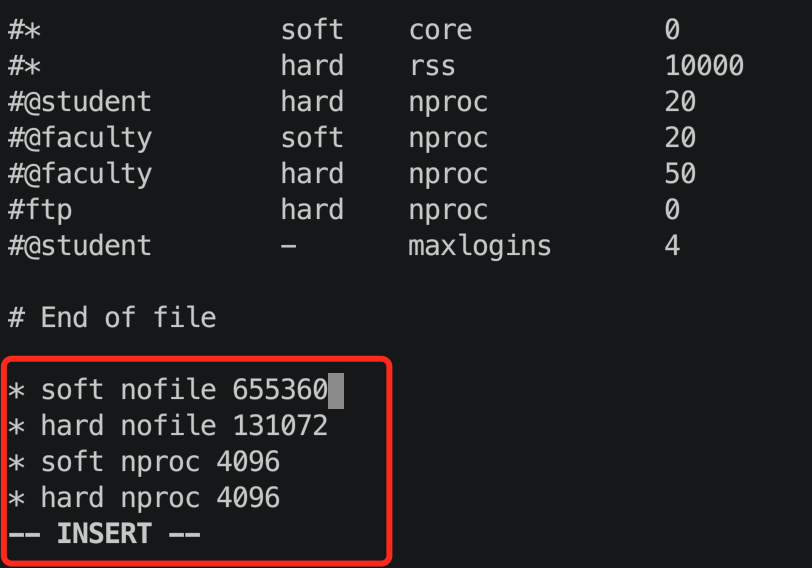
6.修改limits.conf 文件
vi /etc/security/limits.conf

//在文件末尾添加如下内容

* soft nofile 655360
* hard nofile 131072
* soft nproc 4096
* hard nproc 4096

7.修改limit.d下的文件
vi /etc/security/limits.d/20-nproc.conf

//修改内容如下
*    soft    nproc    1024
//改为
*    soft    nproc    4096

8.修改sysctl.conf文件
vi /etc/sysctl.conf

//添加内容
vm.max_map_count=655360

9.新建用户,elasticsearch不能以root用户启动
useradd hduser

cd /user/local

chown -R hduser ./elasticsearch-5.6.2/
chgrp -R hduser ./elasticsearch-5.6.2/
10.切换到hduser用户,启动elasticsearch
su hduser

cd /usr/local/elasticsearch-5.6.2

./bin/elasticsearch -d                              //后台启动
最后
以上就是失眠毛衣最近收集整理的关于CentOS7(单节点)安装elasticsearch的全部内容,更多相关CentOS7(单节点)安装elasticsearch内容请搜索靠谱客的其他文章。
本图文内容来源于网友提供,作为学习参考使用,或来自网络收集整理,版权属于原作者所有。


发表评论 取消回复