一、步骤:倒推
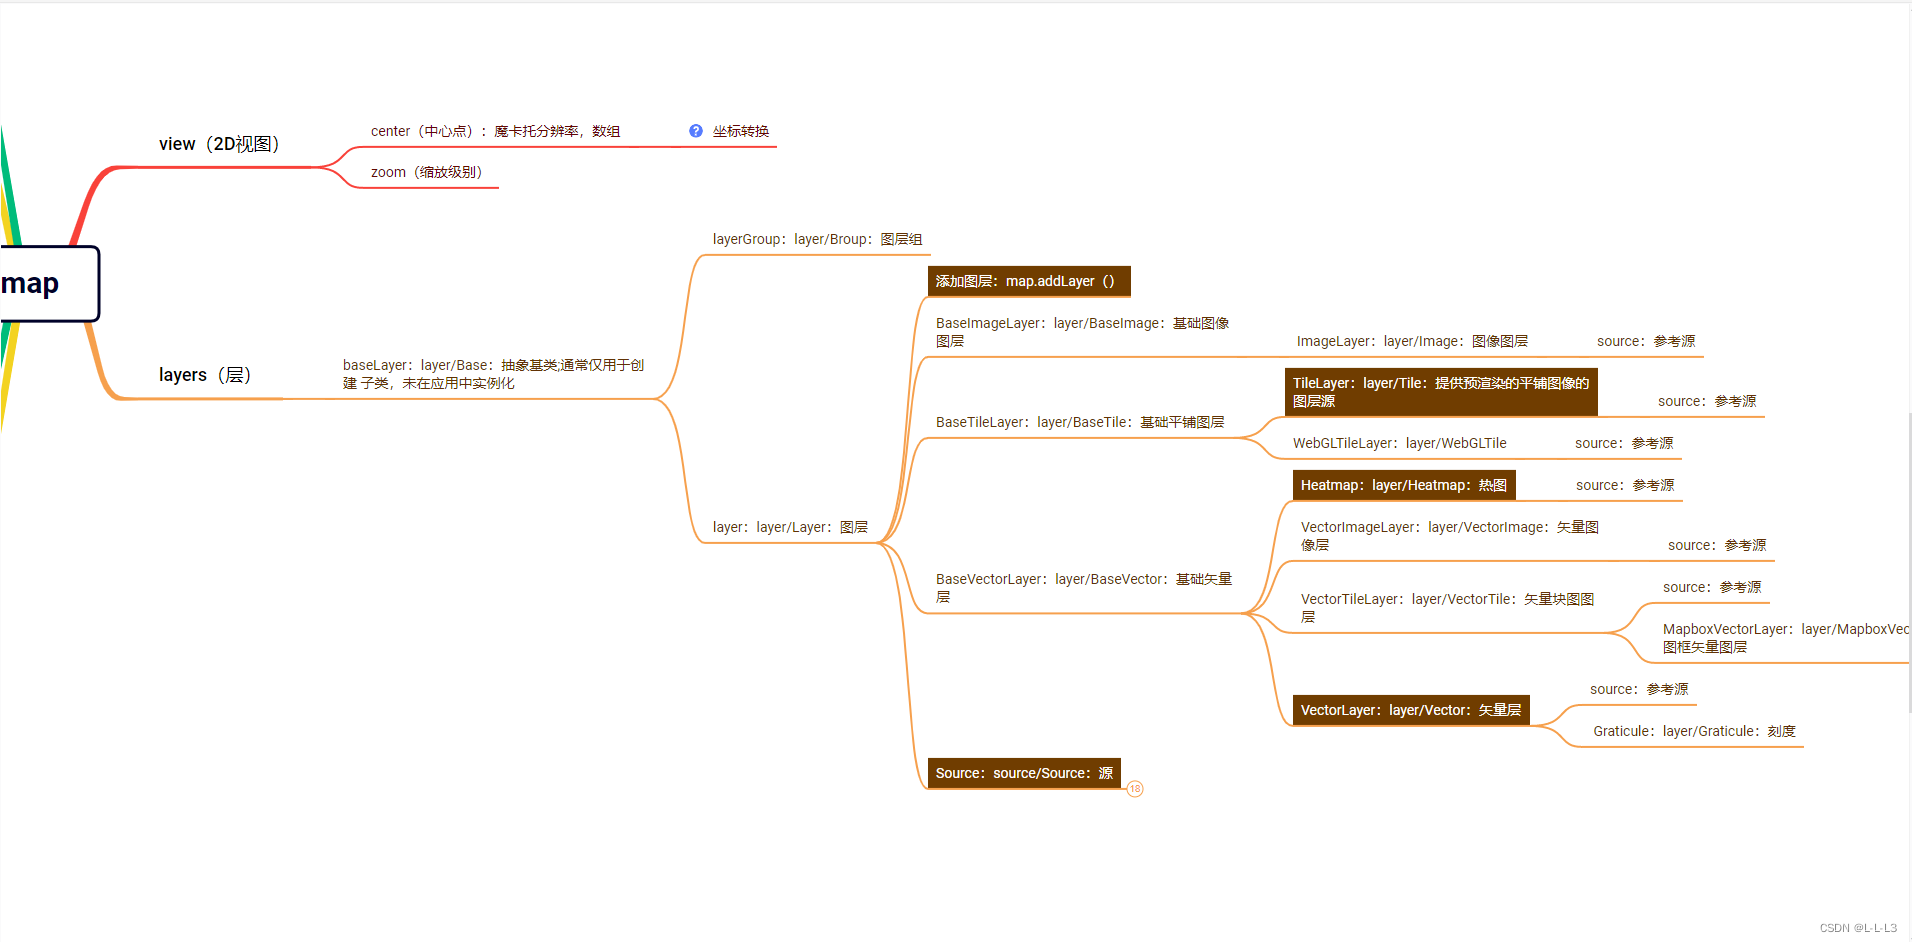
map.addLayer(Vector) :将矢量层添加到map
Vector设置source属性:将源添加到矢量层
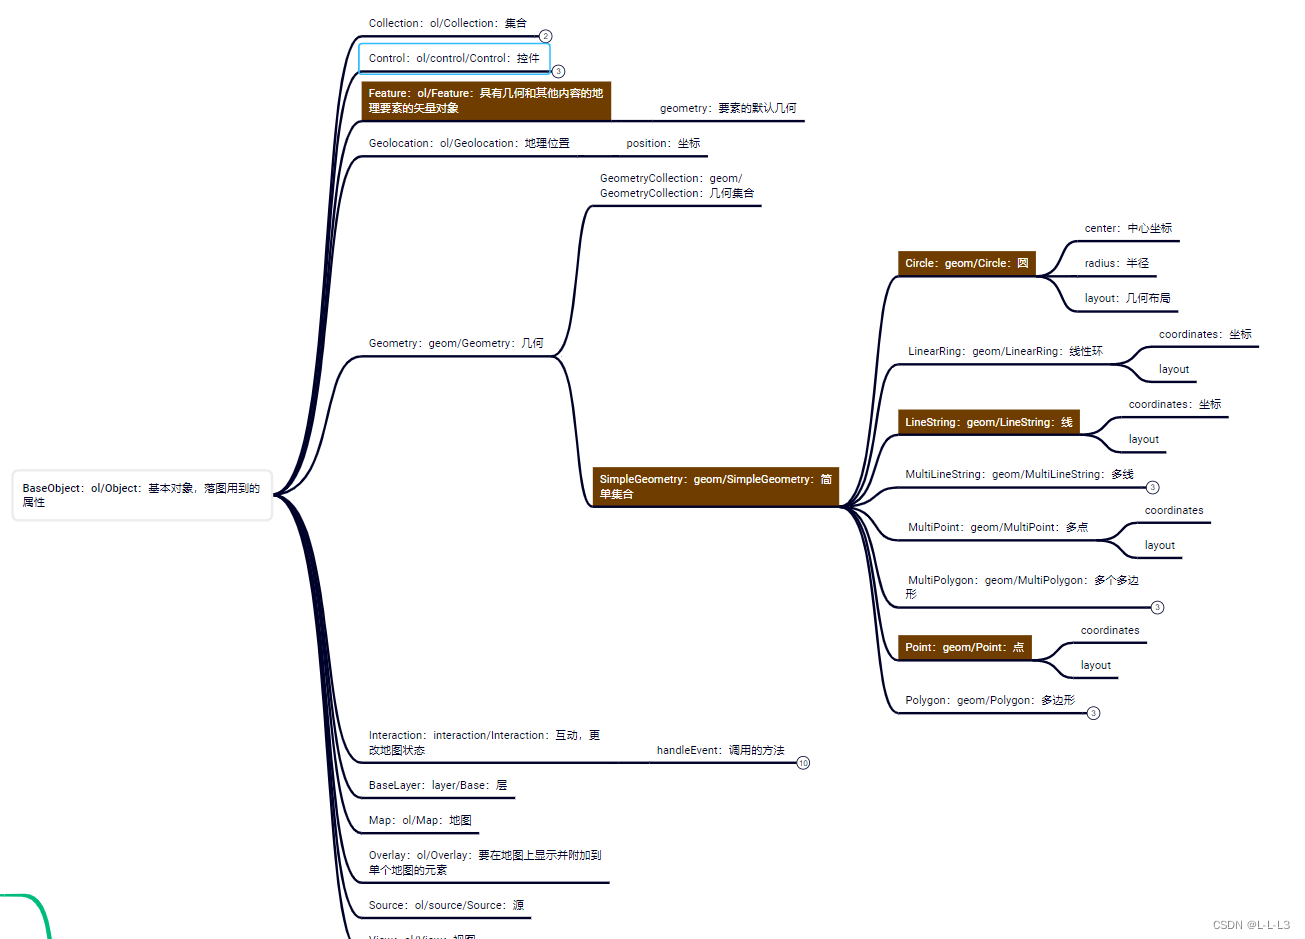
Source设置feature属性:将矢量对象添加到源
Feature设置geometry属性:将几何添加到矢量对象
Geometry包括简单几何:Point、LineString、Circle
二、思维导图
map:

source:

三、完整代码
import Map from "ol/Map";
import View from "ol/View";
import TileLayer from "ol/layer/Tile";
import "ol/ol.css";
import * as olProj from "ol/proj";
import TileGrid from "ol/tilegrid/TileGrid";
import TileImage from "ol/source/TileImage";
import XYZ from "ol/source/XYZ";
import Point from "ol/geom/Point";
import Feature from "ol/Feature";
import VectorSource from "ol/source/Vector";
import VectorLayer from "ol/layer/Vector";
import { Circle, Fill, Stroke, Style } from "ol/style";
import OSM from "ol/source/OSM";
import { fromLonLat } from "ol/proj";

      // 创建几何(圆)
      let point = new Point(olProj.fromLonLat([116.3, 39.9]));

      // 创建样式
      const fill = new Fill({
        color: "green",
      });
      const stroke = new Stroke({
        color: "green",
        width: 25,
      });
      const styles = [
        new Style({
          image: new Circle({
            fill: fill,
            stroke: stroke,
            radius: 5,
          }),
          fill: fill,
          stroke: stroke,
        }),
      ];

      // 创建矢量对象
      let feature = new Feature({
        geometry: point,
      });
      // 创建矢量源
      let source = new VectorSource({});

      // 把要素集合添加到源 addFeatures
      source.addFeature(feature);
      // 创建矢量层
      let vector = new VectorLayer({
        source: source,
        style: styles,
        id: "point1",
      });
      // 把源添加到地图
      this.myMap.addLayer(vector);
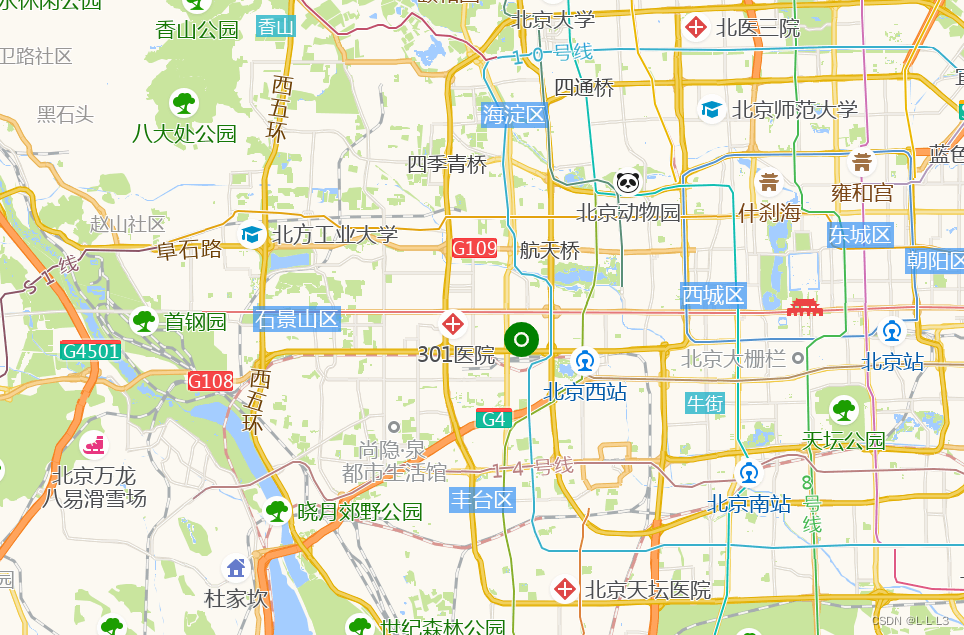
四、效果

最后
以上就是聪慧冬天最近收集整理的关于openLayers新手入门三:画点一、步骤:倒推三、完整代码四、效果的全部内容,更多相关openLayers新手入门三内容请搜索靠谱客的其他文章。
本图文内容来源于网友提供,作为学习参考使用,或来自网络收集整理,版权属于原作者所有。


发表评论 取消回复