前言
第一步
在百度AI上注册账号
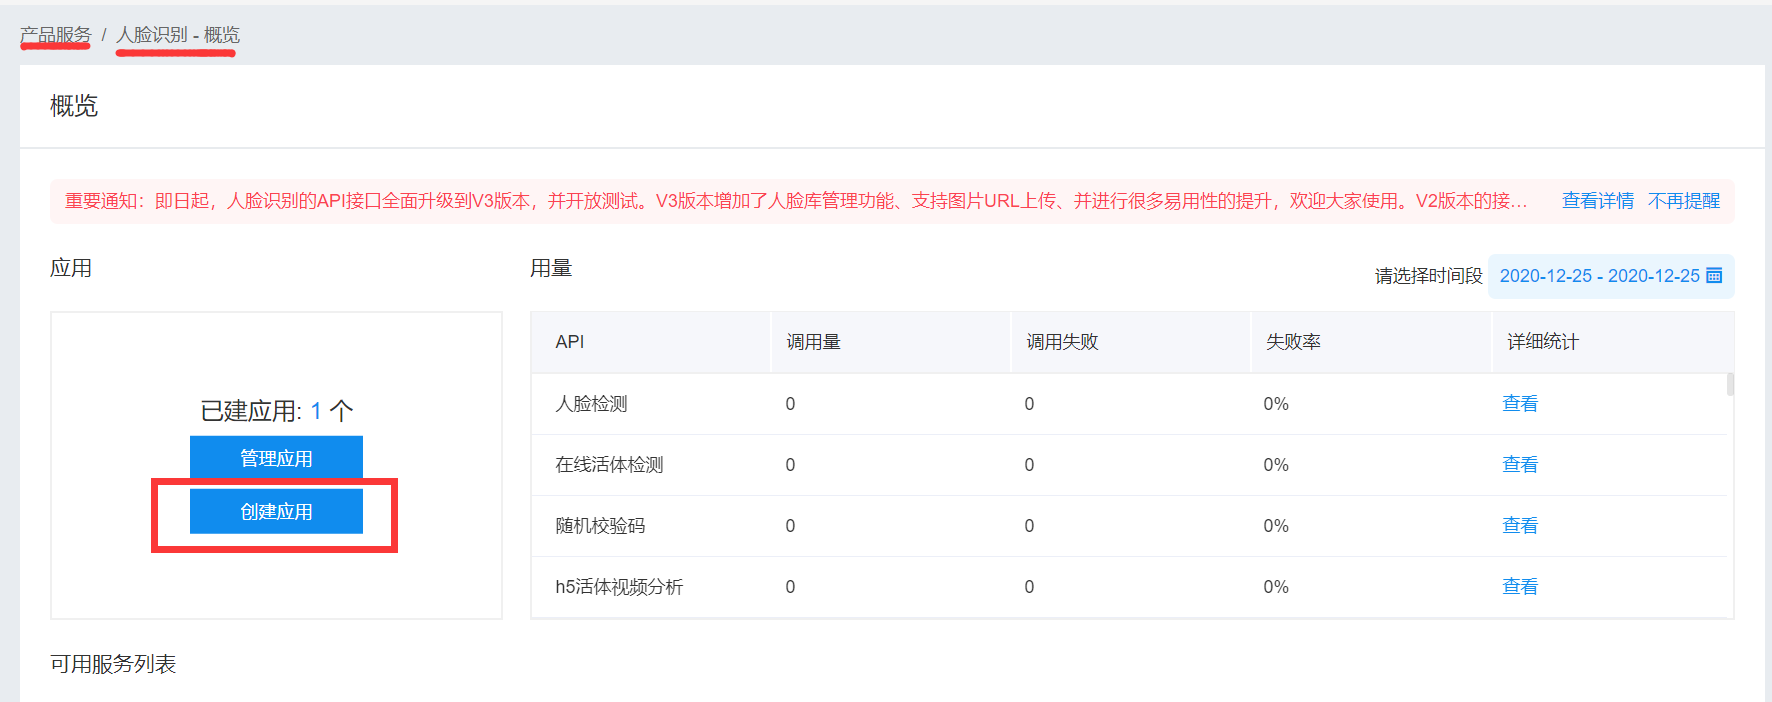
在控制台内创建属于你的相应的应用
以下是创建完成后的,
API Key SecretKey是俩个要用到的参数
根据文档
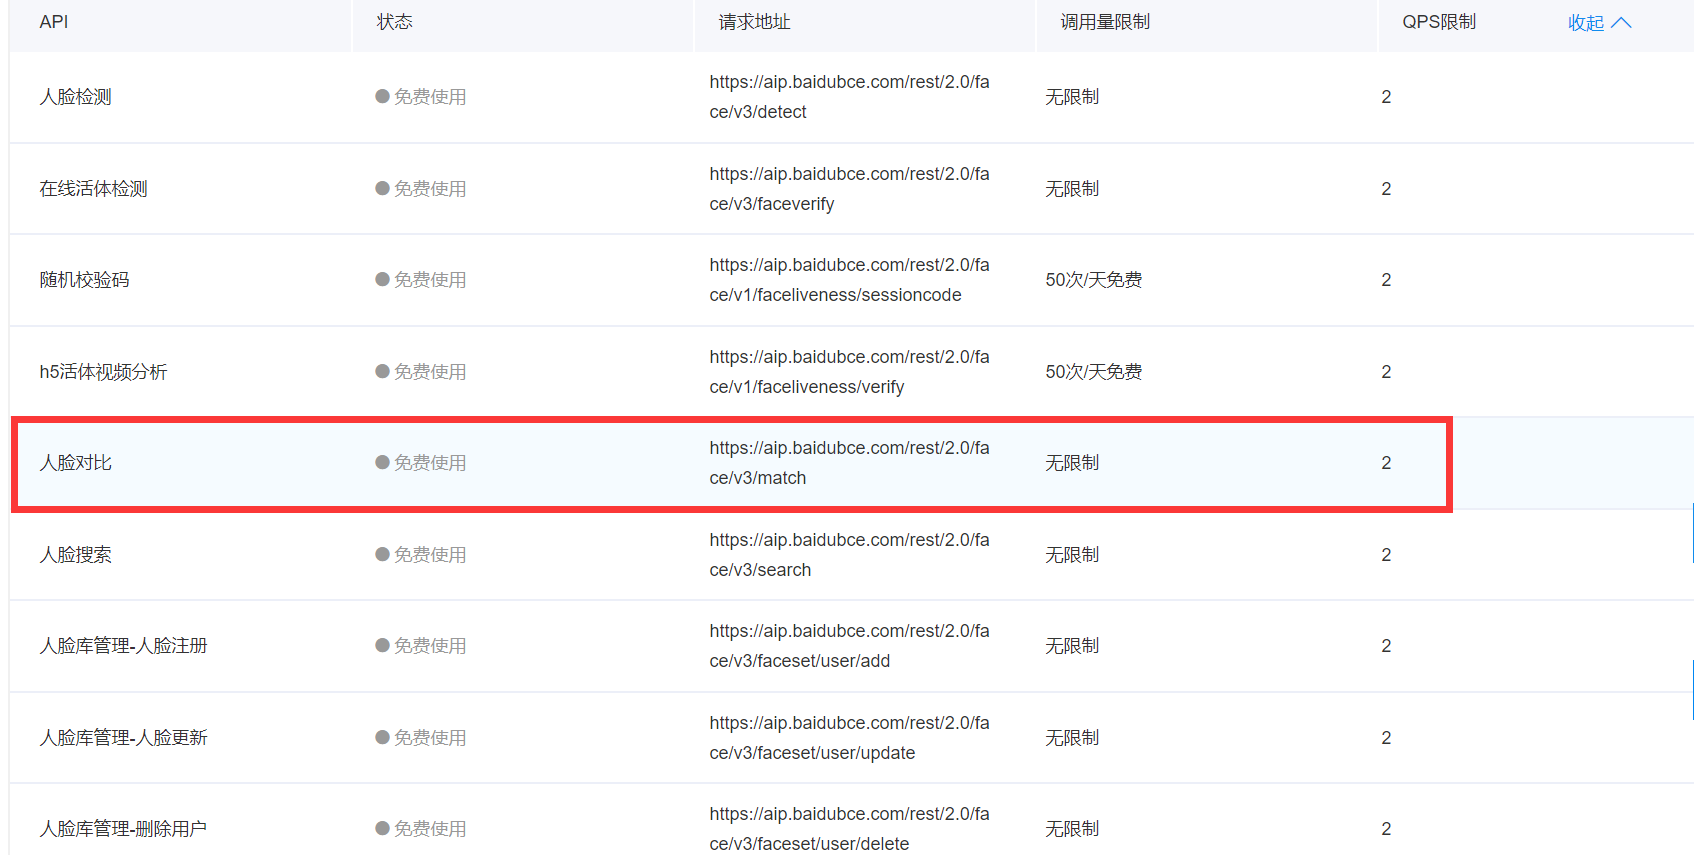
选择相应的API

人脸对比请求地址
发送请求获取 access_token
注意:
access_token的有效期为30天
请求地址:
https://aip.baidubce.com/oauth/2.0/token?grant_type=client_credentials&client_id=【API Key】&client_secret=【Secret Key】
请求方式:GET
返回数据格式:JSON
调用人脸识别
请求地址:
https://aip.baidubce.com/rest/2.0/face/v1/merge?access_token=+access_token
请求方式:POST
请求头:{'Content-Type': 'application/json'}
提交表单数据:image、image_type图片的格式需要通过base64编码其他参数可根据自己的需求的选择
人脸对别文档
上代码
import os
import ssl, json,requests
import base64
import threading

ssl._create_default_https_context = ssl._create_unverified_context

class FaceRec(object):

    def __init__(self):
        self.get_token_url = 'https://aip.baidubce.com/oauth/2.0/token?grant_type=client_credentials&client_id=%s&client_secret=%s' % (
            "API Key", "Secret Key")
        self.match_url = 'https://aip.baidubce.com/rest/2.0/face/v3/match?access_token='
        self.headers = {
            'Content-Type': 'application/json; charset=UTF-8',
        }


    # 提交进行对比获得结果
    def face_rec(self):
        my_thread = []
        pics, pic_new = self.base64_img()		# 获取图片编码

        for pic in pics:
        	# 创建多线程
            t = threading.Thread(target=self.check, args=(pic, pic_new))
            # 启动线程
            t.start()
            # 将线程添加到列表中
            my_thread.append(t)

        for i in my_thread:
            i.join()

    def check(self,pic, pic_new):
        params = []
        # 将参数添加到列表中
        params.append({"image": str(pic_new, 'utf-8'),
                       "image_type": "BASE64",
                       "face_type": "LIVE",
                       "quality_control": "LOW",
                       "liveness_control": "NONE"
                       })
        params.append({"image": str(pic, 'utf-8'),
                          "image_type": "BASE64",
                          "face_type":"LIVE",
                          "quality_control":"LOW",
                          "liveness_control":"NONE"
                          })
		# 构建请求参数
        url = self.match_url + json.loads(requests.get(self.get_token_url, headers=self.headers).text)['access_token']
        # 获取人脸对比分数
        score = json.loads(requests.post(url, data=json.dumps(params), headers=self.headers).text)['result']['score']
        # 获得分数
        if score > 80:print('照片相似度:' + str(score) + ',人脸识别通过')
        else:print('照片相似度:' + str(score) + ',人脸识别部不通过')

    def base64_img(self):
        images = []
        # 保存原有的人脸图片
        img_list = os.listdir('imagesSave')
        # 保存新的需要对比的图片
        img_new_list = os.listdir('imageNew')[0]
        # 通过循环对图片进行编码
        for img in img_list:
            with open(r'imagesSave/' + img, 'rb')as f:
                images.append(base64.b64encode(f.read()))
        with open(r'imageNew/' + img_new_list, 'rb')as f1:
            img_new = base64.b64encode(f1.read())

        return images, img_new


if __name__ == '__main__':
    app = FaceRec()
    app.face_rec()
最后
本代码仅用于少量照片的对比,若要进行大量匹配需要消耗大量时间。代码还需要改进,比如使用多线程,希望各位大佬提点建议~~~~
最后
以上就是从容眼睛最近收集整理的关于百度AI(一) | 人脸对比的全部内容,更多相关百度AI(一)内容请搜索靠谱客的其他文章。
本图文内容来源于网友提供,作为学习参考使用,或来自网络收集整理,版权属于原作者所有。


发表评论 取消回复