验证码、激活码各种码的输入框格日常使用里屡见不鲜了,四格的,六格的
最近开发遇到这么一个输入14位序号(美观而需要输入框)的需求,本着这种简单控件,不重复造轮子的想法,开始全网搜寻ing…
但就是这么一个我以为极其常用的控件,硬是找了三四个小时,把git逛烂了都没搜到合适的,要么是输入框不支持粘贴,要么是框格只有单行,14格撑满屏幕不够摆,还有要么就是框太丑,字太小太窄有bug之类的
算了,自己写给大家用!
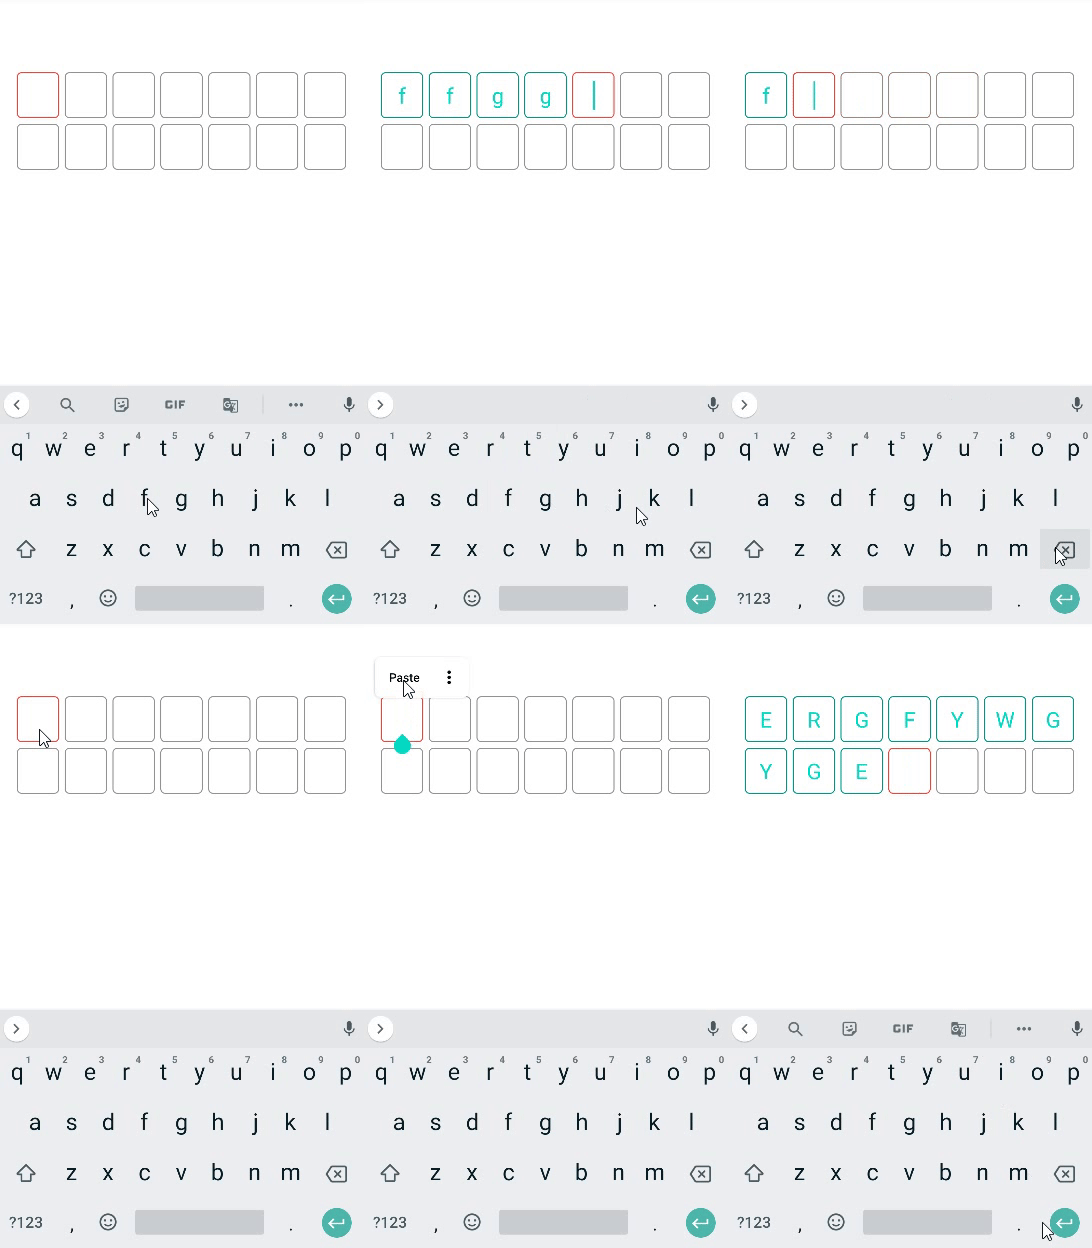
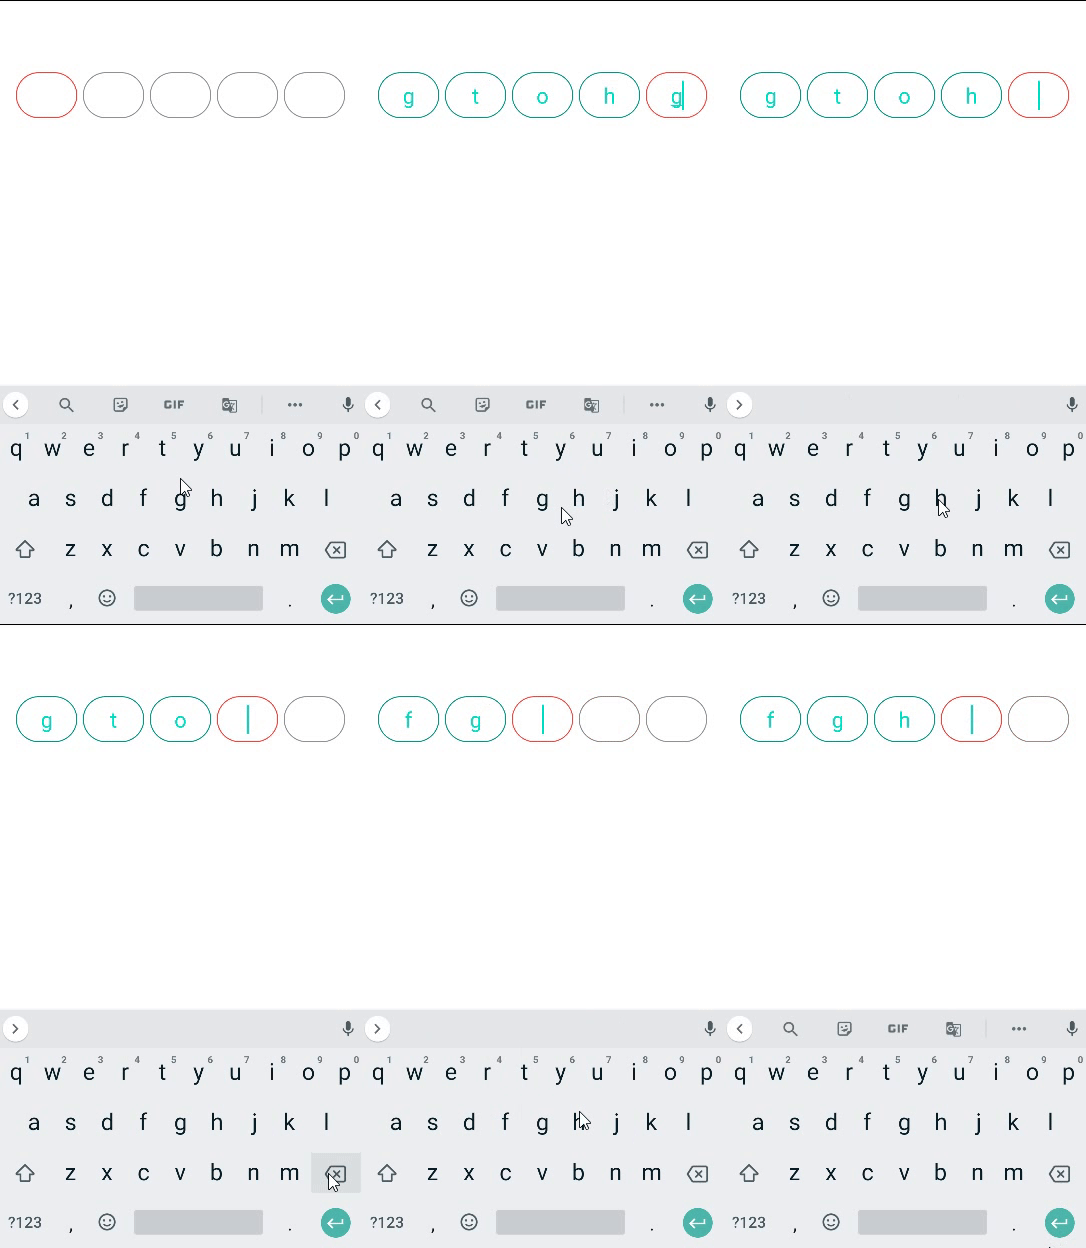
- 效果长这样:


文章目录
- 一、直接使用我的
- 方式1:引入gjylibrary本地aar包依赖(无需关心代码逻辑
- 方式2:引入gjylibrary在线依赖(无需关心代码逻辑
- 二、逻辑如何实现(感兴趣可以看)
- 1.新建MyEditText.java
- 2.新建GjySerialnumberLayout.java继承自relativelayout
- 3.资源文件
一、直接使用我的
【注】方式1、2任选一即可
方式1:引入gjylibrary本地aar包依赖(无需关心代码逻辑
1.下载gjylibrary.aar(支持字母数字混合输入)
或下载gjylibrarynumber.aar(只支持数字输入、二者根据需要选一即可)
2. 将其粘贴到项目的libs下
3. app的build.gradle中直接引入
implementation files('libs\gjylibrary.aar')
- (众所周知,jar包只包含class文件,而aar可以包括布局xml等,因此aar引入方式和引入本地jar包相同)
方式2:引入gjylibrary在线依赖(无需关心代码逻辑
-
添加jitpack作为仓库
如果你的gradle <7.0,直接在项目根目录build.gradle中添加:
 allprojects {
repositories {
maven { url 'https://www.jitpack.io' }
}
}
如果gradle >=7.0,需要在settings.gradle中添加,不要build.gradle中加,否则报错
maven { url 'https://www.jitpack.io' }
2.implement我的gjyedittext(在app的build.gradle里),以下两个二选一即可,分别是GitHub和gitee的library (注意这是2.0版本,3.0更新了只支持纯数字输入,因为有的人反映输入法在字母和数字之间来回横跳体验不好,所以更新了3.0版本)
dependencies {
implementation 'com.github.gjygit:editext:2.0' //3.0只支持纯数字,根据需要选择
}
dependencies {
implementation 'com.gitee.gongjingyao:gjyedittext:2.0' //3.0只支持纯数字,根据需要选择
}
-
使用
- xml布局文件中:(code_number代表框格数,自己调整,大于8时自动两行显示,大于8的奇数自动+1变偶数,最大不要超过20)
<com.example.gjylibrary.GjySerialnumberLayout android:id="@+id/verification_code" android:layout_width="match_parent" android:layout_height="wrap_content" android:layout_marginLeft="20dp" android:layout_marginTop="83dp" android:layout_marginRight="20dp" app:code_number="8" />- java代码中实现监听输入的返回值
GjySerialnumberLayout verificationCode=findViewById(R.id.verification_code);
verificationCode.setOnInputListener(new GjySerialnumberLayout.OnInputListener() {
@Override
public void onSucess(String code) {
System.out.println("内容是:"+code);
}
});
二、逻辑如何实现(感兴趣可以看)
在网上现有的思路中,基本都是屏蔽edittext的selection光标,要么把颜色设为透明,要么把光标直接屏蔽,整个界面只有一个edittext,然后输入内容的显示是继承textview重写这样的控件,监听并捕获最新输入的内容,将其展示在多个不同的textview上。
这样做也可以,但缺点就是只可以单行输入,一旦格子数量增加,需要换行就找不准输入框的位置,导致粘贴无效。
或是把光标显示,重新计算每个textview的距离,按照屏幕宽度➗number个数,设置间距,假装光标在移动。这样又太麻烦,而且字体换行间距不可能调整的正好,特别是在不同比例的手机上。
因此我采用n次实例化edittext,将其排列在页面上,以水平的线性布局排放,当涉及换行时,再用linealayout2去addview。
废话不多说,上代码
1.新建MyEditText.java
继承AppCompatEditText类,屏蔽回车换行,实现粘贴事件的拦截,将粘贴内容监听并通知调用
public class MyEditText extends AppCompatEditText {
public interface onTextContextMenuItemListener {
public boolean onTextContextMenuItem(int id, String content);
}
private onTextContextMenuItemListener onTextContextMenuItemListener;
//设置监听回调
public void setZTListener(onTextContextMenuItemListener listener){
this.onTextContextMenuItemListener = listener;
}
public MyEditText(Context context, AttributeSet attrs, int defStyle) {
super(context, attrs, defStyle);
}
public MyEditText(Context context, AttributeSet attrs) {
super(context, attrs);
}
public MyEditText(Context context) {
super(context);
}
@Override
public boolean onTextContextMenuItem(int id) {
if (id == android.R.id.paste) {
ClipboardManager clip = (ClipboardManager)getContext().getSystemService(Context.CLIPBOARD_SERVICE);
onTextContextMenuItemListener.onTextContextMenuItem(id,clip.getText().toString());
}
return false;
}
/**
* 屏蔽回车
* @param event
* @return
*/
@Override
public boolean dispatchKeyEvent(KeyEvent event) {
switch (event.getKeyCode()) {
case KeyEvent.KEYCODE_DPAD_CENTER:
case KeyEvent.KEYCODE_ENTER:
return true;
}
return super.dispatchKeyEvent(event);
}
}
2.新建GjySerialnumberLayout.java继承自relativelayout
- 监听焦点的改变,设置框格不同的背景:
code_child.setOnFocusChangeListener(new OnFocusChangeListener() {
@Override
public void onFocusChange(View view, boolean b) {
if (b == true) {
code_child.setBackground(getResources().getDrawable(R.drawable.bg_text_focus));
} else {
code_child.setBackground(getResources().getDrawable(R.drawable.bg_text_normal));
}
}
});
- code_child监听到文字输入改变时,判断是多文字输入还是单字符,根据内容,使得输入焦点跳转到下一个输入框,所有输入框存放在arraylist中,为所有的code_child设置id,方便获取位置跳转光标,输入内容满code_number数量时完成onsuccess回调:
public void afterTextChanged(Editable editable) {
if (editable != null && editable.length() > 0) {
String inputcontent = editable.toString();
int location = code_child.getId();
if(location+inputcontent.length() <=codeNumber){
if (inputcontent.length() > 1 && location < codeNumber - 1) {
for (int i = location; i < editViews.size(); i++) {
MyEditText myEditText = editViews.get(i);
myEditText.setText("");
}
for (int i = 0; i < inputcontent.length(); i++) {
showCode(i + location, inputcontent.charAt(i) + "");
}
editViews.get(location+inputcontent.length() - 1).setSelection(1);
} else {
if (location < codeNumber - 1) {
showCode(location + 1, "");
code_child.setBackground(getResources().getDrawable(R.drawable.bg_text_complete));
} else {
String content = "";
for (int i = 0; i < codeNumber; i++) {
content += editViews.get(i).getText();
}
if(onInputListener!=null)
onInputListener.onSucess(content);
}
}
}else{
code_child.setText("");
Toast.makeText(context, "长度超过" + codeNumber + ",请检查", Toast.LENGTH_SHORT).show();
}
}
}
- 由于输入法自带粘贴功能,和长按粘贴不是同一个事件,因此监听无法获取,解决方法是通过根据一次性的输入内容拦截区分,还有删除,光标的改变很多细节…不多赘述了
GjySerialnumberLayout.java完整代码:
public class GjySerialnumberLayout extends RelativeLayout {
private Context context;
List<MyEditText> editViews;
private int textColor;
private int codeNumber;
private LinearLayout ll_content;
public GjySerialnumberLayout(Context context) {
this(context, null);
}
public GjySerialnumberLayout(Context context, AttributeSet attrs) {
this(context, attrs, 0);
}
public GjySerialnumberLayout(Context context, AttributeSet attrs, int defStyleAttr) {
super(context, attrs, defStyleAttr);
this.context = context;
loadView(attrs);
}
private void loadView(AttributeSet attrs) {
View view = LayoutInflater.from(context).inflate(R.layout.verification_code, this);
ll_content = view.findViewById(R.id.ll_code_content);
TypedArray typedArray = context.obtainStyledAttributes(attrs, R.styleable.Verificationcode);
textColor = typedArray.getColor(R.styleable.Verificationcode_code_text_color, getResources().getColor(R.color.teal_200));
codeNumber = typedArray.getInt(R.styleable.Verificationcode_code_number, 16);
if (codeNumber > 8 && codeNumber % 2 == 1) codeNumber += 1;
initView();
}
private void initView() {
editViews = new ArrayList<>();
LinearLayout linearLayout1 = new LinearLayout(context);
LinearLayout linearLayout2 = new LinearLayout(context);
for (int i = 0; i < codeNumber; i++) {
LinearLayout.LayoutParams layout_param = new LinearLayout.LayoutParams(0, LinearLayout.LayoutParams.WRAP_CONTENT, 1.0f);
View item_view = LayoutInflater.from(context).inflate(R.layout.verifation_code_item, null);
final MyEditText code_child = item_view.findViewById(R.id.tv_code);
code_child.setTextColor(textColor);
code_child.setBackground(getResources().getDrawable(R.drawable.bg_text_normal));
code_child.setId(i);
code_child.setOnFocusChangeListener(new OnFocusChangeListener() {
@Override
public void onFocusChange(View view, boolean b) {
if (b == true) {
code_child.setBackground(getResources().getDrawable(R.drawable.bg_text_focus));
} else {
code_child.setBackground(getResources().getDrawable(R.drawable.bg_text_normal));
}
}
});
code_child.addTextChangedListener(new TextWatcher() {
@Override
public void beforeTextChanged(CharSequence s, int start, int count, int after) {
}
@Override
public void onTextChanged(CharSequence s, int start, int before, int count) {
}
@Override
public void afterTextChanged(Editable editable) {
if (editable != null && editable.length() > 0) {
String inputcontent = editable.toString();
int location = code_child.getId();
if (location + inputcontent.length() <= codeNumber) {
if (inputcontent.length() > 1 && location < codeNumber - 1) {
for (int i = location; i < editViews.size(); i++) {
MyEditText myEditText = editViews.get(i);
myEditText.setText("");
}
for (int i = 0; i < inputcontent.length(); i++) {
showCode(i + location, inputcontent.charAt(i) + "");
}
editViews.get(location + inputcontent.length() - 1).setSelection(1);
} else {
if (location < codeNumber - 1) {
showCode(location + 1, "");
code_child.setBackground(getResources().getDrawable(R.drawable.bg_text_complete));
} else {
String content = "";
for (int i = 0; i < codeNumber; i++) {
content += editViews.get(i).getText();
}
if (onInputListener != null)
onInputListener.onSucess(content);
}
}
} else {
code_child.setText("");
Toast.makeText(context, "长度超过" + codeNumber + ",请检查", Toast.LENGTH_SHORT).show();
}
}
}
});
// 监听验证码删除按键
code_child.setOnKeyListener(new OnKeyListener() {
@Override
public boolean onKey(View view, int keyCode, KeyEvent keyEvent) {
if (keyCode == KeyEvent.KEYCODE_DEL && keyEvent.getAction() == KeyEvent.ACTION_DOWN) {
int location = code_child.getId();
if (code_child.getText().toString().equals("")) {
if (location >= 1)
removeCode(location - 1);
return true;
} else
return false;
}
return false;
}
});
code_child.setZTListener(new MyEditText.onTextContextMenuItemListener() {
@Override
public boolean onTextContextMenuItem(int id, String content) {
if (content.length() > codeNumber) {
Toast.makeText(context, "长度超过" + codeNumber + ",请检查", Toast.LENGTH_SHORT).show();
} else if (content.length() > 0) {
for (int i = 0; i < editViews.size(); i++) {
MyEditText myEditText = editViews.get(i);
myEditText.setText("");
}
showCode(0, "");
for (int i = 0; i < content.length(); i++) {
showCode(i, content.charAt(i) + "");
}
editViews.get(content.length() - 1).setSelection(1);
}
return false;
}
});
if (codeNumber <= 8) {
linearLayout1.addView(item_view, layout_param);
} else {
if (i >= codeNumber / 2) {
linearLayout2.addView(item_view, layout_param);
} else
linearLayout1.addView(item_view, layout_param);
}
//code_child.setInputType(InputType.TYPE_CLASS_NUMBER);//纯数字输入关键代码,只有一行
editViews.add(code_child);
}
if (codeNumber <= 8) {
ll_content.addView(linearLayout1);
} else {
ll_content.addView(linearLayout1);
ll_content.addView(linearLayout2);
}
InputFilter[] filters = {new InputFilter.LengthFilter(1)};
editViews.get(codeNumber - 1).setFilters(filters);
editViews.get(0).setFocusable(true);
editViews.get(0).setFocusableInTouchMode(true);
editViews.get(0).requestFocus();
}
private void showCode(int location, String code) {
EditText et_code = editViews.get(location);
et_code.setFocusable(true);
et_code.setFocusableInTouchMode(true);
et_code.requestFocus();
et_code.setText(code);
}
private void removeCode(int location) {
EditText et_code = editViews.get(location);
et_code.setFocusable(true);
et_code.setFocusableInTouchMode(true);
et_code.requestFocus();
et_code.setText("");
}
private OnInputListener onInputListener;
//定义回调
public interface OnInputListener {
void onSucess(String code);
}
public void setOnInputListener(OnInputListener onInputListener) {
this.onInputListener = onInputListener;
}
}
3.资源文件
layout下新建verifation_code_item.xml
<?xml version="1.0" encoding="utf-8"?>
<RelativeLayout xmlns:android="http://schemas.android.com/apk/res/android"
android:layout_width="0dp"
android:layout_height="wrap_content"
android:padding="3dp"
android:layout_weight="1">
<com.example.gjylibrary.MyEditText
android:id="@+id/tv_code"
android:layout_width="match_parent"
android:layout_height="wrap_content"
android:layout_centerInParent="true"
android:paddingTop="10dp"
android:paddingBottom="10dp"
android:gravity="center"
android:textSize="25sp"
android:background="@drawable/bg_text_complete"/>
</RelativeLayout>
layout下新建verification_code.xml
<?xml version="1.0" encoding="utf-8"?>
<RelativeLayout xmlns:android="http://schemas.android.com/apk/res/android"
android:layout_width="match_parent"
android:layout_height="wrap_content">
<LinearLayout
android:id="@+id/ll_code_content"
android:layout_width="match_parent"
android:layout_height="wrap_content"
android:orientation="vertical" />
</RelativeLayout>
drawable下新建bg_text_complete.xml
<?xml version="1.0" encoding="utf-8"?>
<shape xmlns:android="http://schemas.android.com/apk/res/android">
<corners android:radius="5dp"/>
<solid android:color="#00ffffff"/>
<stroke android:color="#009688" android:width="1dp"/>
</shape>
drawable下新建bg_text_focus.xml
<?xml version="1.0" encoding="utf-8"?>
<shape xmlns:android="http://schemas.android.com/apk/res/android">
<corners android:radius="5dp"/>
<solid android:color="#00ffffff"/>
<stroke android:color="#00D5C1" android:width="1dp"/>
</shape>
drawable下新建bg_text_normal.xml
<?xml version="1.0" encoding="utf-8"?>
<shape xmlns:android="http://schemas.android.com/apk/res/android">
<corners android:radius="5dp"/>
<solid android:color="#00ffffff"/>
<stroke android:color="#919191" android:width="1dp"/>
</shape>
values下的attrs.xml
<?xml version="1.0" encoding="utf-8"?>
<resources>
<declare-styleable name="Verificationcode">
<attr name="code_text_color" format="color" />//验证码字体颜色
<attr name="code_text_size" format="dimension" />//验证码字体大小
<attr name="code_number" format="integer" />//验证码数量 4位
6位
<attr name="line_color_default" format="color" />//验证码下面线的默认颜色
<attr name="line_color_focus" format="color" />//验证码下面线选中后的颜色
</declare-styleable>
</resources>
结束!!!!!!!
还有几个color的颜色,自己随便选一下就好了,因人而异,这就不统一审美贴出来了
完整代码已经上传CSDN,有需要移步gjycsdn
没有积分下载的可以去Gitee下:gjygitee
最后
以上就是大力咖啡豆最近收集整理的关于Android中的验证码输入框的全部内容,更多相关Android中内容请搜索靠谱客的其他文章。


发表评论 取消回复