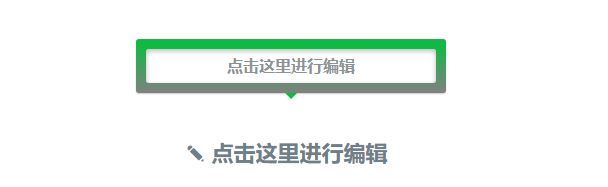
实现效果如下:
实现代码及注释
<!DOCTYPE html>
<html>
<head>
  <title>vue.js数据动态编辑</title>
  <meta charset="utf-8">
  <meta name="viewport" content="width=device-width, initial-scale=1.0">
  <style type="text/css">
    /* 在Vue实例没有准备好之前隐藏没有编译的mustache */
    [v-cloak]{
      display: none;
    }
    *{
      padding: 0;
      margin: 0;
    }
    body{
      font: 15px/1.3 'Open Sans', sans-serif;
      color: #5e5b64;
      text-align: center;
    }
    a, a:visited{
      outline: none;
      color: #389dc1;
    }
    a:hover{
      text-decoration: none;
    }
    section,footer,header,aside,nav{
      display: block;
    }
    /* tooltip style */
    .tooltip{
      background-color: #03c03c;
      background-image: -webkit-linear-gradient(top, #03c03c, gray);
      background-image: -moz-linear-gradient(top,#03c03c, gray);
      background-image: linear-gradient(top, #03c03c, gray);
      box-shadow: 0 1px 1px #ccc;
      border-radius: 3px;
      width: 290px;
      padding: 10px;
      position: absolute;
      left: 50%;
      margin-left: -150px;
      top: 50px;
    }
    /* 小三角形 */
    .tooltip:after{
      content: "";
      position: absolute;
      border: 6px solid #03c03c;
      border-color: #03c03c transparent transparent;
      width: 0;
      height: 0;
      bottom: -12px;
      left: 50%;
      margin-left: -6px;
    }
    .tooltip input{
      border: none;
      width: 100%;
      line-height: 34px;
      border-radius: 3px;
      box-shadow: 0 2px 6px #bbb inset;
      text-align: center;
      font-size: 16px;
      font-family: inherit;
      color: #8d9395;
      font-weight: bold;
      outline: none;
    }
    p{
      font-size: 22px;
      font-weight: bold;
      color: #6d8088;
      height: 30px;
      cursor: pointer;
    }
    p b{
      color: #fff;
      display: inline-block;
      padding: 5px 10px;
      background-color: #c4d7e0;
      border-radius: 2px;
      text-transform: uppercase;
      font-size: 18px;
    }
    p:before{
      content:"✎";
      display: inline-block;
      margin-right: 5px;
      font-weight: normal;
      vertical-align: text-bottom;
    }
    #main{
      height: 300px;
      position: relative;
      padding-top: 150px;
    }
  </style>
</head>
<body>
<!-- 在Vue实例准备好之前,v-vloak会隐藏任何没有编译的绑定数据 -->
<!-- 当元素被点击后,hideTooltp()方法将被调用 -->
<div id="main" v-cloak v-on:click="hideTooltip">
  <!-- 这是一个tooltip。
    v-on:clock.stop是一个关联点击事件的句柄,用于停止事件。
    v-if保证只有在showtooltip变量为真时才显示tooltip-->
  <div class="tooltip" v-on:click.stop v-if="show_tooltip">
    <!-- v-model绑定text_content模型的文本内容,对于任何文本编辑框的变化都会被自动更新 -->
    <input type="text" name="" v-model="text_content">
  </div>
  <!-- 当p区域被点击后,会调用toggleTooltip方法,阻止事件扩散 -->
  <!-- mustache表达式将会替换text_content的值,它将会自动更新变量值的所有变化 -->
  <p v-on:click.stop="toggleTooltip">{{text_content}}</p>
</div>
<script src="https://cdnjs.cloudflare.com/ajax/libs/vue/2.0.5/vue.min.js"></script>
<script type="text/javascript">
  // 创建一个Vue实例,并且传递一个可选对象
  var demo = new Vue({
    // 一个DOM元素表示view model
    el: '#main',
    // 定义属性值,给出初始值
    data: {
      show_tooltip :false,
      text_content: '点击这里进行编辑'
    },
    // 需要使用到的函数
    methods: {
      hideTooltip: function(){
        // 当model被修改,view将被自动更新
        this.show_tooltip = false;
      },
      toggleTooltip: function(){
        this.show_tooltip = !this.show_tooltip;
      }
    }
  })
</script>
</body>
</html>
总结
以上所述是小编给大家介绍的Vue.js实现输入框绑定的实例代码,希望对大家有所帮助,如果大家有任何疑问请给我留言,小编会及时回复大家的。在此也非常感谢大家对脚本之家网站的支持!
最后
以上就是爱笑荔枝最近收集整理的关于Vue.js实现输入框绑定的实例代码的全部内容,更多相关Vue.js实现输入框绑定内容请搜索靠谱客的其他文章。
本图文内容来源于网友提供,作为学习参考使用,或来自网络收集整理,版权属于原作者所有。


发表评论 取消回复