线性布局
LinearLayout线性布局是程序中最常见的布局方式之一,线性布局可以分为水平线性布局和垂直线性布局两种,分别是通过android:orientation="horizontal"和vertical"来控制的。
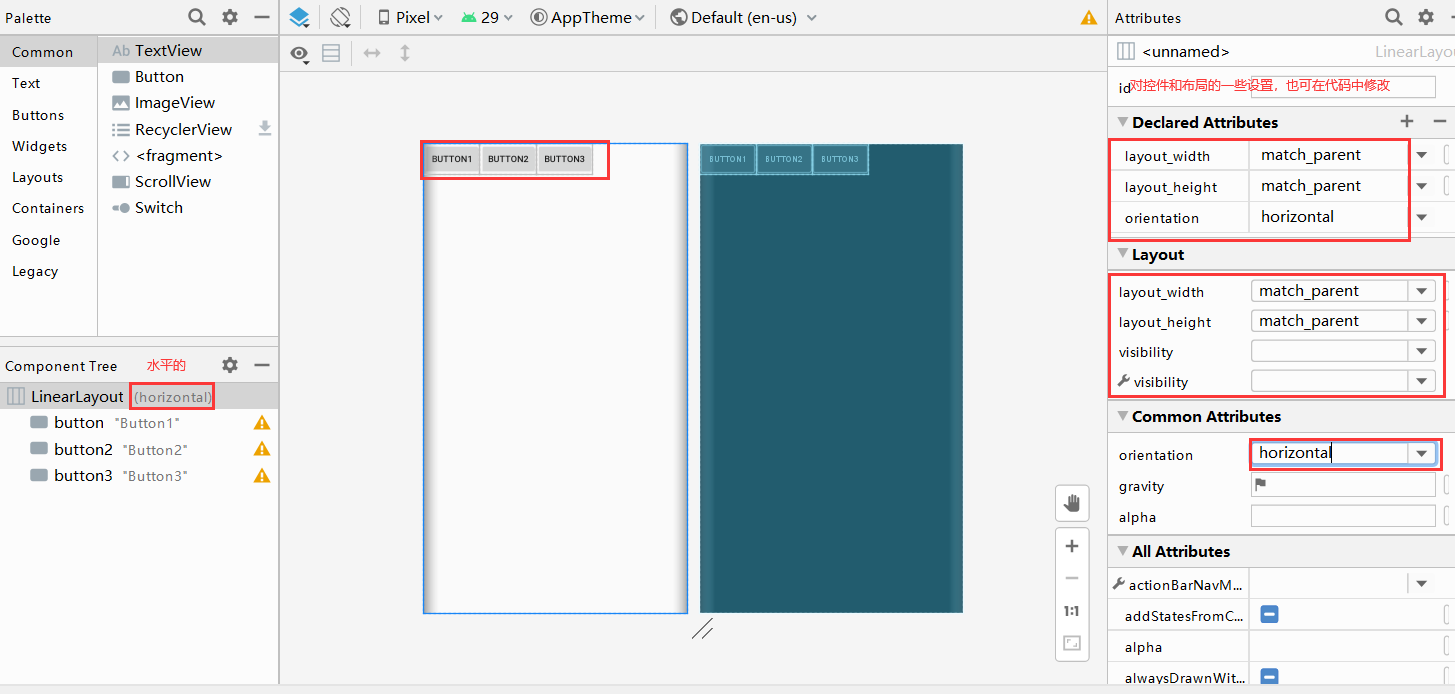
垂直的

android:layout_gravity:是本元素相对于父元素的对齐方式。
android:padding=“10dp”:是本元素所有子元素与父元素边缘的距离,设置在父元素上
android:layout_marginLeft=“10dp”:子元素与父元素边缘的距离,设置在子元素上
android:layout_weight=“1”:分配分配权重值,如果垂直方向设置权重,高度应设置为0
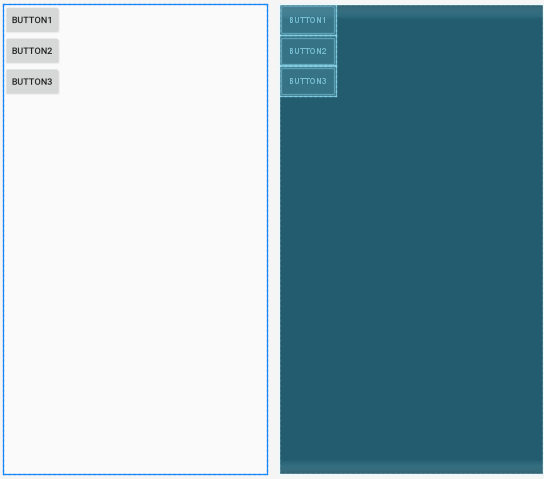
一个简单的线性布局例子
<?xml version="1.0" encoding="utf-8"?>
<LinearLayout xmlns:android="http://schemas.android.com/apk/res/android"
    android:layout_width="match_parent"
    android:layout_height="match_parent"
    android:orientation="vertical">

    <Button
        android:id="@+id/button"
        android:layout_width="wrap_content"
        android:layout_height="wrap_content"
        android:text="Button1" />

    <Button
        android:id="@+id/button2"
        android:layout_width="wrap_content"
        android:layout_height="wrap_content"
        android:text="Button2" />

    <Button
        android:id="@+id/button3"
        android:layout_width="wrap_content"
        android:layout_height="wrap_content"
        android:text="Button3" />
</LinearLayout>
相对布局
RelaiveLayout相对布局在实际开发中用的比较多的布局之一。顾名思义是有参照对象的,是以某个兄弟组件,或者父容器来决定的
| 常用属性 | 解释 |
|---|---|
| android:layout_toLeftOf | 参考兄弟控件左边界对齐 |
| android:layout_toRightOf | 参考兄弟控件右边界对齐 |
| android:layout_above | 参考兄弟控件上边界对齐 |
| android:layout_below | 参考兄弟控件下边界对齐 |
| android:layout_alighParentLeft | 参考父容器左侧对齐 |
| android:layout_alighParentRight | 参考父容器右侧对齐 |
| android:layout_alighParentTop | 参考父容器顶端对齐 |
| android:layout_alighParentBottom | 参考父容器底部对齐 |
| android:layout_centerHorizontal | 在父容器中水平居中 |
| android:layout_centerVertical | 在父容器中垂直居中 |
| android:layout_centerInParent | 在父容器中中央位置 |
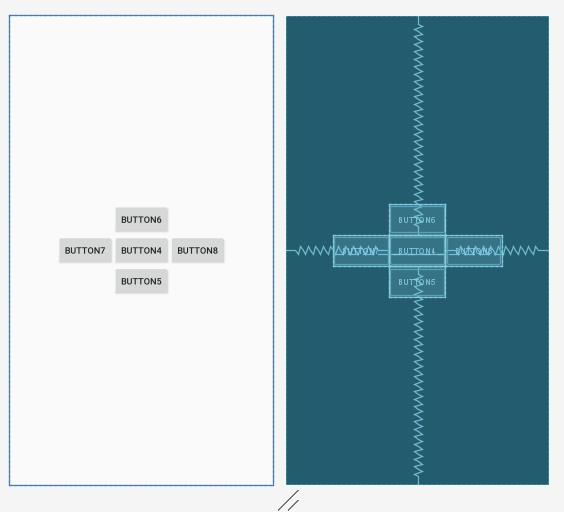
简单例子:
<?xml version="1.0" encoding="utf-8"?>
<RelativeLayout xmlns:android="http://schemas.android.com/apk/res/android"
    android:layout_width="match_parent"
    android:layout_height="match_parent">

    <Button
        android:id="@+id/button4"
        android:layout_width="wrap_content"
        android:layout_height="wrap_content"
        android:layout_centerInParent="true"
        android:text="Button4" />

    <Button
        android:id="@+id/button5"
        android:layout_width="wrap_content"
        android:layout_height="wrap_content"
        android:layout_below="@id/button4"
        android:layout_alignLeft="@id/button4"
        android:text="Button5" />

    <Button
        android:id="@+id/button6"
        android:layout_width="wrap_content"
        android:layout_height="wrap_content"
        android:layout_above="@id/button4"
        android:layout_alignRight="@id/button4"
        android:text="Button6" />

    <Button
        android:id="@+id/button7"
        android:layout_width="wrap_content"
        android:layout_height="wrap_content"
        android:layout_toLeftOf="@id/button4"
        android:layout_alignBaseline="@id/button4"
        android:text="Button7" />

    <Button
        android:id="@+id/button8"
        android:layout_width="wrap_content"
        android:layout_height="wrap_content"
        android:layout_toRightOf="@id/button4"
        android:layout_alignBaseline="@id/button4"
        android:text="Button8" />
</RelativeLayout>
最后
以上就是会撒娇荷花最近收集整理的关于Android:线性布局和相对布局的全部内容,更多相关Android内容请搜索靠谱客的其他文章。
本图文内容来源于网友提供,作为学习参考使用,或来自网络收集整理,版权属于原作者所有。


发表评论 取消回复