线程虽然在web开发中用的不算特别多,但在特定的情况下还是能发挥重要重要作用的,因此即使用的少还是掌握下比较好;下面先回顾下比较线程的常规实现方法
1 继承Thread类
2 实现runnable接口(使用较多)
java5之后有了新的线程实现方式,java5可以使用Executor来启动线程,效率更好;这次主要从Executor执行runnable任务、callable任务、自定义线程池三个方面进行学习分享
一 Executor执行runnable任务、callable任务
callable任务相比runnable任务的区别在于它有返回值,每个任务执行后可以通过Future返回结果
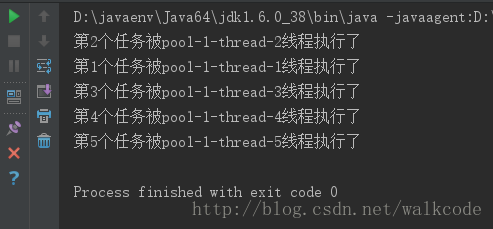
1 Executor执行runnable任务(打印执行的任务和负责执行的线程名称)
package com.debug;

import java.util.concurrent.*;

public class Executor01 {
       public static void main(String aargs[]){
                     //ExecutorService pool=Executors.newFixedThreadPool(5);固定数目线程池
                     //ExecutorService pool=Executors.newSingleThreadExecutor();单例线程池
                     ExecutorService executorService=Executors.newCachedThreadPool();//缓存型池子

                     for (int i = 1; i <= 5; i++){
                           executorService.execute(new Executor01Runnable(i));

                     }
                    executorService.shutdown();

       }

}
class Executor01Runnable implements Runnable{
    private int task;
    public Executor01Runnable(int task){
        this.task=task;
    }
   public void run(){
       System.out.println("第"+task+"个任务被"+Thread.currentThread().getName() + "线程执行了");
   }
}
2 Executor执行callable任务
runnable任务执行使用execute方法,但callable使用submit;
submit 也是首先选择空闲线程来执行任务,如果没有,才会创建新的线程来执行任务。另外,需要注意:如果Future的返回尚未完成,则get()方法会阻塞等待,直到Future完成返回,可以通过调用isDone()方法判断Future是否完成了返回。
package com.debug;

import java.util.ArrayList;
import java.util.Iterator;
import java.util.List;
import java.util.concurrent.*;

public class UseCallable {
    public static void main(String aargs[]){
        ExecutorService pool=Executors.newCachedThreadPool();
        List<Future<String>> arr=new ArrayList<Future<String>>();
        for(int i=1;i<=10;i++){
            Future<String> res=pool.submit(new ThreadTaskWithResult(i));
            arr.add(res);


        }
        Iterator<Future<String>> it=arr.iterator();
        while(it.hasNext()){
            Future<String> result=it.next();

            try {
                System.out.println(result.get());
                //System.out.println(result.get());

            } catch (InterruptedException e) {
                e.printStackTrace();
            } catch (ExecutionException e) {
                e.printStackTrace();
            } finally {
                pool.shutdown();
            }

        }
        // pool.shutdown();
    }

}

class ThreadTaskWithResult implements Callable<String> {
    private int count;
    public ThreadTaskWithResult(int count){
        this.count=count;
    }
    public String call() throws Exception {
        System.out.println("call()方法被自动调用!!!    " + Thread.currentThread().getName());
        return "第"+count+"个任务执行完毕,执行任务的线程是:"+Thread.currentThread().getName();
    }
}
执行的结果截图如下所示:

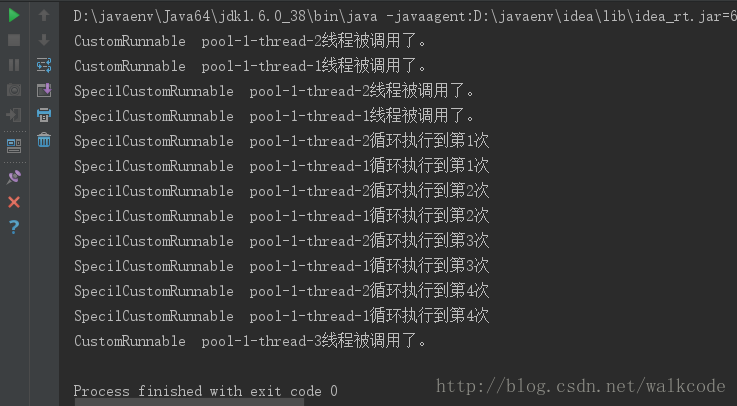
二 自定义线程池
package com.debug;

import java.util.concurrent.*;

public class CustomThreadPool {

    public static void main(String args[]) throws Exception{
        //创建等待队列
        BlockingQueue<Runnable> block=new ArrayBlockingQueue<Runnable>(30);
        //创建线程池,最小3个,最大10个
        ThreadPoolExecutor pool=new ThreadPoolExecutor(3,5,1000, TimeUnit.MILLISECONDS,block);

        pool.execute(new CustomRunnable());
        pool.execute(new CustomRunnable());
        pool.execute(new CustomRunnable());
        pool.execute(new SpecilCustomRunnable());
        pool.execute(new SpecilCustomRunnable());

        pool.shutdown();

    }
}
class CustomRunnable implements Runnable{
    public void run(){
        System.out.println("CustomRunnable  "+Thread.currentThread().getName() + "线程被调用了。");
    }
}
class SpecilCustomRunnable implements Runnable{
    public void run(){
        System.out.println("SpecilCustomRunnable  "+Thread.currentThread().getName() + "线程被调用了。");
        for(int i=1;i<5;i++){
            System.out.println("SpecilCustomRunnable  "+Thread.currentThread().getName() + "循环执行到第"+i+"次");
        }

    }
}
文章可能写的潦草,只能算自己的随笔和摘抄,大部分灵感都来源于下面这篇博客,可以顺带看一看
http://blog.csdn.net/ns_code/article/details/17465497
最后
以上就是寂寞可乐最近收集整理的关于java线程之Executor框架与线程池的全部内容,更多相关java线程之Executor框架与线程池内容请搜索靠谱客的其他文章。
本图文内容来源于网友提供,作为学习参考使用,或来自网络收集整理,版权属于原作者所有。


发表评论 取消回复