**
Web登录
**
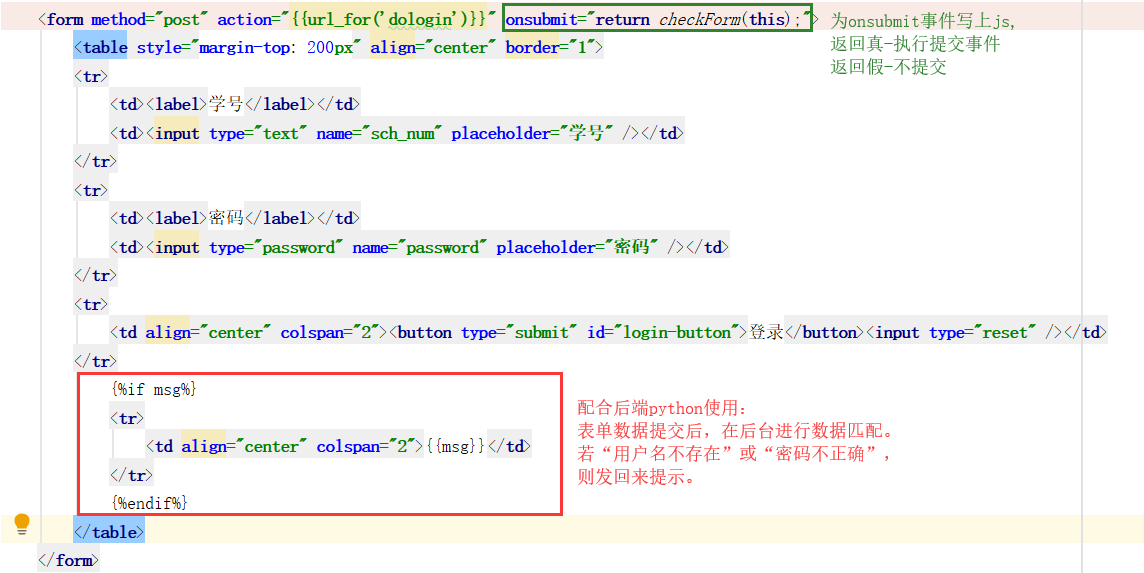
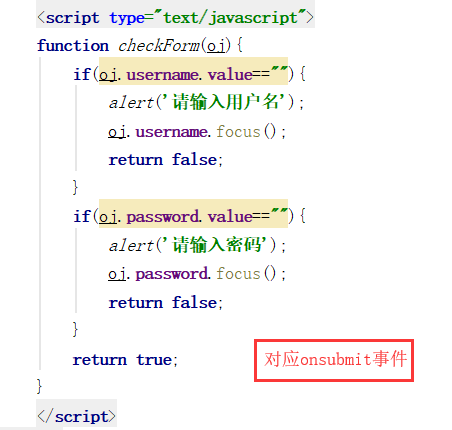
1、 写一个登录界面,并为其写上js
2、 后端代码(python)
#进入登录界面
@app.route("/")
def login():
    return render_template('login.html')
#获取表单提交的数据,并返送结果
@app.route("/dologin",methods=["post"])
def dologin():
sch_num= request.form['sch_num']
password= request.form['password']
sql="select a.name,a.sch_num,a.password,a.status,b.role_id from viewer a left join user_link b on a.sch_num=b.sch_num where a.sch_num='{}'"
sql=sql.format(sch_num)
db = pymysql.connect(hostName, userName, userPassword, dbName)
_cursor = db.cursor()
user=None
try:
_cursor.execute(sql)
user = _cursor.fetchone()
except:
print('出错啦')
_cursor.close()
db.close()
# 处理数据
# A、判断用户名是否存在
if (user == None):
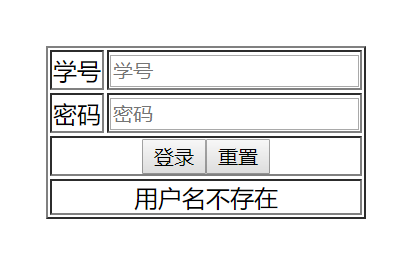
return render_template('login.html', msg="用户名不存在")
# B、判断密码是否正确
if (user[2]!=password):
return render_template('login.html', msg="密码不正确")
# C、判断状态是否可用
if (user[3]!= 1):
return render_template('login.html', msg="账号已被锁定,请联系管理员")
# D、登录信息写入session
session['isLogin'] = 'Y'
session['userInfo'] = user
return redirect(url_for("index"))
运行结果:
存储:
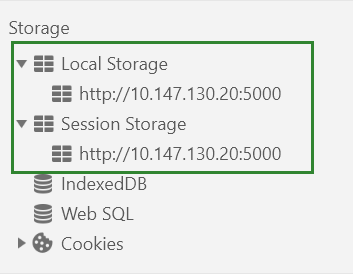
=>这里还可以在手机里写一个小的数据库(但是有大小限制)
**
App登录
**
Login.vue
<template>

<div id="page">

<van-nav-bar title="用户登录"/>

<van-cell-group>
    <van-field
      v-model="my.sch_num"
      required
      clearable
	  type="number"
      label="用户名"
      placeholder="请输入用户名"
    />

    <van-field
      v-model="my.password"
	  required
      type="password"
      label="密码"
      placeholder="请输入密码"
/>
</van-cell-group>

<div class="btns">
<van-button class="jumpBtn" type="primary" @click.native="handleClick" size="large">登录</van-button>
</div>

<div class="tabarTop90px"></div>

</div>

</template>

<script>
import {getStore,setStore} from '@/store'        //取、写数据到本地
import axios from 'axios'
import Config from '../config'

import {Button, Field ,Cell, CellGroup, NavBar, Dialog} from 'vant';

export default {
  name: 'Login',
//data接收提交的数据:学号&密码
  data () {
    return {
      isShowx:false,
      my:{sch_num:"",password:""}
    }
  },
//componemts定义组件的名字
  components: {
	[Field.name]: Field,
	[Cell.name]: Cell,
	[CellGroup.name]: CellGroup,
	[NavBar.name]: NavBar,
	[Button.name]: Button,
	[Dialog.name]: Dialog
  },
//methods对应登录按钮的click事件:判空&登录(记录用户信息、授权token、跳转)(失败)
  methods:{
	  handleClick(){
		  //1判空
		  if(this.my.sch_num==""){
			  Dialog.alert({
				  title:'系统提示',
				  message:'请输入用户名'
			  }).then(()=>{
				  //on close
				})
			  return;
		  }
		  if(this.my.password==""){
			  Dialog.alert({
				  title:'系统提示',
				  message:'请输入密码'
			  }).then(()=>{
				//on close
				})
			return;
		  }
		  //2登录
		  let config = {};
		  //axios.post(Config.baseUrl+'/gsp/api/member/login',this.my, config)  //这是测试
		  axios.post('http://127.0.0.1:5000/doLoginJson' , this.my , config)   //发送请求,传递对象my包含的数据:		  .then(response => {                                       //返回后台函数的结果
		  	console.log(response);
		  	if (response.data.status == "Y") {
				                         //提示登陆成功
				Dialog.alert({
					title:'系统提示',
					message:'登陆成功'
				}).then(()=>{
					//on close
				  })
				//3、记录用户信息
				setStore({name:'loginInfo',content:this.my})  //将my的信息存到name为loginInf的对象里去,取:getStore.name
				setStore({name:'userInfo',content:response.data.data})
				//4、授权token(类似网页的session,给登陆的人授权一个序列号)

				//5、跳转
				this.$router.push('/lectureList')

			}else{                         //提示登陆失败
				Dialog.alert({
					title:'系统提示',
					message:response.data.msg
				}).then(()=>{
					//on close
				  })
			}
		  })
	  }
  },
  created () {
  }
}
</script>
Python
注意要在开头import json 以及跨域访问:
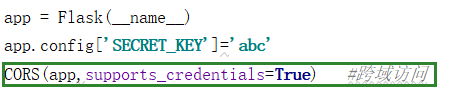
DoLoginJson主体代码:
@app.route("/doLoginJson",methods=['post'])
def doLoginJson():
#获取参数
data = request.get_data()
json_data = json.loads(data.decode('utf-8')) #json转化为对象
sch_num = json_data.get('sch_num')
password = json_data.get('password')
sql="select a.name,a.sch_num,a.password,a.status,b.role_id from viewer a left join user_link b on a.sch_num=b.sch_num where a.sch_num='{}'"
sql=sql.format(sch_num)
db = pymysql.connect(hostName, userName, userPassword, dbName)
_cursor = db.cursor()
user=None
try:
print(sql)
print(sch_num)
print(password)
_cursor.execute(sql)
user = _cursor.fetchone()
print(user[2])
except:
print('出错啦')
_cursor.close()
db.close()
# 处理数据
# A、判断用户名是否存在
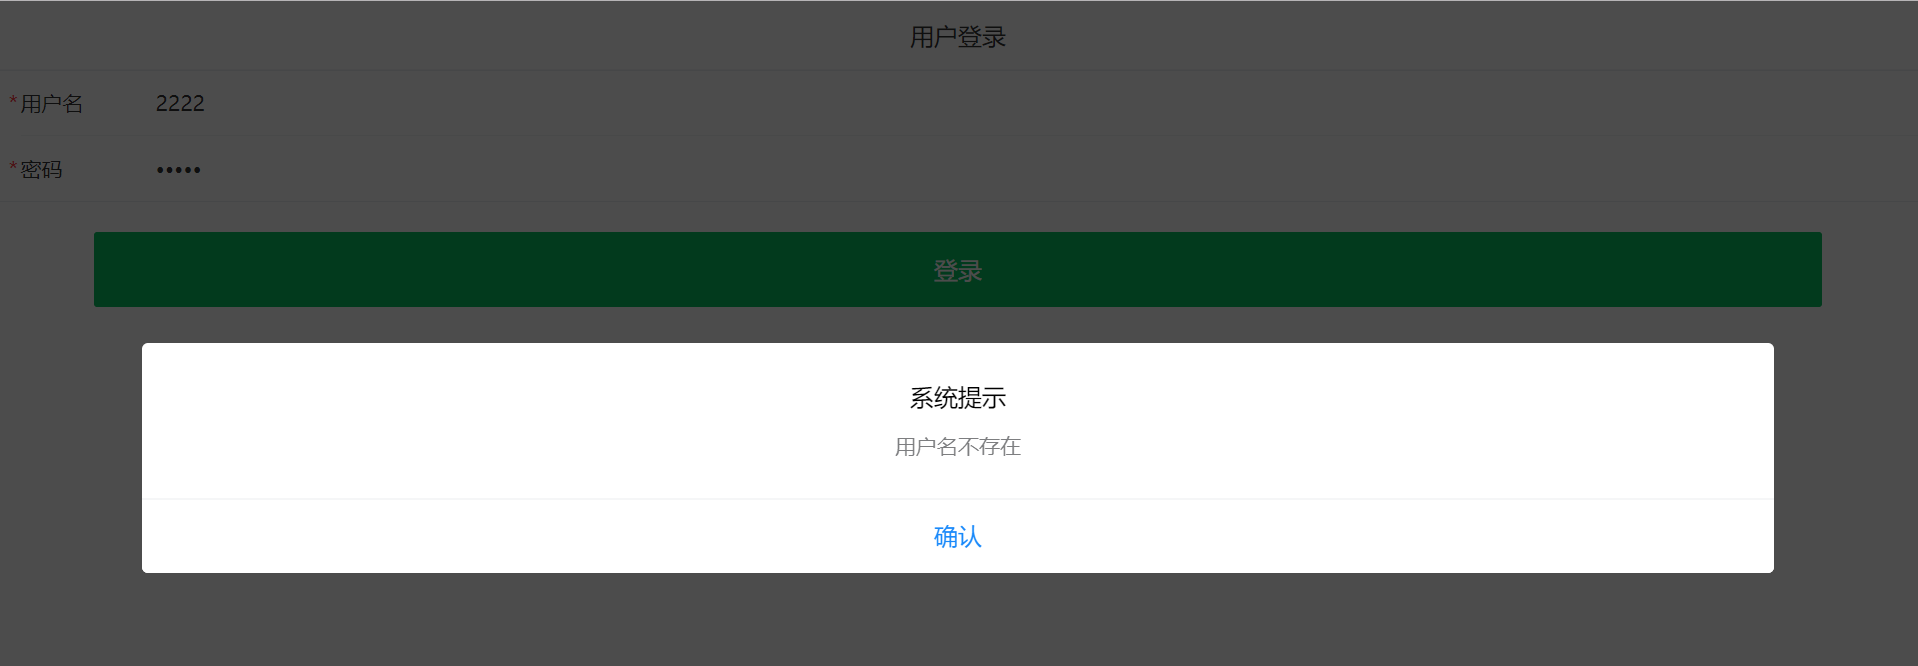
if (user == None):
d = { "status":"N","msg":"用户名不存在" }
return json.dumps(d,ensure_ascii=False)
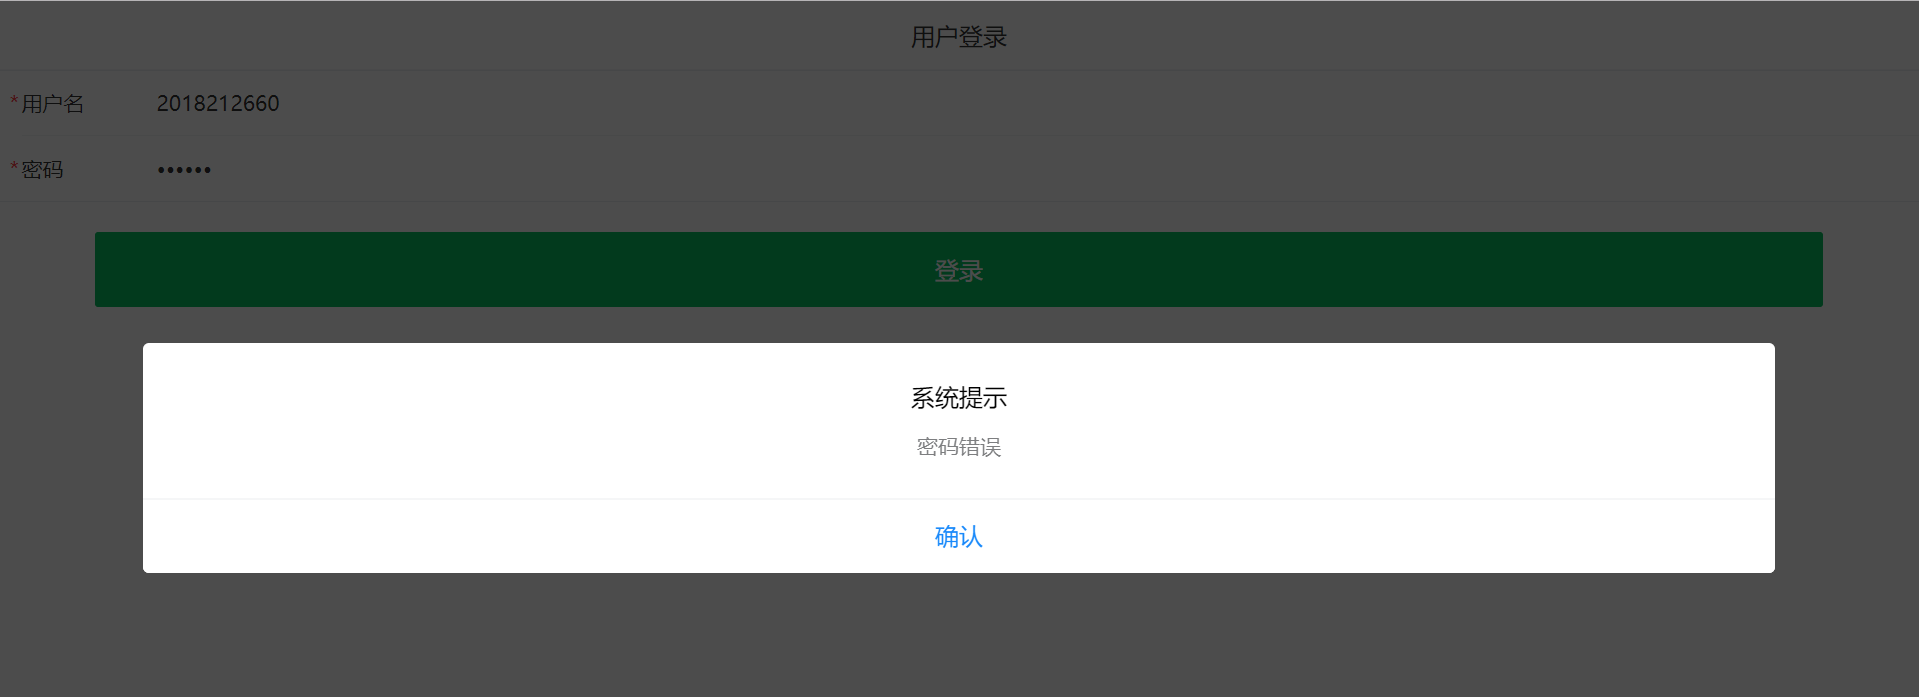
# B、判断密码是否正确
if (user[2]!=password):
d = { "status": "N", "msg": "密码错误" }
return json.dumps(d, ensure_ascii=False)
# C、判断状态是否可用
if (user[3]!= 1):
d = { "status": "N", "msg": "账号已被锁定,请联系管理员" }
return json.dumps(d, ensure_ascii=False)
# D、登录信息写入session
d = { "status":"Y","msg": "登陆成功","data":user }
return json.dumps(d,ensure_ascii=False)
如遇以下错误:注意vue中axios是否为post ,python中是否methods=[‘post’]

运行结果:


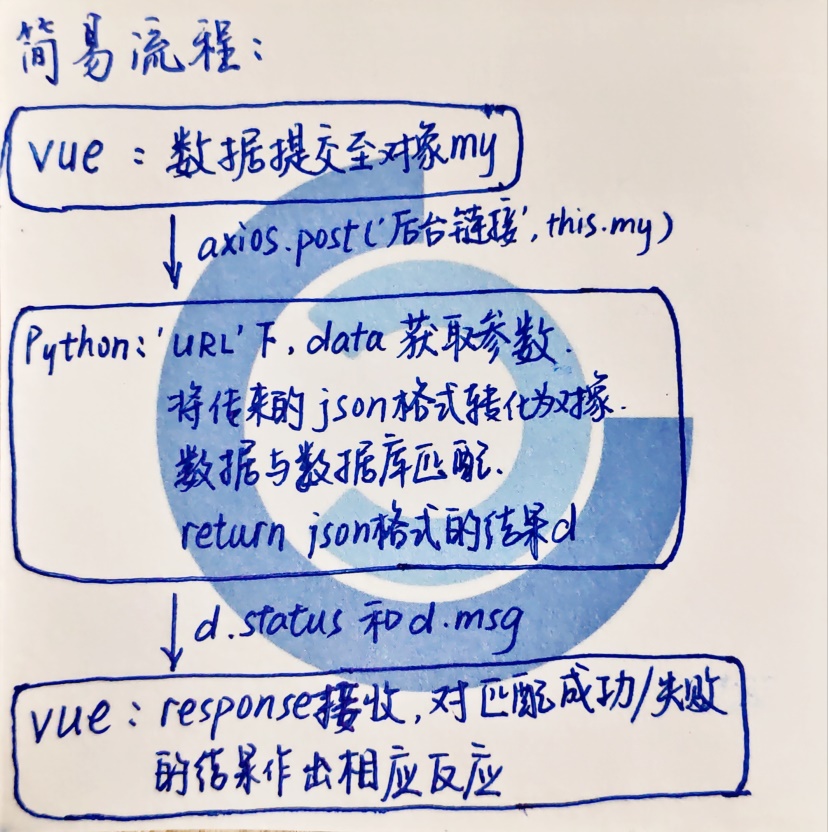
数据传递总结:
最后
以上就是雪白黑米最近收集整理的关于用户登录功能实现(web登录、App【vue】登录)的全部内容,更多相关用户登录功能实现(web登录、App【vue】登录)内容请搜索靠谱客的其他文章。
本图文内容来源于网友提供,作为学习参考使用,或来自网络收集整理,版权属于原作者所有。


发表评论 取消回复