需求背景
项目中快速集成·限流组件Sentinel
Tips技术点
1. 引入spring-cloud-starter-alibaba-sentinel依赖包
注:默认监控所有访问接口
代码演示
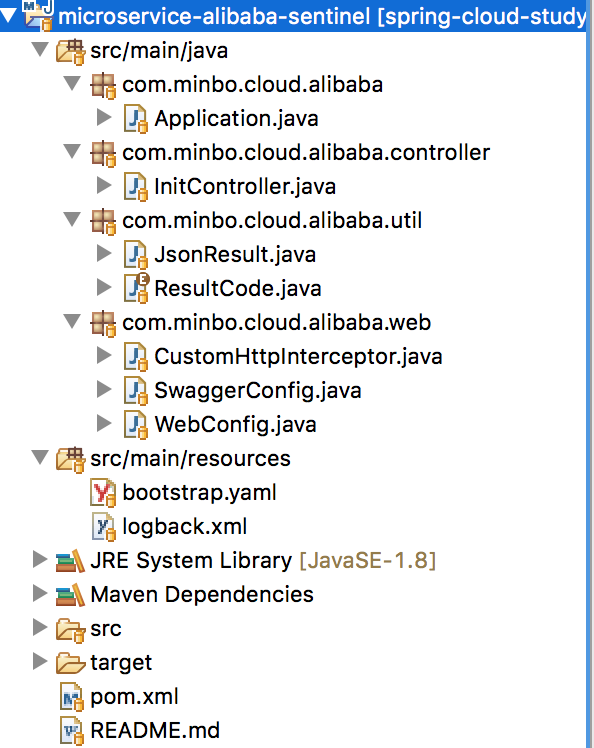
1. 项目目录结构
2. pom.xml依赖组件
<?xml version="1.0" encoding="UTF-8"?>
<project xmlns="http://maven.apache.org/POM/4.0.0"
	xmlns:xsi="http://www.w3.org/2001/XMLSchema-instance"
	xsi:schemaLocation="http://maven.apache.org/POM/4.0.0 http://maven.apache.org/xsd/maven-4.0.0.xsd">
	<modelVersion>4.0.0</modelVersion>

	<artifactId>microservice-alibaba-sentinel</artifactId>
	<packaging>jar</packaging>

	<parent>
		<groupId>com.minbo.cloud.alibaba</groupId>
		<artifactId>spring-cloud-alibaba-study-parent</artifactId>
		<version>0.0.1-SNAPSHOT</version>
	</parent>

	<dependencies>
		<dependency>
			<groupId>org.springframework.boot</groupId>
			<artifactId>spring-boot-starter-web</artifactId>
		</dependency>
		<dependency>
			<groupId>org.projectlombok</groupId>
			<artifactId>lombok</artifactId>
		</dependency>
		<dependency>
			<groupId>io.springfox</groupId>
			<artifactId>springfox-swagger2</artifactId>
		</dependency>
		<dependency>
			<groupId>io.springfox</groupId>
			<artifactId>springfox-swagger-ui</artifactId>
		</dependency>
		<dependency>
			<groupId>com.github.xiaoymin</groupId>
			<artifactId>swagger-bootstrap-ui</artifactId>
		</dependency>
		<dependency>
			<groupId>net.sf.json-lib</groupId>
			<artifactId>json-lib-ext-spring</artifactId>
		</dependency>
		<dependency>
			<groupId>org.springframework.cloud</groupId>
			<artifactId>spring-cloud-starter-alibaba-nacos-discovery</artifactId>
		</dependency>
		<dependency>
			<groupId>org.springframework.cloud</groupId>
			<artifactId>spring-cloud-starter-alibaba-nacos-config</artifactId>
		</dependency>
		<dependency>
			<groupId>org.springframework.cloud</groupId>
			<artifactId>spring-cloud-starter-alibaba-sentinel</artifactId>
		</dependency>
	</dependencies>
</project>
3. bootstrap.yaml配置文件
配置sentinel
spring:
   application:
      name: microservice-alibaba-sentinel
   profiles:
      active: dev
   cloud:
      nacos:
         discovery:
            server-addr: 127.0.0.1:8848
            namespace: 2bc5565f-453f-4b1c-bde4-eafe23bdb2f0
         config:
            server-addr: 127.0.0.1:8848
            namespace: 2bc5565f-453f-4b1c-bde4-eafe23bdb2f0
            file-extension: properties
            shared-dataids: microservice-alibaba-sentinel.properties
            refreshable-dataids: microservice-alibaba-sentinel.properties
      sentinel:
         transport:
            port: 8719 # 默认数据端口
            dashboard: 127.0.0.1:9191
# server
server:
   port: 9092
对Nacos配置不熟,可以先阅读下面两篇文章
- SpringCloud Alibaba从入门到精通教程(二)- 项目中快速集成配置中心·Nacos服务注册发现功能
- SpringCloud Alibaba从入门到精通教程(三)- 项目中快速集成配置中心·Nacos配置中心管理功能
4. 接口类
package com.minbo.cloud.alibaba.controller;

import org.springframework.web.bind.annotation.GetMapping;
import org.springframework.web.bind.annotation.RestController;

import io.swagger.annotations.Api;
import io.swagger.annotations.ApiOperation;
import lombok.extern.slf4j.Slf4j;

/**
 * @author Minbo
 */
@RestController
@Slf4j
@Api(tags = { "init" })
public class InitController {

	@ApiOperation(value = "欢迎入口", httpMethod = "GET")
	@GetMapping("/hello")
	public String hello() {
		log.info("microservice-alibaba-sentinel");
		return "Hello, greetings from microservice-alibaba-sentinel";
	}
}
5. 启动类
package com.minbo.cloud.alibaba;

import org.springframework.boot.SpringApplication;
import org.springframework.boot.autoconfigure.SpringBootApplication;
import org.springframework.cloud.client.discovery.EnableDiscoveryClient;

import com.github.xiaoymin.swaggerbootstrapui.annotations.EnableSwaggerBootstrapUI;

/**
 * 程序主入口
 *
 * @author Minbo
 *
 */
@SpringBootApplication
@EnableSwaggerBootstrapUI
@EnableDiscoveryClient
public class Application {

	public static void main(String[] args) {
		SpringApplication.run(Application.class, args);
	}

}
6. 测试
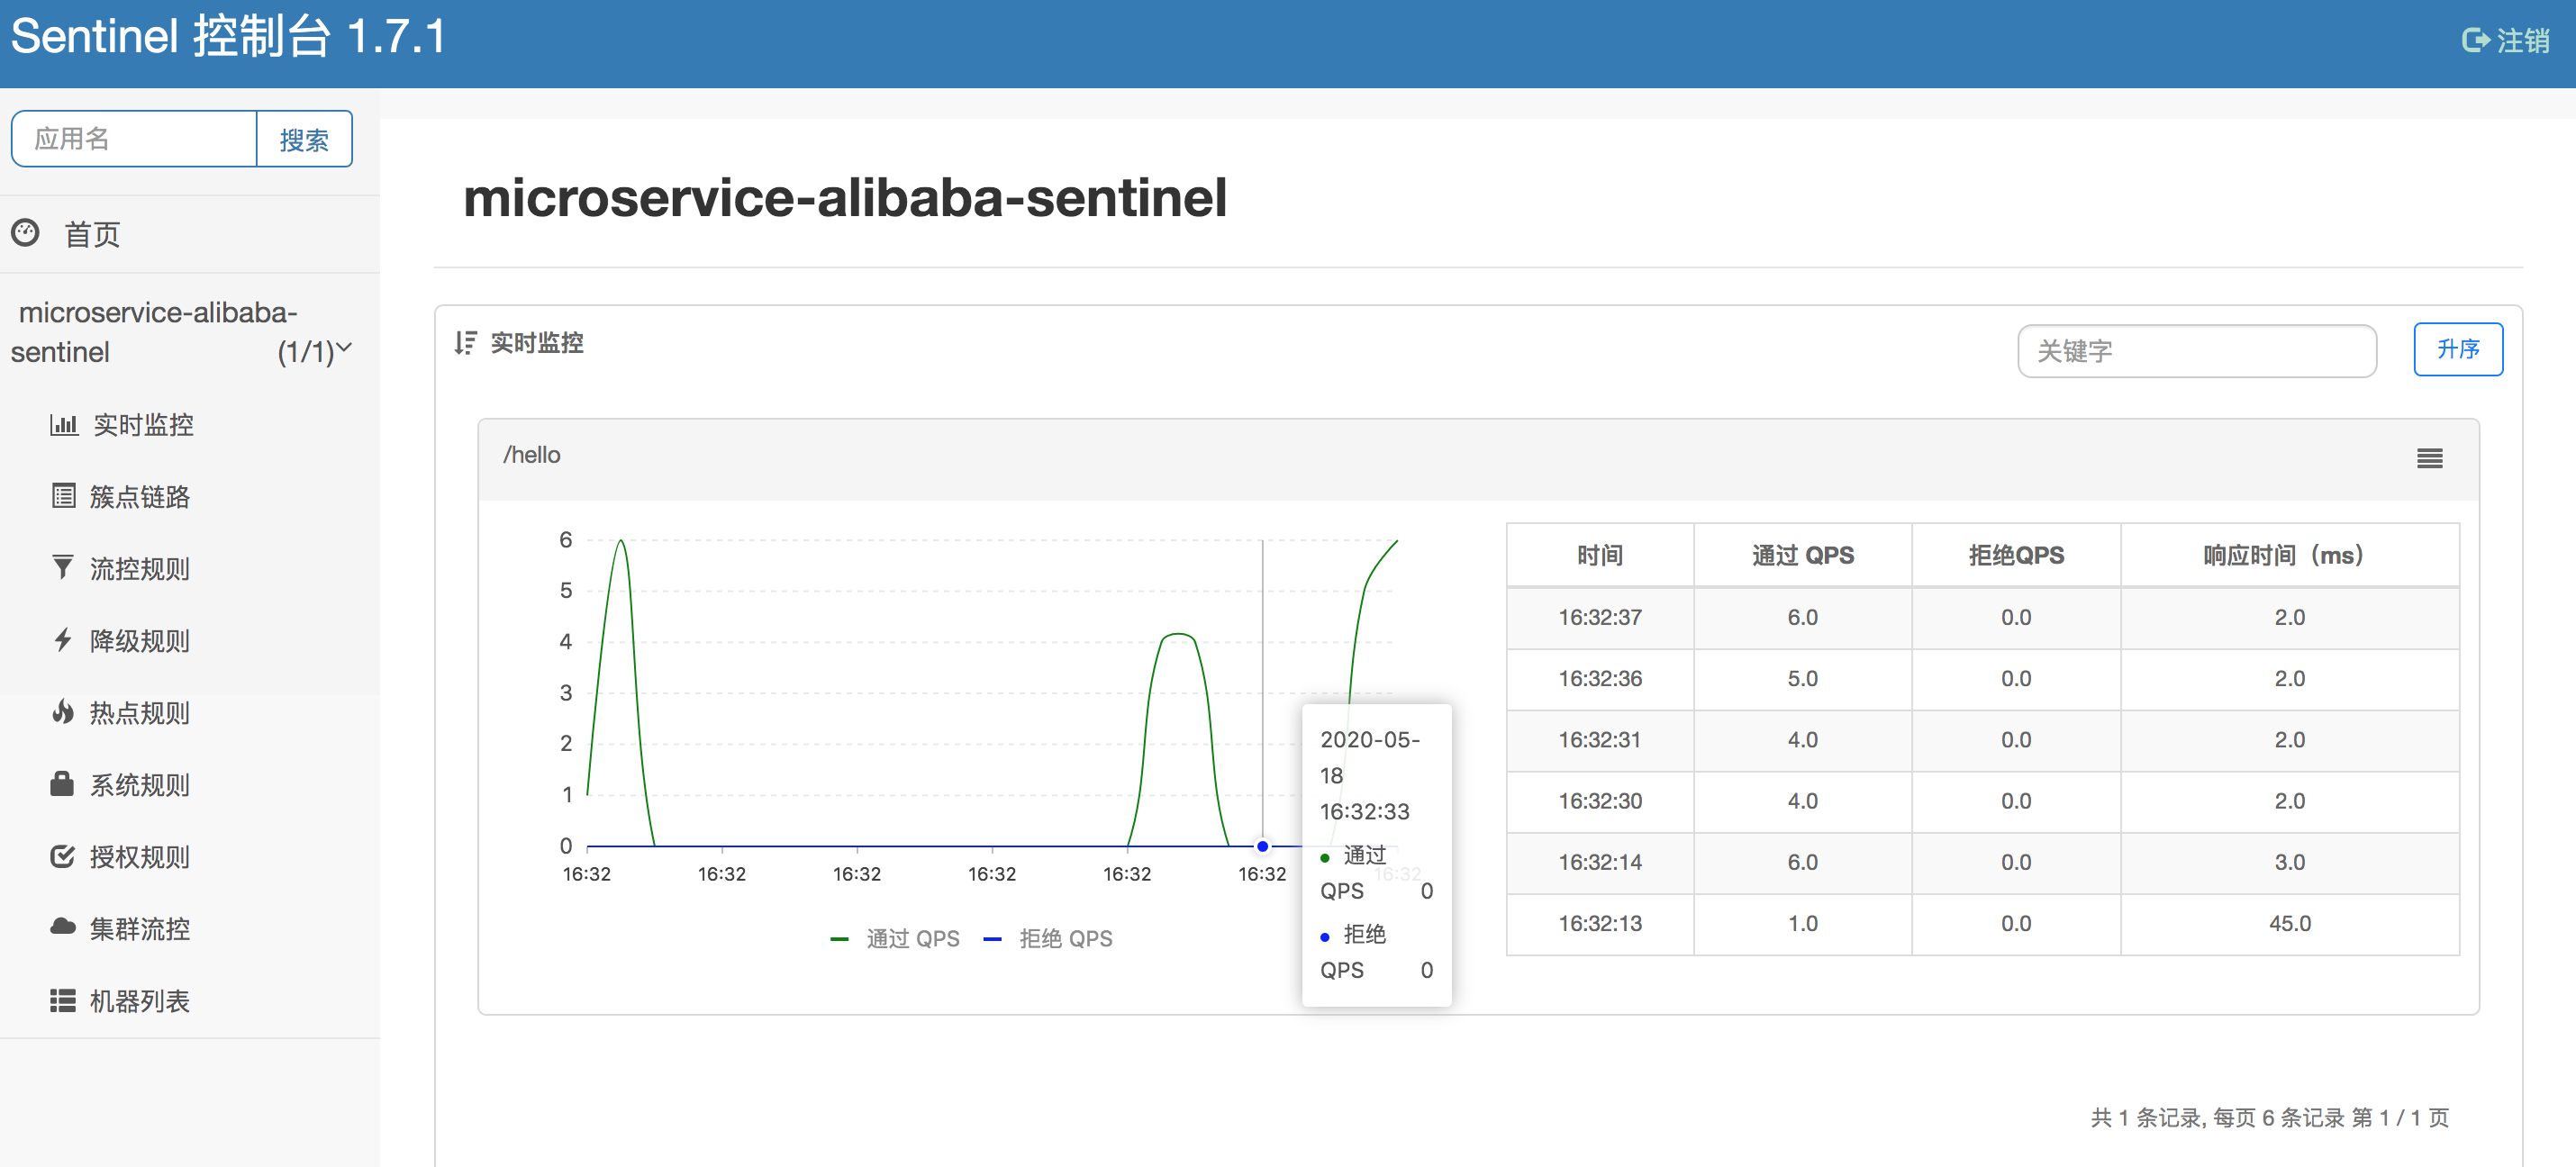
多访问几次接口:http://localhost:9092/hello
Sentinel控制台,可以看到下图,实时监控接口访问数据:
高级用法
1. 流控规则用法
案例:新增接口流控规则,基于QPS,限定只允许每次一个请求通过
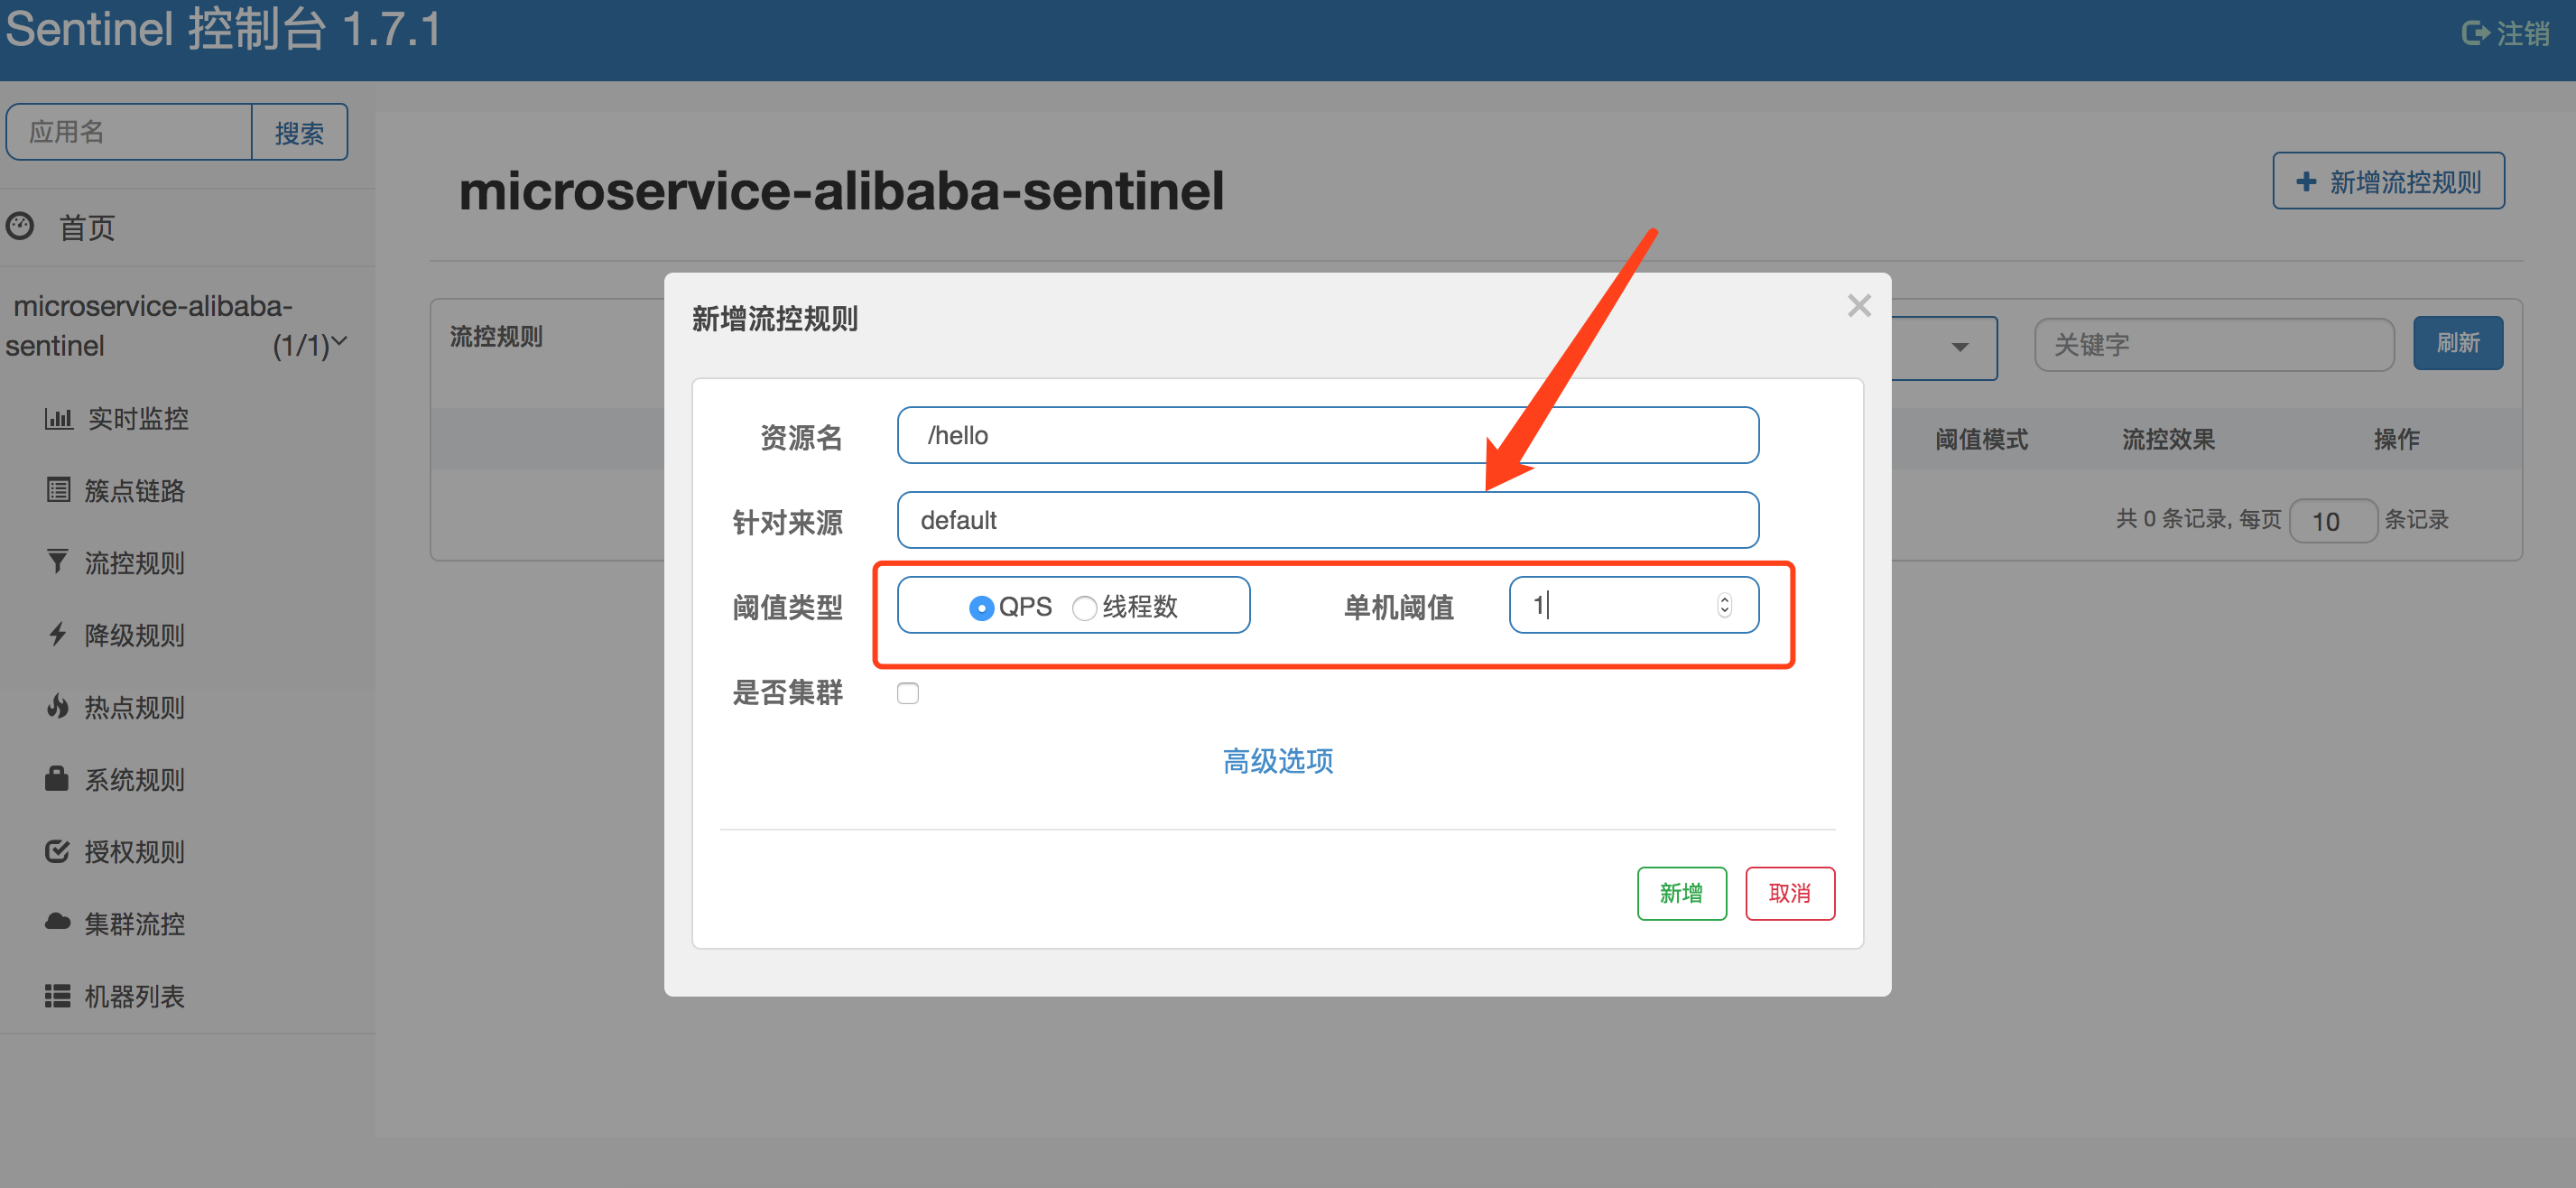
新增规则成功后

再次测试接口:
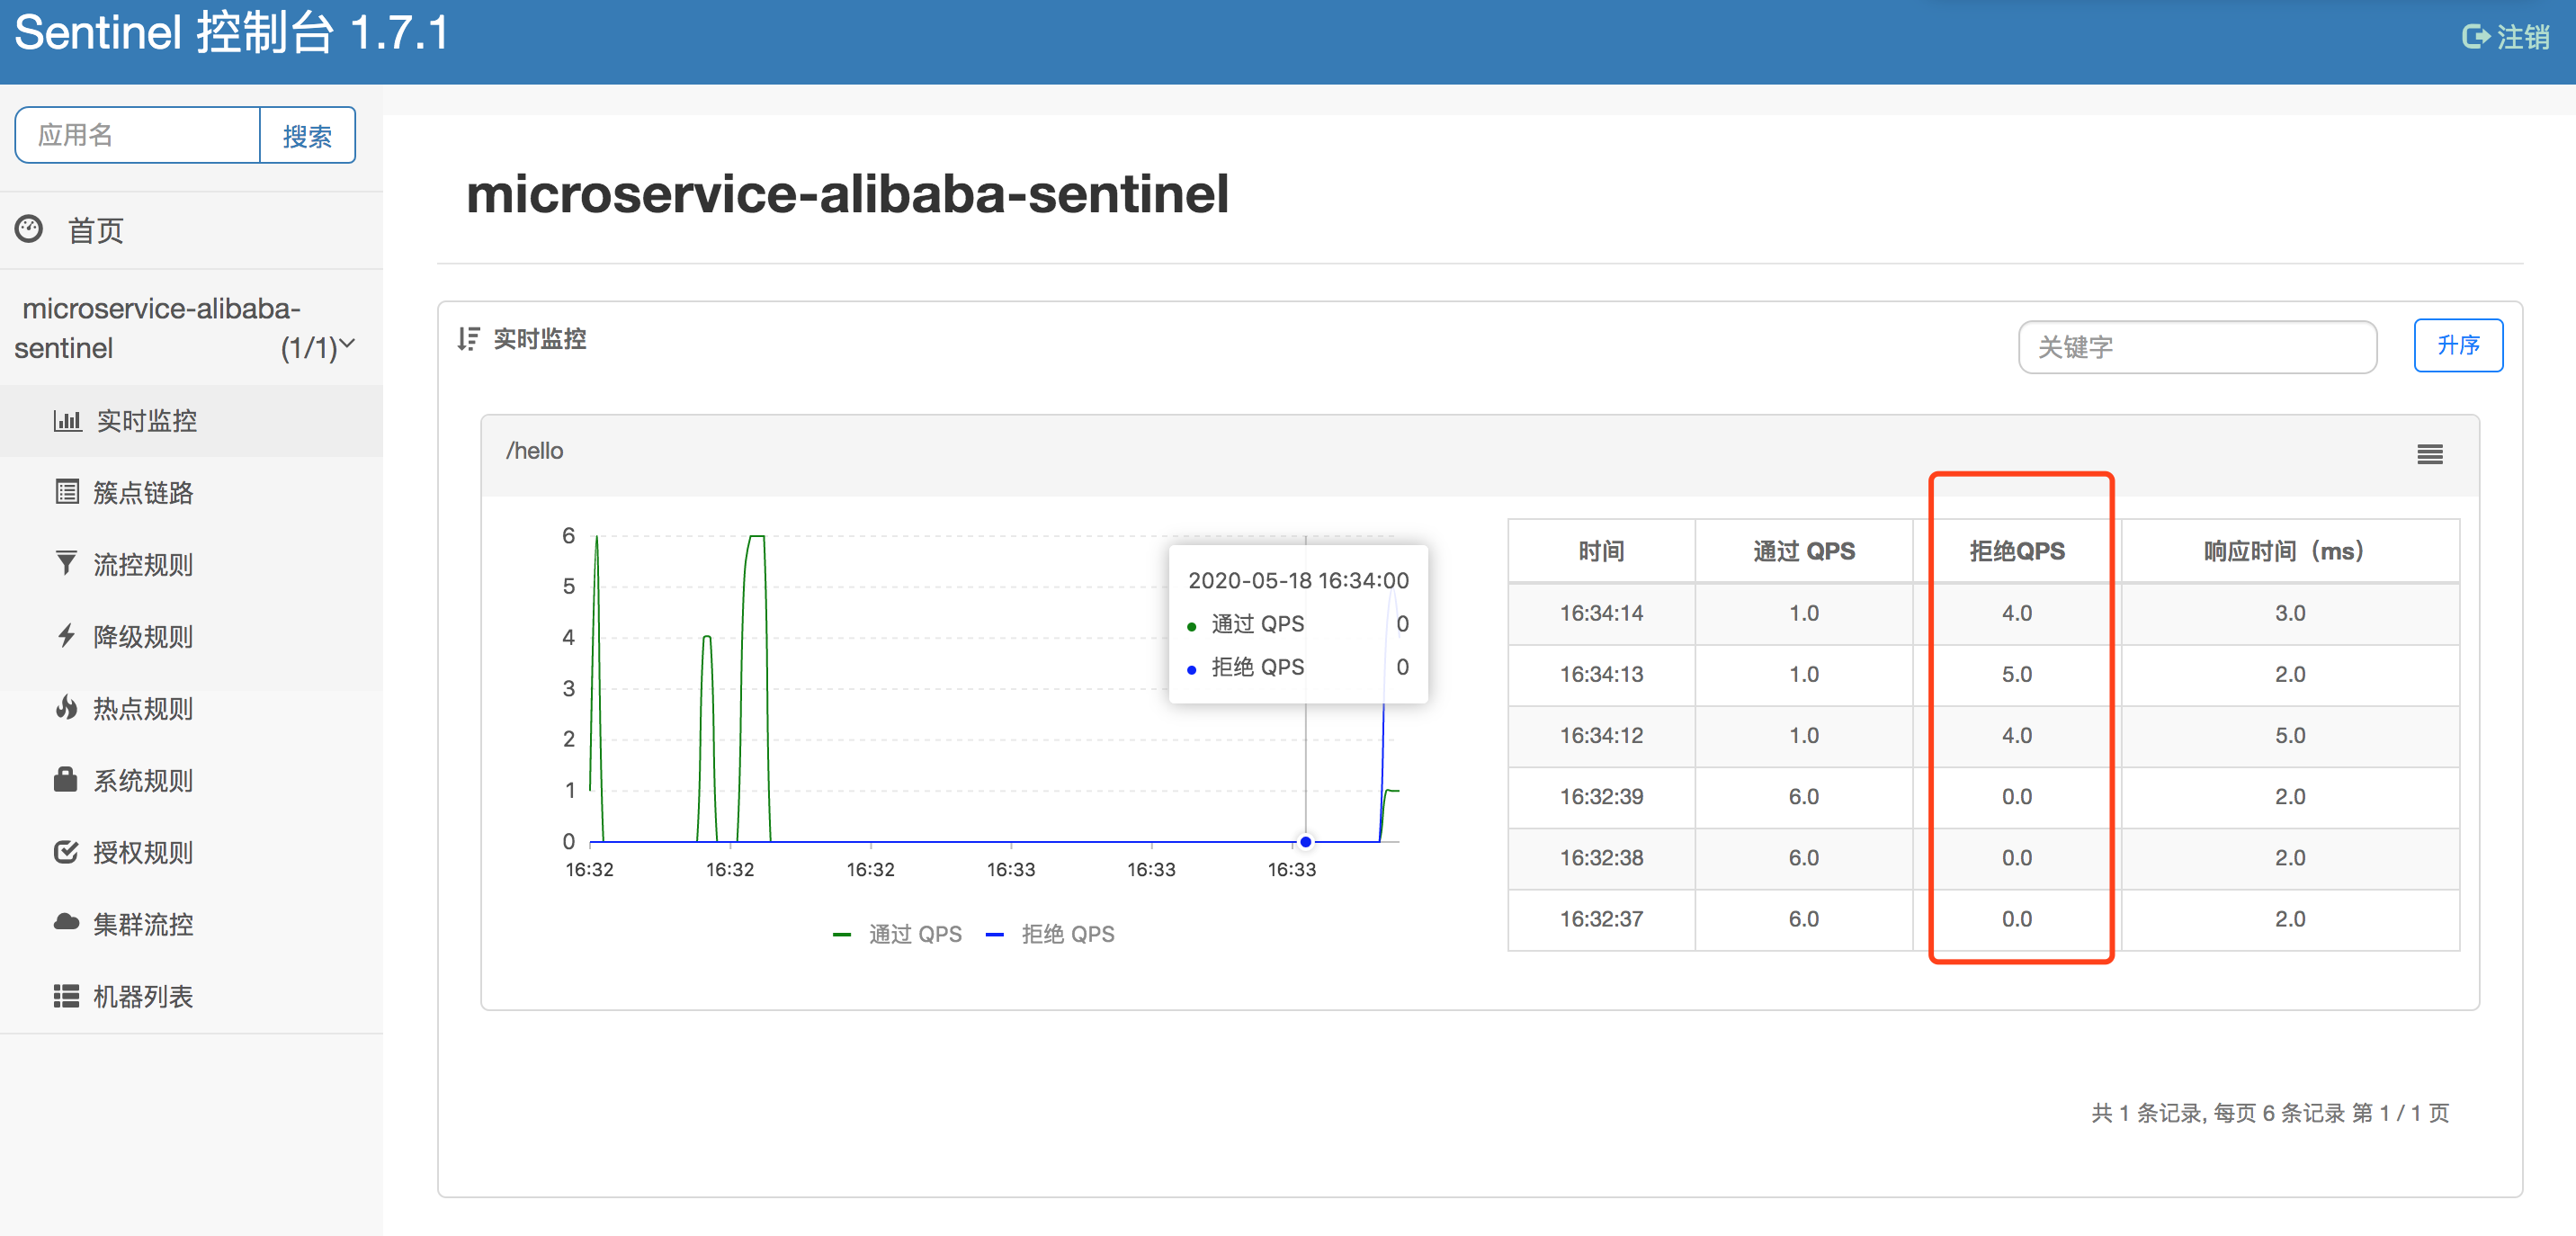
快速访问多几次 http://localhost:9092/hello,接口响应结果如下图:
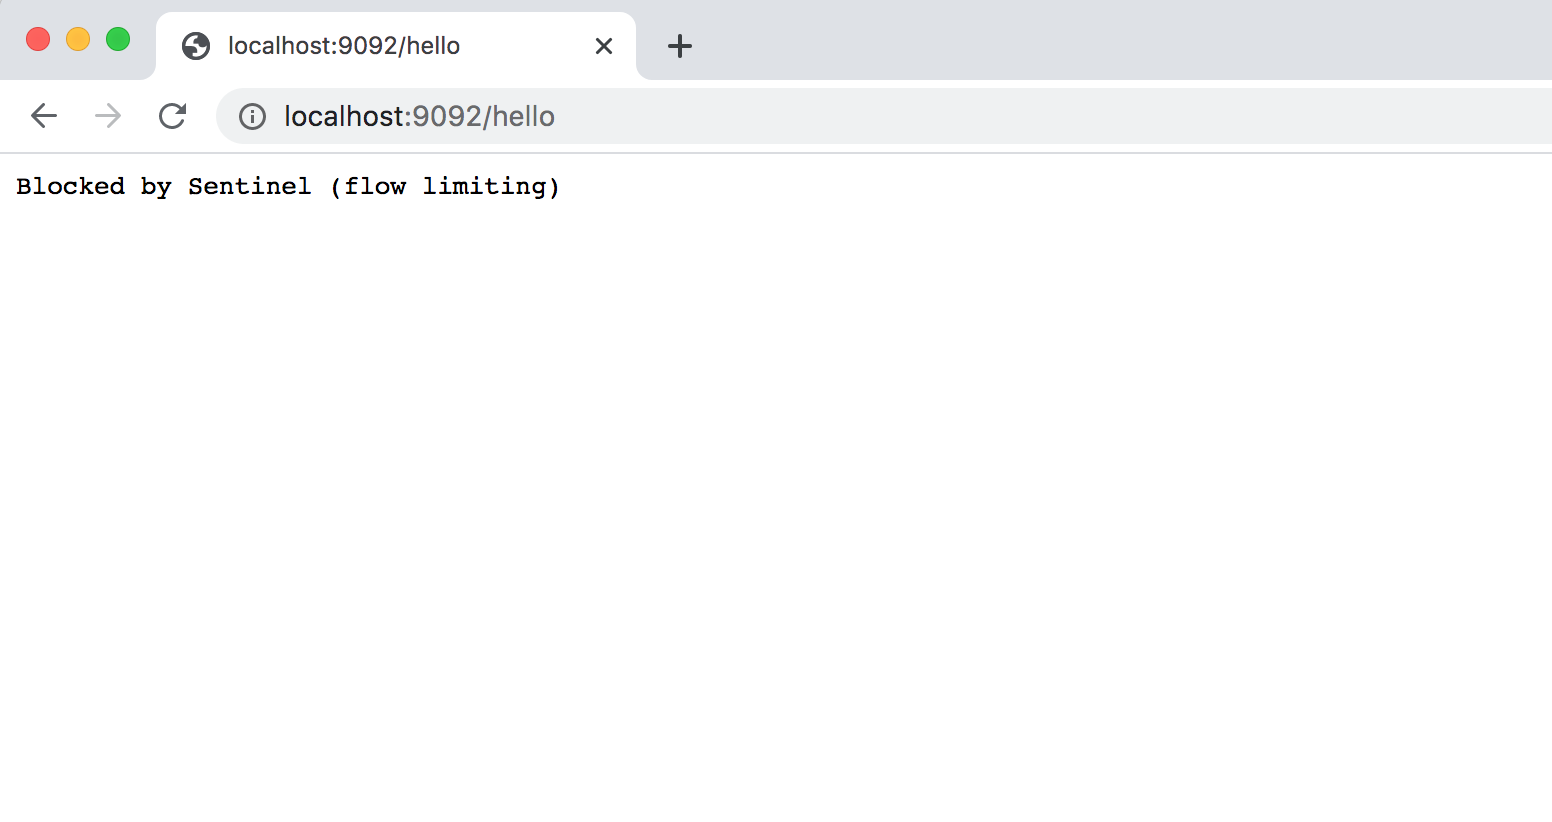
表示流控规则生效了。在监控控制台上,可以看到“拒绝QPS”的值,而每次通过的QPS只有一个
其他用法基本同理,比如“降级规则”,“热点规则”等等,可自行研究探索其用法了
完整源码下载
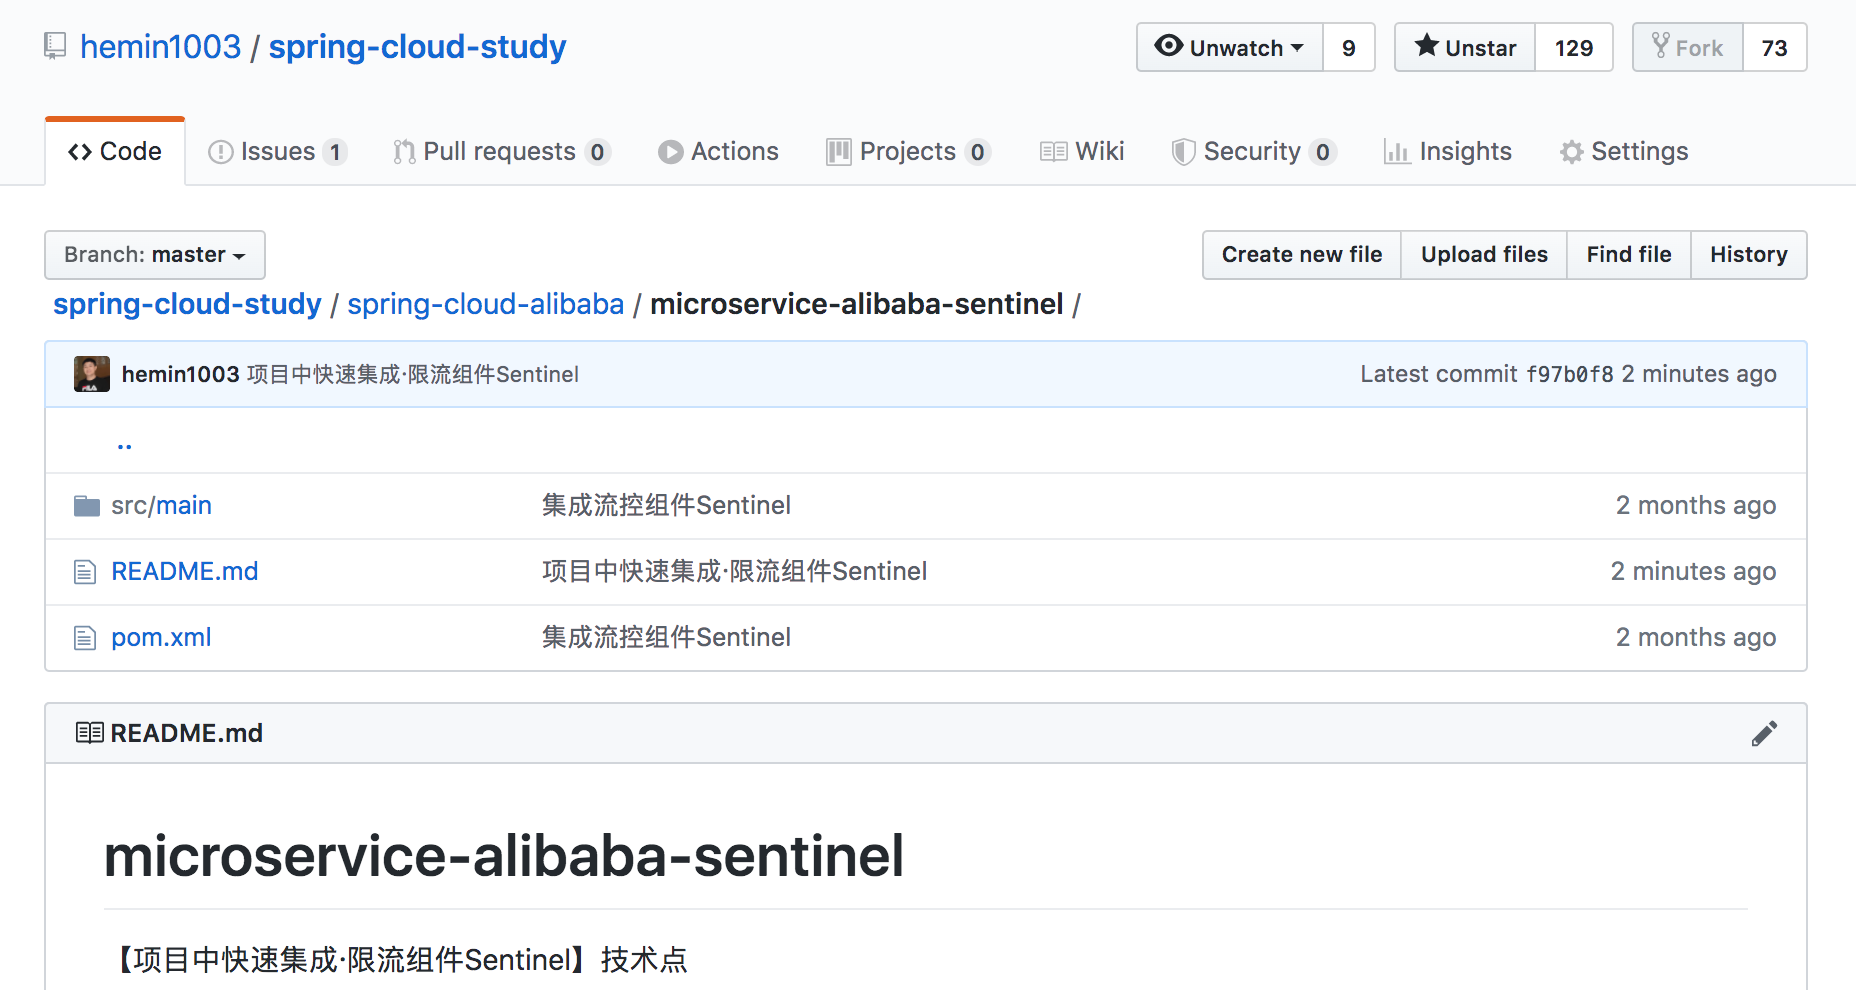
我的Github源码地址:
https://github.com/hemin1003/spring-cloud-study/tree/master/spring-cloud-alibaba/microservice-alibaba-sentinel
其他技术
此项目代码案例中,还集成了以下功能:
1. 集成swagger
十分简单、简洁易用的在线接口文档组件swagger
Swagger入门教程用法:SpringBoot从入门到精通教程(二十四)- Swagger集成用法
下一章教程
SpringCloud Alibaba从入门到精通教程(六)- 消息组件RocketMQ快速入门介绍·Server启动安装
该系列教程
SpringCloud Alibaba从入门到精通教程
我的专栏
- SpringBoot系列专栏
- SpringCloud系列专栏
- 高可用高并发实战专栏
- 微服务架构实战
- DevOps实战专栏
- 程序化广告实战专栏
至此,全部介绍就结束了
-------------------------------
-------------------------------
我的CSDN主页
关于我(个人域名)
我的开源项目集Github
期望和大家一起学习,一起成长,共勉,O(∩_∩)O谢谢
欢迎交流问题,可加个人QQ 469580884,
或者,加我的群号 751925591,一起探讨交流问题
不讲虚的,只做实干家
Talk is cheap,show me the code

最后
以上就是乐观故事最近收集整理的关于SpringCloud Alibaba从入门到精通教程(五)- 项目中快速集成·限流组件Sentinel需求背景Tips技术点代码演示高级用法完整源码下载其他技术下一章教程该系列教程我的专栏的全部内容,更多相关SpringCloud内容请搜索靠谱客的其他文章。


发表评论 取消回复