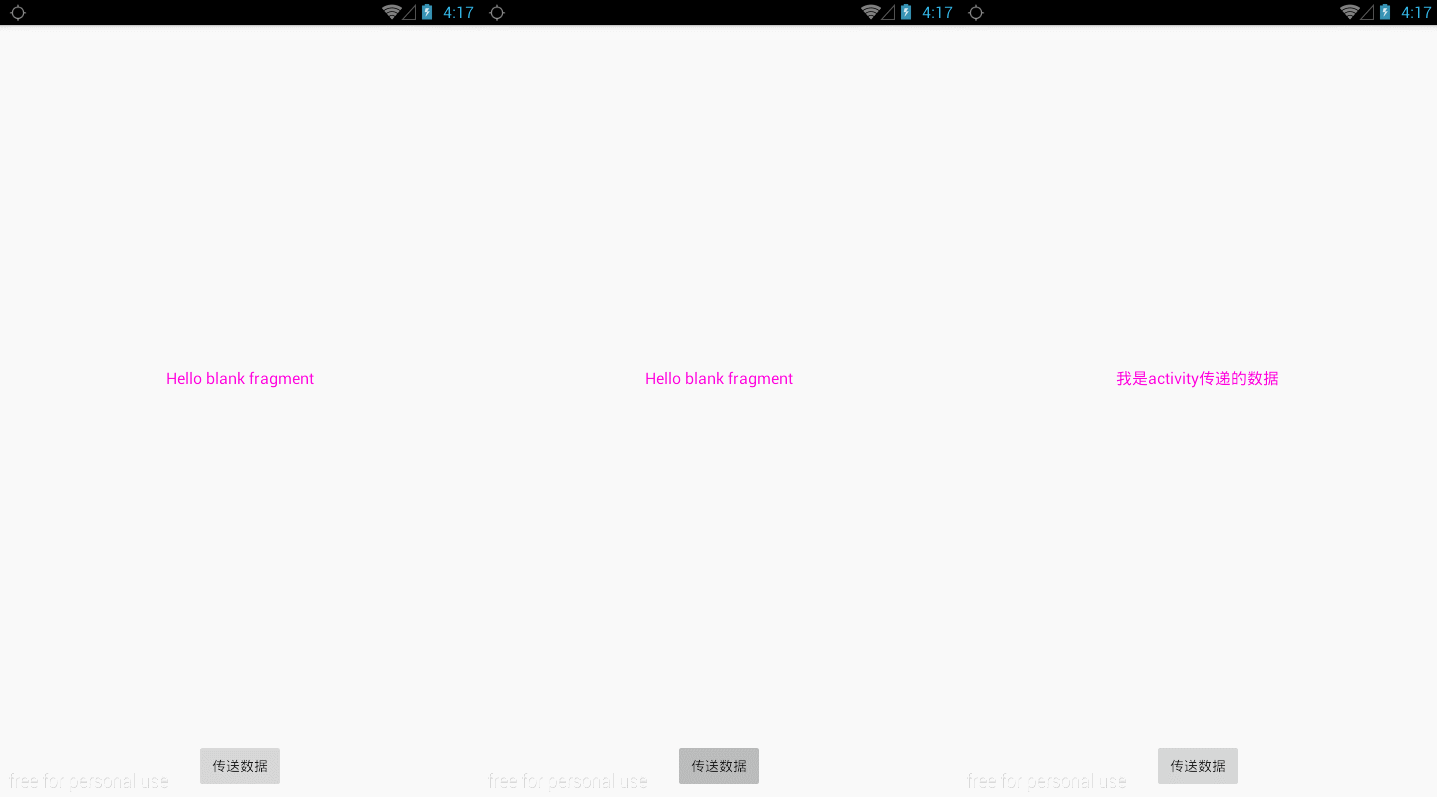
记得处学java时间,对于接口的概念就是一个 “蒙啊” ,而做android开发又是面向接口编程的。现在做开发也有一段时间了,也时长用到接口,知道大概什么概念,怎么用。但是一直都没有去梳理它。今天忽然想起来接口,于是决定记录下来,虽然比较简单,但是还是做为回顾吧,温故知新么。也希望能帮到一些初学者去理解回调接口这个概念。下面我们先看下效果图:

我们这里使用了Activity + Fragment 来实现。
先看下代码吧:
public class MainActivity extends AppCompatActivity {

    private Button btn_send;
    private FrameLayout fragment;
    private SendData mSendData;

    @Override
    protected void onCreate(Bundle savedInstanceState) {
        super.onCreate(savedInstanceState);
        setContentView(R.layout.activity_main);

        fragment = (FrameLayout) findViewById(R.id.fragment);
        FragmentTransaction ft = getSupportFragmentManager().beginTransaction();
        MyFragment myFragment = new MyFragment();
        ft.add(R.id.fragment,myFragment);
        ft.commit();

        btn_send = (Button) findViewById(R.id.btn_send);
        btn_send.setOnClickListener(new View.OnClickListener() {
            @Override
            public void onClick(View v) {
                mSendData.sendData("我是activity传递的数据");
            }
        });
    }

    public void setSendData(SendData sendData){
        mSendData = sendData;
    }
}

<LinearLayout
    xmlns:android="http://schemas.android.com/apk/res/android"
    xmlns:tools="http://schemas.android.com/tools"
    android:layout_width="match_parent"
    android:layout_height="match_parent"
    android:orientation="vertical"
    tools:context=".MainActivity">

    <FrameLayout
        android:id="@+id/fragment"
        android:layout_width="match_parent"
        android:layout_height="0dp"
        android:layout_weight="1"/>

    <Button
        android:id="@+id/btn_send"
        android:text="传送数据"
        android:layout_width="wrap_content"
        android:layout_height="wrap_content"
        android:layout_gravity="center"
        android:layout_margin="10dp"/>

</LinearLayout>
public class MyFragment extends Fragment implements SendData{
private TextView textview;
@Override
public View onCreateView(LayoutInflater inflater, ViewGroup container,
Bundle savedInstanceState) {
View view = inflater.inflate(R.layout.fragment_my, container, false);
textview = (TextView) view.findViewById(R.id.tv_textview);
((MainActivity)getActivity()).setSendData(this);
return view;
}
@Override
public void sendData(String s) {
textview.setText(s);
}
}
<RelativeLayout xmlns:android="http://schemas.android.com/apk/res/android"
xmlns:tools="http://schemas.android.com/tools"
android:layout_width="match_parent"
android:layout_height="match_parent"
tools:context="com.jimmy.connector.MyFragment">
<TextView
android:id="@+id/tv_textview"
android:layout_width="wrap_content"
android:layout_height="wrap_content"
android:text="@string/hello_blank_fragment"
android:textSize="16sp"
android:textColor="#ff00dd"
android:layout_centerInParent="true"/>
</RelativeLayout>public interface SendData {
void sendData(String s);
}代码很简单,我们直接说重点 - 接口:
第一步:
在MainActivity中我们创建了接口的成员变量,并且在setSendData中给这个接口的成员变量赋值。
第二步:
fragment实现接口,然后获取到了MainActivity的实例,然后调用setSendData方法,给MainActivity的成员变量进行赋值。
第三步:
在MainActivity中,通过接口的成员变量,调用接口中的方法。但是我们都知道,调用接口中的方法,实际上是调用其实现类中的方法,所以这时会去fragment实现接口的方法中。
通过以上三步,我们的数据就通过接口回调给了fragment。在一二步做完时间,activity和fragment就都已拥有了对方的引用。
接口回调也就是通过接口的引用调用接口中的方法,然后去其实现类中执行相应操作。观察者模式也是很好的使用了接口,大家可以自己敲敲去体验下。
最后
以上就是开朗战斗机最近收集整理的关于回调接口的全部内容,更多相关回调接口内容请搜索靠谱客的其他文章。
本图文内容来源于网友提供,作为学习参考使用,或来自网络收集整理,版权属于原作者所有。


发表评论 取消回复