文章目录
- 前言
- 第一节 RPC 通信
- 服务调用
- Dubbo介绍
- 第二节 环境准备
- 第三节 如何使用dubbo进行远程调用
- 1. 图解调用关系
- 2. 工程结构
- 3. 创建maven项目
- 4. service-1模块
- 4.1 创建service-1模块
- 4.2. 创建service-1-api模块
- 4.3 创建service-1-server模块
- 5. service-2 模块
- 6. 实现service-1
- 6.1 service-1-api定义接口
- 6.2 service-1-server实现
- 7. 实现service-2
- 7.1 service-2-server模块
- 8. 启动服务器测试
- 第四节 注意的问题
- 1. 对象序列化Serializable
- 2. 调用失败或者无法访问
前言
Apache Dubbo时一款高性能的Java RPC框架。
第一节 RPC 通信
服务调用
在微服务架构中,通常存在多个服务之间的远程调用需求。目前主流的远程调用技术有基于HTTP的RESTful接口以及基于TCP的RPC协议。
- REST(Representational State Transfer)
这是一种http调用的格式,更标准、更通用,无论哪种语言都支持http协议。 - RPC(Remote Promote Call)
一种进程间通信方式。允许像调用本地服务一样调用远程服务。RPC框架的主要目标就是让远程服务调用更简单、透明。RPC框架负责屏蔽底层的传输方式、序列化方式和通信细节。开发人员在调用的时候只需要了解谁在什么位置提供了什么样的远程服务接口即可,并不需要关系底层通信细节和调用过程。
Dubbo介绍
Dubbo是阿里巴巴开源的基于Java的高性能RPC分布式服务框架,致力于提供搞性能和透明化的RPC远程服务调用方案,以及SOA服务治理方案。
Spring-Cloud-alibaba-dubbo是基于SpringCloudAlibaba技术栈对 dubbo技术的一种封装,目的在于实现基于RPC的服务调用。
第二节 环境准备
-
需要先启动nacos
nacos版本1.4.3 -
版本说明
版本信息:
springboot版本2.3.2.RELEASE
springcloud版本Hoxton.SR8
springcloud-alibaba版本2.2.5.RELEASE
本章代码已分享至Gitee:https://gitee.com/lengcz/springcloudalibaba-dubbo.git
第三节 如何使用dubbo进行远程调用
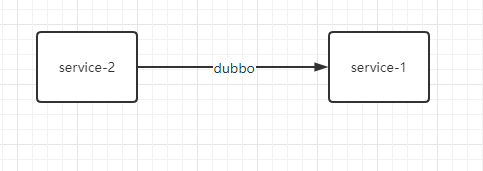
1. 图解调用关系
下面的示例是service-2微服务调用service-1微服务
2. 工程结构
springcloudalibaba-dubbo  整个父工程
|-service-1               服务1
|-|- service-1-api        服务1  api
|-|- service-1-server     服务1 实现,port:10020
|-service-2               服务2
|-|- service-2-api        服务2  api
|-|- service-2-server     服务2 实现,port:10030
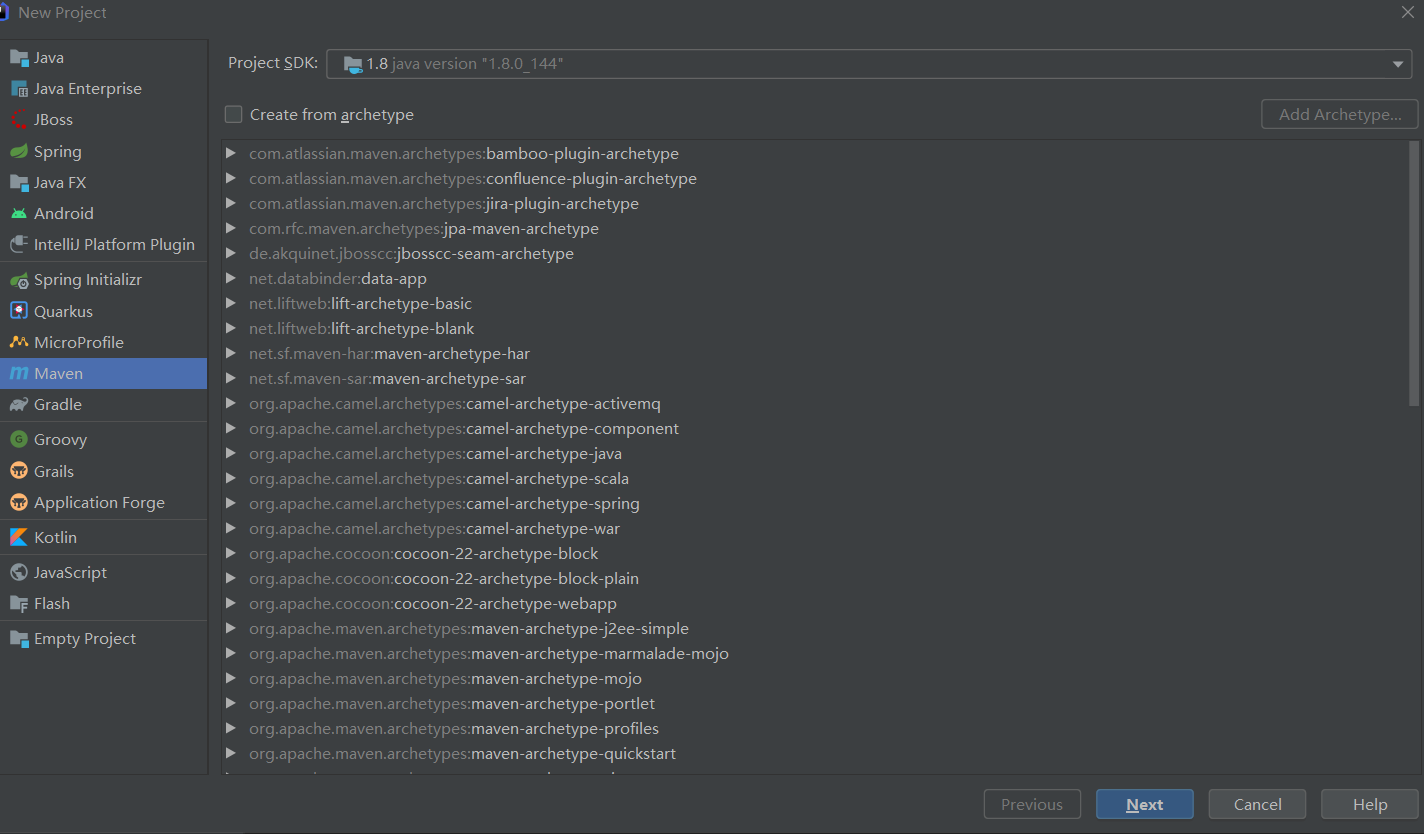
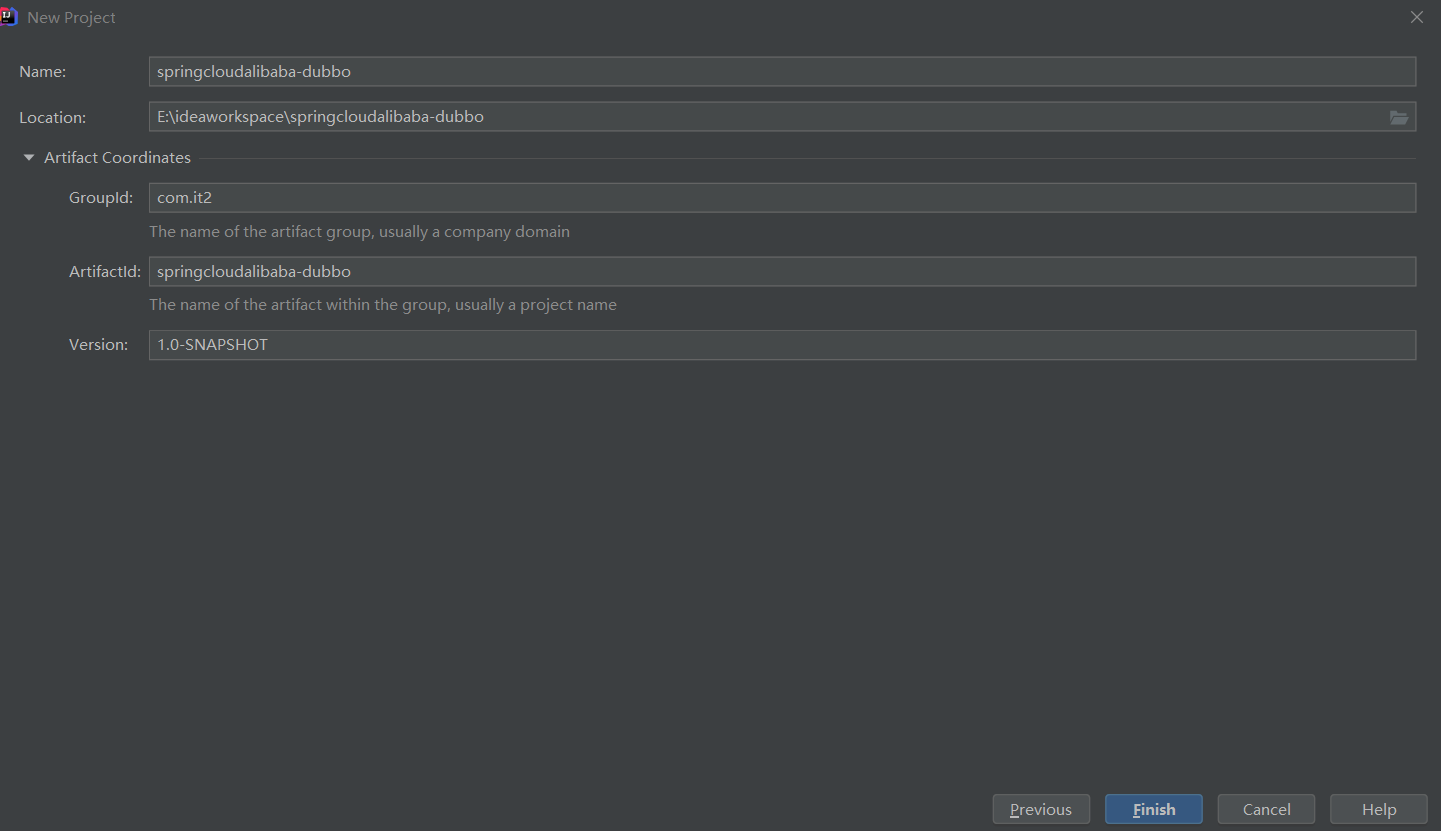
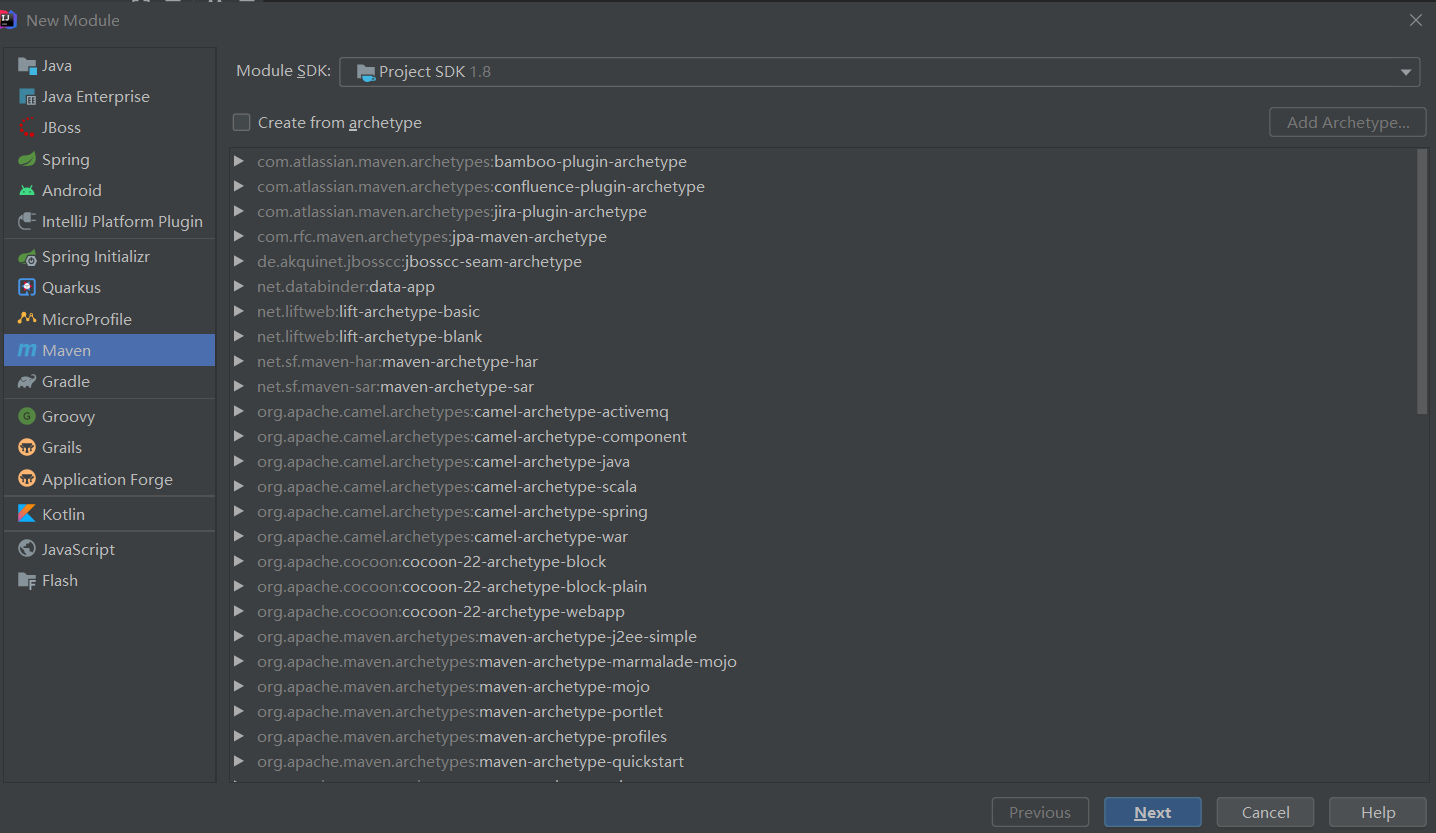
3. 创建maven项目
- 创建项目,项目名称为springcloudalibaba-dubbo
- pom文件内容
<packaging>pom</packaging>
- 定义包管理(下面是pom文件的全部内容)
<?xml version="1.0" encoding="UTF-8"?>
<project xmlns="http://maven.apache.org/POM/4.0.0"
         xmlns:xsi="http://www.w3.org/2001/XMLSchema-instance"
         xsi:schemaLocation="http://maven.apache.org/POM/4.0.0 http://maven.apache.org/xsd/maven-4.0.0.xsd">
    <modelVersion>4.0.0</modelVersion>

    <groupId>com.it2</groupId>
    <artifactId>springcloudalibaba-dubbo</artifactId>
    <version>1.0-SNAPSHOT</version>
    <packaging>pom</packaging>

    <!--依赖的父工程-->
    <parent>
        <groupId>org.springframework.boot</groupId>
        <artifactId>spring-boot-starter-parent</artifactId>
        <version>2.3.2.RELEASE</version>
    </parent>

    <!--版本管理-->
    <properties>
        <java.version>1.8</java.version>
        <project.build.sourceEncoding>UTF-8</project.build.sourceEncoding>
        <project.reporting.outputEncoding>UTF-8</project.reporting.outputEncoding>
        <spring-cloud.version>Hoxton.SR8</spring-cloud.version>
        <spring-cloud-alibaba.version>2.2.5.RELEASE</spring-cloud-alibaba.version>
    </properties>

    <dependencyManagement>
        <dependencies>
            <dependency>
                <groupId>org.springframework.cloud</groupId>
                <artifactId>spring-cloud-dependencies</artifactId>
                <version>${spring-cloud.version}</version>
                <type>pom</type>
                <scope>import</scope>
            </dependency>
            <dependency>
                <groupId>com.alibaba.cloud</groupId>
                <artifactId>spring-cloud-alibaba-dependencies</artifactId>
                <version>${spring-cloud-alibaba.version}</version>
                <type>pom</type>
                <scope>import</scope>
            </dependency>

        </dependencies>
    </dependencyManagement>

    <build>
        <!--配置插件-->
        <plugins>
            <plugin>
                <groupId>org.springframework.boot</groupId>
                <artifactId>spring-boot-maven-plugin</artifactId>
            </plugin>
        </plugins>
    </build>
</project>
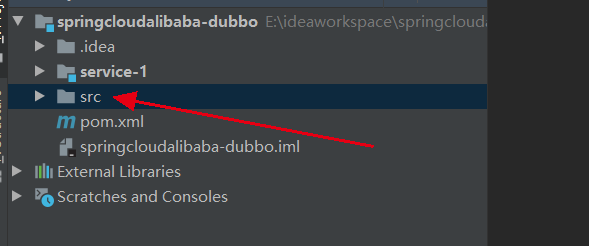
- 删除src文件夹,因为项目的所有代码都在模块里,src没有作用,所以可以删除。
4. service-1模块
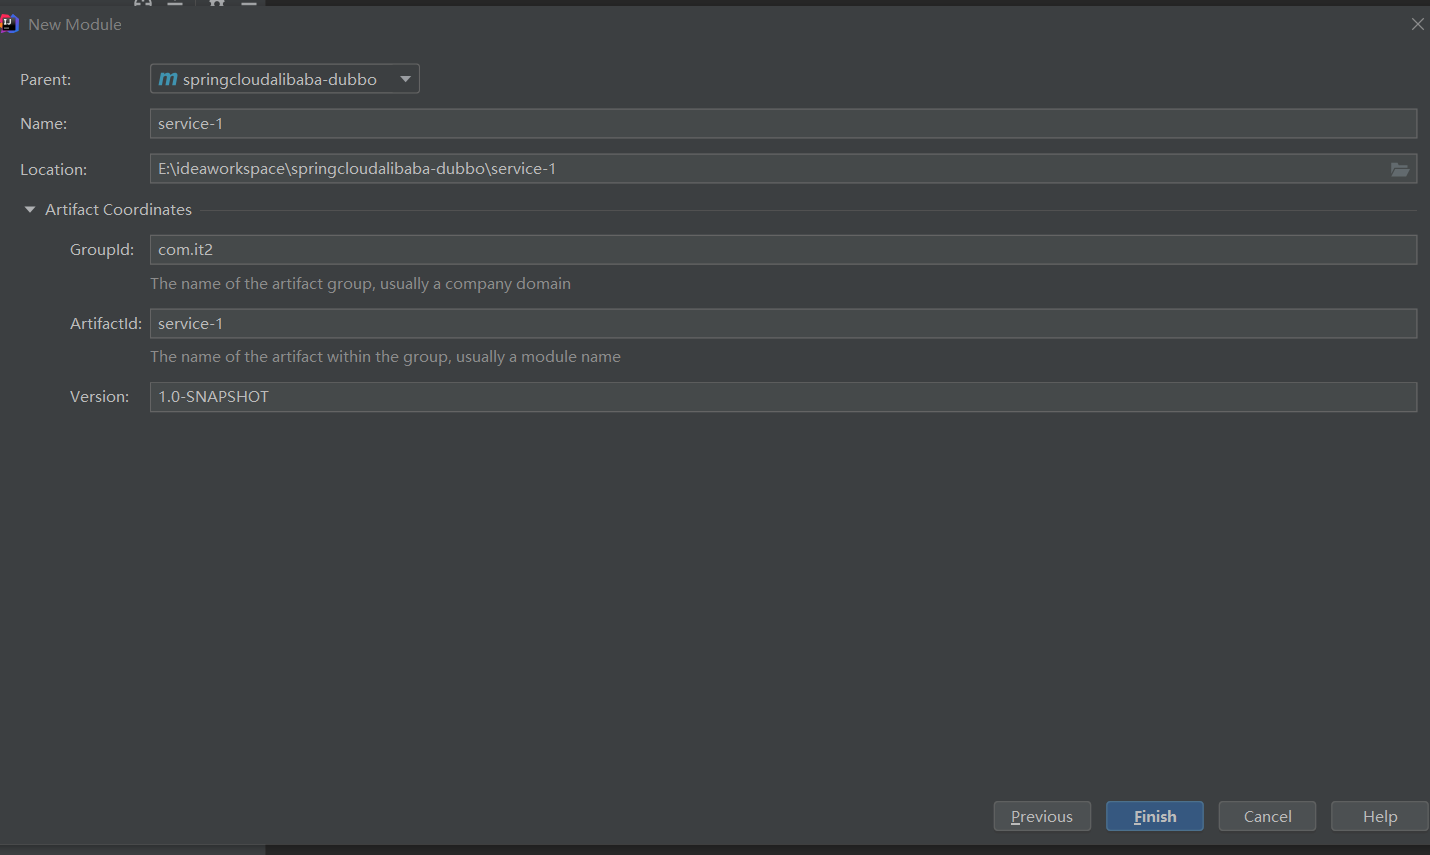
4.1 创建service-1模块
- 在根项目下,新建service-1模块
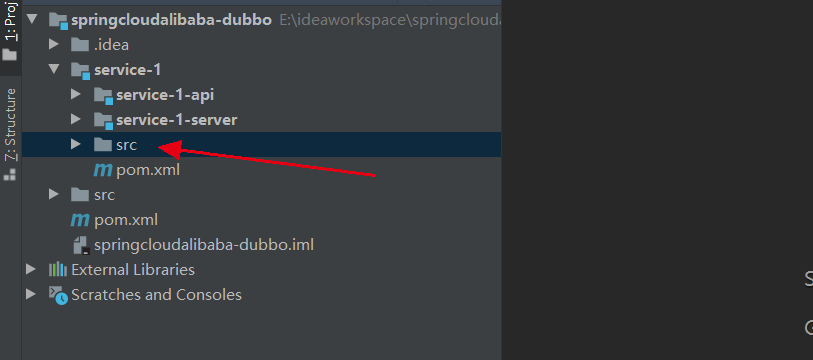
- 删除src文件夹,因为项目的所有代码都在模块里,src没有作用,所以可以删除。
4.2. 创建service-1-api模块
-
创建模块
service-1-api的parent是service-1,service-1-api是service-1的子模块
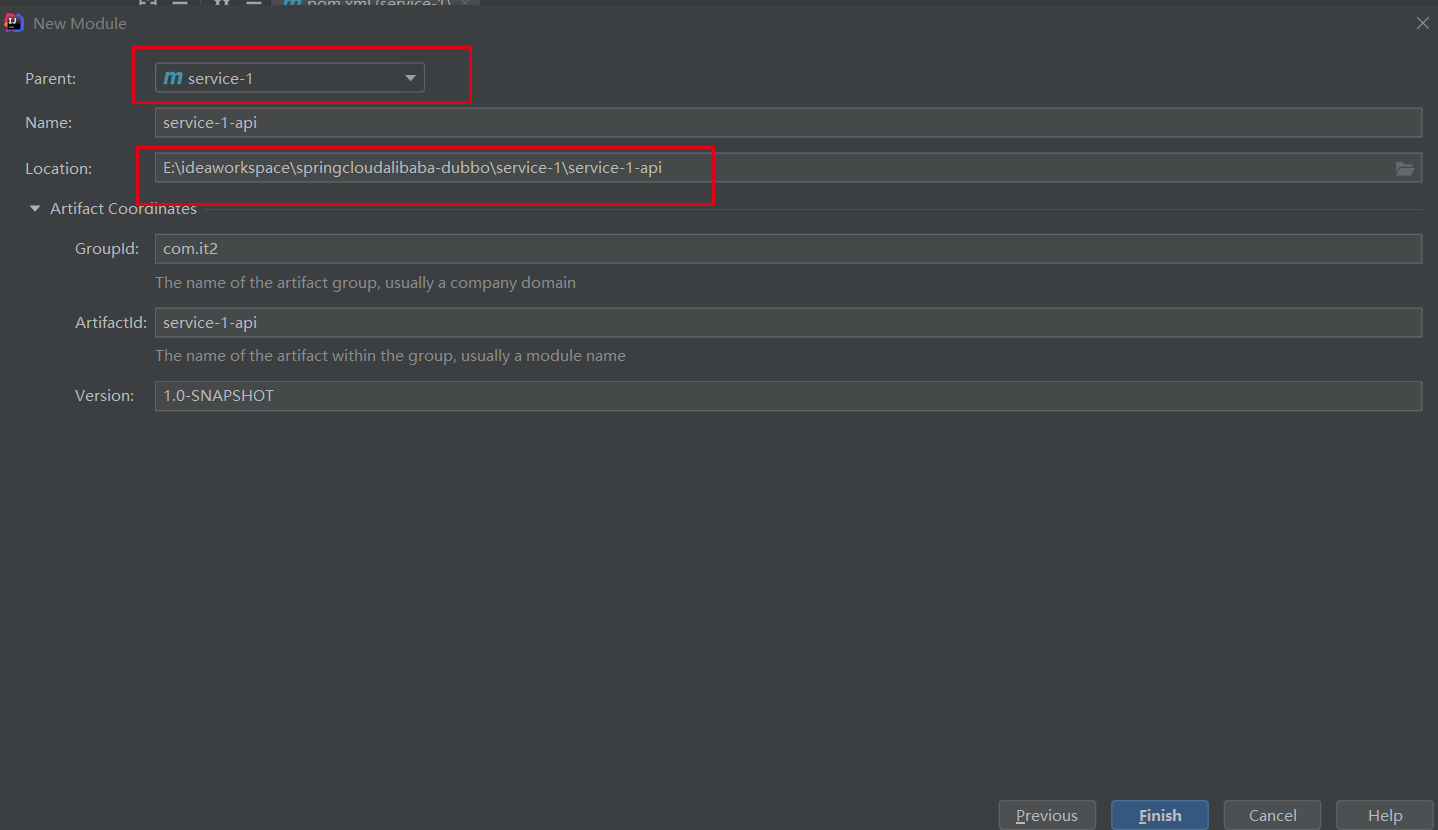
-
删除test和resources目录,因为xxx-api模块只是用于定义接口的,没有实现,不需要配置文件,也不需要测试用例。

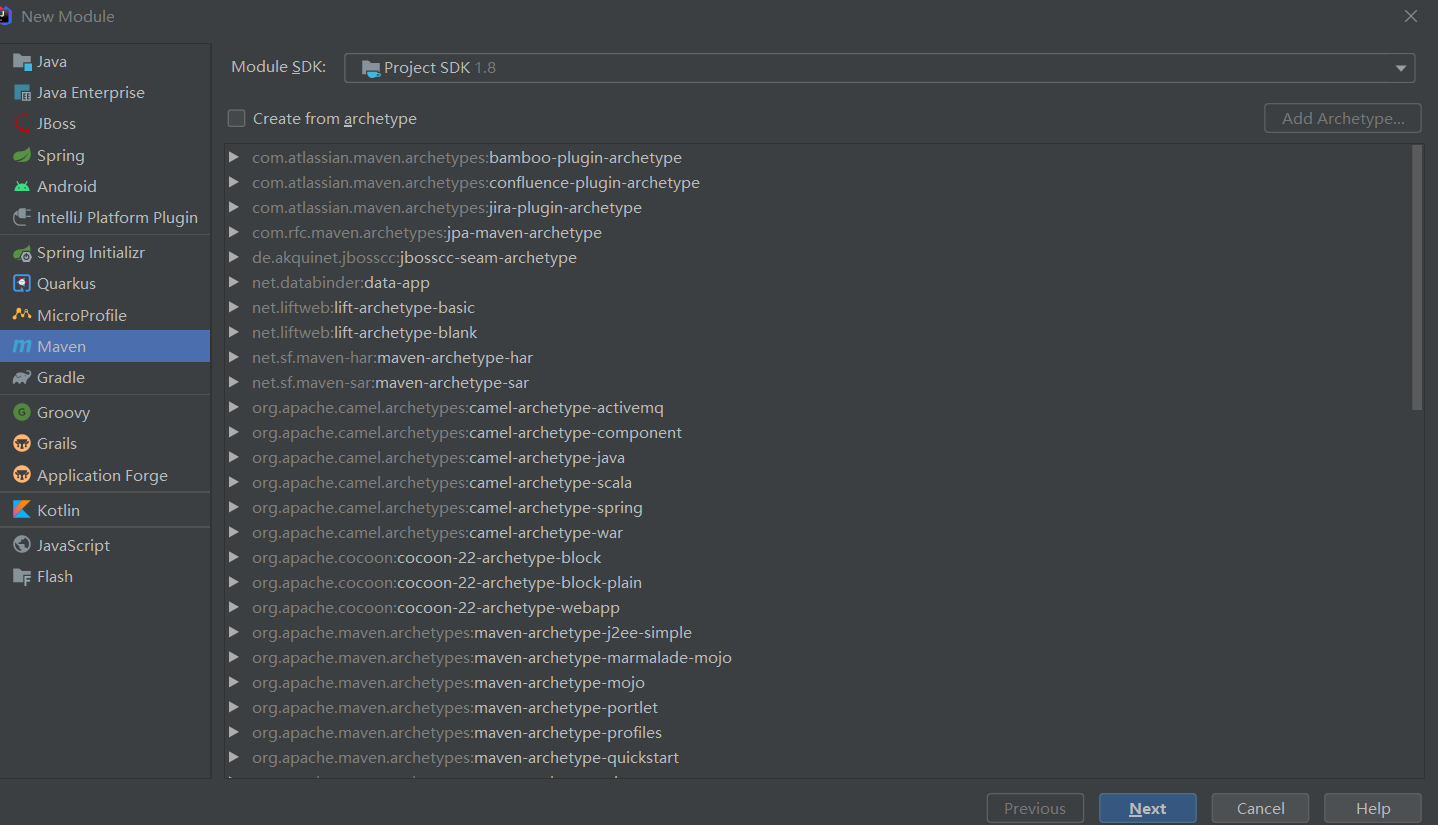
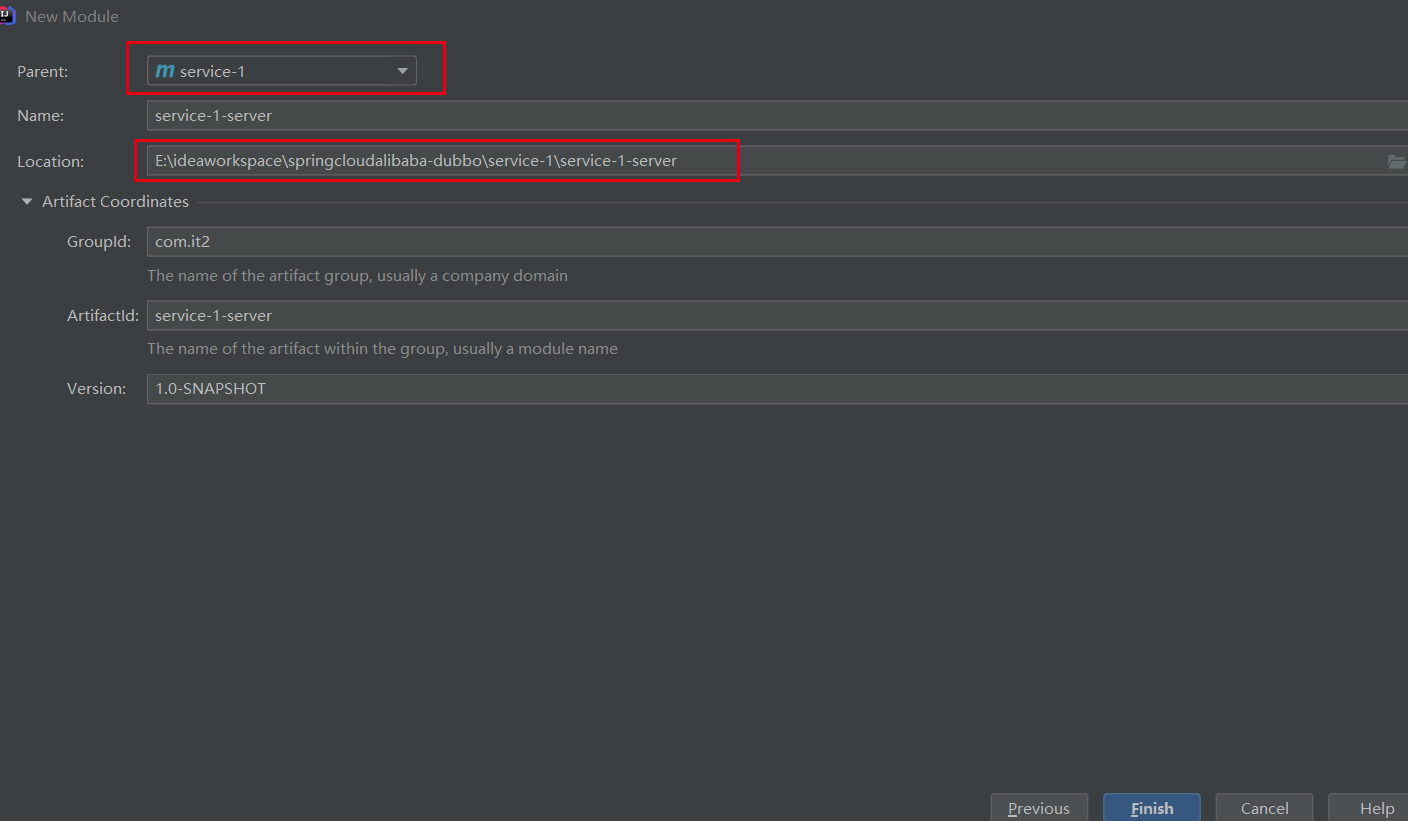
4.3 创建service-1-server模块
- 创建模块
5. service-2 模块
按照service-1的步骤创建service-2即可,此处步骤省略。
6. 实现service-1
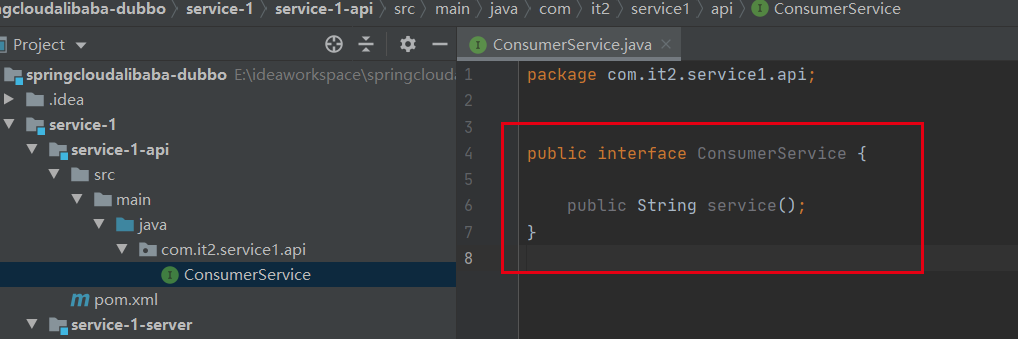
6.1 service-1-api定义接口
在service-1-api里定义接口
package com.it2.service1.api;


public interface ConsumerService {

    public String service();
}
6.2 service-1-server实现
- 引入需要使用到的依赖
<dependencies>
		<dependency>
            <groupId>org.springframework.boot</groupId>
            <artifactId>spring-boot-starter-web</artifactId>
        </dependency>
        <!--引入service1api的依赖-->
        <dependency>
            <groupId>com.it2</groupId>
            <artifactId>service-1-api</artifactId>
            <version>1.0-SNAPSHOT</version>
        </dependency>

        <!--用于服务注册和发现-->
        <dependency>
            <groupId>com.alibaba.cloud</groupId>
            <artifactId>spring-cloud-starter-alibaba-nacos-discovery</artifactId>
        </dependency>
        <!--用于配置管理-->
        <dependency>
            <groupId>com.alibaba.cloud</groupId>
            <artifactId>spring-cloud-starter-alibaba-nacos-config</artifactId>
        </dependency>
        <!--引入dubbo-->
        <dependency>
            <groupId>com.alibaba.cloud</groupId>
            <artifactId>spring-cloud-starter-dubbo</artifactId>
        </dependency>
    </dependencies>
- 实现service-1-api的接口
package com.it2.service1.service;

import com.it2.service1.api.ConsumerService;

//注解标记此类表示此方法暴露为dubbo接口
//@org.apache.dubbo.config.annotation.Service  //(已不推荐)不是spring的Service,是dubbo的service,推荐写类全名
@org.apache.dubbo.config.annotation.DubboService
public class ConsumerServiceImpl implements ConsumerService {

    //dubbo接口实现
    public String service() {
        System.out.println("我被调用了--");
        return "consumer invoke ";
    }
}
- 编写启动类
package com.it2.service1;

import org.springframework.boot.SpringApplication;
import org.springframework.boot.autoconfigure.SpringBootApplication;
import org.springframework.cloud.client.discovery.EnableDiscoveryClient;

@SpringBootApplication
@EnableDiscoveryClient //开启nacos服务发现
@EnableDubbo //开启dubbo
public class Service1Bootstrap {

    public static void main(String[] args) {
        SpringApplication.run(Service1Bootstrap.class,args);
    }
}
7. 实现service-2
7.1 service-2-server模块
- 引入依赖
		<dependency>
            <groupId>org.springframework.boot</groupId>
            <artifactId>spring-boot-starter-web</artifactId>
        </dependency>
        <dependency>
            <groupId>com.it2</groupId>
            <artifactId>service-1-api</artifactId>
            <version>1.0-SNAPSHOT</version>
        </dependency>
        <!--用于服务注册和发现-->
        <dependency>
            <groupId>com.alibaba.cloud</groupId>
            <artifactId>spring-cloud-starter-alibaba-nacos-discovery</artifactId>
        </dependency>
        <!--用于配置管理-->
        <dependency>
            <groupId>com.alibaba.cloud</groupId>
            <artifactId>spring-cloud-starter-alibaba-nacos-config</artifactId>
        </dependency>
        <!--引入dubbo-->
        <dependency>
            <groupId>com.alibaba.cloud</groupId>
            <artifactId>spring-cloud-starter-dubbo</artifactId>
        </dependency>
- 配置bootstrap.yaml
server:
  port: ${port:10030}  #启动端口
spring:
  application:
    name: service2
  cloud:
    nacos:
      discovery:  #注册发现
        server-addr: 127.0.0.1:8848
        namespace: public
        cluster-name: DEFAULT #集群
      config:     #配置中心
        server-addr: 127.0.0.1:8848
        file-extension: yaml
        namespace: public
        group: NACOS_MICROSERVICE_GROUP #业务组
  main:
    allow-bean-definition-overriding: true # spring boot 2.1 需要设定(防止bean重复覆盖问题)

#dubbo相关
dubbo:
  scan:
    base-packages: com.it2.service2  #服务扫描基准包(扫描被dubbo注解的类)
  protocol:
    name: dubbo  #协议
    port: ${dubbo_port:20891}  #协议端口 -1 表示不限制
  registry:
    address: spring-cloud://localhost #注册中心,表示使用配置文件中的注册中心
  application:
    qos-enable: false #dubbo运维服务是否开启
  consumer:
    check: false #启动时就检查依赖的服务
- 编写controller
package com.it2.service2.controller;
import com.it2.service1.api.ConsumerService;
import org.springframework.web.bind.annotation.GetMapping;
import org.springframework.web.bind.annotation.RestController;
@RestController
public class HelloController {
//注入service
// @org.apache.dubbo.config.annotation.Reference //(已不推荐)生成代理对象
@org.apache.dubbo.config.annotation.DubboReference //生成代理对象
private ConsumerService consumerService;
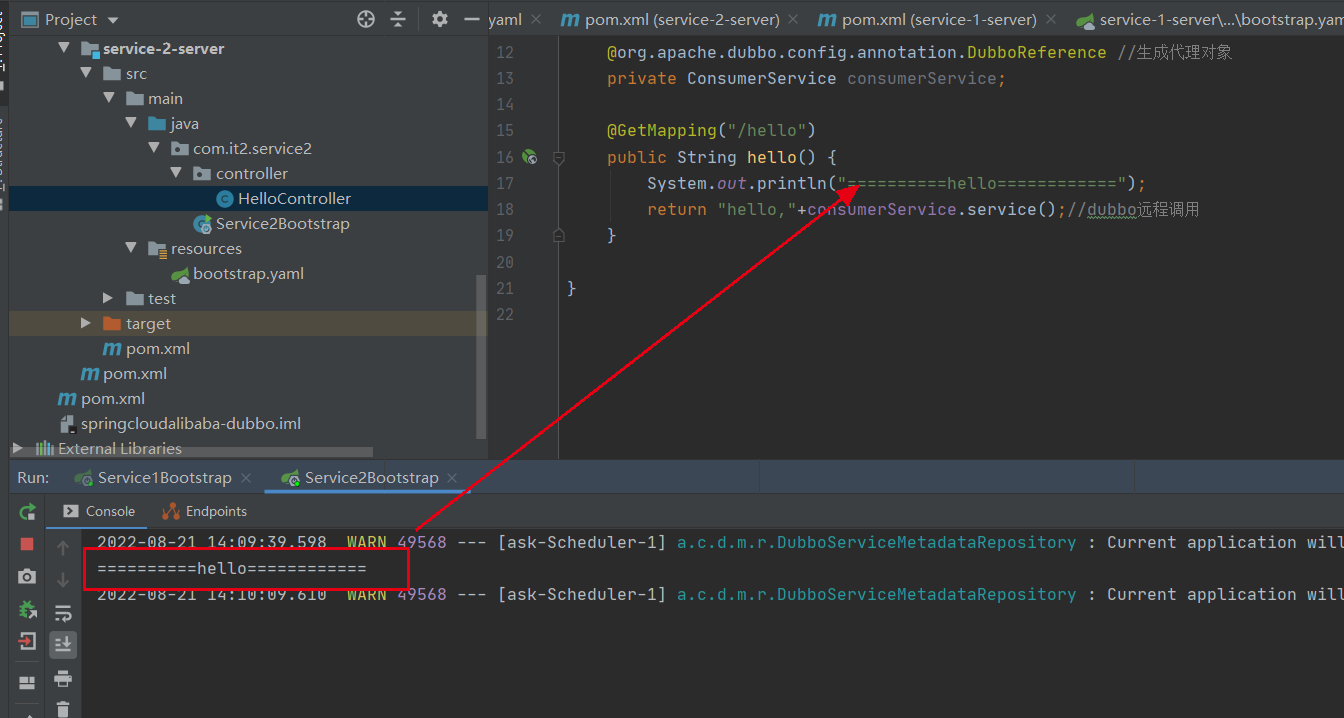
@GetMapping("/hello")
public String hello() {
System.out.println("==========hello============");
return "hello,"+consumerService.service();//dubbo远程调用
}
}
- 编写启动类
package com.it2.service2;

import org.springframework.boot.SpringApplication;
import org.springframework.boot.autoconfigure.SpringBootApplication;
import org.springframework.cloud.client.discovery.EnableDiscoveryClient;

@SpringBootApplication
@EnableDiscoveryClient //开启nacos服务发现
@EnableDubbo //开启dubbo
public class Service2Bootstrap {

    public static void main(String[] args) {
        SpringApplication.run(Service2Bootstrap.class,args);
    }
}
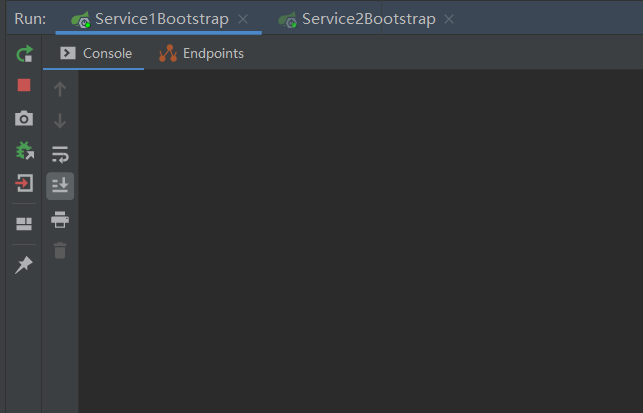
8. 启动服务器测试
先启动service-1-server,再启动service-2-server,按照依赖顺序,先启动被依赖的服务。启动之后,清空日志。
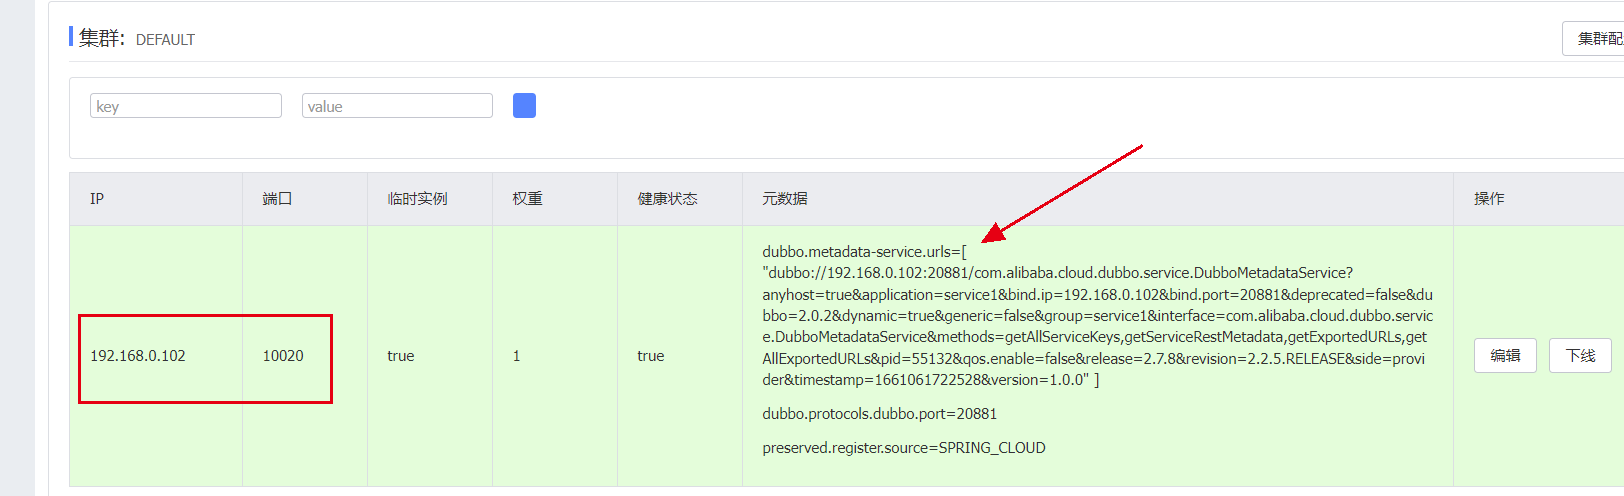
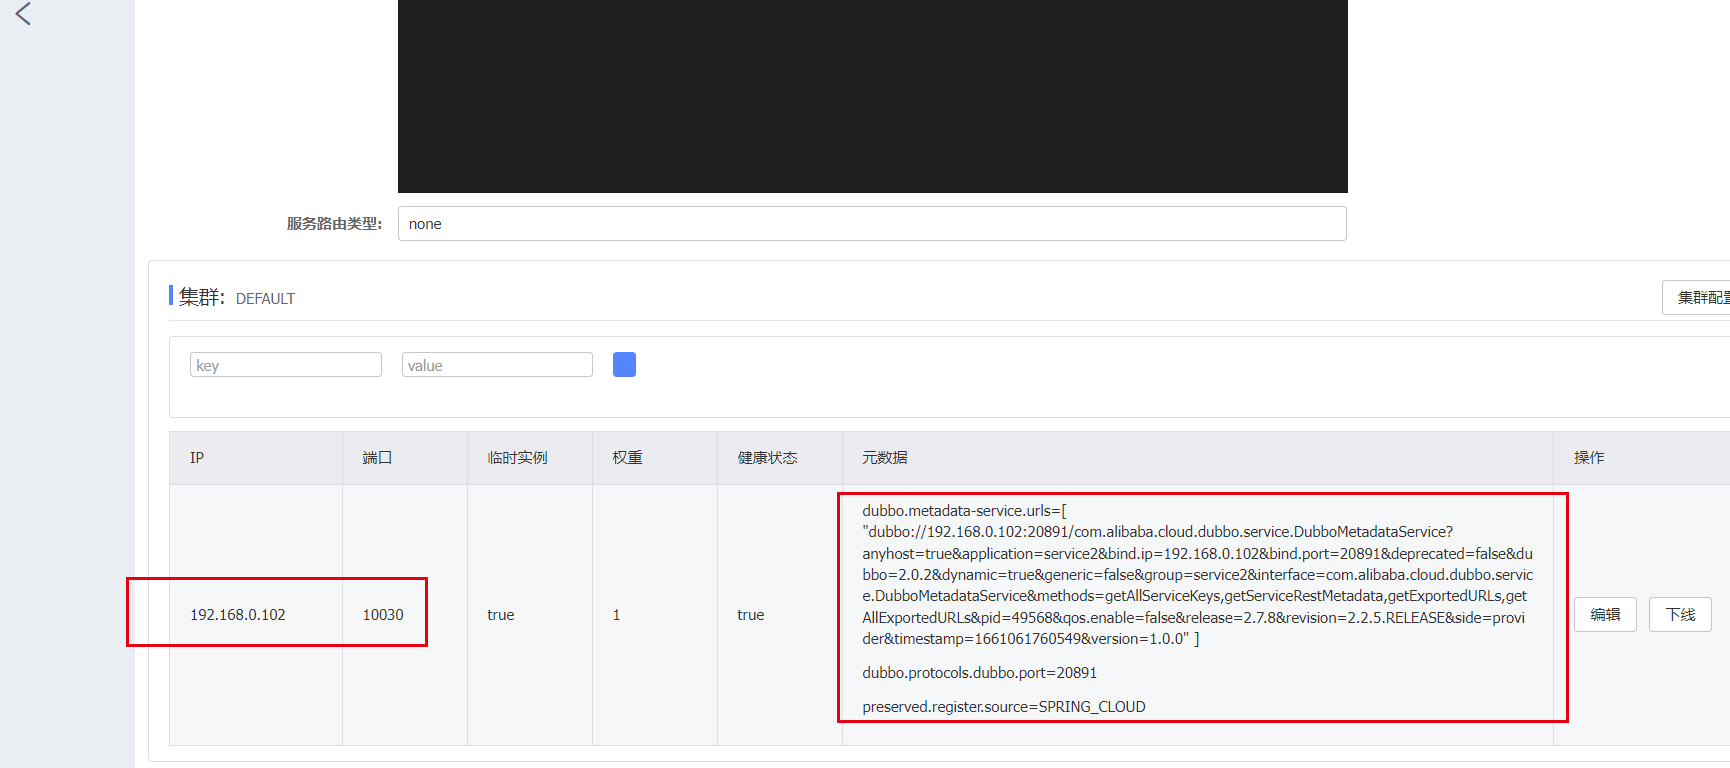
发起调用请求http://localhost:10030/hello

nacos后台看到的dubbo注册到nacos的元数据(dubbo相关内容)
第四节 注意的问题
1. 对象序列化Serializable
上面的示例service1提供的返回值是String,如果我们改成对象,如下。
//注解标记此类表示此方法暴露为dubbo接口
//@org.apache.dubbo.config.annotation.Service  //(已不推荐)不是spring的Service,是dubbo的service,推荐写类全名
@org.apache.dubbo.config.annotation.DubboService
public class ConsumerServiceImpl implements ConsumerService {

    //dubbo接口实现
    public User service() {
        System.out.println("我被调用了--");
        return new User();
    }
}
那么我们的实体类就需要实现序列化接口Serializable
//网络传输或者存储需要实现序列化接口
public class User implements Serializable {
}
2. 调用失败或者无法访问
注意检查是否引入了spring-boot-starter-web
        <dependency>
            <groupId>org.springframework.boot</groupId>
            <artifactId>spring-boot-starter-web</artifactId>
        </dependency>
最后
以上就是洁净酸奶最近收集整理的关于springcloudalibaba架构(30):Dubbo的使用入门前言第一节 RPC 通信第二节 环境准备第三节 如何使用dubbo进行远程调用第四节 注意的问题的全部内容,更多相关springcloudalibaba架构(30):Dubbo的使用入门前言第一节内容请搜索靠谱客的其他文章。


发表评论 取消回复