实战项目名称:实现微信小程序订阅消息通知
文章目录
- 一、实战步骤
- 1. 登录微信小程序管理端,添加订阅消息模板
- 2. 定义好需要发送的消息
- 3.获取小程序的access_token
- 4. 发起请求,向用户推送消息
- 4. 小程序端添加接收订阅消息的按钮
- 二、完整源代码
- 三. 需要注意的地方
一、实战步骤
1. 登录微信小程序管理端,添加订阅消息模板
登录后,在功能 > 订阅消息 > 公共模板库 ,然后去添加你需要的模板
- 注意下图
红线部分的内容,下一步用的到
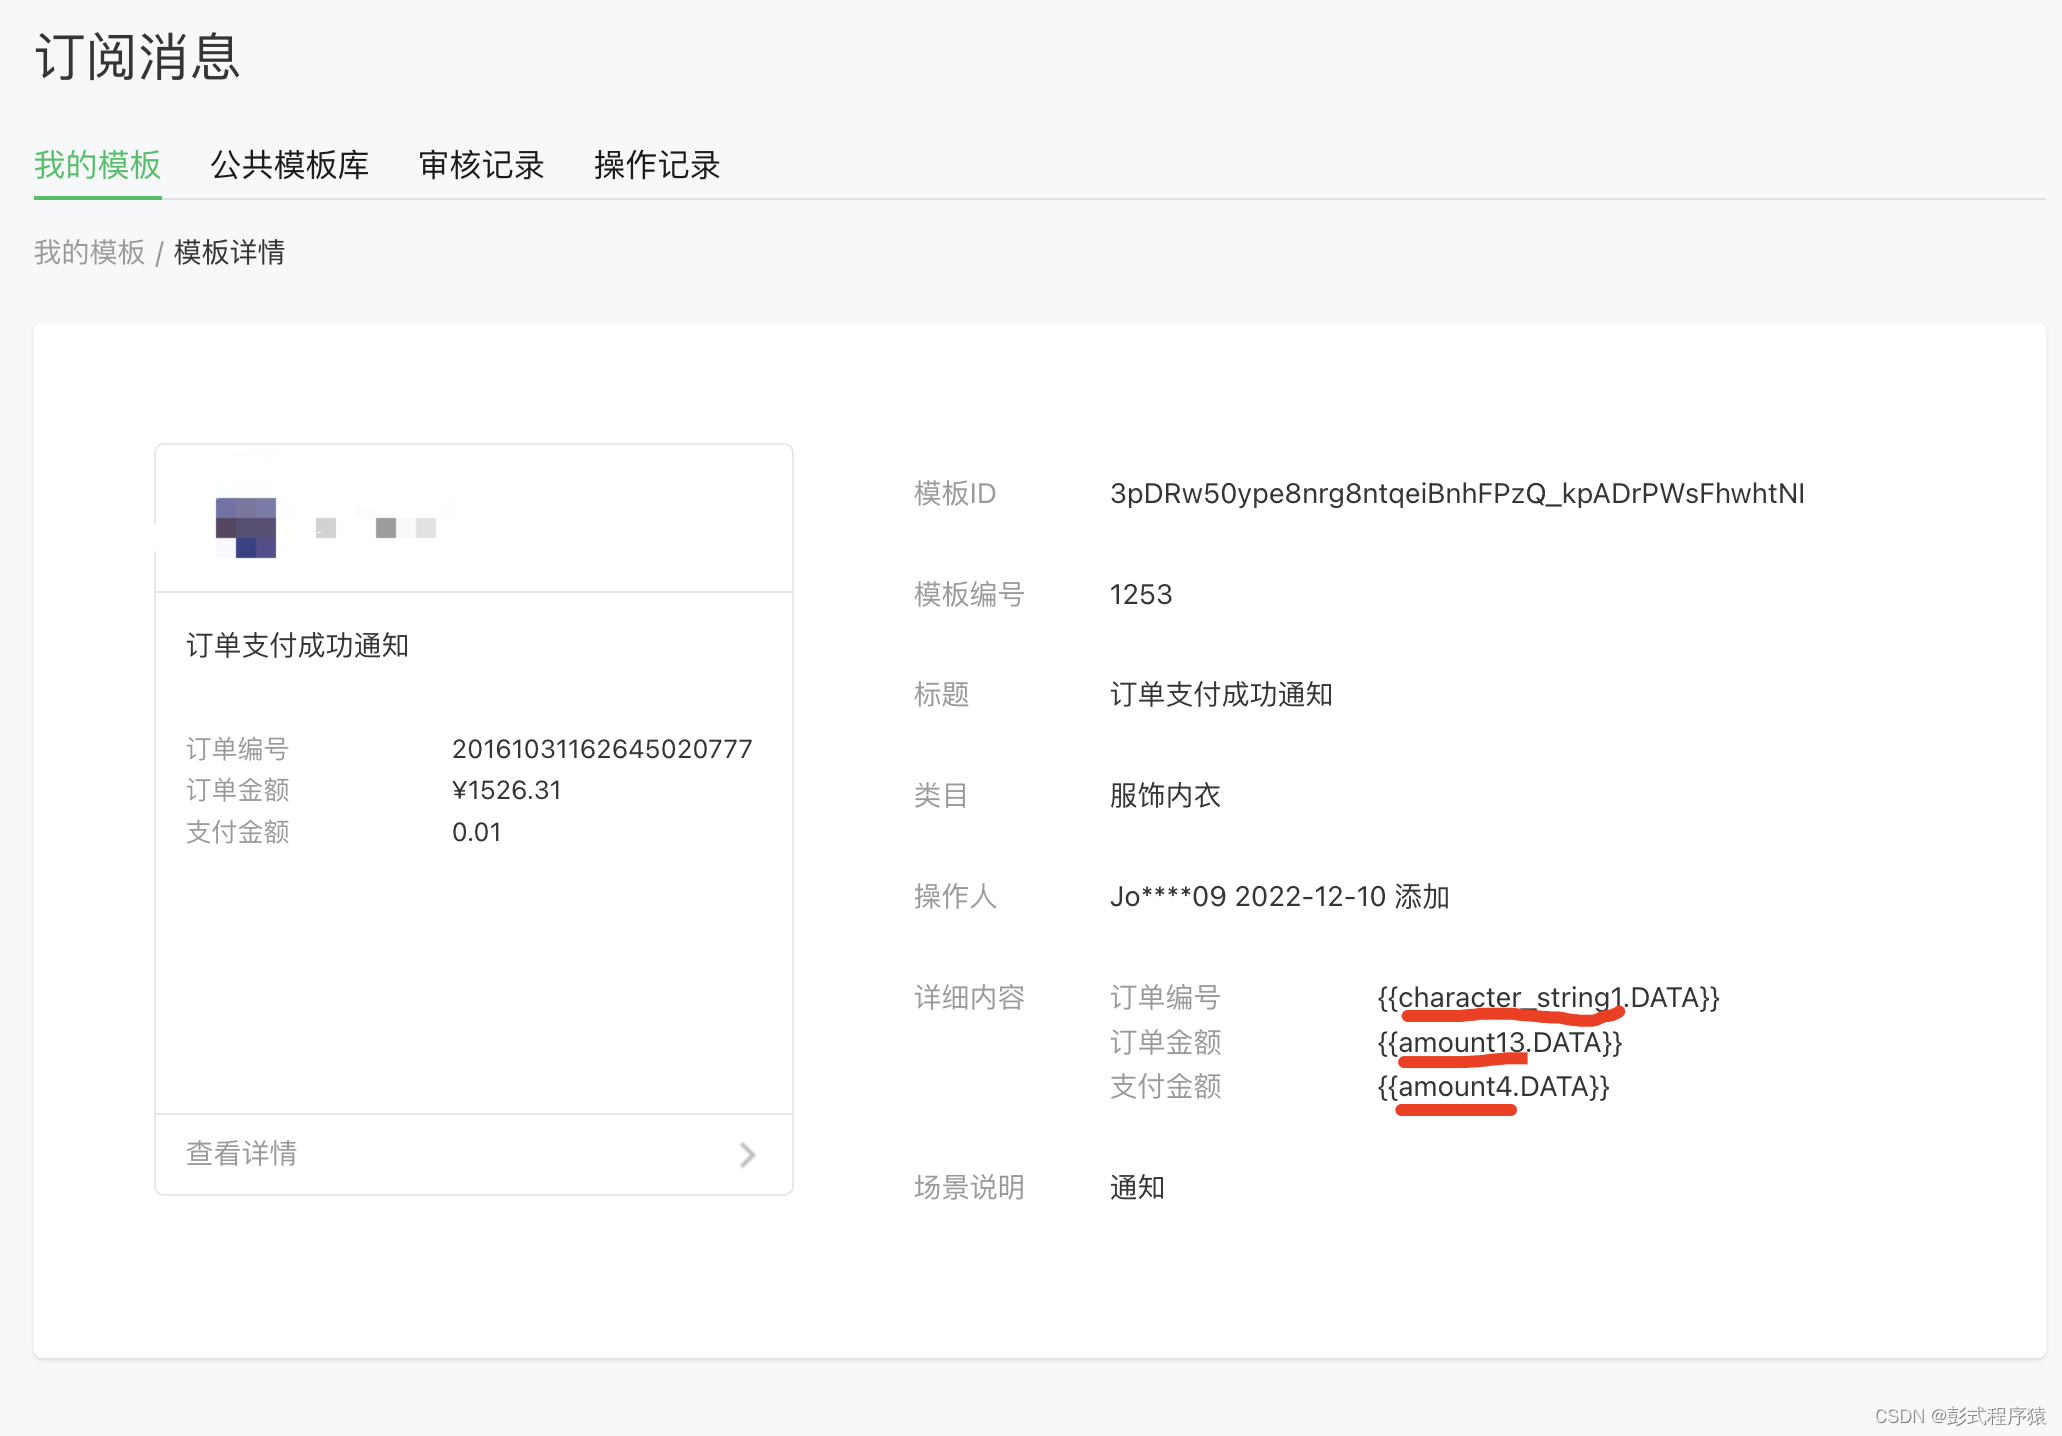
2. 定义好需要发送的消息
// 示例代码,对应上方红线的内容
let messages =
        {
            touser: '********************',//给某用户推送的openid,这个得你获取到用户的openid,才可以进行推送
            template_id: 'xxxxxxxxxxxxxxxxxxxxxxx', //订阅模板id
            data: {
                character_string1: {
                    value: 'order_87689176582576'// 订单号
                },
                amount13: {
                    value: '9999.00' //订单金额
                },
                amount4: {
                    value: '9999.00' //支付金额
                }
            }
        }
3.获取小程序的access_token
// config.app.appid 对应小程序的appid
// config.app.secret 对应小程序的秘钥
 const url = `https://api.weixin.qq.com/cgi-bin/token?grant_type=client_credential&appid=${config.app.appid}&secret=${config.app.secret}`
        const responses = await axios.get(url)
            .then(function (response) {
                // 处理成功情况
                return response.data
            })
            .catch(function (error) {
                // 处理错误情况
                console.log(error);
            })
4. 发起请求,向用户推送消息
这里有用到request插件,记得
npm install request或者yarn add request;
- 然后记得引用就好了
import request from 'request'
// responses.access_token就是上一步我们拿到的access_token

 const urls = `https://api.weixin.qq.com/cgi-bin/message/subscribe/send?access_token=${responses.access_token}`

        const options = {
            method: 'post',
            url: urls,
            json: messages //第二步定于的消息内容
        }
        request(options, function (err, res, body) {
            if (err) {
                console.log(err)
            } else {
                if (body.errcode !== 0) {
                    console.log(body)
                }
            }
        })
4. 小程序端添加接收订阅消息的按钮
// 点击后,会弹窗一个授权窗口,同意之后就可以进行测试订阅消息推送了

uni.requestSubscribeMessage({
					// 模板id:可以在微信公众平台 -> 功能 -> 订阅信息进行选择
					tmplIds: ['3pDRw50ype8nrg8ntqeiBnhFPzQ_kpADrPWsFhwhtNI'],
					success: res => {
						console.log(res)
					},
					fail: e => {
						console.log(e)
					}
				})
二、完整源代码
 async startToast(_, { id }) {

        let messages =
        {
            touser: '********************',//给某用户推送的openid
            template_id: 'xxxxxxxxxxxxxxxxxx',//订阅模板id(上面提到的)
            data: {
                character_string1: {
                    value: 'order_87689176582576'// 订单号
                },
                amount13: {
                    value: '9999.00' //售后单号
                },
                amount4: {
                    value: '9999.00' //退款时间
                }
            }
        }

        const url = `https://api.weixin.qq.com/cgi-bin/token?grant_type=client_credential&appid=${config.app.appid}&secret=${config.app.secret}`
        const responses = await axios.get(url)
            .then(function (response) {
                // 处理成功情况
                return response.data
            })
            .catch(function (error) {
                // 处理错误情况
                console.log(error);
            })
        // console.log(responses)
        const urls = `https://api.weixin.qq.com/cgi-bin/message/subscribe/send?access_token=${responses.access_token}`
        // console.log(urls)
        const options = {
            method: 'post',
            url: urls,
            json: messages
        }
        request(options, function (err, res, body) {
            if (err) {
                console.log(err)
            } else {
                if (body.errcode !== 0) {
                    console.log(body)
                }
            }
        })
    },
三. 需要注意的地方
-
- 一次订阅对应一次消息推送,目前
没有长期订阅的方案
- 一次订阅对应一次消息推送,目前
-
- 小程序端和node.js后端中的
模板ID注意一定要一致,不然推送不了
- 小程序端和node.js后端中的
最后
以上就是稳重咖啡豆最近收集整理的关于【Node.js】实现微信小程序订阅消息推送功能一、实战步骤二、完整源代码三. 需要注意的地方的全部内容,更多相关【Node.js】实现微信小程序订阅消息推送功能一、实战步骤二、完整源代码三.内容请搜索靠谱客的其他文章。
本图文内容来源于网友提供,作为学习参考使用,或来自网络收集整理,版权属于原作者所有。


发表评论 取消回复