这段时间在做人脸识别的课设,在OPENCV方面,如果仅仅是为了实现功能而去做的话,项目的充实度不够并且能达到的检测效果其实也并不理想,所以在此对OpenCV中的源代码进行了学习和解读;
首先我们先展示一段OPENCV自带的LBP-FaceRecognizer的示例代码:
#include "opencv2/core/core.hpp"
#include "opencv2/contrib/contrib.hpp"
#include "opencv2/highgui/highgui.hpp"
#include <iostream>
#include <fstream>
#include <sstream>
using namespace cv;
using namespace std;
static void read_csv(const string& filename, vector<Mat>& images, vector<int>& labels, char separator = ';') {
std::ifstream file(filename.c_str(), ifstream::in);
if (!file) {
string error_message = "No valid input file was given, please check the given filename.";
CV_Error(CV_StsBadArg, error_message);
}
string line, path, classlabel;
while (getline(file, line)) {
stringstream liness(line);
getline(liness, path, separator);
getline(liness, classlabel);
if (!path.empty() && !classlabel.empty()) {
images.push_back(imread(path, 0));
labels.push_back(atoi(classlabel.c_str()));
}
}
}
int main(int argc, const char *argv[]) {
// Check for valid command line arguments, print usage
// if no arguments were given.
// Get the path to your CSV.
string fn_csv = "D:\experiment\Graduating_class_set\pictures\orl_faces\at.txt";
// These vectors hold the images and corresponding labels.
vector<Mat> images;
vector<int> labels;
// Read in the data. This can fail if no valid
// input filename is given.
try {
read_csv(fn_csv, images, labels);
}
catch (cv::Exception& e) {
cerr << "Error opening file "" << fn_csv << "". Reason: " << e.msg << endl;
// nothing more we can do
exit(1);
}
// Quit if there are not enough images for this demo.
if (images.size() <= 1) {
string error_message = "This demo needs at least 2 images to work. Please add more images to your data set!";
CV_Error(CV_StsError, error_message);
}
// Get the height from the first image. We'll need this
// later in code to reshape the images to their original
// size:
int height = images[0].rows;
// The following lines simply get the last images from
// your dataset and remove it from the vector. This is
// done, so that the training data (which we learn the
// cv::FaceRecognizer on) and the test data we test
// the model with, do not overlap.
Mat testSample = images[images.size() - 1];
int testLabel = labels[labels.size() - 1];
images.pop_back();
labels.pop_back();
// The following lines create an LBPH model for
// face recognition and train it with the images and
// labels read from the given CSV file.
//
// The LBPHFaceRecognizer uses Extended Local Binary Patterns
// (it's probably configurable with other operators at a later
// point), and has the following default values
//
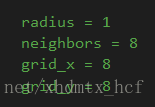
// radius = 1
// neighbors = 8
// grid_x = 8
// grid_y = 8
//
// So if you want a LBPH FaceRecognizer using a radius of
// 2 and 16 neighbors, call the factory method with:
//
// cv::createLBPHFaceRecognizer(2, 16);
//
// And if you want a threshold (e.g. 123.0) call it with its default values:
//
// cv::createLBPHFaceRecognizer(1,8,8,8,123.0)
//
Ptr<FaceRecognizer> model = createLBPHFaceRecognizer();
model->train(images, labels);
// The following line predicts the label of a given
// test image:
int predictedLabel = model->predict(testSample);
//
// To get the confidence of a prediction call the model with:
//
// int predictedLabel = -1;
// double confidence = 0.0;
// model->predict(testSample, predictedLabel, confidence);
//
string result_message = format("Predicted class = %d / Actual class = %d.", predictedLabel, testLabel);
cout << result_message << endl;
// Sometimes you'll need to get/set internal model data,
// which isn't exposed by the public cv::FaceRecognizer.
// Since each cv::FaceRecognizer is derived from a
// cv::Algorithm, you can query the data.
//
// First we'll use it to set the threshold of the FaceRecognizer
// to 0.0 without retraining the model. This can be useful if
// you are evaluating the model:
//
model->set("threshold", 0.0);
// Now the threshold of this model is set to 0.0. A prediction
// now returns -1, as it's impossible to have a distance below
// it
predictedLabel = model->predict(testSample);
cout << "Predicted class = " << predictedLabel << endl;
// Show some informations about the model, as there's no cool
// Model data to display as in Eigenfaces/Fisherfaces.
// Due to efficiency reasons the LBP images are not stored
// within the model:
cout << "Model Information:" << endl;
string model_info = format("tLBPH(radius=%i, neighbors=%i, grid_x=%i, grid_y=%i, threshold=%.2f)",
model->getInt("radius"),
model->getInt("neighbors"),
model->getInt("grid_x"),
model->getInt("grid_y"),
model->getDouble("threshold"));
cout << model_info << endl;
// We could get the histograms for example:
vector<Mat> histograms = model->getMatVector("histograms");
/*imshow("his",histograms[0]);
waitKey(0);
system("pause");*/
// But should I really visualize it? Probably the length is interesting:
cout << "Size of the histograms: " << histograms[0].total() << endl;
return 0;
}
读者结合代码与注释应该能大致了解Ptr<FaceRecognizer> model = createLBPHFaceRecognizer();
我们假设大家已经知道LBP算子的原理,结合代码可以看出,此类方法使用的是圆形的LBP算子,默认的参数为圆形LBP算子半径为1,取周边8个点,所取分块为8*8;
创建人脸识别模型后,将我们已经准备好的CVS文件(此文件的作用是标注样本图片的路径和样本所属标签)解析之后,得到Vector<Mat> images与Vector<int> labels两个集合,使用train方法即可进行模型训练,训练结束之后可使用predict方法进行人脸识别,过程较为简单,在此没必要做过多的叙述,接下来进行facerec.cpp文件的解读;
lbp-FaceRecognizer的相关代码可以在contrib文件夹中找到,相关文件为facerec.cpp;
先来看一下
class LBPH : public FaceRecognizer2
{
private:
    int _grid_x;
    int _grid_y;
    int _radius;
    int _neighbors;
    double _threshold;

    vector<Mat> _histograms;
    Mat _labels;

    // Computes a LBPH model with images in src and
    // corresponding labels in labels, possibly preserving
    // old model data.
    void train(InputArrayOfArrays src, InputArray labels, bool preserveData);

public:
    using FaceRecognizer::save;
    using FaceRecognizer::load;

    // Initializes this LBPH Model. The current implementation is rather fixed
    // as it uses the Extended Local Binary Patterns per default.
    //
    // radius, neighbors are used in the local binary patterns creation.
    // grid_x, grid_y control the grid size of the spatial histograms.
    LBPH(int radius_=1, int neighbors_=8,
            int gridx=8, int gridy=8,
            double threshold = DBL_MAX) :
        _grid_x(gridx),
        _grid_y(gridy),
        _radius(radius_),
        _neighbors(neighbors_),
        _threshold(threshold) {}

    // Initializes and computes this LBPH Model. The current implementation is
    // rather fixed as it uses the Extended Local Binary Patterns per default.
    //
    // (radius=1), (neighbors=8) are used in the local binary patterns creation.
    // (grid_x=8), (grid_y=8) controls the grid size of the spatial histograms.
    LBPH(InputArrayOfArrays src,
            InputArray labels,
            int radius_=1, int neighbors_=8,
            int gridx=8, int gridy=8,
            double threshold = DBL_MAX) :
                _grid_x(gridx),
                _grid_y(gridy),
                _radius(radius_),
                _neighbors(neighbors_),
                _threshold(threshold) {
        train(src, labels);
    }

    ~LBPH() { }

    // Computes a LBPH model with images in src and
    // corresponding labels in labels.
    void train(InputArrayOfArrays src, InputArray labels);

    // Updates this LBPH model with images in src and
    // corresponding labels in labels.
    void update(InputArrayOfArrays src, InputArray labels);

    // Predicts the label of a query image in src.
    int predict(InputArray src) const;

    // Predicts the label and confidence for a given sample.
    void predict(InputArray _src, int &label, double &dist) const;

    // See FaceRecognizer::load.
    void load(const FileStorage& fs);

    // See FaceRecognizer::save.
    void save(FileStorage& fs) const;

    // Getter functions.
    int neighbors() const { return _neighbors; }
    int radius() const { return _radius; }
    int grid_x() const { return _grid_x; }
    int grid_y() const { return _grid_y; }

    AlgorithmInfo* info() const;
};
LBP类中,私有成员包括:
    int _grid_x;
    int _grid_y;
    int _radius;
    int _neighbors;
    double _threshold;

    vector<Mat> _histograms;
    Mat _labels;

    // Computes a LBPH model with images in src and
    // corresponding labels in labels, possibly preserving
    // old model data.
    void train(InputArrayOfArrays src, InputArray labels, bool preserveData);
分别为每行/每列的区域个数,圆形LBP半径,领域取点个数、识别阈值,特征直方图集合,标签图片以及train方法;
LBP类中,公有成员包括:
public:
    using FaceRecognizer::save;
    using FaceRecognizer::load;

    // Initializes this LBPH Model. The current implementation is rather fixed
    // as it uses the Extended Local Binary Patterns per default.
    //
    // radius, neighbors are used in the local binary patterns creation.
    // grid_x, grid_y control the grid size of the spatial histograms.
    LBPH(int radius_=1, int neighbors_=8,
            int gridx=8, int gridy=8,
            double threshold = DBL_MAX) :
        _grid_x(gridx),
        _grid_y(gridy),
        _radius(radius_),
        _neighbors(neighbors_),
        _threshold(threshold) {}

    // Initializes and computes this LBPH Model. The current implementation is
    // rather fixed as it uses the Extended Local Binary Patterns per default.
    //
    // (radius=1), (neighbors=8) are used in the local binary patterns creation.
    // (grid_x=8), (grid_y=8) controls the grid size of the spatial histograms.
    LBPH(InputArrayOfArrays src,
            InputArray labels,
            int radius_=1, int neighbors_=8,
            int gridx=8, int gridy=8,
            double threshold = DBL_MAX) :
                _grid_x(gridx),
                _grid_y(gridy),
                _radius(radius_),
                _neighbors(neighbors_),
                _threshold(threshold) {
        train(src, labels);
    }

    ~LBPH() { }

    // Computes a LBPH model with images in src and
    // corresponding labels in labels.
    void train(InputArrayOfArrays src, InputArray labels);

    // Updates this LBPH model with images in src and
    // corresponding labels in labels.
    void update(InputArrayOfArrays src, InputArray labels);

    // Predicts the label of a query image in src.
    int predict(InputArray src) const;

    // Predicts the label and confidence for a given sample.
    void predict(InputArray _src, int &label, double &dist) const;

    // See FaceRecognizer::load.
    void load(const FileStorage& fs);

    // See FaceRecognizer::save.
    void save(FileStorage& fs) const;

    // Getter functions.
    int neighbors() const { return _neighbors; }
    int radius() const { return _radius; }
    int grid_x() const { return _grid_x; }
    int grid_y() const { return _grid_y; }

    AlgorithmInfo* info() const;
公有成员包括:FaceRecognizer中的save与load方法;两个构造函数,使用参数列表构造,设置了默认参数,可根据需求改进;析构函数;train方法;update方法;predict方法;以及获取私有成员的方法;
接下来一个一个函数读,首先是一个静态的圆形lbp算法:
static Mat elbp(InputArray src, int radius, int neighbors) {
    Mat dst;
    elbp(src, dst, radius, neighbors);
    return dst;
}
传入参数为一张图片src,圆形半径radius,领域取点数neighbors,在方法中调用elbp方法,得到处理后的lbp图像,elbp方法如下:
template <typename _Tp> static
inline void elbp_(InputArray _src, OutputArray _dst, int radius, int neighbors) {
    //get matrices
    Mat src = _src.getMat();
    // allocate memory for result
    _dst.create(src.rows-2*radius, src.cols-2*radius, CV_32SC1);
    Mat dst = _dst.getMat();
    // zero
    dst.setTo(0);
    for(int n=0; n<neighbors; n++) {
        // sample points
        float x = static_cast<float>(radius * cos(2.0*CV_PI*n/static_cast<float>(neighbors)));
        float y = static_cast<float>(-radius * sin(2.0*CV_PI*n/static_cast<float>(neighbors)));
        // relative indices
        int fx = static_cast<int>(floor(x));
        int fy = static_cast<int>(floor(y));
        int cx = static_cast<int>(ceil(x));
        int cy = static_cast<int>(ceil(y));
        // fractional part
        float ty = y - fy;
        float tx = x - fx;
        // set interpolation weights
        float w1 = (1 - tx) * (1 - ty);
        float w2 =      tx  * (1 - ty);
        float w3 = (1 - tx) *      ty;
        float w4 =      tx  *      ty;
        // iterate through your data
        for(int i=radius; i < src.rows-radius;i++) {
            for(int j=radius;j < src.cols-radius;j++) {
                // calculate interpolated value
                float t = static_cast<float>(w1*src.at<_Tp>(i+fy,j+fx) + w2*src.at<_Tp>(i+fy,j+cx) + w3*src.at<_Tp>(i+cy,j+fx) + w4*src.at<_Tp>(i+cy,j+cx));
                // floating point precision, so check some machine-dependent epsilon
                dst.at<int>(i-radius,j-radius) += ((t > src.at<_Tp>(i,j)) || (std::abs(t-src.at<_Tp>(i,j)) < std::numeric_limits<float>::epsilon())) << n;
            }
        }
    }
}

static void elbp(InputArray src, OutputArray dst, int radius, int neighbors)
{
    int type = src.type();
    switch (type) {
    case CV_8SC1:   elbp_<char>(src,dst, radius, neighbors); break;
    case CV_8UC1:   elbp_<unsigned char>(src, dst, radius, neighbors); break;
    case CV_16SC1:  elbp_<short>(src,dst, radius, neighbors); break;
    case CV_16UC1:  elbp_<unsigned short>(src,dst, radius, neighbors); break;
    case CV_32SC1:  elbp_<int>(src,dst, radius, neighbors); break;
    case CV_32FC1:  elbp_<float>(src,dst, radius, neighbors); break;
    case CV_64FC1:  elbp_<double>(src,dst, radius, neighbors); break;
    default:
        string error_msg = format("Using Original Local Binary Patterns for feature extraction only works on single-channel images (given %d). Please pass the image data as a grayscale image!", type);
        CV_Error(CV_StsNotImplemented, error_msg);
        break;
    }
}
elbp方法为一个圆形lbp处理算法,其使用了模板函数,根据不同的原始数据类型得到不同的结果;(设计者考虑的可真全面);
现在我将此方法和olbp方法一同拿出来,单独实验进行更好的展示,得到的结果图像如下:
其从左到右分别为,正常人脸图像,olbp处理人脸图像,elbp-1-8处理图像,elbp-2-8处理图像,elbp-2-16处理图像;可以很明显看出来圆形elbp算子能够更好的体现出纹理特征,在一定程度上,我觉得circle3窗口中显示出来的lbp图像较好,当然,这还需要后期实验的测试;
接下来看一下load函数:
void LBPH::load(const FileStorage& fs) {
    fs["radius"] >> _radius;
    fs["neighbors"] >> _neighbors;
    fs["grid_x"] >> _grid_x;
    fs["grid_y"] >> _grid_y;
    //read matrices
    readFileNodeList(fs["histograms"], _histograms);
    fs["labels"] >> _labels;
    const FileNode& fn = fs["labelsInfo"];
    if (fn.type() == FileNode::SEQ)
    {
        _labelsInfo.clear();
        for (FileNodeIterator it = fn.begin(); it != fn.end();)
        {
            LabelInfo item;
            it >> item;
            _labelsInfo.insert(std::make_pair(item.label, item.value));
        }
    }
}
可以看出,load函数主要是从文件中获取LBP类的信息;相反,save函数就是向文件中保存相关信息:
void LBPH::save(FileStorage& fs) const {
    fs << "radius" << _radius;
    fs << "neighbors" << _neighbors;
    fs << "grid_x" << _grid_x;
    fs << "grid_y" << _grid_y;
    // write matrices
    writeFileNodeList(fs, "histograms", _histograms);
    fs << "labels" << _labels;
    fs << "labelsInfo" << "[";
    for (std::map<int, string>::const_iterator it = _labelsInfo.begin(); it != _labelsInfo.end(); it++)
        fs << LabelInfo(it->first, it->second);
    fs << "]";
}
接下来主要看一下train函数的内容:
void LBPH::train(InputArrayOfArrays _in_src, InputArray _in_labels, bool preserveData) {
    if(_in_src.kind() != _InputArray::STD_VECTOR_MAT && _in_src.kind() != _InputArray::STD_VECTOR_VECTOR) {
        string error_message = "The images are expected as InputArray::STD_VECTOR_MAT (a std::vector<Mat>) or _InputArray::STD_VECTOR_VECTOR (a std::vector< vector<...> >).";
        CV_Error(CV_StsBadArg, error_message);
    }
    if(_in_src.total() == 0) {
        string error_message = format("Empty training data was given. You'll need more than one sample to learn a model.");
        CV_Error(CV_StsUnsupportedFormat, error_message);
    } else if(_in_labels.getMat().type() != CV_32SC1) {
        string error_message = format("Labels must be given as integer (CV_32SC1). Expected %d, but was %d.", CV_32SC1, _in_labels.type());
        CV_Error(CV_StsUnsupportedFormat, error_message);
    }
    // get the vector of matrices
    vector<Mat> src;
    _in_src.getMatVector(src);
    // get the label matrix
    Mat labels = _in_labels.getMat();
    // check if data is well- aligned
    if(labels.total() != src.size()) {
        string error_message = format("The number of samples (src) must equal the number of labels (labels). Was len(samples)=%d, len(labels)=%d.", src.size(), _labels.total());
        CV_Error(CV_StsBadArg, error_message);
    }
    // if this model should be trained without preserving old data, delete old model data
    if(!preserveData) {
        _labels.release();
        _histograms.clear();
    }
    // append labels to _labels matrix
    for(size_t labelIdx = 0; labelIdx < labels.total(); labelIdx++) {
        _labels.push_back(labels.at<int>((int)labelIdx));
    }
    // store the spatial histograms of the original data
    for(size_t sampleIdx = 0; sampleIdx < src.size(); sampleIdx++) {
        // calculate lbp image
        Mat lbp_image = elbp(src[sampleIdx], _radius, _neighbors);
        // get spatial histogram from this lbp image
        Mat p = spatial_histogram(
                lbp_image, /* lbp_image */
                static_cast<int>(std::pow(2.0, static_cast<double>(_neighbors))), /* number of possible patterns */
                _grid_x, /* grid size x */
                _grid_y, /* grid size y */
                true);
        // add to templates
        _histograms.push_back(p);
    }
}
源代码如上,我用最简单的语言来解释一下train函数干了啥------依次计算每个图片的lbp图,并计算特征向量,存入私有成员histograms的集合中;
源代码中先对特殊情况进行了一些判断后,获取了传入的Mat集合与labels集合,进行数量判断,如果图片数与标签数不符,则报错;
在完成特殊情况判断之后,需要进行的是将标签按顺序存入模型中,之后将图片按顺序进行elbp处理,并且将得到的elbp图进行直方图特征化,所使用函数为spatial_histogram();此函数源代码如下:
static Mat spatial_histogram(InputArray _src, int numPatterns,
                             int grid_x, int grid_y, bool /*normed*/)
{
    Mat src = _src.getMat();
    // calculate LBP patch size
    int width = src.cols/grid_x;
    int height = src.rows/grid_y;
    // allocate memory for the spatial histogram
    Mat result = Mat::zeros(grid_x * grid_y, numPatterns, CV_32FC1);
    // return matrix with zeros if no data was given
    if(src.empty())
        return result.reshape(1,1);
    // initial result_row
    int resultRowIdx = 0;
    // iterate through grid
    for(int i = 0; i < grid_y; i++) {
        for(int j = 0; j < grid_x; j++) {
            Mat src_cell = Mat(src, Range(i*height,(i+1)*height), Range(j*width,(j+1)*width));
            Mat cell_hist = histc(src_cell, 0, (numPatterns-1), true);
            // copy to the result matrix
            Mat result_row = result.row(resultRowIdx);
            cell_hist.reshape(1,1).convertTo(result_row, CV_32FC1);
            // increase row count in result matrix
            resultRowIdx++;
        }
    }
    // return result as reshaped feature vector
    return result.reshape(1,1);
}
相信这个函数是大家想看的重点吧?大部分人对LBP特征算法都能说上来几句,但是具体代码实现或者想自己进行改进的时候却又发现所掌握的知识不足,所以现在来看一下这个求取特征直方图的算法;(std::pow(a,b)的作用是求出a的b次方);
OK,现在来通过文字描述一下这个函数,希望大家能看明白,看不明白的地方查一下资料应该也可以理解:
首先讲解一下传入参数src就是传入的图片,numPatterns表示行向量的维数(听不懂是吧,不要慌,下面会解释),grid_x表示每一行被划分的块数,grid_y表示每一列被划分的块数;
下面来讲解一下numPatterns的含义,首先我们知道,在默认的lbp算法中,采用圆形lbp算子进行图像的lbp处理,而圆形lbp算子中默认半径为1,领域取8个点,所以,所以,所以,经过lbp圆形算子处理之后的图片,其像素值的可取值范围为0-2的8次方对吗?也就是0-255,我们回看train函数中在调用spatial_histogram函数的时候,传入的numPatterns的值就是2的neighbours次方,默认为8的话传入的就是2的8次方,那么为什么要传入这个参数呢,因为要得到统计直方图,什么叫统计直方图,大家可以理解为一张图片的像素点分布规律特征图,在某些情况下,统计直方图即为每个像素点值出现的概率统计,所以如果像素点的取值在0-255之间,那么所得到统计直方图应该是一个256维的向量,什么叫256维的向量?OK,那就是vector<>.size()=256,明白了吧?
OK现在大家明白了numPatterns的含义之后,这个算法就很好读懂了,首先为我们最终想要得到的统计直方图分配空间,Mat::zeros(grid_x*grid_y,numPatterns,CV_32FC1)的作用就是分配空间,其建立了一个Mat矩阵,这个矩阵的行数为grid_x*grid_y,列数为numPatterns,为什么要这样做?之前说过grid的意思表示每行每列的划分块数,此算法的思想即是将大图片划分此8*8=64个小区域,分别获得每一个小区域的特征直方图之后将直方图连接得到整张大图片的特征直方图(好了, 现在肯定有人疑惑为什么不直接对整张大图片做直方图统计呢,因为那样的话得到的准确率太低了),看到代码中有width=src.cols/grid_x;height=src.rows/grid_y;这两行代码的作用是计算每一个区域的像素点数行列;接下来进入到二重的for循环,其作用很简单,就是在原图上借助Range函数(范围取值)来计算每一个区域的特征直方图并将其放入Mat result中,Mat result就是刚才分配的64行,256列的最终统计直方图空间;在计算完整张图片之后使用reshape函数将其化为单通道且只有一行的特征向量;这样,我们就得到了一张人脸图片的最终特征向量,最终特征向量即为人脸图片经过elbp处理和分块处理之后的统计直方图的一维化结果;train函数到此学习完毕;
下面来学习predict函数,其实train函数学习完之后,相信,,predict函数不解释就知道怎么做了吧?没错,opencv这里写的仍然很粗糙,Opencv所做的就是将需要识别的人脸调用spatial_histogram函数,就是我们上面讲的那个,得到特征值之后,与已经存储在模型中的每一张图进行比较,求出最近距离,然后返回模型中那张图片的标签,是不是,,很粗糙。。所以不要把这东西想的太难,其实他根本没有去把人脸特征进行统计,这样的方法可以拿来识别山,识别水,识别天空,都可以,不是吗?我们来看一下源代码:
void LBPH::predict(InputArray _src, int &minClass, double &minDist) const {
    if(_histograms.empty()) {
        // throw error if no data (or simply return -1?)
        string error_message = "This LBPH model is not computed yet. Did you call the train method?";
        CV_Error(CV_StsBadArg, error_message);
    }
    Mat src = _src.getMat();
    // get the spatial histogram from input image
    Mat lbp_image = elbp(src, _radius, _neighbors);
    Mat query = spatial_histogram(
            lbp_image, /* lbp_image */
            static_cast<int>(std::pow(2.0, static_cast<double>(_neighbors))), /* number of possible patterns */
            _grid_x, /* grid size x */
            _grid_y, /* grid size y */
            true /* normed histograms */);
    // find 1-nearest neighbor
    minDist = DBL_MAX;
    minClass = -1;
    for(size_t sampleIdx = 0; sampleIdx < _histograms.size(); sampleIdx++) {
        double dist = compareHist(_histograms[sampleIdx], query, CV_COMP_CHISQR);
        if((dist < minDist) && (dist < _threshold)) {
            minDist = dist;
            minClass = _labels.at<int>((int) sampleIdx);
        }
    }
}最后
以上就是快乐外套最近收集整理的关于Opencv2中 lbp源码解读的全部内容,更多相关Opencv2中内容请搜索靠谱客的其他文章。


发表评论 取消回复