树莓派将DHT11温度湿度上传到阿里云物联网平台
1、自定义功能
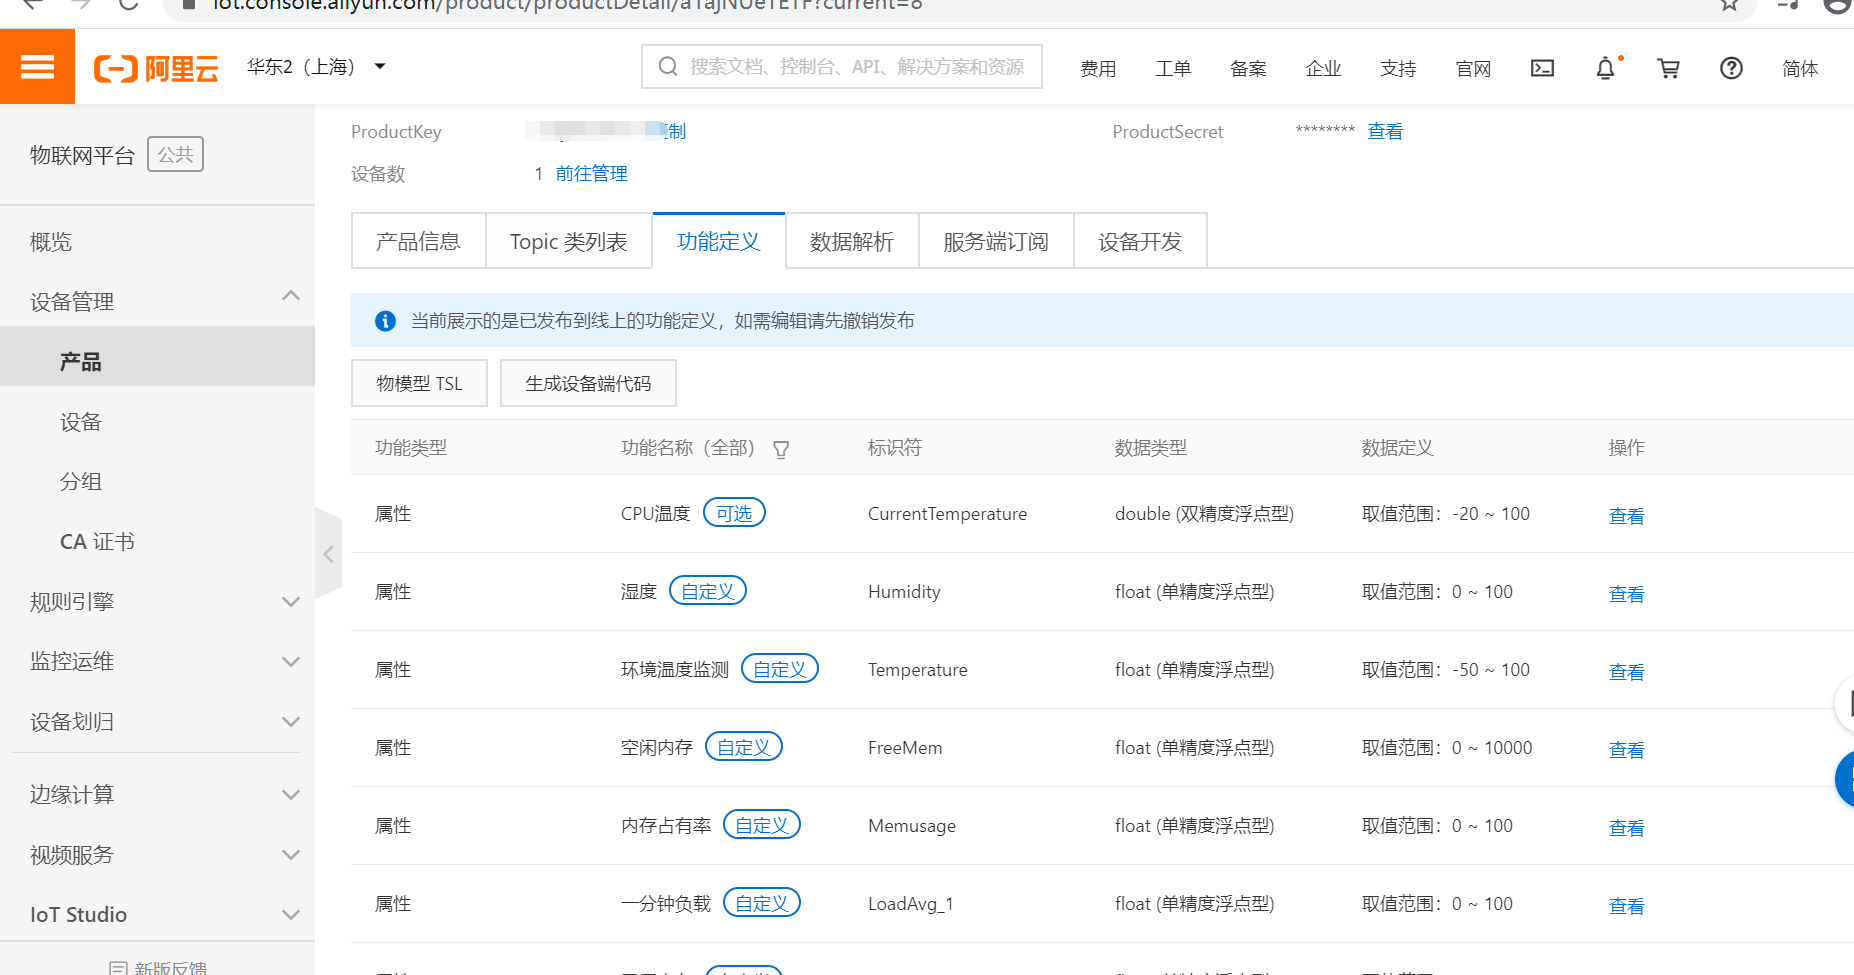
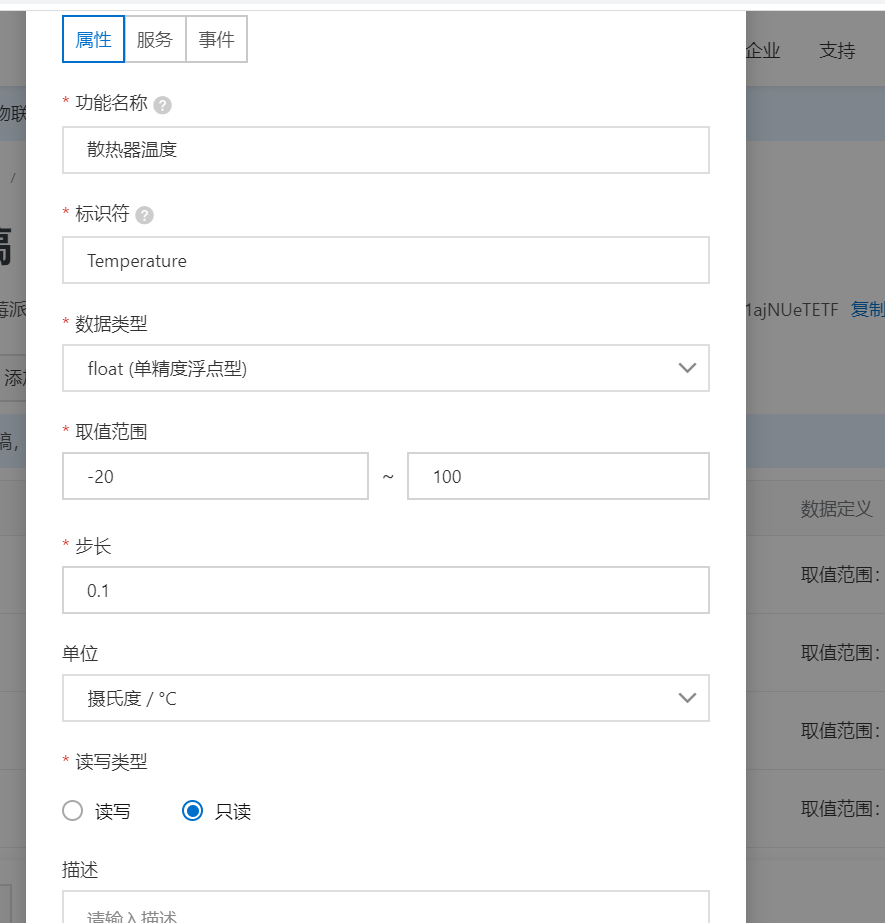
添加的过程就是如此,因为温度是有小数点的,所以用float比较好,其他的比如时间等等也可以使用text类型,视情况而定。
定义好之后就可以发布了,当前只有一个温度,还需要添加是湿度。
2、环境准备
- 下载Node.js
- 安装mtqq库
npm install aliyun-iot-mqtt -S
- 安装阿里云SDK
sudo pip install aliyun-python-sdk-core
sudo pip install aliyun-python-sdk-iot
3、代码
#-*- coding: utf-8 -*-
import aliyunsdkiotclient.AliyunIotMqttClient as iot
import json
import multiprocessing
import time
import random
import RPi.GPIO as gpio
import sys
import os
options = {
    'productKey': '你的产品号',
    'deviceName': '你的产品名称',
    'deviceSecret': '密码',
    'port': 1883,
    'host': 'iot-as-mqtt.cn-shanghai.aliyuncs.com'
}

def GetDTH():
    gpio.setwarnings(False)
    gpio.setmode(gpio.BCM)
    time.sleep(1)
    data = []

    def delay(i):  # 20*i usdelay
        a = 0
        for j in range(i):
            a + 1

    j = 0
    # start work
    gpio.setup(21, gpio.OUT)
    # gpio.output(12,gpio.HIGH)
    # delay(10)
    gpio.output(21, gpio.LOW)
    time.sleep(0.02)
    gpio.output(21, gpio.HIGH)
    i = 1
    i = 1

    # wait to response
    gpio.setup(21, gpio.IN)

    while gpio.input(21) == 1:
        continue

    while gpio.input(21) == 0:
        continue

    while gpio.input(21) == 1:
        continue
    # get data

    while j < 40:
        k = 0
        while gpio.input(21) == 0:
            continue

        while gpio.input(21) == 1:
            k += 1
            if k > 100: break
        if k < 20:
            data.append(0)
        else:
            data.append(1)
        j += 1

    print("Sensor is working")
    # get temperature
    humidity_bit = data[0:8]
    humidity_point_bit = data[8:16]
    temperature_bit = data[16:24]
    temperature_point_bit = data[24:32]
    check_bit = data[32:40]

    humidity = 0
    humidity_point = 0
    temperature = 0
    temperature_point = 0
    check = 0

    for i in range(8):
        humidity += humidity_bit[i] * 2 ** (7 - i)
        humidity_point += humidity_point_bit[i] * 2 ** (7 - i)
        temperature += temperature_bit[i] * 2 ** (7 - i)
        temperature_point += temperature_point_bit[i] * 2 ** (7 - i)
        check += check_bit[i] * 2 ** (7 - i)

    tmp = humidity + humidity_point + temperature + temperature_point

    if check == tmp:
        print("temperature is ", temperature, ".", temperature_point, "*C", "wet is ", humidity, ".", humidity_point,
               "%")
        s=temperature+temperature_point*0.1
        m=humidity+humidity_point*0.1
        return s,m
    else:
        print("file")
        return 0, 0


host = options['productKey'] + '.' + options['host']


def on_message(client, userdata, msg):

    print(msg.payload)
    setjson = json.loads(msg.payload)


def on_connect(client, userdata, flags_dict, rc):
    print("Connected with result code " + str(rc))


def on_disconnect(client, userdata, flags_dict, rc):
    print("Disconnected.")


def worker(client):
    topic = '/sys/' + options['productKey'] + '/' + options['deviceName'] + '/thing/event/property/post'
    while True:
        file =open("/sys/class/thermal/thermal_zone0/temp",'r')
        temp = float(file.read())/1000
        file.close()
        time.sleep(5)
        T, H = GetDTH()
        print('T=', T, 'H=', H)

        if T != 0 or H != 0:
            payload_json = {
                'id': int(time.time()),
                'params': {
                    'CurrentTemperature':temp,
                    'Temperature': T,  # random.randint(20, 30),
                    'Humidity': H,  # random.randint(40, 50)
                },
                'method': "thing.event.property.post"
            }

            print('send data to iot server: ' + str(payload_json))
            client.publish(topic, payload=str(payload_json))


if __name__ == '__main__':
    client = iot.getAliyunIotMqttClient(options['productKey'], options['deviceName'], options['deviceSecret'],
                                        secure_mode=3)
    client.on_connect = on_connect
    client.on_disconnect = on_disconnect
    client.on_message = on_message
    client.connect(host=host, port=options['port'], keepalive=60)

    p = multiprocessing.Process(target=worker, args=(client,))
    p.start()
    client.loop_forever()
里面的代码是可以直接可以使用的,修改好自己的产品信息,然后将DHT11中数据引脚修改一下就可以了。然后注意的是params中的key要与阿里云定义的标识符相同,运行之后才会传送到阿里云中去。
最后
以上就是发嗲咖啡豆最近收集整理的关于树莓派将DHT11温度湿度上传到阿里云物联网平台的全部内容,更多相关树莓派将DHT11温度湿度上传到阿里云物联网平台内容请搜索靠谱客的其他文章。
本图文内容来源于网友提供,作为学习参考使用,或来自网络收集整理,版权属于原作者所有。


发表评论 取消回复