前篇:ajax 与 axios的区别
刚刚接触axios有好多疑惑。它和ajax有什么关系呢和区别呢?接下来一起看下:
1.区别
axios是通过promise实现对ajax技术的一种封装,就像jQuery实现ajax封装一样。
简单来说: ajax技术实现了网页的局部数据刷新,axios实现了对ajax的封装。
axios是ajax ajax不止axios。
下面列出代码来对比一下:
axios:
axios({
            url: '/getUsers',
            method: 'get',
            responseType: 'json', // 默认的
            data: {
                //'a': 1,
                //'b': 2,
            }
        }).then(function (response) {
            console.log(response);
            console.log(response.data);
        }).catch(function (error) {
            console.log(error);
            })
JQuery- ajax:
$.ajax({
            url: '/getUsers',
            type: 'get',
            dataType: 'json',
            data: {
                //'a': 1,
                //'b': 2,
            },
            success: function (response) {
                console.log(response);
            }
        })
2.优缺点:
ajax:
本身是针对MVC的编程,不符合现在前端MVVM的浪潮
基于原生的XHR开发,XHR本身的架构不清晰,已经有了fetch的替代方案
JQuery整个项目太大,单纯使用ajax却要引入整个JQuery非常的不合理(采取个性化打包的方案又不能享受CDN服务
axios:
从 node.js 创建 http 请求
支持 Promise API
客户端支持防止CSRF
提供了一些并发请求的接口(重要,方便了很多的操作)
一、安装Axios 依赖
使用 npm:   $ npm install axios  ||  npm i axios

使用 bower: $ bower install axios

使用  cdn:  <script src="https://unpkg.com/axios/dist/axios.min.js"></script>
当前使用命令(在项目目录下执行)
npm i axios

二、模拟数据(使用java创建测试接口模拟数据)
测试接口
查询所有: http://localhost:8088/findAll
id查询:http://localhost:8088/findId   ?id=1
添加:http://localhost:8088/insert     ?id=1&name=wang&age=22
修改:http://localhost:8088/update     ?id=1&name=erping&age=24
Uncaught (in promise) Error: Request failed with status code 400 错误说明
axios请求如果出现: **Uncaught (in promise) Error: Request failed with status code 400**  错误
那么请注意 axios请求头的 Content-Type 默认是 application/json,后台接收格式也要为 application/json,
此处使用了@RequestBody 处理,postman 工具默认的是 application/x-www-form-urlencoded
此次的跨域问题后台处理方式,使用springboot 的跨域处理注解
@CrossOrigin(origins = "*", allowCredentials = "true")
示例代码如下:看不懂的请跳过
/**
 * TODO  用户管理
 *
 * @author 王松
 * @mail 1720696548@qq.com
 * @date 2020/1/28 0028 11:29
 */
@RestController
public class UserService {

    //user数据容器,key=id
    private static List<User> users = new ArrayList<>();

    /**
     * TODO  查询所有
     */
    @GetMapping("findAll")
    @CrossOrigin(origins = "*", allowCredentials = "true")
    public String getAll() {
        if (users.size() <= 0) {
            return "查询成功,用户信息为空";
        } else {
            return users.toString();
        }
    }


    /**
     * TODO  id查询
     */
    @GetMapping("/findId")
    @CrossOrigin(origins = "*", allowCredentials = "true")
    public String get(int id) {
        User user = this.getId(id);
        if (user == null) {
            return "没有该id数据";
        } else {
            return user.toString();
        }
    }


    /**
     * TODO  查询用户信息
     *
     * @param user 参数[id,name,age]
     */
    @RequestMapping("/insert")
    @CrossOrigin(origins = "*", allowCredentials = "true")
    public String insert(@RequestBody User user) {
        users.add(user);
        return "添加成功";
    }


    /**
     * TODO  修改用户信息
     *
     * @param user 参数[id,name,age] -- id必传
     */
    @RequestMapping("/update")
    @CrossOrigin(origins = "*", allowCredentials = "true")
    public String update(@RequestBody User user) {
        //删除原数据
        for (User oldUser : users) {
            if (oldUser.getId() == user.getId()) {
                users.remove(oldUser);
                break;
            }
        }
        //添加
        users.add(user);
        return "修改成功";
    }


    //通过id 获取用户信息
    private User getId(Integer id) {
        for (User user : users) {
            if (user.getId() == id) {
                return user;
            }
        }
        return null;
    }
三、Vue 项目使用Axios
1、main.js 加载axios组件
// 导入axios //安装命令 npm  i  axios
import axios from 'axios';


// 注册到全局组件
Vue.use(axios);


//axios 相关配置,注意:axios请求头的 Content-Type 默认是 application/json,而postman默认的是 application/x-www-form-urlencoded
var instance = axios.create({
    //请求根目录
	baseURL: 'http://localhost:8088',
	// withCredentials : true,
	//timeout: 1000,
	// headers: {'X-Custom-Header': 'foobar'},
});


Vue.prototype.$axios = instance;   //  使用方式 this.$axios
2、get 请求示例
                this.$axios.get('/findId?id=1')
					.then(function(response) {
						//请求成功
						window.console.log(response);
						_this.resUser = response.data;
					})
					.catch(function(err) {
						alert("请求失败--" + err)
					});
3、post 请求示例
             this.$axios.post('/insert', {
						id: _this.addUser.id,
						name: _this.addUser.name,
						age: _this.addUser.age,
					})
					.then(function(response) {
						//请求成功
						alert("请求成功--" + response.data);
					})
					.catch(function(err) {
						//请求失败
						alert("请求失败--" + err)
					});
4、 AxiosTest.vue(测试get,post 代码)
let _this = this; 注意this 作用域范围,需要重新定义变量接收
<template>
	<div>
		<button @click="findAll"> 查询所有(GET)</button>
		<button @click="findId1"> id查询1(GET-id=1)</button>
		<button @click="findId2"> id查询2(GET-id=2)</button>
		<hr />
		users = {{resUser}}  <!-- 展示查询数据 -->
		<hr />
		<input type="text" v-model="addUser.id" />
		<input type="text" v-model="addUser.name" />
		<input type="text" v-model="addUser.age" />
		<button @click="insert"> 添加</button>
		<br />
		<input type="text" v-model="updUser.id" />
		<input type="text" v-model="updUser.name" />
		<input type="text" v-model="updUser.age" />
		<button @click="update"> 修改</button>
	</div>
</template>


<script type="text/javascript">
	export default {
		//定义当前vue数据,每个实例数据是独立的
		data() {
			return {
				resUser: {},  //查询数据
				addUser: {"id": 1,	name: "wangsong",	age: 22},	//添加输入框数据
				updUser: {"id": 1,	name: "erping",	age: 23},      //修改输入框数据
			}
		},
		methods: {
			// 查询所有
			findAll() {
				let _this = this;
				this.$axios.get('/findAll')
					.then(function(response) {
						//请求成功
						window.console.log(response);
						//赋值属性
						_this.resUser = response.data;

					})
					.catch(function(err) {
						alert("请求失败--" + err)
					});
			},

			// id查询方式一,url 拼接查询参数
			findId1() {
				let _this = this;
				//通过给定的ID来发送请求
				//this.$axios.get('/user?ID=12345')
				this.$axios.get('/findId?id=1')
					.then(function(response) {
						//请求成功
						window.console.log(response);
						_this.resUser = response.data;
					})
					.catch(function(err) {
						alert("请求失败--" + err)
					});
			},

			// id查询方式二,params 添加查询参数
			findId2() {
				let _this = this;
				//以上请求也可以通过这种方式来发送
				this.$axios.get('/findId', {
						//请求参数
						params: {
							id: 2
						}
					})
					.then(function(response) {
						//请求成功
						window.console.log(response);
						_this.resUser = response.data;
					})
					.catch(function(err) {
						//请求失败
						alert("请求失败--" + err)
					});
			},
			//添加
			insert() {
				const _this = this;
				//以上请求也可以通过这种方式来发送
				this.$axios.post('/insert', {
						id: _this.addUser.id,
						name: _this.addUser.name,
						age: _this.addUser.age,
					})
					.then(function(response) {
						//请求成功
						alert("请求成功--" + response.data);
					})
					.catch(function(err) {
						//请求失败
						alert("请求失败--" + err)
					});
			},
			//修改
			update() {
				const _this = this;
				//以上请求也可以通过这种方式来发送
				this.$axios.post('/update', {
						id: _this.updUser.id,
						name: _this.updUser.name,
						age: _this.updUser.age,
					})
					.then(function(response) {
						//请求成功
						alert("请求成功--" + response.data);
					})
					.catch(function(err) {
						//请求失败
						alert("请求失败--" + err)
					});
			}
		}
	}
</script>

<style>
</style>
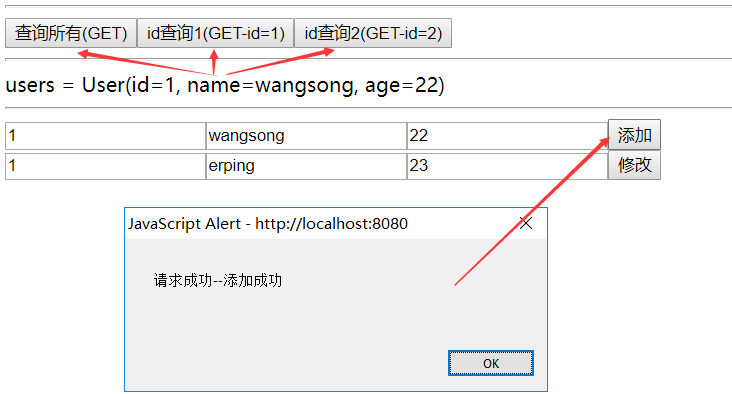
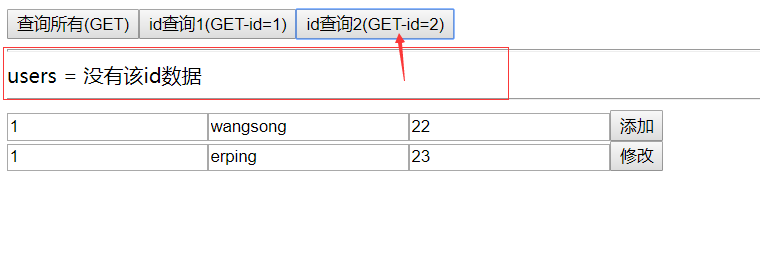
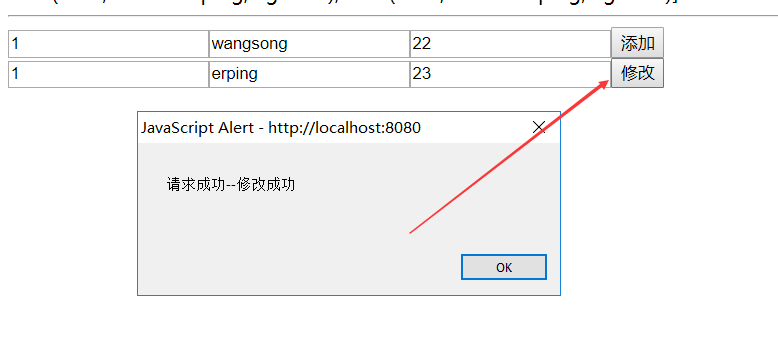
5、测试效果
测试页

添加数据

查询数据


修改数据

查询所有

其他还有一些可以参考地址:https://www.kancloud.cn/yunye/axios/234845
如:url 拦截器(可以进行 toket验证),合并请求(两个请求需同时发送),还有请求配置等等
最后
以上就是俊秀指甲油最近收集整理的关于vue 三、Axios (ajax 框架) 在vue 项目中的使用的全部内容,更多相关vue内容请搜索靠谱客的其他文章。


发表评论 取消回复