目录
- 1. 上传jar
- 1.1 创建工程
- 1.2 修改pom
- 1.3 发布
- 2. 下载jar
相关文章
Jfrog Artifactory 安装
Jfrog Artifactory 仓库配置
Jfrog Artifactory 上传和下载jar
Jfrog Artifactory 上传和下载jar (gradle篇)
1. 上传jar
- 这里提前创建好snapshort和release仓库
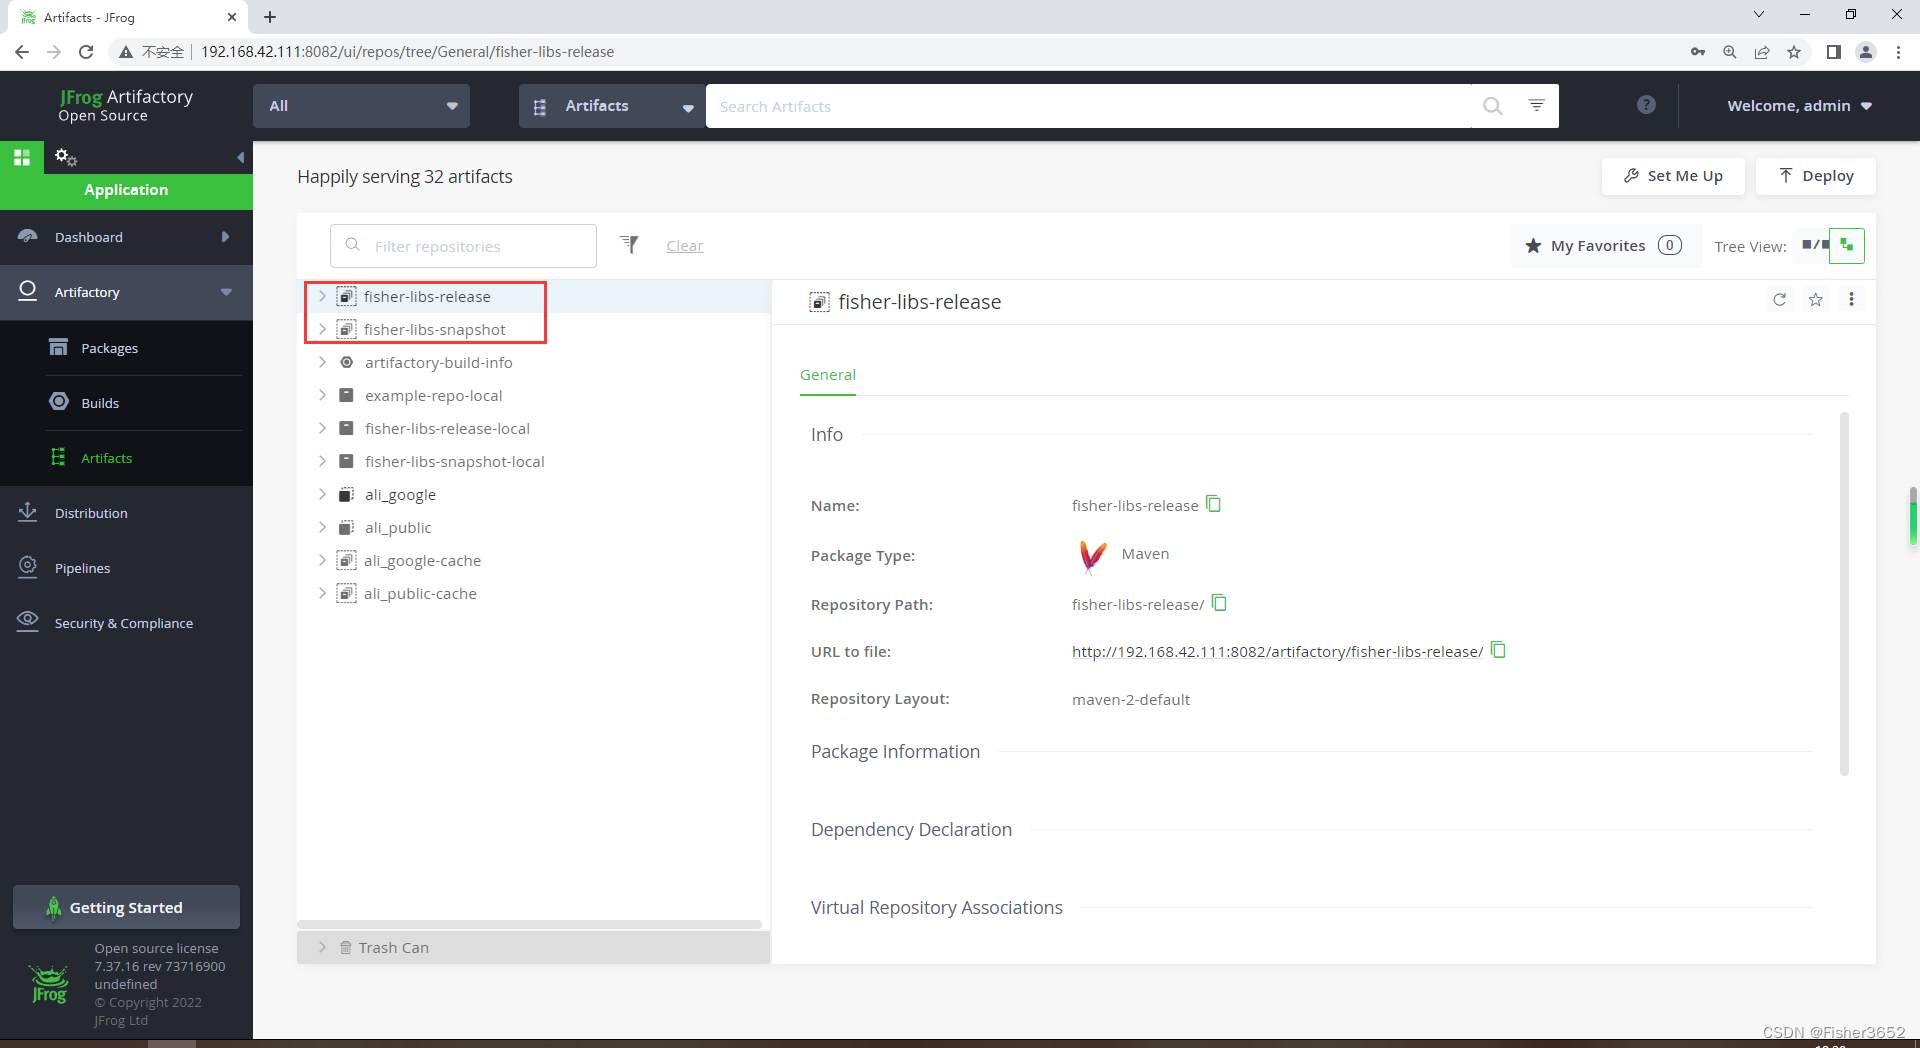
- maven工程中上传jar参考https://www.jfrog.com/confluence/display/JFROG/Maven+Artifactory+Plugin
1.1 创建工程
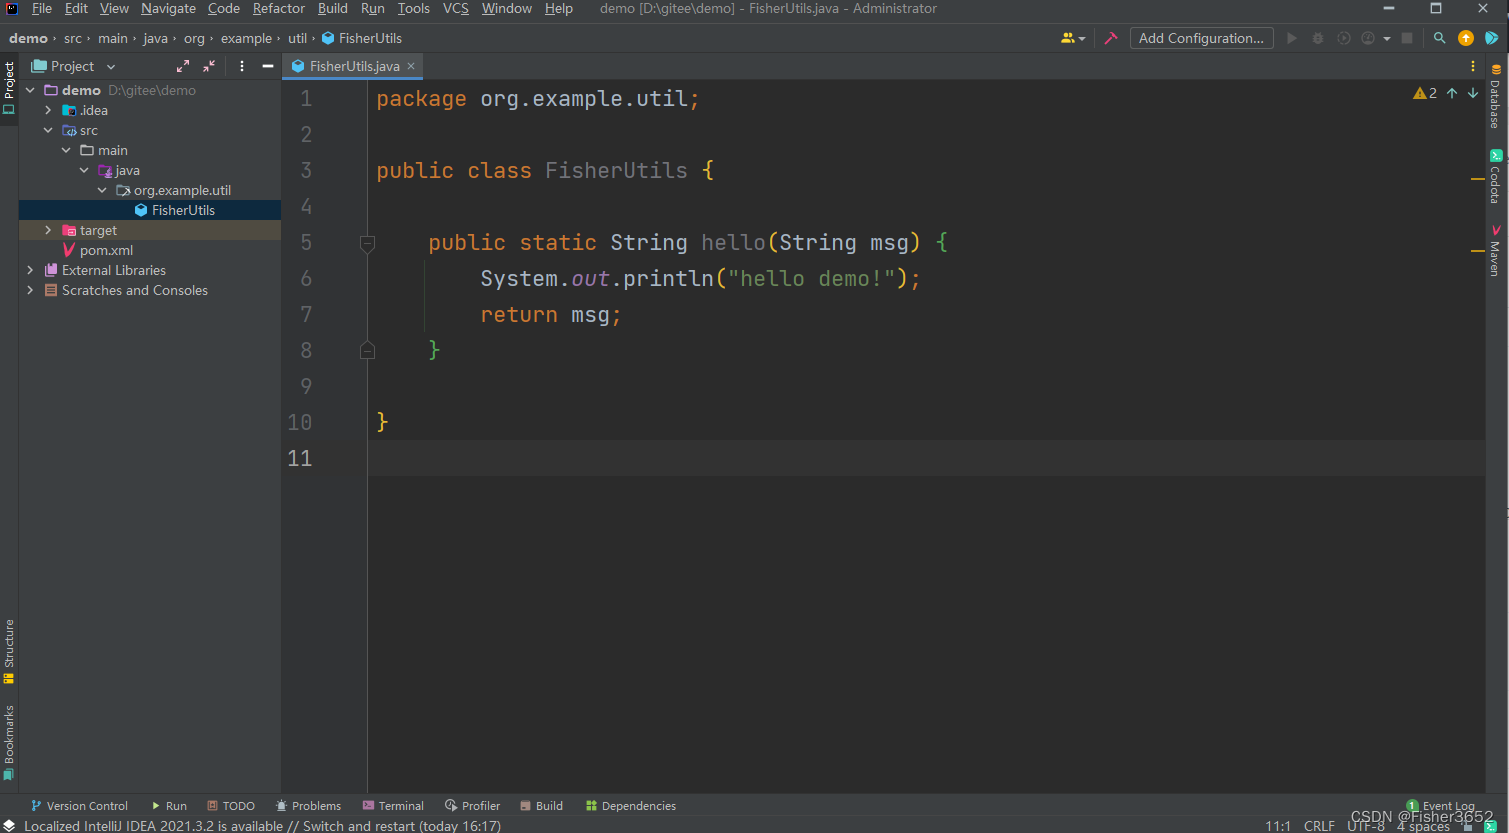
- 这里创建了一个新的maven工程,只有一个util文件,用来后续测试使用
1.2 修改pom
- 最重要的部分
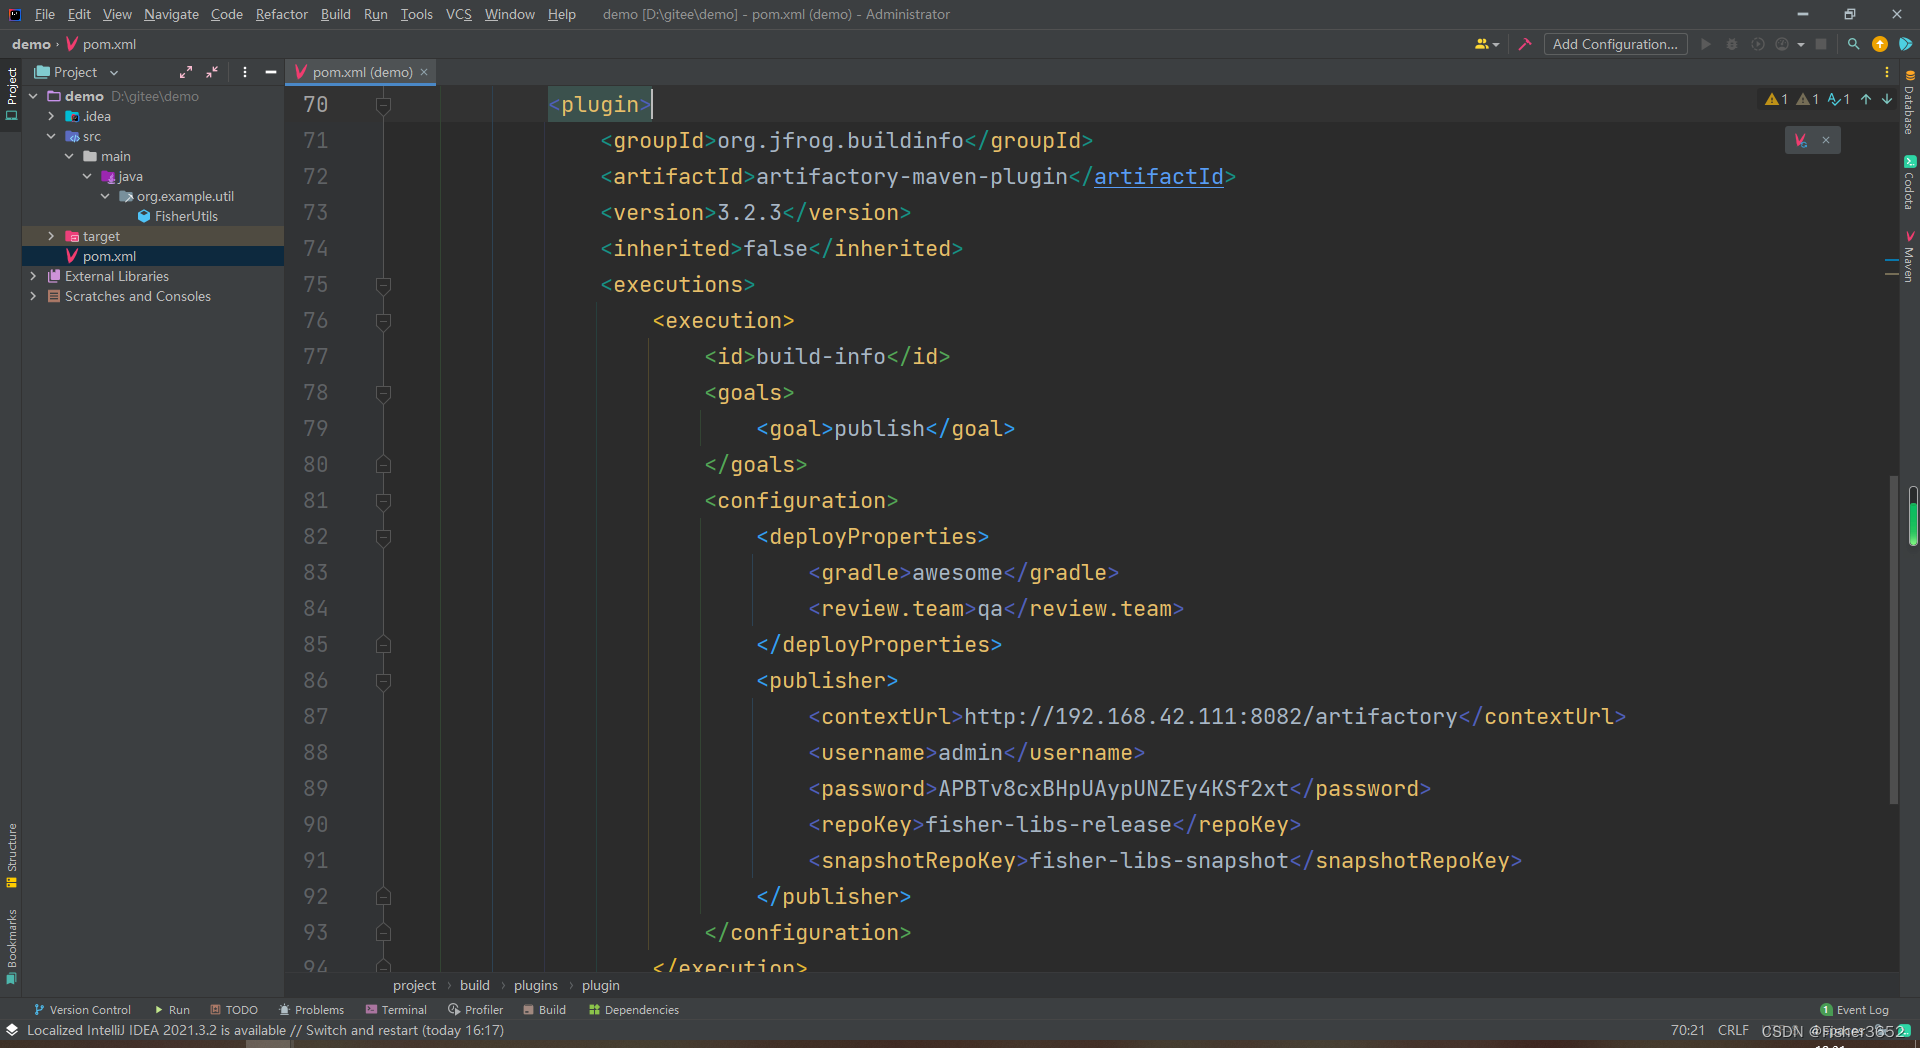
- 完整配置
<?xml version="1.0" encoding="UTF-8"?>

<project xmlns="http://maven.apache.org/POM/4.0.0" xmlns:xsi="http://www.w3.org/2001/XMLSchema-instance"
         xsi:schemaLocation="http://maven.apache.org/POM/4.0.0 http://maven.apache.org/xsd/maven-4.0.0.xsd">
    <modelVersion>4.0.0</modelVersion>

    <groupId>org.example</groupId>
    <artifactId>demo</artifactId>
    <version>1.0-SNAPSHOT</version>

    <name>demo</name>
    <!-- FIXME change it to the project's website -->
    <url>http://www.example.com</url>

    <properties>
        <project.build.sourceEncoding>UTF-8</project.build.sourceEncoding>
        <maven.compiler.source>1.7</maven.compiler.source>
        <maven.compiler.target>1.7</maven.compiler.target>
    </properties>

    <dependencies>

    </dependencies>

    <build>
        <pluginManagement><!-- lock down plugins versions to avoid using Maven defaults (may be moved to parent pom) -->
            <plugins>
                <!-- clean lifecycle, see https://maven.apache.org/ref/current/maven-core/lifecycles.html#clean_Lifecycle -->
                <plugin>
                    <artifactId>maven-clean-plugin</artifactId>
                    <version>3.1.0</version>
                </plugin>
                <!-- default lifecycle, jar packaging: see https://maven.apache.org/ref/current/maven-core/default-bindings.html#Plugin_bindings_for_jar_packaging -->
                <plugin>
                    <artifactId>maven-resources-plugin</artifactId>
                    <version>3.0.2</version>
                </plugin>
                <plugin>
                    <artifactId>maven-compiler-plugin</artifactId>
                    <version>3.8.0</version>
                </plugin>
                <plugin>
                    <artifactId>maven-surefire-plugin</artifactId>
                    <version>2.22.1</version>
                </plugin>
                <plugin>
                    <artifactId>maven-jar-plugin</artifactId>
                    <version>3.0.2</version>
                </plugin>
                <plugin>
                    <artifactId>maven-install-plugin</artifactId>
                    <version>2.5.2</version>
                </plugin>
                <plugin>
                    <artifactId>maven-deploy-plugin</artifactId>
                    <version>2.8.2</version>
                </plugin>
                <!-- site lifecycle, see https://maven.apache.org/ref/current/maven-core/lifecycles.html#site_Lifecycle -->
                <plugin>
                    <artifactId>maven-site-plugin</artifactId>
                    <version>3.7.1</version>
                </plugin>
                <plugin>
                    <artifactId>maven-project-info-reports-plugin</artifactId>
                    <version>3.0.0</version>
                </plugin>
            </plugins>
        </pluginManagement>
        <plugins>
            <plugin>
                <groupId>org.jfrog.buildinfo</groupId>
                <artifactId>artifactory-maven-plugin</artifactId>
                <version>3.2.3</version>
                <inherited>false</inherited>
                <executions>
                    <execution>
                        <id>build-info</id>
                        <goals>
                            <goal>publish</goal>
                        </goals>
                        <configuration>
                            <deployProperties>
                                <gradle>awesome</gradle>
                                <review.team>qa</review.team>
                            </deployProperties>
                            <publisher>
                                <contextUrl>http://192.168.42.111:8082/artifactory</contextUrl>
                                <username>admin</username>
                                <password>APBTv8cxBHpUAypUNZEy4KSf2xt</password>
                                <repoKey>fisher-libs-release</repoKey>
                                <snapshotRepoKey>fisher-libs-snapshot</snapshotRepoKey>
                            </publisher>
                        </configuration>
                    </execution>
                </executions>
            </plugin>
        </plugins>
    </build>

</project>
- 配置好地址,用户名、密码、snapshort仓库、release仓库
- 密码使用的是加密后的,获取方法如下
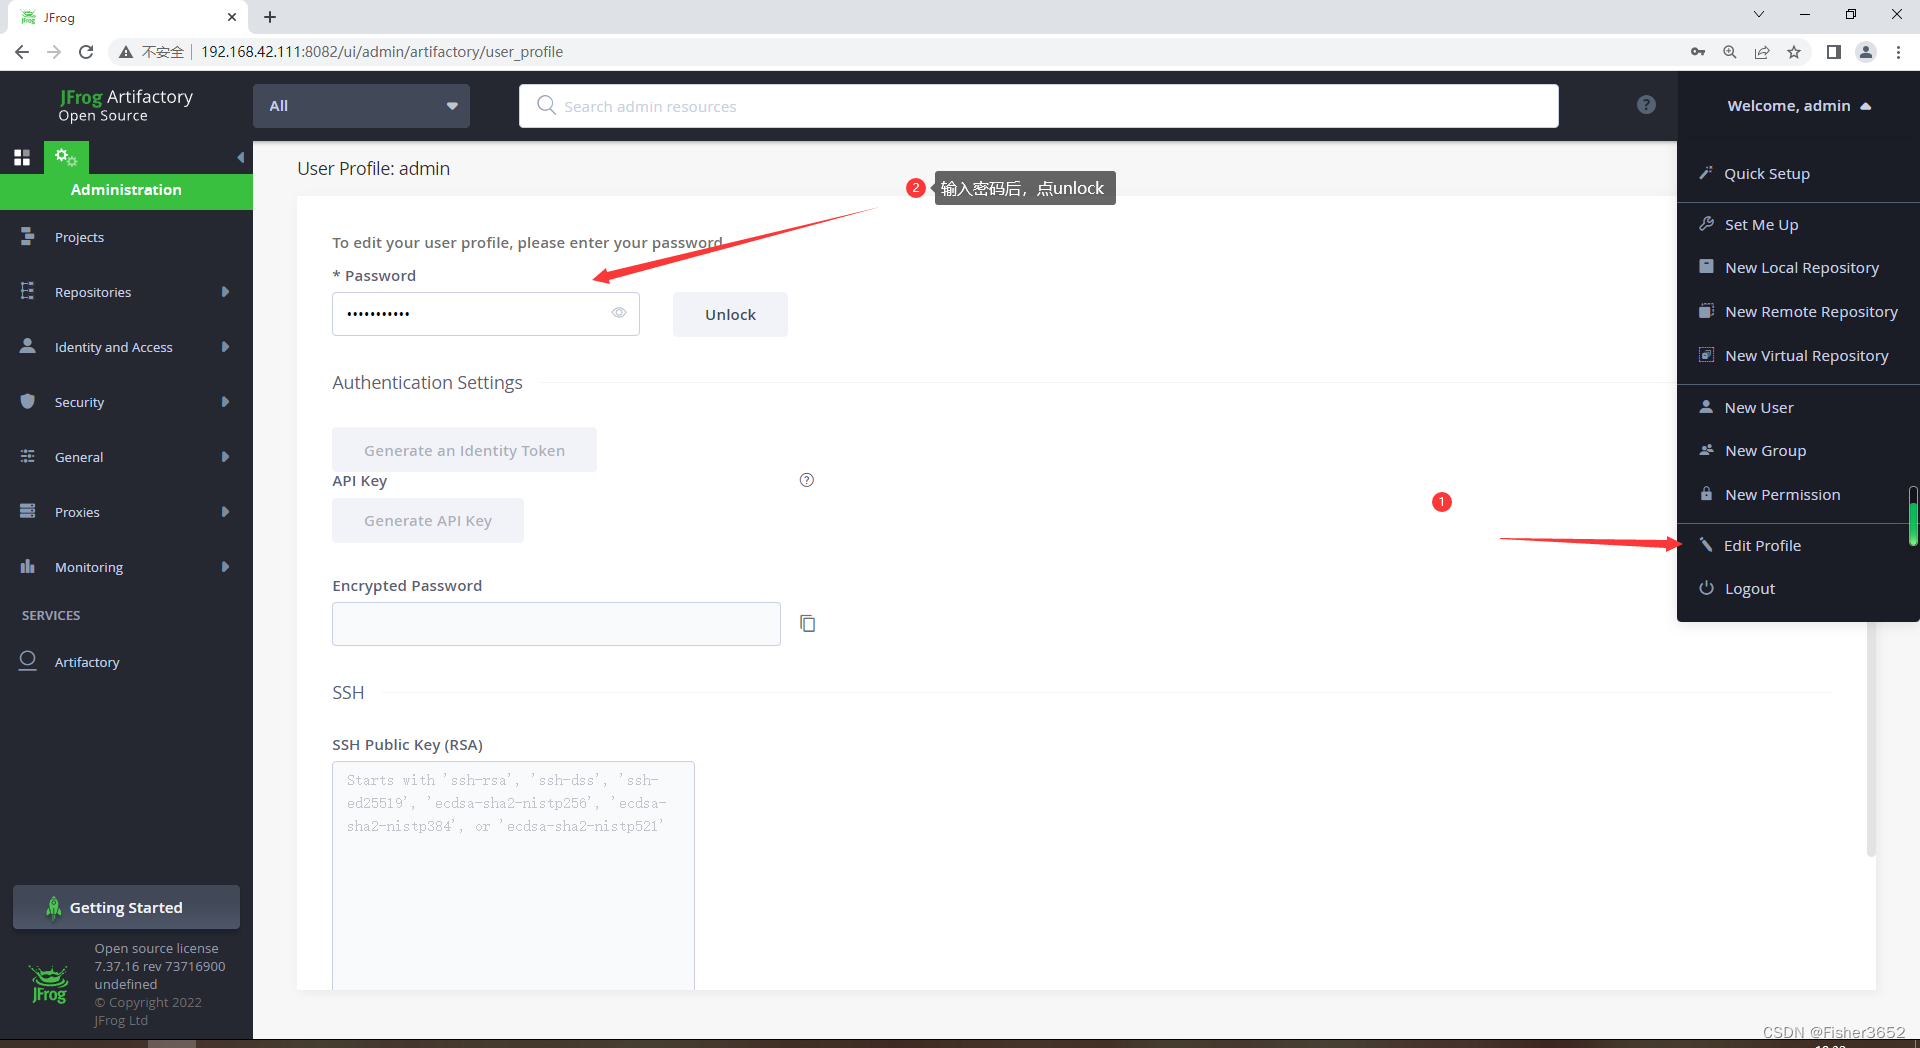
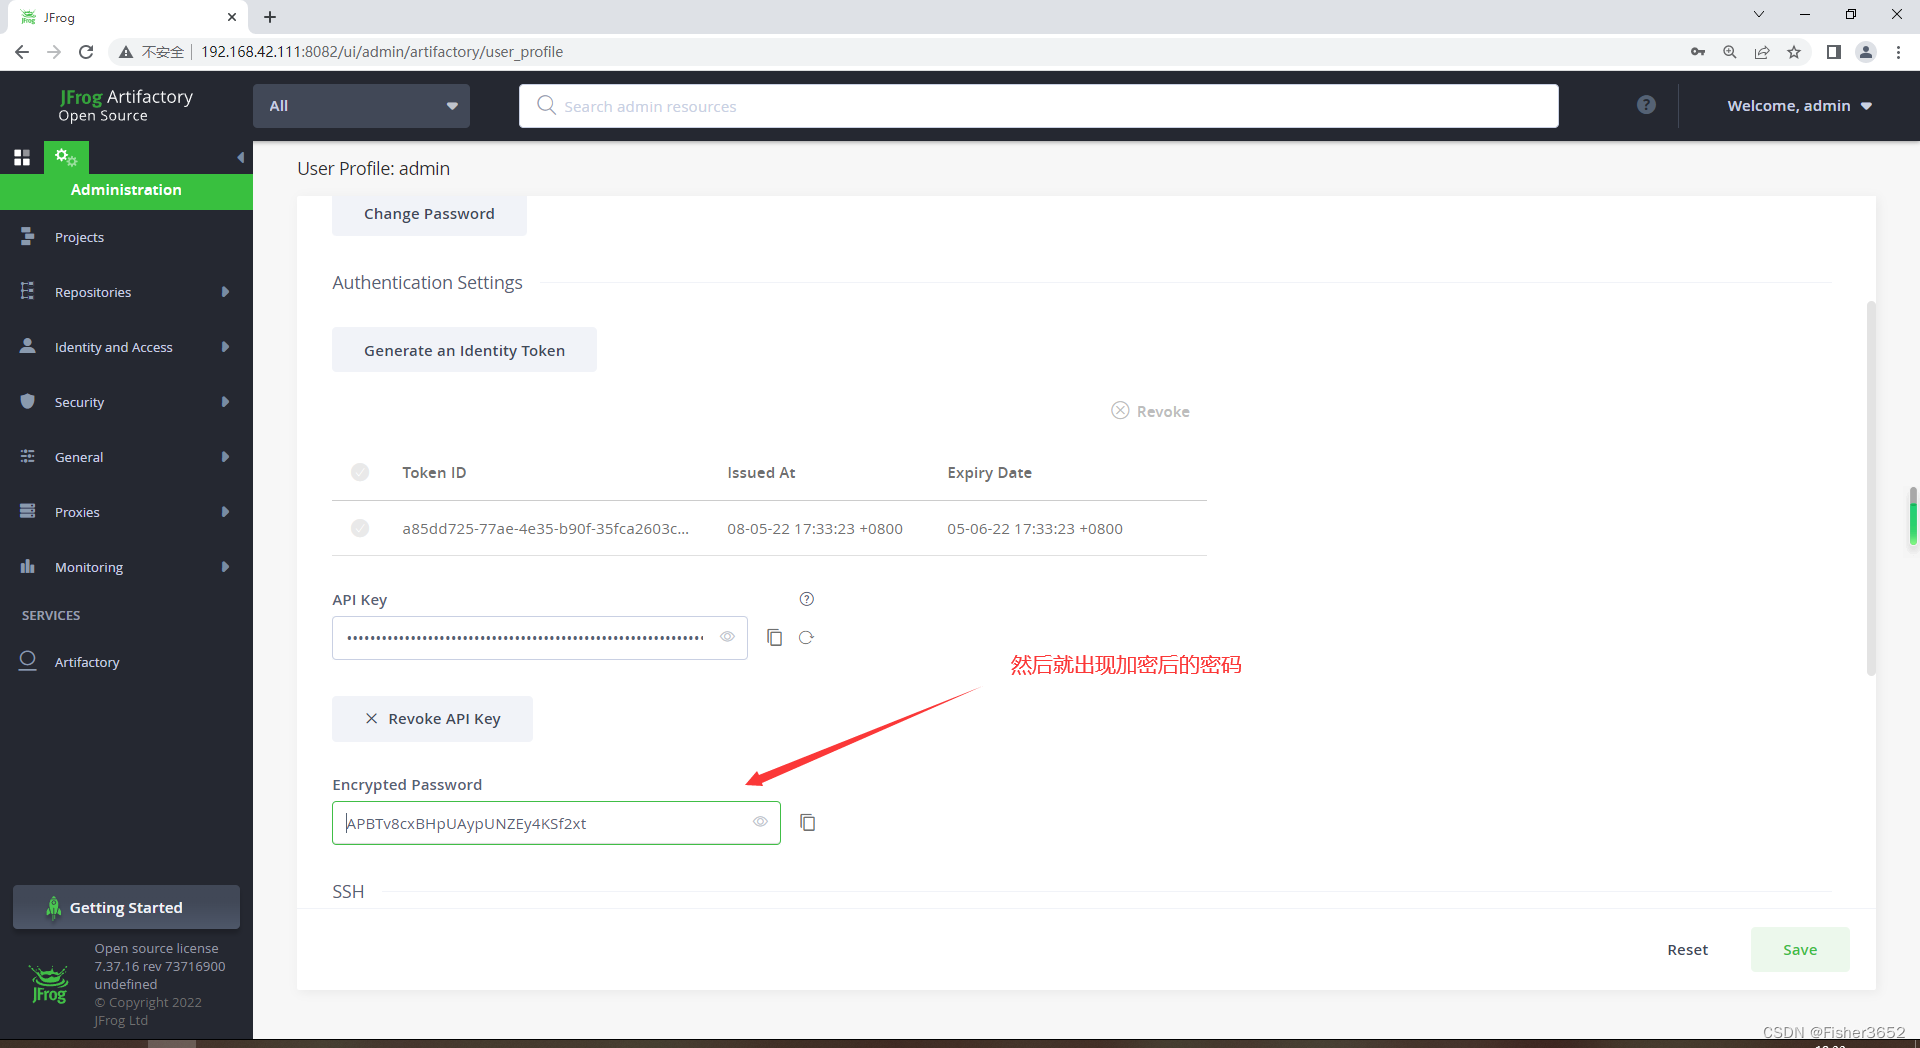
- 仓库可以使用虚拟仓库,也可以使用本地仓库,在fisher-libs-release和fisher-libs-snapshot后面带上
-local即可
1.3 发布
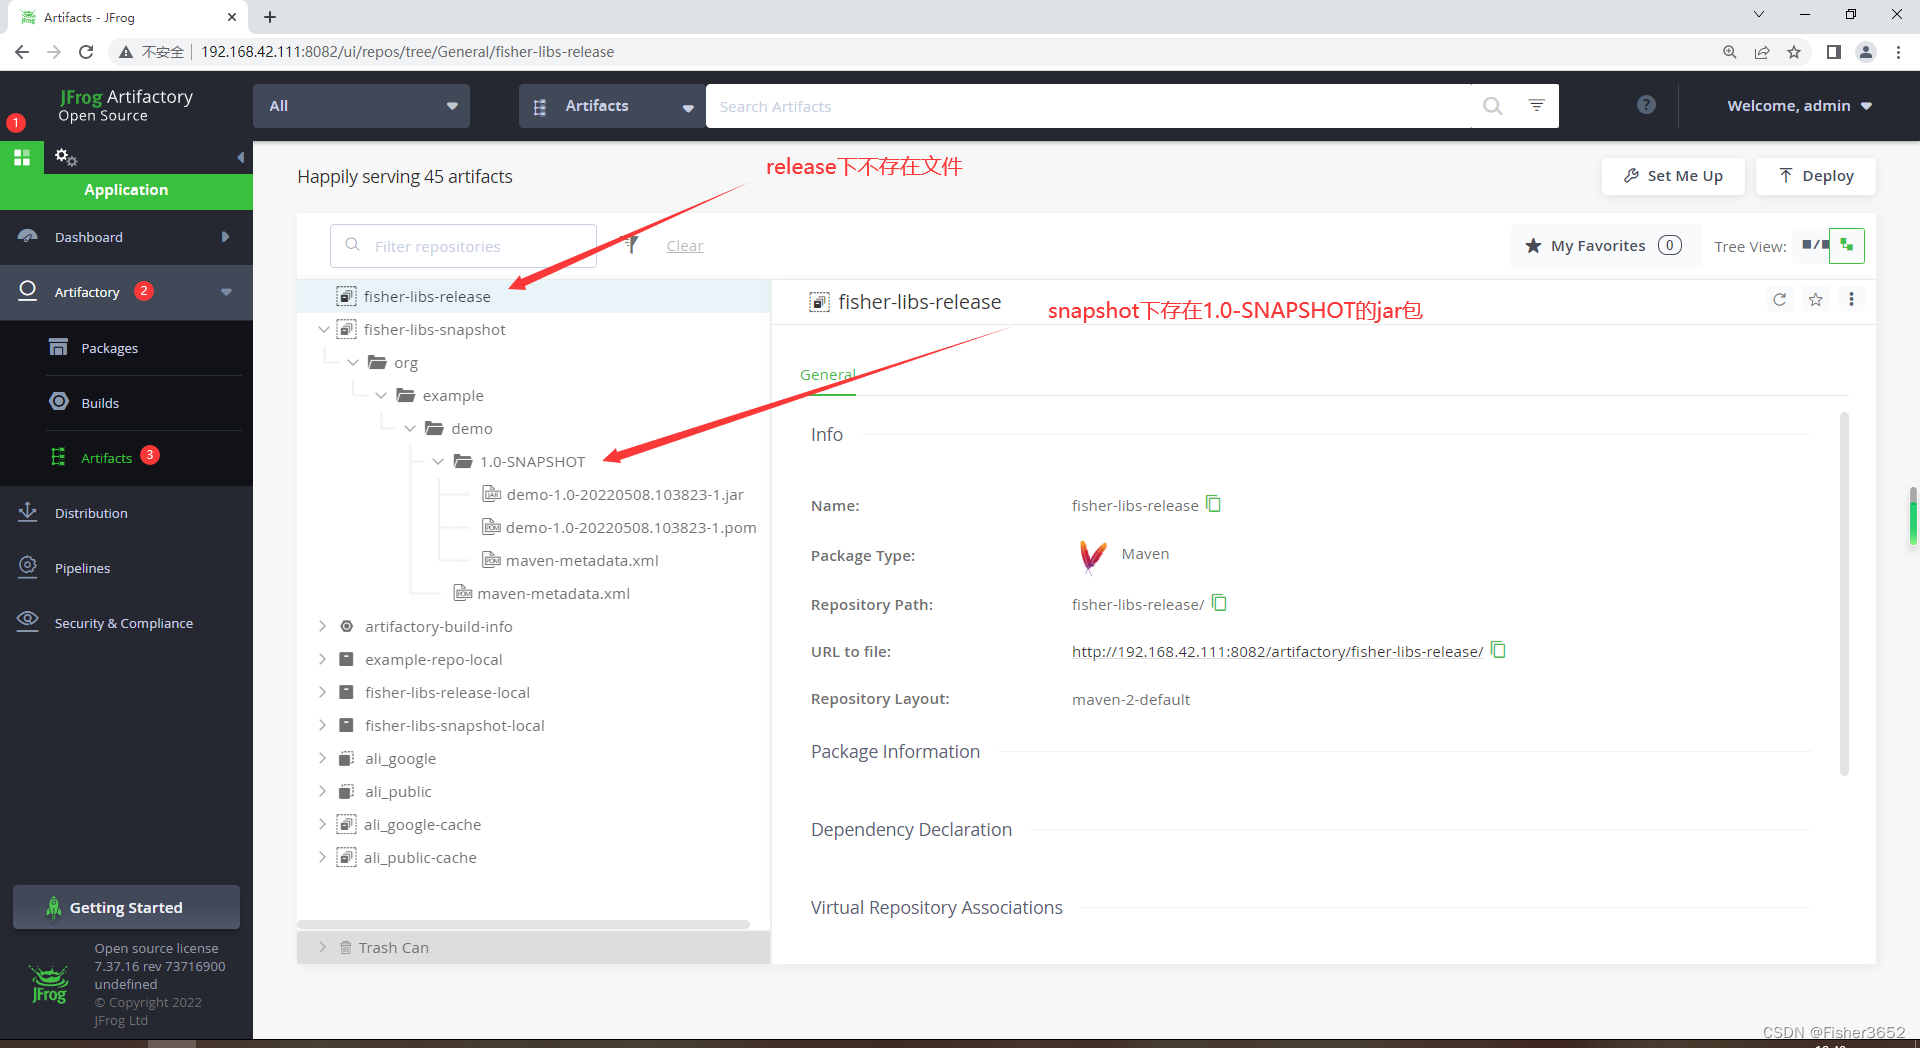
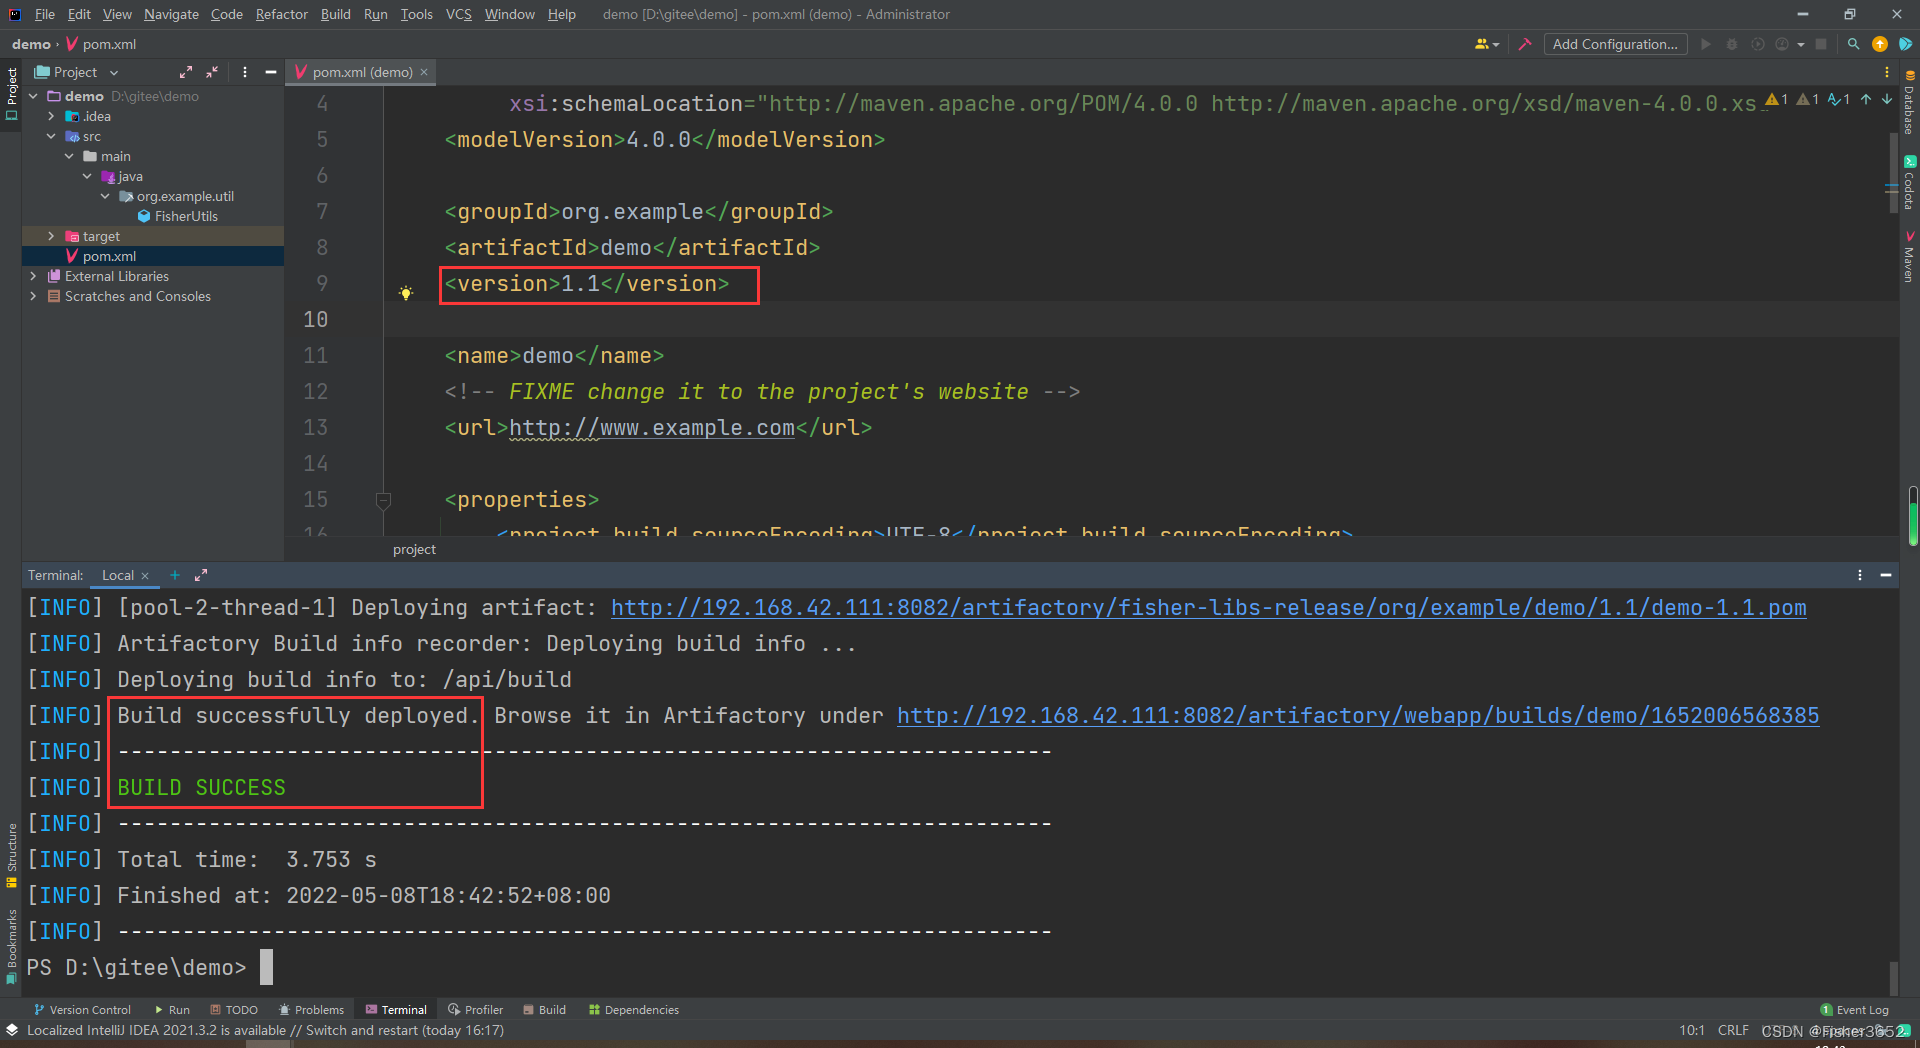
- 这里需要注意的是,如果版本号后面带了SNAPSHOT,则只会发布到snapshot仓库;不带SNAPSHOT,才会发布到release仓库
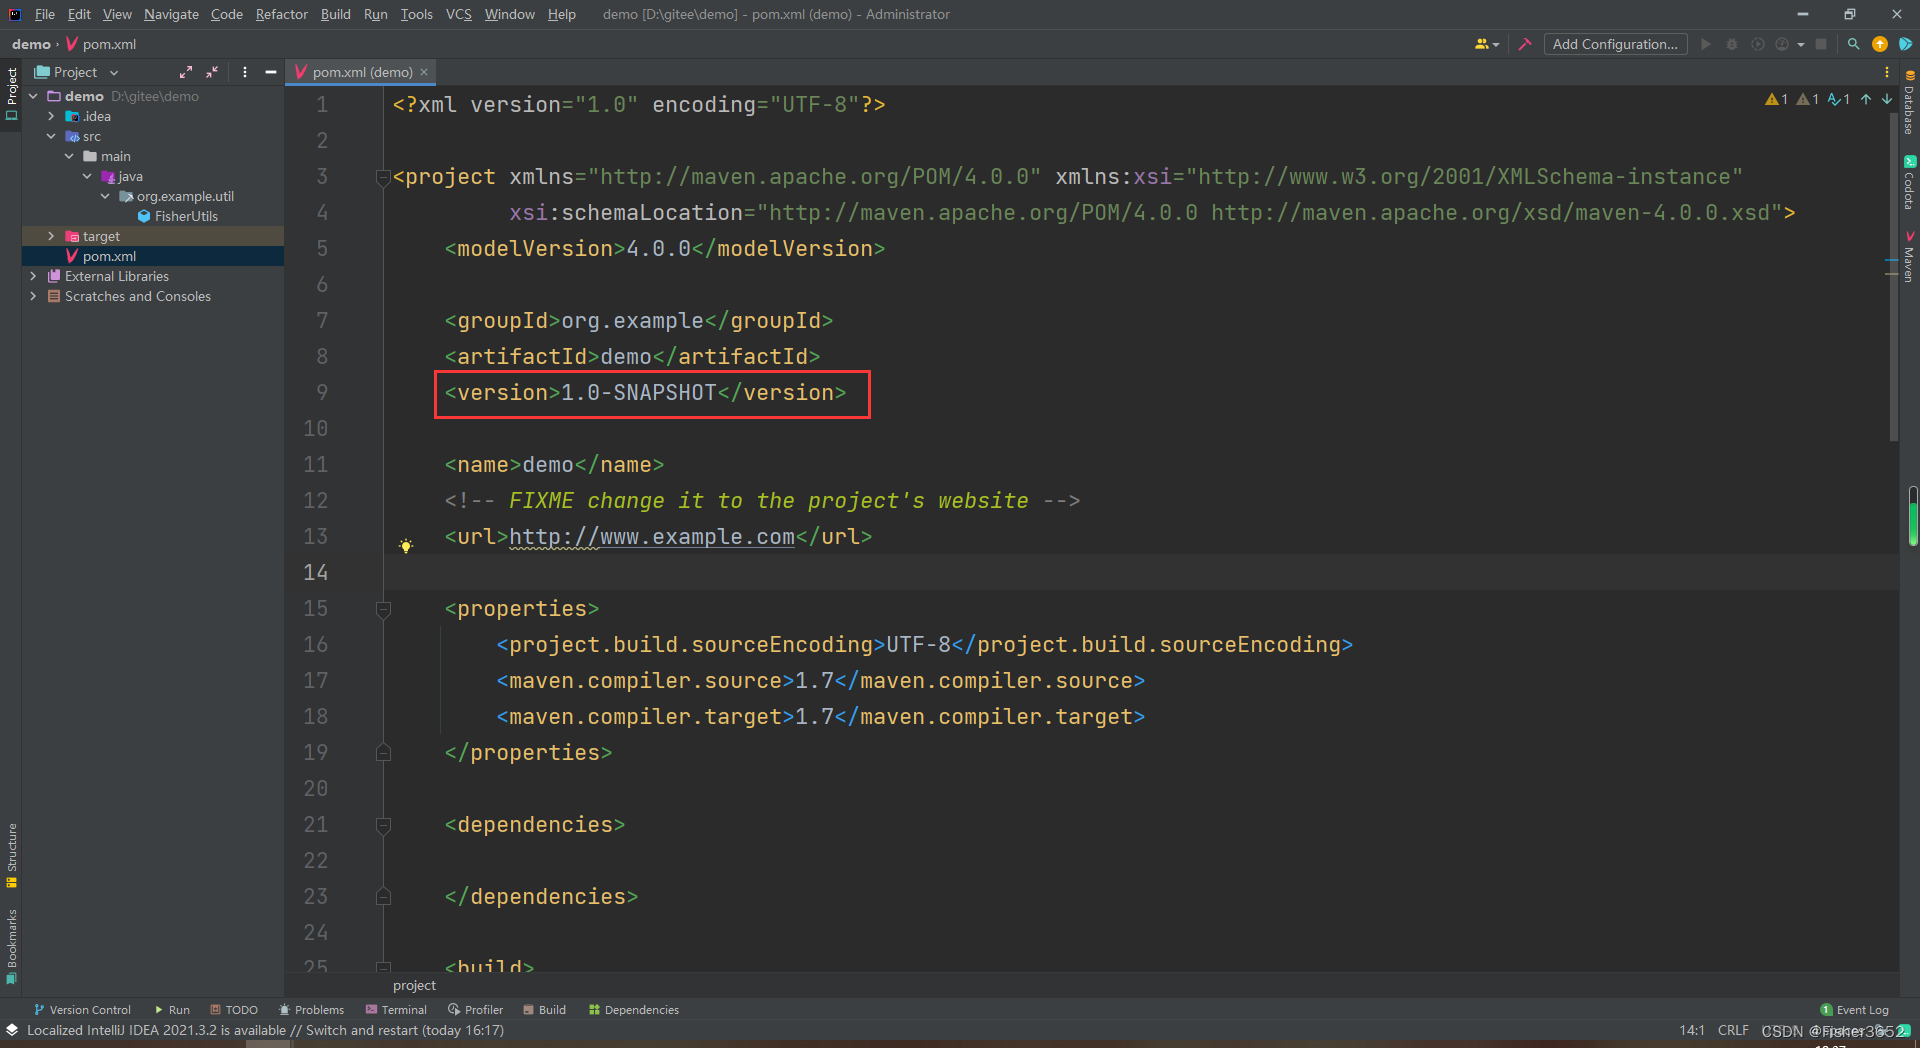
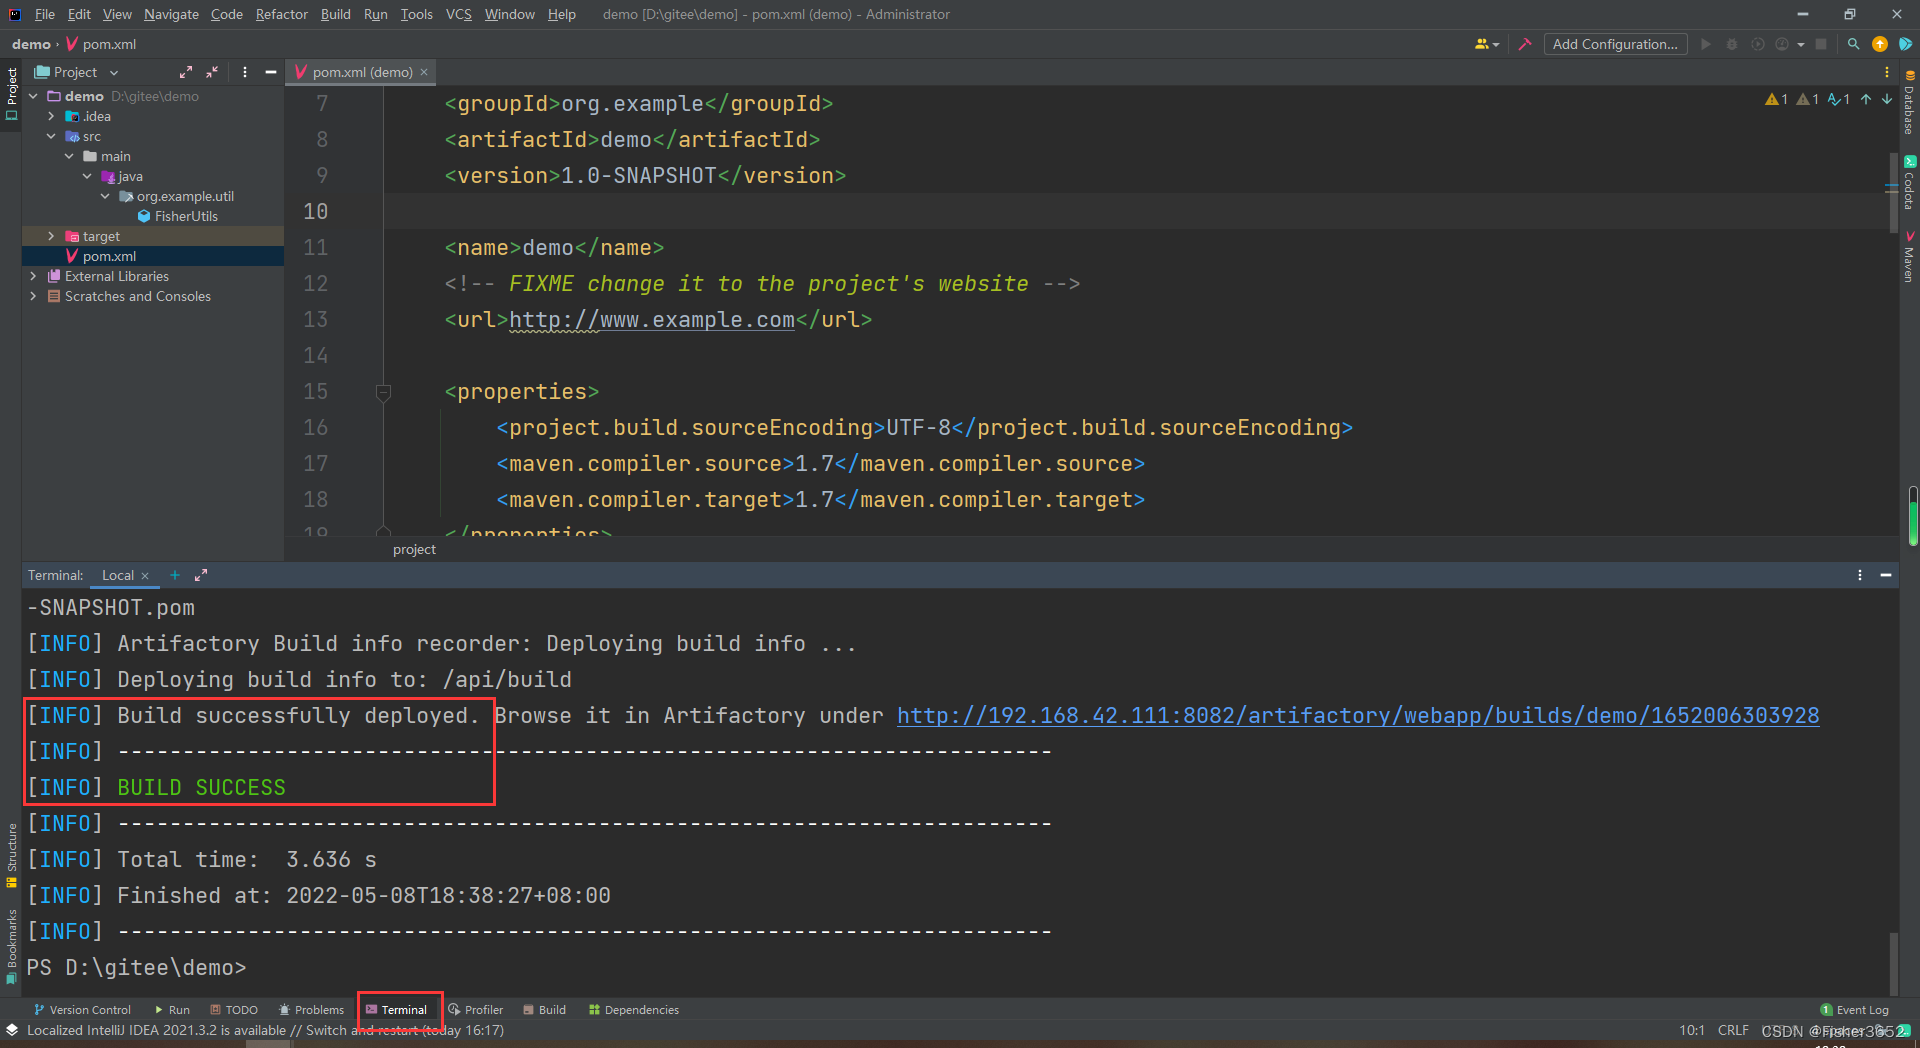
- 在Terminal下,执行
mvn deploy命令
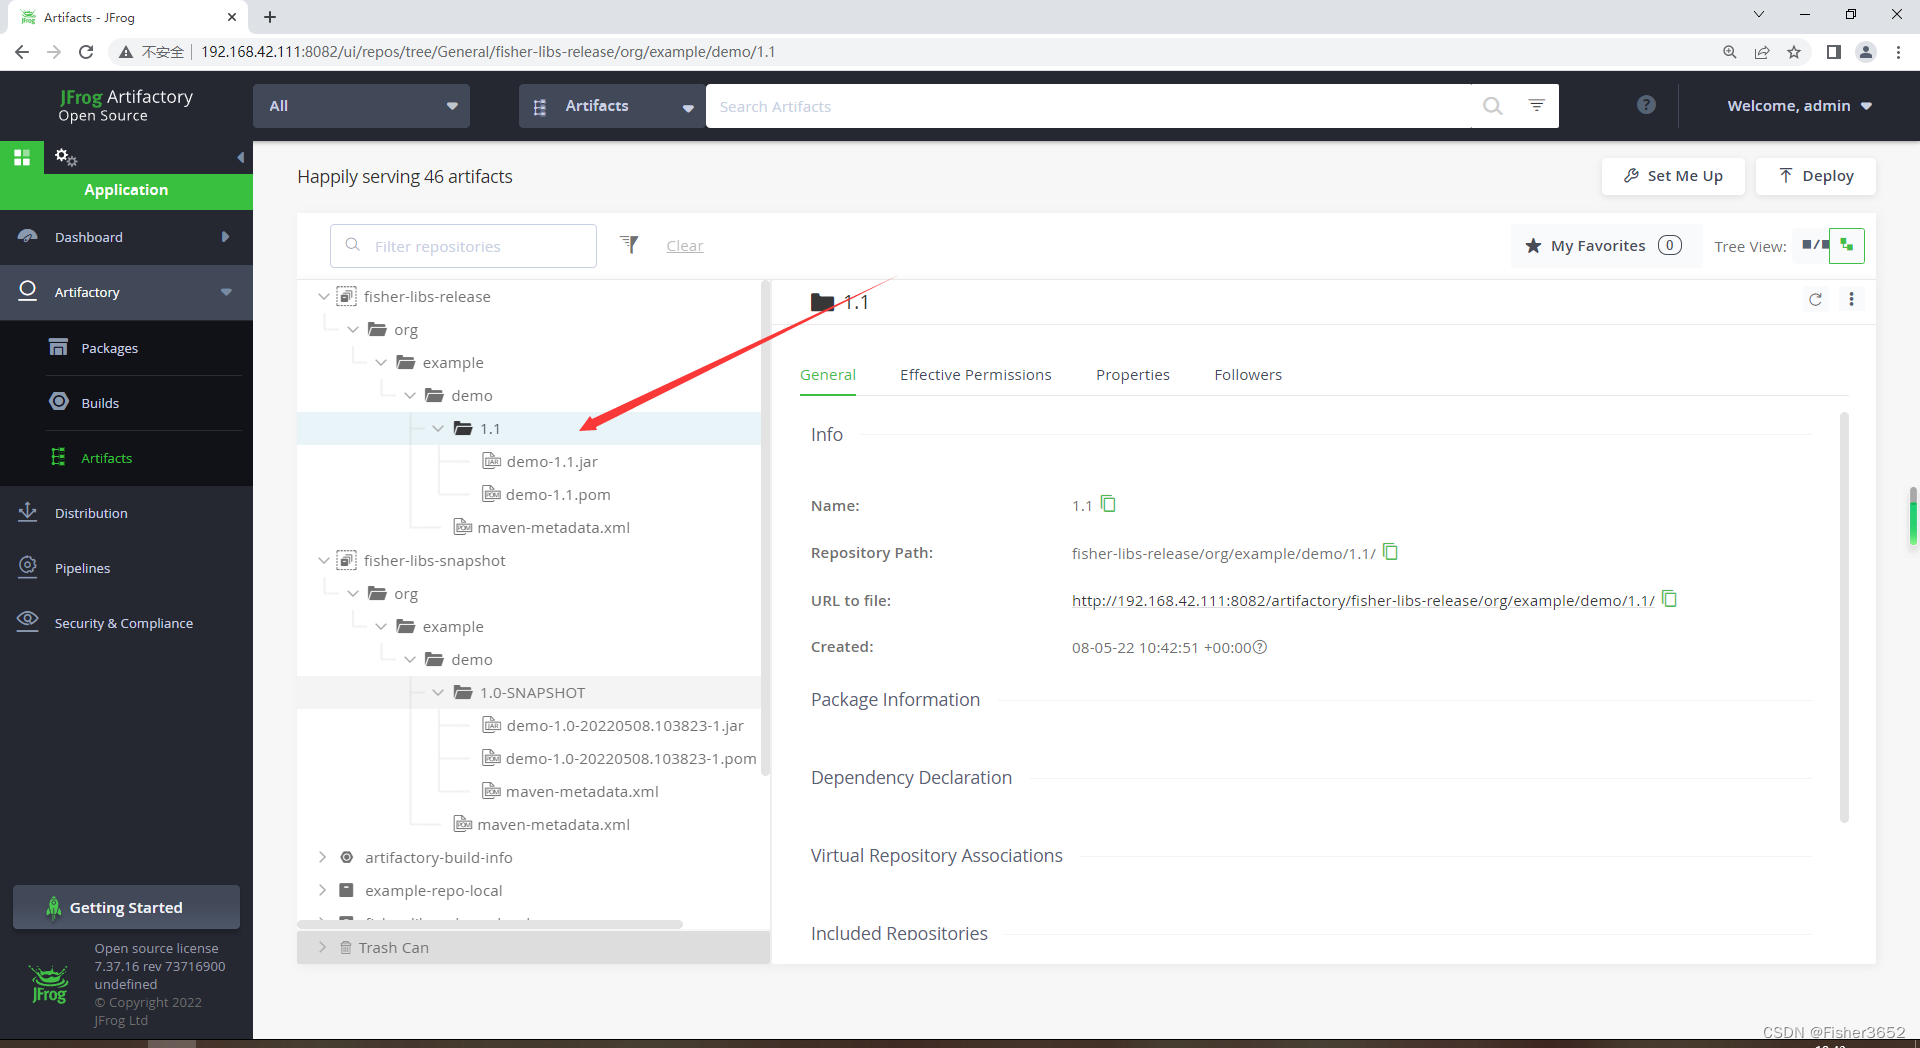
- 查看上传的jar
- 将jar上传到release仓库中,先修改版本号再发布
- 这时候release仓库已经有1.1版本的jar了
2. 下载jar
- 在项目中使用时,在pom文件中添加下面代码,不需要用户名密码也可以下载jar

- 这里是新建的一个新的springboot工程,完整的pom.xml
<?xml version="1.0" encoding="UTF-8"?>
<project xmlns="http://maven.apache.org/POM/4.0.0" xmlns:xsi="http://www.w3.org/2001/XMLSchema-instance"
         xsi:schemaLocation="http://maven.apache.org/POM/4.0.0 https://maven.apache.org/xsd/maven-4.0.0.xsd">
    <modelVersion>4.0.0</modelVersion>
    <parent>
        <groupId>org.springframework.boot</groupId>
        <artifactId>spring-boot-starter-parent</artifactId>
        <version>2.6.7</version>
        <relativePath/> <!-- lookup parent from repository -->
    </parent>
    <groupId>com.example</groupId>
    <artifactId>demo1</artifactId>
    <version>0.0.1-SNAPSHOT</version>
    <name>demo1</name>
    <description>demo1</description>
    <properties>
        <java.version>1.8</java.version>
    </properties>
    <dependencies>
        <dependency>
            <groupId>org.springframework.boot</groupId>
            <artifactId>spring-boot-starter-web</artifactId>
        </dependency>

        <dependency>
            <groupId>org.example</groupId>
            <artifactId>demo</artifactId>
            <version>1.1</version>
        </dependency>
    </dependencies>

    <build>
        <plugins>
            <plugin>
                <groupId>org.springframework.boot</groupId>
                <artifactId>spring-boot-maven-plugin</artifactId>
            </plugin>
        </plugins>
    </build>
    <repositories>
        <repository>
            <id>fisher-libs-release</id>
            <name>fisher-libs-release</name>
            <url>http://192.168.42.111:8081/artifactory/fisher-libs-release</url>
            <releases>
                <enabled>true</enabled>
            </releases>
        </repository>
    </repositories>
</project>
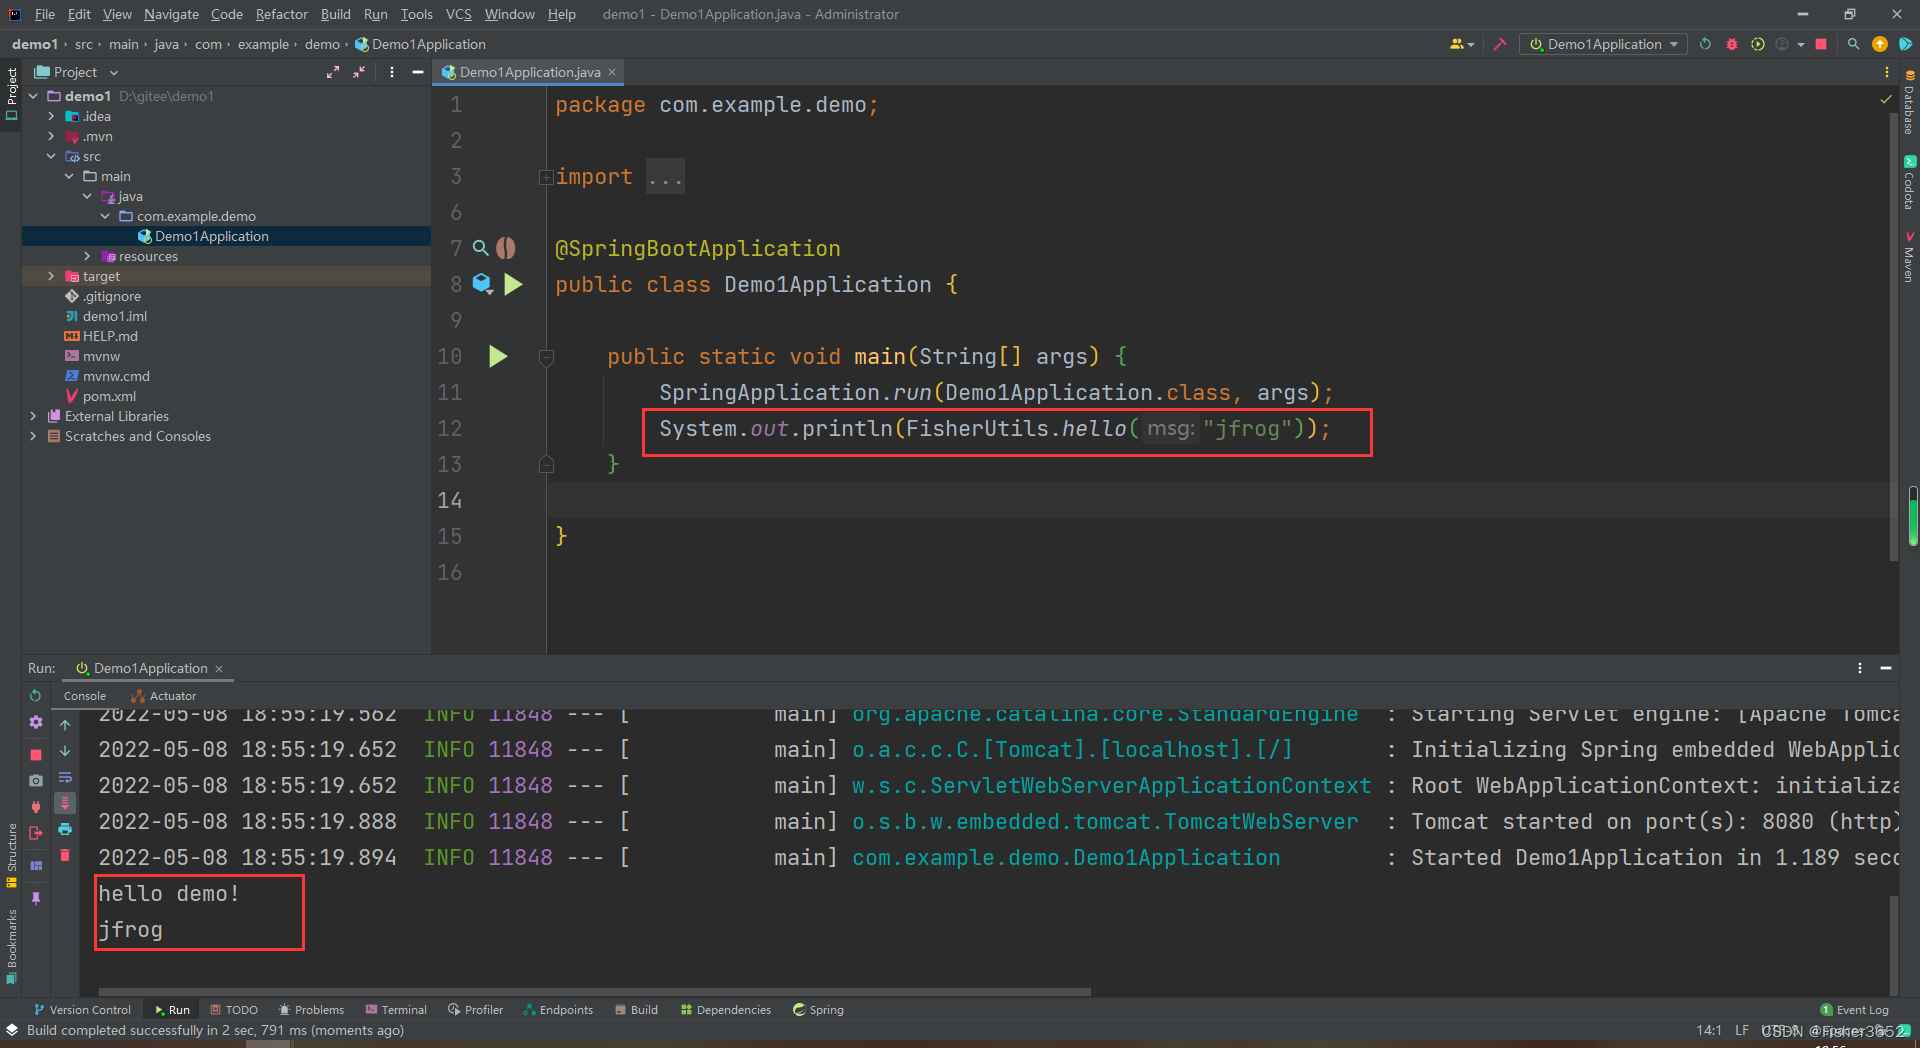
- 使用jar内的方法
最后
以上就是自觉鼠标最近收集整理的关于Jfrog Artifactory 上传和下载jar1. 上传jar2. 下载jar的全部内容,更多相关Jfrog内容请搜索靠谱客的其他文章。
本图文内容来源于网友提供,作为学习参考使用,或来自网络收集整理,版权属于原作者所有。


发表评论 取消回复