一、软件安装部分:
1、synopsys软件安装,以Verdi软件安装为例:
首先cd 到S家软件安装工具installer 目录下,然后执行installer 程序,如下:
## -install_as_root 参数:可以用root账号安装
## -source 参数:安装文件路径

./installer -install_as_root -source /data/software/verdi_vO-2018.09-SP2


it will be created. [/usr/synopsys]: /root/testinstall    ##这里输入软件安装路径


Site ID number [000]:    ##默认回车

Accept, Install? [yes]:    ##默认回车
也可以使用setup.sh 通过GUI的方式来安装软件
2、cadence软件安装,以IC618为例:
第一步:解压缩软件安装包
##所有的tar包都需要解压

[root@test lnx86]# tar xf Base_IC06.18.000_lnx86_1of3.tar
[root@test lnx86]# tar xf Base_IC06.18.000_lnx86_2of3.tar
[root@test lnx86]# tar xf Base_IC06.18.000_lnx86_3of3.tar
[root@test lnx86]# tar xf Hotfix_IC06.18.010_lnx86_1of3.tar
[root@test lnx86]# tar xf Hotfix_IC06.18.010_lnx86_2of3.tar
[root@test lnx86]# tar xf Hotfix_IC06.18.010_lnx86_3of3.tar
[root@test lnx86]# ll
total 17862988
-rw-r--r-- 1 root root 3900682240 Sep 26  2019 Base_IC06.18.000_lnx86_1of3.tar
-rw-r--r-- 1 root root 4000051200 Sep 26  2019 Base_IC06.18.000_lnx86_2of3.tar
-rw-r--r-- 1 root root  622131200 Sep 26  2019 Base_IC06.18.000_lnx86_3of3.tar
-rw-r--r-- 1 root root      18173 Sep 26  2019 Base_IC06.18.000_README-IC_README.txt
-rw-r--r-- 1 root root 3900712960 Sep 26  2019 Hotfix_IC06.18.010_lnx86_1of3.tar
-rw-r--r-- 1 root root 4000030720 Sep 26  2019 Hotfix_IC06.18.010_lnx86_2of3.tar
-rw-r--r-- 1 root root 1868032000 Sep 26  2019 Hotfix_IC06.18.010_lnx86_3of3.tar
### 解压后的两个文件夹Base包和Hotfix包
drwxr-xr-x 3  380 mail       4096 Oct 10  2018 IC06.18.000_lnx86.Base
drwxr-xr-x 3  380 mail       4096 Feb  1  2019 IC06.18.010_lnx86.Hotfix
第二步:使用iscape 安装软件:
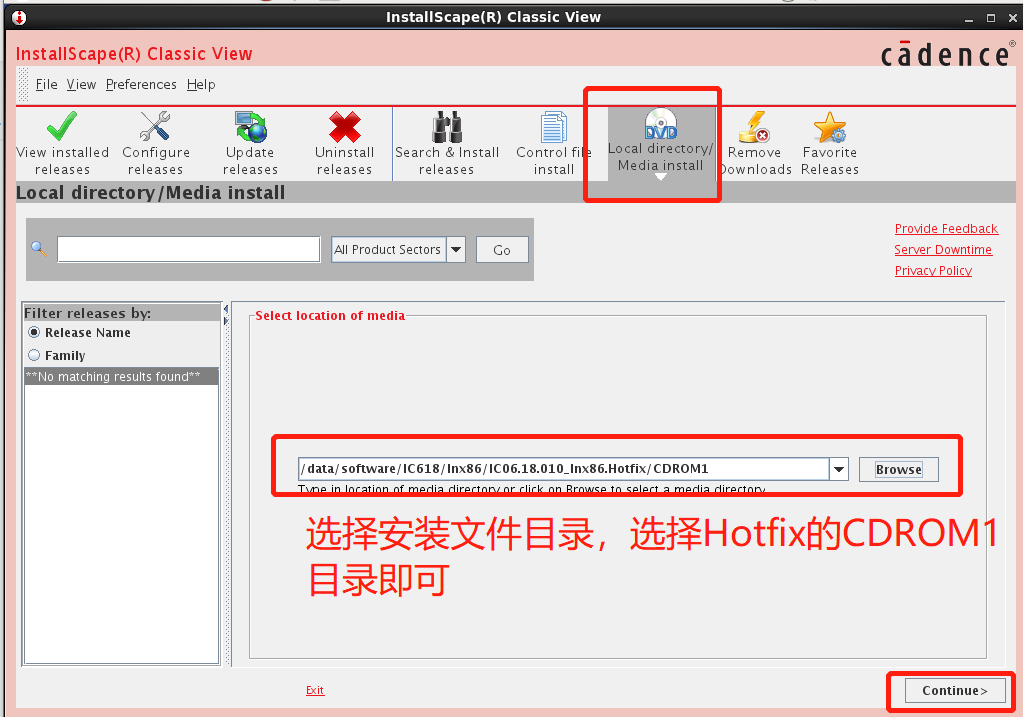
进入iscape bin目录,执行./iscape.sh 打开GUI界面,如图所示,在安装过程中如果提示需要Base包,选择上一步解压的Base包安装路径即可;如果没有Hotfix直接选择Base包安装路径。

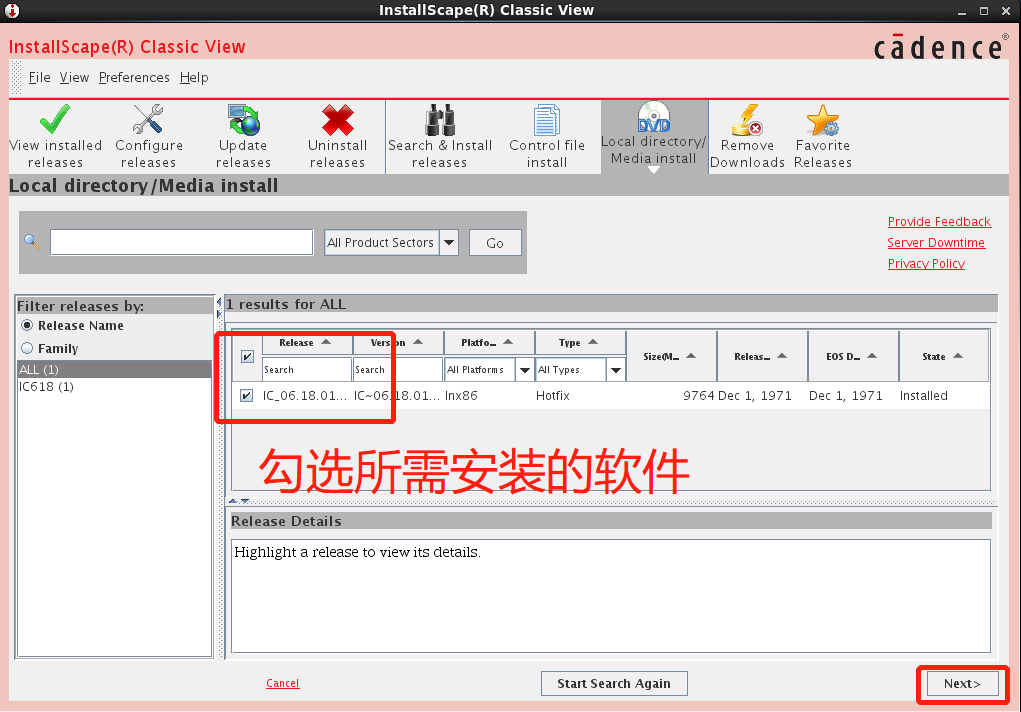
勾选需要安装的软件

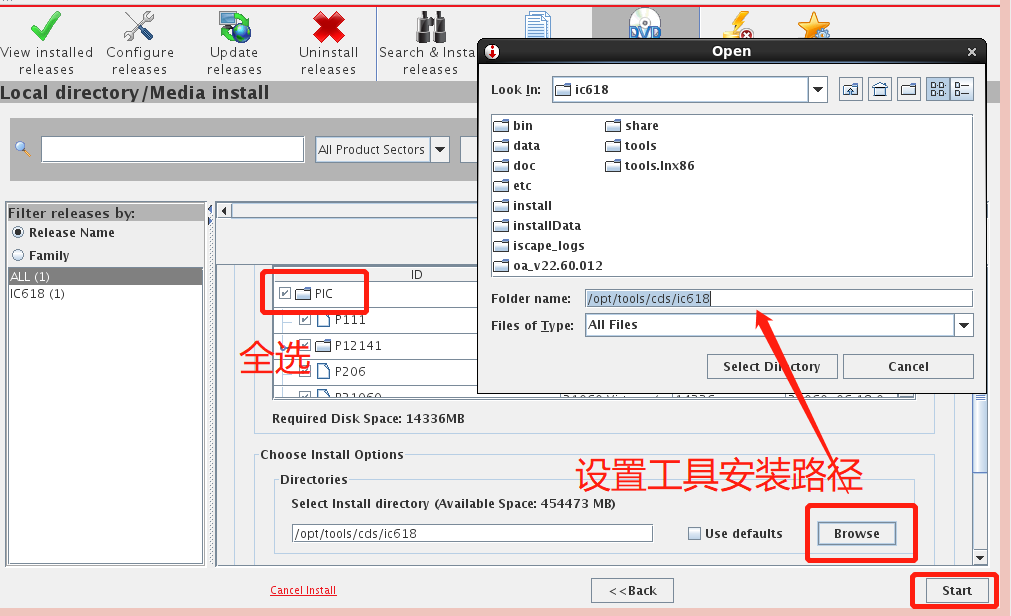
选择安装路径,点start 直到工具安装完成,退出即可

第三步:安装依赖库:
cd 到 <install_dir>/tools.lnx86/bin 执行 ./checkSysConf 检查依赖,如有缺失,则需要安装缺失的库文件:
## 查看安装的软件名称及版本:
[root@test bin]# ./checkSysConf -r
=====================================================================
[Copyright 2002-2018] Cadence Design Systems, Inc. All rights reserved.

This  program and online  documentation  may not be copied, modified,
re-published, uploaded,  executed, or  distributed in any way, in any
medium, whether in whole or in part, without prior written permission
from Cadence Design Systems, Inc.
=====================================================================


============== checkSysConf:  Version 3.36 ====================


Valid release names are :
                             IC6.1.8
                             ICADVM18.1


Exiting checkSysConf ... Good-bye
Output is saved as /tmp/checkSysConf.node02-2021.07.23.10:36.143349.log


## 执行检查
[root@test bin]# ./checkSysConf IC6.1.8
=====================================================================
[Copyright 2002-2018] Cadence Design Systems, Inc. All rights reserved.

This  program and online  documentation  may not be copied, modified,
re-published, uploaded,  executed, or  distributed in any way, in any
medium, whether in whole or in part, without prior written permission
from Cadence Design Systems, Inc.
=====================================================================


============== checkSysConf:  Version 3.36 ====================


Date information gathered: Fri Jul 23 10:36:58 CST 2021
-------------------------------------------------------
Host Name ..............:  node02
Hostid .................:  007f0100
Operating System .......:  Linux / x86_64
OS Version .............:  Red Hat Enterprise Linux Server release 6.10 (Santiago)
Kernel Version .........:  2.6.32-754.el6.x86_64
Hardware Type ..........:  x86_64
Memory .................:  258233 Megabyte
CPU model ..............:  Intel(R) Xeon(R) CPU E5-2695 v4 @ 2.10GHz
No. of CPUs ............:  36
Total Swap Space........:  4095 Megabyte
X Server ...............:  [ 511.563] (--) MGA(0): Pseudo-DMA transfer window at 0x91000000
Patch Data file ........:  /opt/tools/tools_pg/cds/IC618/share/patchData/Linux/x86_64/redhat/6.0WS/IC6.1.8


****************   Now verifying configuration     ****************


Validating Kernel requirements...
            Minimum             Installed                   Status    Info
            --------------      --------------------------  ------    --------------------
            2.6.32-431.11.2     2.6.32-754.el6.x86_64       PASS


Validating MEMORY requirements MegaByte ...
            Minimum   Installed Status  Info
            -------   --------- ------  --------------------
            2048MB    258233MB  PASS


Validating SWAP requirements in MegaByte ...
            Minimum   Installed Status  Info
            -------   --------- ------  --------------------
            4096MB    4095MB    FAIL


Validating DISPLAY requirements...
          Minimum           Installed                   Status  Info
          ----------------- ---------------------       ------  ----
          8 planes          --- planes                  FAIL    DISPLAY couldn't be opened. Set DISPLAY variable correctly
          PseudoColor


Validating PACKAGE requirements.....32 to check
#   PACKAGE                Release    Build          Installed               Arch        Status  Info
--  -------                -------    -----          ----------              ----        ------  --------------------
1   glibc                  2.12       1.132          2.12-1.212.el6          i686        PASS
->  'GlibC-32bit'
2   glibc                  2.12       1.132          2.12-1.212.el6          x86_64      PASS
->  'GlibC'
3   elfutils-libelf        0.152      1              0.164-2.el6             i686        PASS
->  'Libelf-32bit'
4   elfutils-libelf        0.152      1              0.164-2.el6             x86_64      PASS
->  'Libelf Library'
5   ksh                    20120801   10             20120801-37.el6_9       x86_64      PASS
->  'ksh'
6   mesa-libGL             9.2        0.5            11.0.7-4.el6            i686        PASS
->  'Mesa libGL 32bit'
7   mesa-libGL             9.2        0.5            11.0.7-4.el6            x86_64      PASS
->  'Mesa libGL Library'
8   mesa-libGLU            9.2        0.5            11.0.7-4.el6            i686        PASS
->  'Mesa libGLU 32bit'
9   mesa-libGLU            9.2        0.5            11.0.7-4.el6            x86_64      PASS
->  'Mesa libGLU Library'
10  openmotif22            2.2.3      19             2.2.3-19.el6            i686        PASS
->  'openmotif-32bit'
11  openmotif22            2.2.3      19             2.2.3-19.el6            x86_64      PASS
->  'openmotif'
12  libXp                  1.0.0      15.1           1.0.2-2.1.el6           i686        PASS
->  'libXp-32bit'
13  libXp                  1.0.0      15.1           1.0.2-2.1.el6           x86_64      PASS
->  'libXp'
14  libpng                 1.2.49     1.el6_2        1.2.49-2.el6_7          i686        PASS
->  'libpng-32bit'
15  libpng                 1.2.49     1.el6_2        1.2.49-2.el6_7          x86_64      PASS
->  'libpng'
16  libjpeg-turbo          1.2.1      1              1.2.1-3.el6_5           i686        PASS
->  'libjpeg-32bit'
17  libjpeg-turbo          1.2.1      1              1.2.1-3.el6_5           x86_64      PASS
->  'libjpeg'
18  compat-expat1          1.95.8     8              1.95.8-8.el6            i686        PASS
->  'libexpat-32bit'
19  compat-expat1          1.95.8     8              1.95.8-8.el6            x86_64      PASS
->  'libexpat.so.0'
20  libXtst                1.2.1      2              1.2.3-1.el6             i686        PASS
->  'libXtst-32bit'
21  libXtst                1.2.1      2              1.2.3-1.el6             x86_64      PASS
->  'libXtst.so.6'
22  compat-readline5       5.2        17.1           5.2-17.1.el6            i686        PASS
->  'Readline-32bit'
23  compat-readline5       5.2        17.1           5.2-17.1.el6            x86_64      PASS
->  'Readline Library'
24  ncurses-libs           5.7        3.20090208     5.7-4.20090207.el6      i686        PASS
->  'ncurses-32bit'
25  ncurses-libs           5.7        3.20090208     5.7-4.20090207.el6      x86_64      PASS
->  'ncurses library'
26  redhat-lsb             4.0        7              4.0-7.el6               i686        PASS
->  'lsb-32bit'
27  redhat-lsb             4.0        7              4.0-7.el6               x86_64      PASS
->  'lsb'
28  glibc-devel            2.12       1.132          2.12-1.212.el6          i686        PASS
->  'GlibC-devel-32bit'
29  glibc-devel            2.12       1.132          2.12-1.212.el6          x86_64      PASS
->  'GlibC-devel'
30  gdb                    7.2        60.el6_4.1     7.2-92.el6              x86_64      PASS
->  'GNU debugger'
31  xorg-x11-fonts-misc    7.2        9.1            7.2-11.el6              noarch      PASS
->  'Fonts'
32  libXScrnSaver          1.2.2      2.el6          1.2.2-2.el6             x86_64      PASS
->  'libXScrnSaver'
3、其他家软件安装:
这个需要自己判断,有的工具直接加执行权限,直接执行就可以进行安装;有的工具直接解压即可
二、License文件设置:
1、license文件修改
申请license文件时,需要提供license服务器的mac地址,拿到license文件后需要修改license文件中hostname和主机名相同,端口号也可以修改:

2、license server启动
一般新建一个文件夹,将license文件、lmgrd、厂商daemon、lmstat 拷贝到一个文件夹下直接启动服务即可:
[root@test license]# ll
total 11640
-rwxr-xr-x 1 root root 1538528 Jul 23 10:34 lmgrd
-rwxr-xr-x 1 root root 1362472 Jul 23 10:35 lmstat
-rwxr-xr-x 1 root root 7866904 Jul 23 10:34 snpslmd
-rw-r--r-- 1 root root 1082639 Jul 23 10:34 Synopsys.dat

##使用lmgrd启动license服务
[root@test license]# ./lmgrd -c Synopsys.dat -l Synopsys.log

##使用lmstat 可以查看license服务是否启动,并能看到license的使用状态等信息
[root@testlicense]# ./lmstat -a -c 27020@test|more
lmstat - Copyright (c) 1989-2017 Flexera Software LLC. All Rights Reserved.
Flexible License Manager status on Fri 7/23/2021 10:54

License server status: 27020@test
    License file(s) on node02: /home/lzq/test/license/Synopsys.dat:

    node02: license server UP (MASTER) v11.14.1

Vendor daemon status (on node02):

   snpslmd: UP v11.14.0
Feature usage info:

Users of SSS:  (Total of 1 license issued;  Total of 0 licenses in use)
三、设置环境变量
1、设置license服务器环境变量
27020 是license端口号,test是license服务器主机名,和license文件中相同
export LM_LICENSE_FILE=27020@test
synopsys也可以设置成:
export SNPSLMD_LICENSE_FILE=27020@test
cadence :export CDS_LIC_FILE=5280@test
mentor:export MGLS_LICENSE_FILE=1717@test
2、设置安装工具的环境变量
设置PATH
export PATH=$PATH:<install_dir>/bin 如:
export PATH=$PATH:/testinstall/verdi/Verdi_O-2018.09-SP2/bin
安装软件要求设置其他变量,比如verdi_home 等
最后
以上就是虚心电话最近收集整理的关于EDA Tools 安装的全部内容,更多相关EDA内容请搜索靠谱客的其他文章。


发表评论 取消回复