参考:https://www.cnblogs.com/qq20004604/p/8066581.html
重新学习webpack 需要重新安装node指定版本 http://nodejs.cn/ .org 组织 .cn 中国 .zn 中文 .en 英文
node npm webpack 版本要对应 不然会出现想不到的问题 node 8.11.1 npm 5.60 webpack 3.5.5 本地可以覆盖全局的 -save 保存在.pack.json 中
一 初级版本
mkdir webpack-demo
cd webpack-demo
npm init -y
npm install webpack@3.5.5 -S
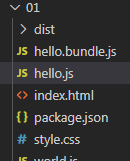
1.index 引入的
<!DOCTYPE html>
<html lang="en">
<head>
    <meta charset="UTF-8">
    <meta name="viewport" content="width=device-width, initial-scale=1.0">
    <title>Document</title>
</head>
<body>
    <script src="./hello.bundle.js"></script>
</body>
</html>
2.hello.js 需要打包的js 代码
// require('./world.js')
// require('style-loader!css-loader!./style.css')
function hello(str){
    alert(str)
}
hello('hello world!!!')
3.pack.josn
 {
   "name": "webpack-demo",
   "version": "1.0.0",
   "description": "",
   // 进入
  "main": "index.js",
  // 私人
  "private": true,
   "scripts": {
     "test": "echo "Error: no test specified" && exit 1"
   },
   "keywords": [],
   "author": "",
   "license": "ISC",
   "devDependencies": {
     "webpack": "^5.4.0",
     "webpack-cli": "^4.2.0"
   }
 }
webpack hello.js hello.bundle.js
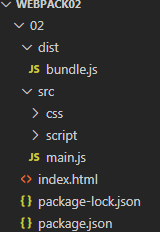
二.手动版本
<!DOCTYPE html>
<html lang="en">
<head>
    <meta charset="UTF-8">
    <meta name="viewport" content="width=device-width, initial-scale=1.0">
    <title>Document</title>
</head>
<body>
    <script src="./dist/bundle.js"></script>
</body>
</html>
//webpack.config.js
const path=require('path');
module.exports = {
  entry: {
    // 进入的
    main: "./src/main",
  },
  output: {
    //输出
    path: path.join(__dirname, "./dist"),
    // 文件名
    filename: "bundle.js",
  },
};
webpack
方式三
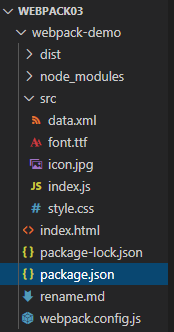
//pack.json
{
  "name": "webpack-demo",
  "version": "1.0.0",
  "description": "",
  "main": "index.js",
  "scripts": {
    "test": "echo "Error: no test specified" && exit 1",
    "dev":"webpack"
  },
  "author": "",
  "license": "ISC",
  "devDependencies": {
    "css-loader": "^4.3.0",
    "csv-loader": "^3.0.3",
    "file-loader": "^6.1.0",
    "lodash": "^4.17.20",
    "style-loader": "^1.2.1",
    "webpack": "^4.44.1",
    "webpack-cli": "^3.3.12",
    "xml-loader": "^1.2.1"
  }
}
// main.js
 import _ from 'lodash';
 import './style.css';
 import Icon from './icon.jpg';
 import Data from './data.xml';

function component() {
  var element = document.createElement('div');

  // Lodash,现在由此脚本导入
  element.innerHTML = _.join(['Hello', 'webpack'], ' ');
  element.classList.add('hello');
  // 将图像添加到我们现有的 div。
   var myIcon = new Image();
   myIcon.src = Icon;

   element.appendChild(myIcon);
   console.log(Data);
  return element;
}

document.body.appendChild(component());
//webpack.config.js
const path = require("path");

module.exports = {
  entry: "./src/index.js",
  output: {
    filename: "bundle.js",
    path: path.resolve(__dirname, "dist"),
  },
  module: {
    rules: [
      {
        test: /.css$/,
        use: ["style-loader", "css-loader"],
      },
      {
        test: /.(png|svg|jpg|gif)$/,
        use: ["file-loader"],
      },
      {
        test: /.(woff|woff2|eot|ttf|otf)$/,
        use: ["file-loader"],
      },
      {
        test: /.(csv|tsv)$/,
        use: ["csv-loader"],
      },
      {
        test: /.xml$/,
        use: ["xml-loader"],
      },
    ],
  },
};
 npm i css-loader style-loader --save-dev
 原生
 npm install cnpm -g
 转化路径
 cnpm i css-loader style-loader --save-dev
 这个路径也可以
 cnpm install  css-loader style-loader --save-dev

 cnpm install node-sass sass-loader  style-loader --save-dev
 npm转化cnpm  node-sass 依据文件  sass-loader 编码文件
 cnpm install less less-loader style-loader css-loader --save-dev
 添加的less文件
 cnpm install url-loader file-loader --save-dev

 webpack
 npm run dev
方式五(本地下载webpack 不用担心版本问题)
{
  "name": "webpack-dome",
  "version": "1.0.0",
  "description": "",
  "main": "index.js",
  "scripts": {
    "test": "echo "Error: no test specified" && exit 1",
    "build": "webpack",
    //观察模式
    "watch": "webpack --watch",
    //打开服务
    "start": "webpack-dev-server",
    // 配置路径
    "server": "node server.js"
  },
   "author": "",
  "license": "ISC",
    // 开发依赖 -D
    //npm i module_name  -D  => npm install module_name --save-dev   写入到 devDependencies 对象 //开发依赖
  "devDependencies": {
     //清除
    "clean-webpack-plugin": "^3.0.0",
    "express": "^4.17.1",
    "html-webpack-plugin": "^4.4.1",
    "lodash": "^4.17.20",
    "webpack": "^4.44.2",
    "webpack-dev-middleware": "^3.7.2",
    "webpack-dev-server": "^3.11.0"
  },
  // vue vuex 等 -S
  // npm i module_name  -S  = >  npm install module_name --save    写入到 dependencies 对象 //生产依赖
  "dependencies": {}
}
//npm i module_name  -g  全局安装
"server": "node server.js"
// server.js  如此配置 不用考虑webpack 配置问题
const express = require('express');
const webpack = require('webpack');
const webpackDevMiddleware = require('webpack-dev-middleware');

const app = express();
const config = require('./webpack.config.js');
const compiler = webpack(config);

// Tell express to use the webpack-dev-middleware and use the webpack.config.js
// configuration file as a base.
app.use(webpackDevMiddleware(compiler, {
  publicPath: config.output.publicPath
}));
// Serve the files on port 3000.
app.listen(3000, function () {
  console.log('Example app listening on port 3000!n');
});
局部配置(可以使用的)
"clean-webpack-plugin": "^3.0.0",
    "express": "^4.17.1",
    "html-webpack-plugin": "^3.2.0",
    "lodash": "^4.17.20",
    "webpack": "^3.10.0",
    "webpack-dev-server": "^2.9.7"
使用命令
   "build": "webpack",
    "watch": "webpack --watch",
    "start": "webpack-dev-server",
//package-lock.json 锁定对应的文件
// src/print.js
export default function printMe() {
    console.log('I get called from print.js!');
    // cosnole.error('I get called from print.js!');
  }
// src/index.js
import _ from "lodash";
import printMe from "./print.js";

function component() {
  var element = document.createElement("div");
  var btn = document.createElement("button");

  element.innerHTML = _.join(["Hello", "webpack"], " ");

  btn.innerHTML = "Click me and check the console!";
  btn.onclick = printMe;

  element.appendChild(btn);

  return element;
}
document.body.appendChild(component());

if (module.hot) {
  module.hot.accept("./print.js", function () {
    console.log("Accepting the updated printMe module!!!");
    printMe();
  });
}
<!doctype html>
<html>
  <head>

    <title>Output Management</title>
     <script src="./dist/print.bundle.js"></script>
  </head>
  <body>

     <script src="./dist/app.bundle.js"></script>
  </body>
</html>
// webpack.config.js

const path = require("path");
const HtmlWebpackPlugin = require("html-webpack-plugin");
const { CleanWebpackPlugin } = require("clean-webpack-plugin");
const webpack = require("webpack");

module.exports = {
  mode: "development",
  entry: {
    // app: "./src/index.js",
    // print: "./src/print.js",
    app: "./src/index.js",
  },
  output: {
    filename: "[name].bundle.js",
    path: path.resolve(__dirname, "dist"),
    publicPath: "/",
  },
  devtool: "inline-source-map",
  devServer: {
    contentBase: "./dist",
    hot: true,
  },
  plugins: [
    new CleanWebpackPlugin(),
    new HtmlWebpackPlugin({
      title: "Output Management",
    }),
    new webpack.NamedModulesPlugin(),
    new webpack.HotModuleReplacementPlugin(),
  ],

  performance: {
    hints: false,
  },
};
//require.context 的使用
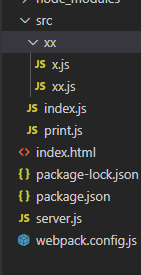
 let arr=require.context('./xx', false, /.js$/)
 console.log(arr.keys(),'=============')
 ["./x.js", "./xx.js"]
webpack 上下文
1.require.context(directory, useSubdirectories = false, regExp = /^.//)

Examples:

require.context("./test", false, /.test.js$/);

require.context("../", true, /.stories.js$/);

2.入参

  1. 你要引入文件的目录

  2.是否要查找该目录下的子级目录

  3.匹配要引入的文件

3.返回的:

       1. context.require 返回一个require 函数:

function webpackContext(req) {return __webpack_require__(webpackContextResolve(req));

函数有三个属性:resolve 、keys、id

        · resolve: 是一个函数,他返回的是被解析模块的id

        · keys: 也是一个函数,他返回的是一个数组,该数组是由所有可能被上下文模块解析的请求对象组成

        · id:上下文模块的id
js 引入
用法:
const pages = require.context('pages', true, //.*.js$/)
pages.keys().map(key => {
  if (!key.includes('/store/')) return
  const keys = key.replace(/(./|.js)/g, '')
  modules[keys.split('/').pop()] = pages(key).default
})

export default modules
let frames = {};
const context = require.context(
  "../assets/image/nocturnalSleep",
  false,
  /.png$/
);
context.keys().forEach((k) => {
  frames[k.replace("./", "").replace(".png", "")] = context(k);
});
图片引入
let frames = {};
const context = require.context( "../assets/image/nocturnalSleep", false, /^./.*.png$/);
context.keys().forEach((k) => {
  frames[k.replace("./", "").replace(".png", "")]=context(k)
});
console.log(frames);
vue组件引入
let frames = {};
let arr = require.context("@/components/expertsToShare/", false, /.vue$/);
console.log(arr.keys(), "=============");
arr.keys().forEach((k) => {
  frames[k.replace("./", "").replace(".vue", "")] = arr(k).default;
});
加载样式:style‐loader 、css‐loader
加载图片:file‐loader、url-loader
加载字体:file‐loader、url-loader
加载数据:file‐loader、csv‐ loader、xml‐loader

问题01:可以用 HtmlWebpackPlugin 来解决对html文件注入内容:。
问题02:clean‐webpack‐plugin插件清除输出目录。
问题03:用WebpackManifestPlugin将模块映射到输出的关系提取到一个 json 文件,以供使

//npm i module_name  -D  => npm install module_name --save-dev   写入到 devDependencies 对象 //开发依赖
npm install ‐‐save‐dev html‐webpack‐plugin
npm install ‐‐save‐dev clean‐webpack‐plugin
npm install ‐‐save‐dev WebpackManifestPlugin

const HtmlWebpackPlugin = require('html‐webpack‐plugin');
const CleanWebpackPlugin = require('clean-webpack-plugin');
const ManifestPlugin = require('webpack-manifest-plugin');
plugins: [
  // 删除 文件
  new CleanWebpackPlugin(['dist']),
  // 注入 index.html
   new HtmlWebpackPlugin(), // Generates default index.html
    new HtmlWebpackPlugin({  // Also generate a test.html
      filename: 'test.html',
      template: 'src/assets/test.html'
    })
  // 缓存的文本
  new ManifestPlugin()
]
es5 转es6
npm install babel-loader babel-preset-es2015 --save-dev

     {
          test: /.js$/,
          exclude: /node_modules/,
          loaders: "babel-loader",
          query: {
            presets: ["es2015", "react"],
          },
        },
公共模块的js 例如 jquery echarts 等框架
// 进入
 entry: {
    main: "./src/main",
    vendors: "./src/vendors"
  },
//合并组合
const merge = require("webpack-merge");
module.exports = merge(webpackBaseConfig, {
  plugins: [
   new webpack.optimize.CommonsChunkPlugin({
      name: "vendors",
      filename: "js/vendors.js"
    }),
    ]
})
//================================
const webpack = require('webpack');
module.exports = {
    entry: {
        main: './src/index.js',
        vendor: [
            'lodash'
        ]
},
plugins: [
//提取第三方的包(加缓存内容)
new webpack.optimize.CommonsChunkPlugin({
name: 'vendor'
}),
//提取 manifest
new webpack.optimize.CommonsChunkPlugin({
            name: 'manifest'
        })
    ],
    output: {
        filename: '[name].[chunkhash].js',
        path: path.resolve(__dirname, 'dist')
    }
};
--------------------------------------------------
var webpack = require("webpack");
var path = require('path');
module.exports = {
    entry: {
        one: "./src/one.js",
        two: "./src/two.js"
    },
    output: {
        path: path.resolve(__dirname, 'dist'),
        filename: "[name].js"
    },
    plugins:[
        new webpack.optimize.CommonsChunkPlugin({
            name: "common",
        }),
    ]
};
dist打包zip 压缩
const FileManagerPlugin = require("filemanager-webpack-plugin"); //打包zip 压缩
plugins: [
   new FileManagerPlugin({
      onEnd: {
         //mkdir: ['./dist'], // 新加的一句代码
         delete: ["./dist.zip"],
        archive: [{ source: "./dist", destination: "./dist.zip" }],
       },
    }),
    ]
plugins: [
   new CompressionWebpackPlugin({
       asset: "[path].gz[query]",
       algorithm: "gzip",
       test: ["js", "css"],
       threshold: 10240,
       minRatio: 0.8,
     }),
    ]
webpack 问题
TypeError: Cannot read property ‘make‘ of undefined
 "html-webpack-plugin": "^4.5.0", 改成  "html-webpack-plugin": "^3.2.0", 即可
 npm uninstall html-webpack-plugin -D
 npm install html-webpack-plugin@3.2.0 -D
invalid "instanceof" keyword value Promise
webpack-dev-server的版本是不是太高了,可以降低版本试一下,我用的版本是"webpack-dev-server": "^2.9.7"
npm uninstall webpack-dev-server -D 换成  npm install webpack-dev-server@2.9.7 -D
context.compiler.hooks.invalid.tap('WebpackDevMiddleware', invalid);
webpack 版本过低
npm uninstall webpack-dev-middleware -D
npm install webpack-dev-middleware@3.7.2 -D

npm uninstall webpack -D
npm install webpack @4.44.2 -D
1.安装依赖
npm install ‐‐save‐dev express webpack‐dev‐middleware
2.设置配置
output: {
    filename: '[name].bundle.js',
    path: path.resolve(__dirname, 'dist'),
    publicPath: '/'
}
3.建服务器dev-server.js
const express = require('express');
const webpack = require('webpack');
const webpackDevMiddleware = require('webpack‐dev‐middleware');
const app = express();
const config = require('./webpack.config.js');
const compiler = webpack(config);
// Tell express to use the webpack‐dev‐middleware and use the webpack.config.js
// configuration file as a base.
app.use(webpackDevMiddleware(compiler, {
    publicPath: config.output.publicPath
}));
// Serve the files on port 3000.
app.listen(3000, function() {
    console.log('Example app listening on port 3000!n');
});
4.包的配置
"scripts": {
    "start": "node dev-server.js"
}
step01:配置文件
//webpack.common.js 通用配置文件
//webpack.pro.js 产品环境文件
//webpack.dev.js 开发环境文件

step02:安装依赖
npm install ‐‐save‐dev webpack‐merge

step03:包的配置
"scripts": {
 "start": "webpack‐dev‐server ‐‐open ‐‐config webpack.dev.js",
 "build": "webpack ‐‐config webpack.pro.js"
}

step04:运行命令
# 开发时
Npm run start
# 构建时
Npm run build
线上 开发 路径的判断
webpack ‐‐env.NODE_ENV=local ‐‐env.production ‐‐progress –config webpack.config.pro.js
//webpack.config.pro.js
module.exports = env => {
// Use env.<YOUR VARIABLE> here:
    console.log('NODE_ENV: ', env.NODE_ENV) // 'local'
    console.log('Production: ', env.production) // true
    return {
        entry: './src/index.js',
        output: {
            filename: 'bundle.js',
            path: path.resolve(__dirname, 'dist')
        }
    }
}
参考:添加链接描述
注意 :
1.路径不要有文字
webpack和webpack-cli的安装和卸载
删除全局webpack-cli
webpack4.x开始官方文档是说要安装cli所以如果的在用4.+就需要卸载cli
npm uninstall -g webpack-cli
#注释给我这种小白提供参考
#卸载 uninstall 可以简写成 un
#全局 -g 的完整写法是 --global
#现在问题来了这样真的卸载了webpack-cli吗?
#答案是没有。到现在为止我还没有发现那个webpack-cli是全局安装的,至少官方文档没看到。
#那就看下面怎么删除局部webpack-cli
删除本地(局部)webpack-cli
npm uninstall webpack-cli
#仔细看你会发现去掉全局参数 -g
#这时候你的命令行会快速滚动一些删除信息。
webpack-cli删除成功
删除全局webpack
npm uninstall -g webpack
这个注释还是给小白看的
#为什么要局部全局删除webpack
#因为你可能在安装webpack时不确定自己是全局安装
#还是本地安装,所以建议先执行全局删除命令
#然后在执行下面的本地删除命令
删除本地webpack
npm un webpack
#这时候小白的webpack是删除完成了
#还没完看下面怎么说
检查webpack残余文件
ls
#用ls命令查看一下是否有这几个文件
#node_modules
#package-lock.json
#package.json
#有是最好的,如果没有那你可能还没找到自己本地安装webpack的准确位置
#有时候我也找不到了
#现在说有的事
rm -rf node_modules package-lock.json package.json
#上面这行命令是删除这些文件的意思
#同学你的webpack 彻底删除干净了
#但是小白一定要好好去了解一下 rm 和 rm -rf 的区别,在这里我不科普怕说错。
安装webpack
接下来让我告诉你安装webpack4.+的正确方式
其实官方文档说的很清楚了,但是有点细节要注意。
创建一个新的本地项目目录名为webpack-demo
mkdir webpack-demo
进入目录
cd webpack-demo
创建package.json文件
npm init -y
安装webpack
#要安装最新版本或特定版本,请运行以下命令之一:
#第一个安装方式默认安装最新版本
npm install --save-dev webpack
#第二个安装方式是安装你需要的版本
npm install --save-dev webpack@
安装webpack-cli
npm install --save-dev webpack-cli
#不要忘记webpack4.+开始webpack-cli是必备的哦
检查webpack是否安装成功
node_modules/.bin/webpack -v
#执行了这个命令以后会输出一个版本号
#我的是4.11.1,因为webpack在不断更新所以我们的版本号会有点区别,不是什么问题
最后
以上就是爱笑小馒头最近收集整理的关于webpack 入门 文件系统require.context 动态 动态引入 vue的全部内容,更多相关webpack内容请搜索靠谱客的其他文章。


发表评论 取消回复