目录
一、Thread 常见的构造方法
(1)无参数的构造方法
(2)传 Runnable 对象的构造方法
(3)传入 String 类的构造方法 (给线程起名)
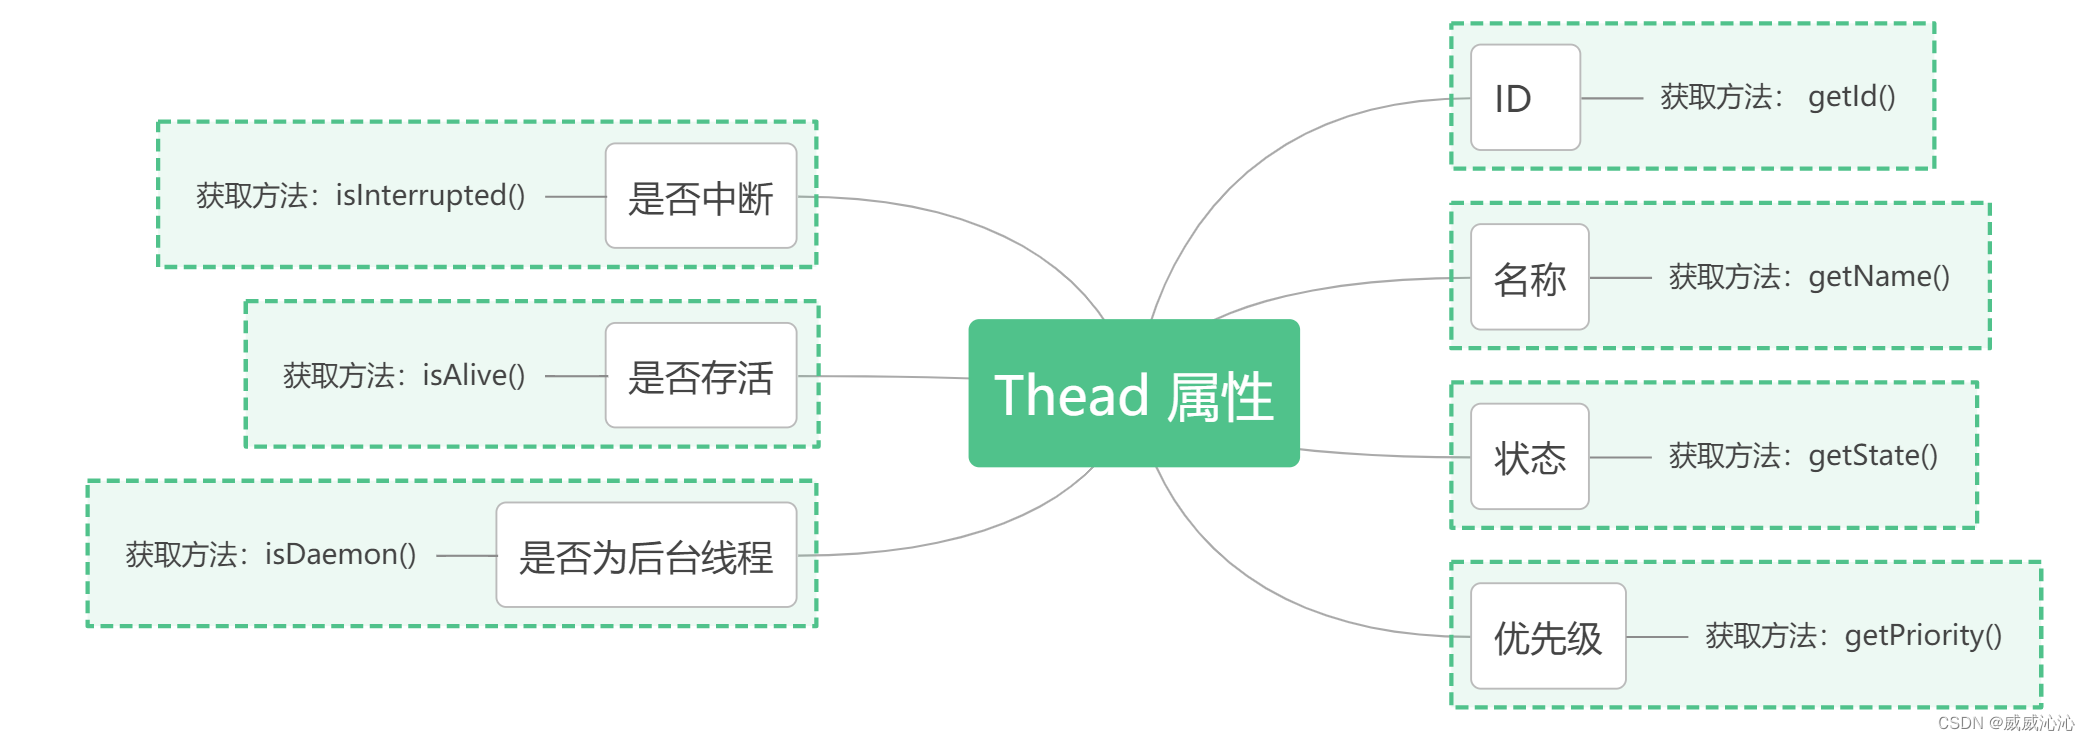
二、Thread 类的几种常见属性
① getId()方法
② getName()方法
③ getState()方法
④ getPriority()方法
⑤ isDaemon()方法
⑥ isAlive() 方法
三、启动线程
四、中断线程
五、线程等待
六、获取当前线程引用
七、线程休眠
一、Thread 常见的构造方法
| 方法 | 说明 |
| Thread() | 创建线程对象 |
| Thread(Runnable target) | 使用 Runnable 对象创建线程对象 |
| Thread(String name) | 创建线程对象,并命名 |
| Thread(Runnable target, String name) | 使用 Runnable 对象创建线程对象,并命名 |
| 【了解】Thread(ThreadGroup group, Runnable target) | 线程可以被用来分组管理,分好的组即为线程组,这 个目前我们了解即可 |
(1)无参数的构造方法
Thread thread = new Thread();(2)传 Runnable 对象的构造方法
class MyRunnable implements Runnable{

    @Override
    public void run() {
           //... 线程具体的工作
    }
}

public class Demo8 {
    public static void main(String[] args) {
        Thread thread = new Thread(MyRunnable);
    }
}
(3)传入 String 类的构造方法 (给线程起名)
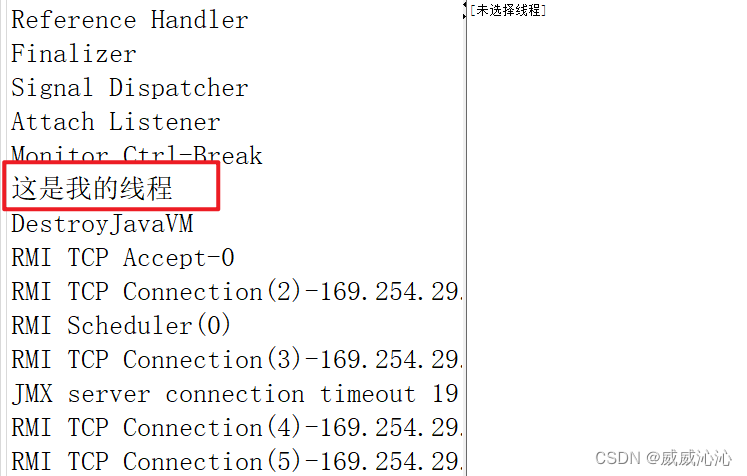
我们在创建线程时,可以给线程起名字,方面我们调试观察分析。
public class Demo8 {
    public static void main(String[] args) {
        Thread t = new Thread(() ->{
            while(true){
                System.out.println("hello");
                try {
                    Thread.sleep(1000);
                } catch (InterruptedException e) {
                    throw new RuntimeException(e);
                }
            }
        },"这是我的线程");
        t.start();
    }
}
注意:这里不要把变量名 ‘t’ 和线程名 “这是我的线程” 弄混,前者只存在代码代码中,运行起来就变成字节码文件了,后者只存在运行状态。
代码运行起来之后,我们可以在第三方软件里面看到我们创建线程的名字。(以 jconsole命令为例)
二、Thread 类的几种常见属性
 ① getId()方法

作用:获取线程的id,返回一个 long 类型的值,值是随机的
    public static void main(String[] args) {
        Thread t = new Thread(()->{

        });
        t.start();
        System.out.println("t 线程id:"+t.getId());
        System.out.println("main 线程id:"+Thread.currentThread().getId());//获取 main 线程 ID
    }
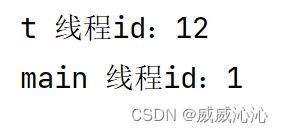
注意:这里获取的 id 是 Java 中给 Thread 对象安排的身份标识,和操作系统内核职工的PCB 的 pid,以及和操作系统提供线程 API 中的线程id 都不是一回事!!!
② getName()方法
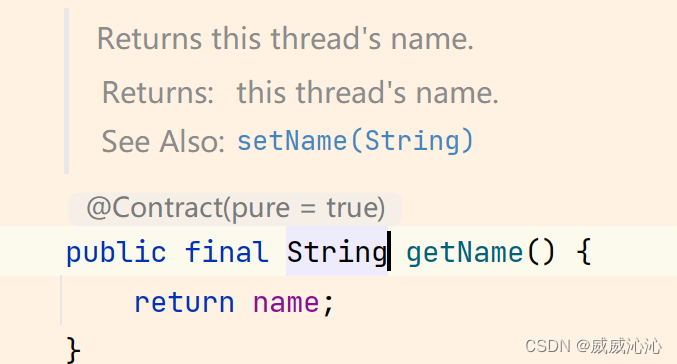
作用:当前获取线程的名字
    public static void main(String[] args) {
        Thread t = new Thread(()->{

        },"这是我的线程");
        t.start();
        System.out.println(t.getName());
}![]()
③ getState()方法

作用:获取线程的状态
在 Java中,线程状态有六种分别是:
- New 初始
- Runnable 运行
- Blocked 阻塞
- Waiting 等待
- Timed_Waiting 超时等待
- Terminated 终止
    public static void main(String[] args) {
        Thread t = new Thread(()->{

        });
        t.start();

        System.out.println(t.getState());
} ![]()
④ getPriority()方法
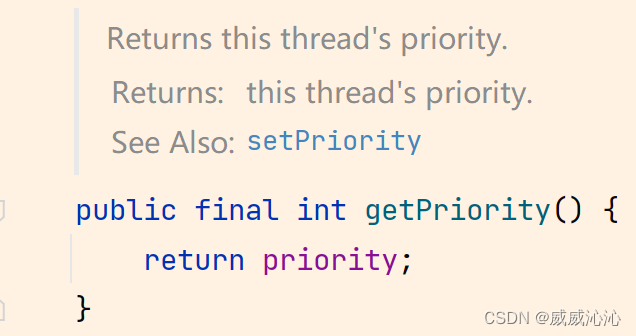
作用:获取线程的优先级
    public static void main(String[] args) {
        Thread t = new Thread(()->{

        });
        t.start();

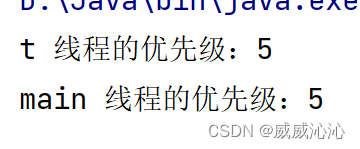
        System.out.println("t 线程的优先级:"+t.getPriority());
        Thread main = Thread.currentThread();
        System.out.println("main 线程的优先级:"+main.getPriority());
} 
⑤ isDaemon()方法

作用:获取线程是否是 “后台”线程,是则返回 true,不是则返回 false。
    public static void main(String[] args) {
        Thread t = new Thread(()->{

        });
        t.start();

        System.out.println(t.isDaemon());
    }
一般默认情况下,我们创建的都是 “前台”线程,前台线程会阻止进程退出。如果是后台线程,后台线程不阻止进程退出。
简而言之,如果 main 运行完了,前台线程还没运行完,进程不会退出。
如果 mian 等其他前台线程执行完了,这时即使后台线程没执行完,进程也会退出。
我们看下面代码:
    public static void main(String[] args) {
        Thread t = new Thread(() ->{
            while(true){
                System.out.println("hello");
                try {
                    Thread.sleep(1000);
                } catch (InterruptedException e) {
                    throw new RuntimeException(e);
                }
            }
        },"这是我的线程");
        t.start();

        System.out.println("main 线程执行完了");
    }
此时创建的是 前台线程,我们看运行结果,发现当 main主线程执行完时,我们创建的线程还在运行。
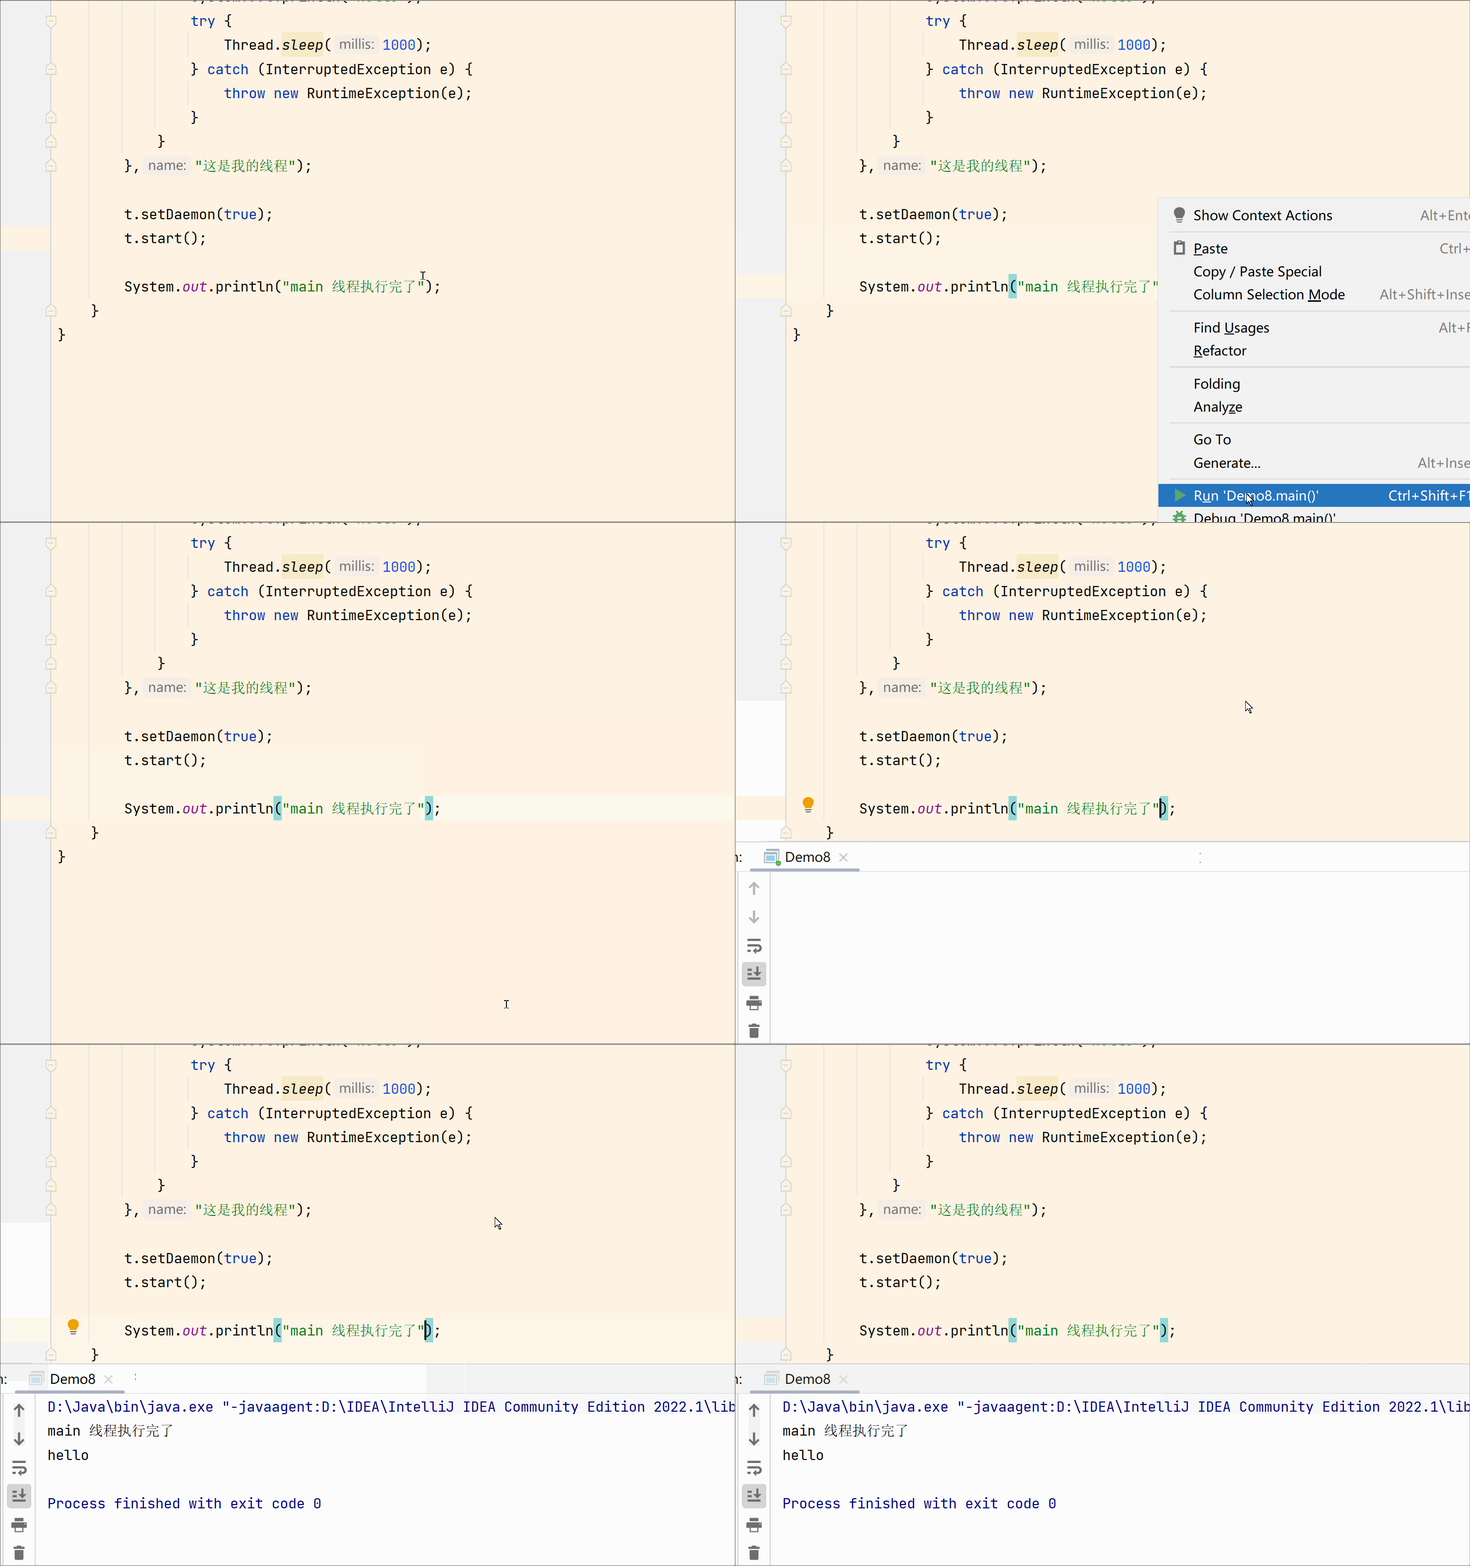
现在来创建一个后台线程,大家来看一下结果。
使用 setDaemon() 方法可以把前台线程设置为后台线程
注意:setDaemon() 方法必须在 start()方法前调用,否则会修改不了
此时我们能看到,我们创建的线程只打印了一条 “hello”。当主线程执行完后,我们创建的后台线程也随之消失了。
⑥ isAlive() 方法

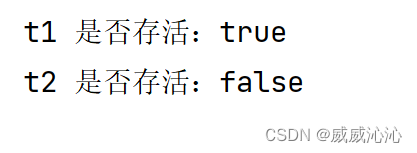
作用:检测线程是否还存活,是则返回 true,否则返回 false
    public static void main(String[] args) throws InterruptedException {
        Thread t1 = new Thread(()->{
        });
        Thread t2 = new Thread(()->{
        });

        t1.start();
        System.out.println("t1 是否存活:"+t1.isAlive());

        t2.start();
        Thread.sleep(1000);//让 main 线程休眠 1000ms
        System.out.println("t2 是否存活:"+t2.isAlive());
    }
三、启动线程
启动线程一般用创建的线程对象来调用 start() 方法即可,如下

只有调用 start 才会真正创建线程!!!不调用 start 就是没创建线程(在内核里创键PCB)
注意区分,调用start 和 run 的区别:
一般情况,我们创建的线程对象调用run方法和start方法时,产生的结果可能会相同,这就会导致我们误以为 run() 和 start() 没有区别!
直接调用run方法并没有创建线程,只是在原来的线程中运行代码
而直接调用start方法,则是创建一个新的线程,在新线程中执行代码(和原来的线程是并发的)
我们来看下面代码:
class MyThread extends Thread{
    @Override
    public void run() {
        while(true){
            try {
                System.out.println("hello Thread");
                Thread.sleep(1000);
            } catch (InterruptedException e) {
                throw new RuntimeException(e);
            }
        }
    }
}
public class Demo1 {
    public static void main(String[] args) {
        Thread t1 = new MyThread();

        t1.run();
        //t1.start();

        while(true){
            try {
                System.out.println("hello main");
                Thread.sleep(1000);
            } catch (InterruptedException e) {
                throw new RuntimeException(e);
            }
        }
    }
}
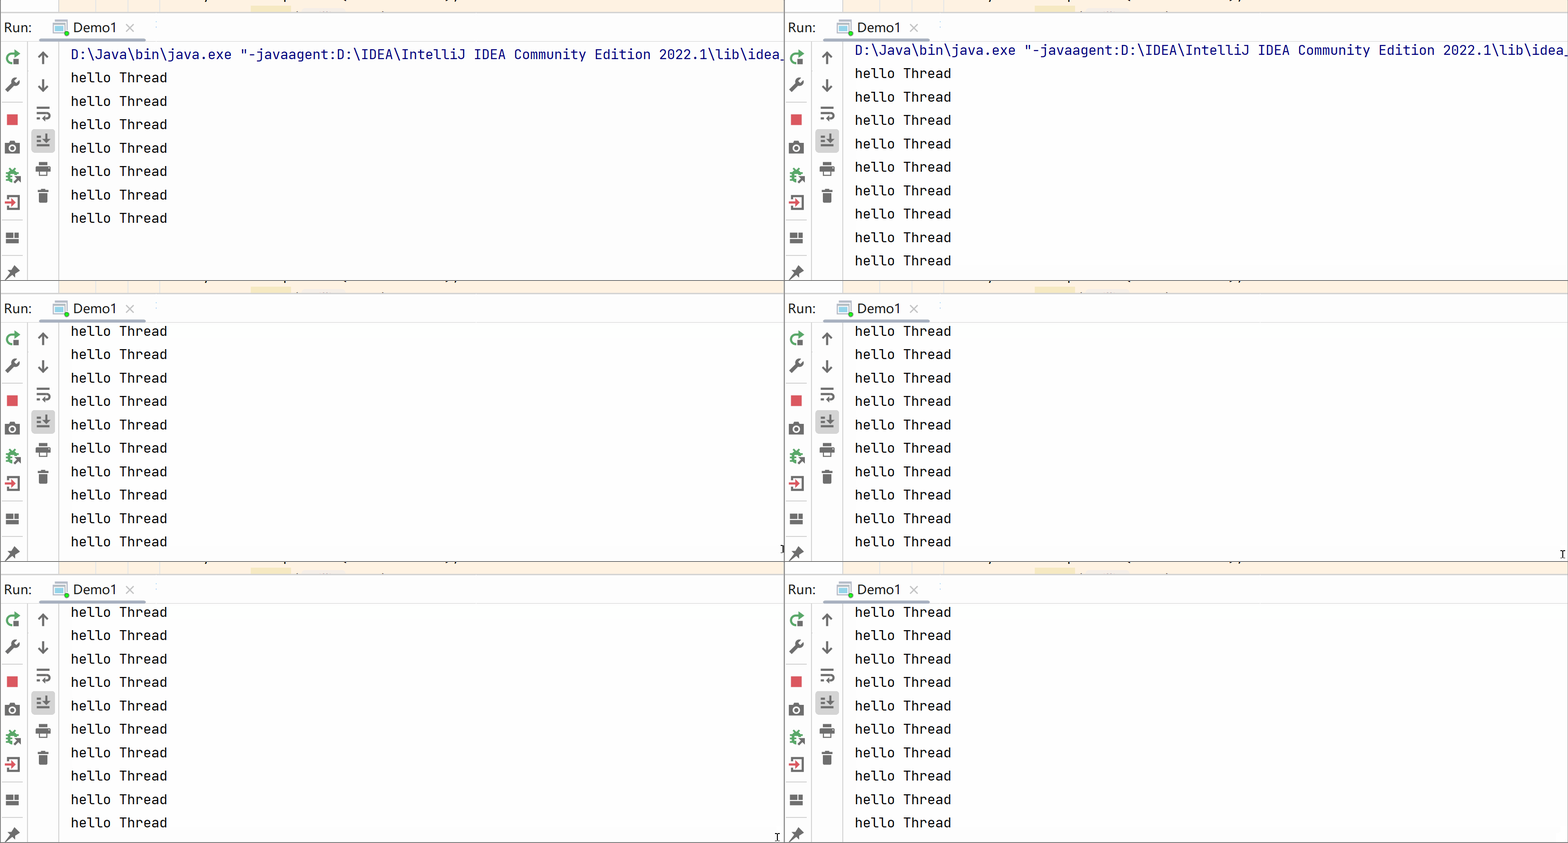
当t1只调用 run() 方法时的结果:
当t1调用 start() 方法时的结果:
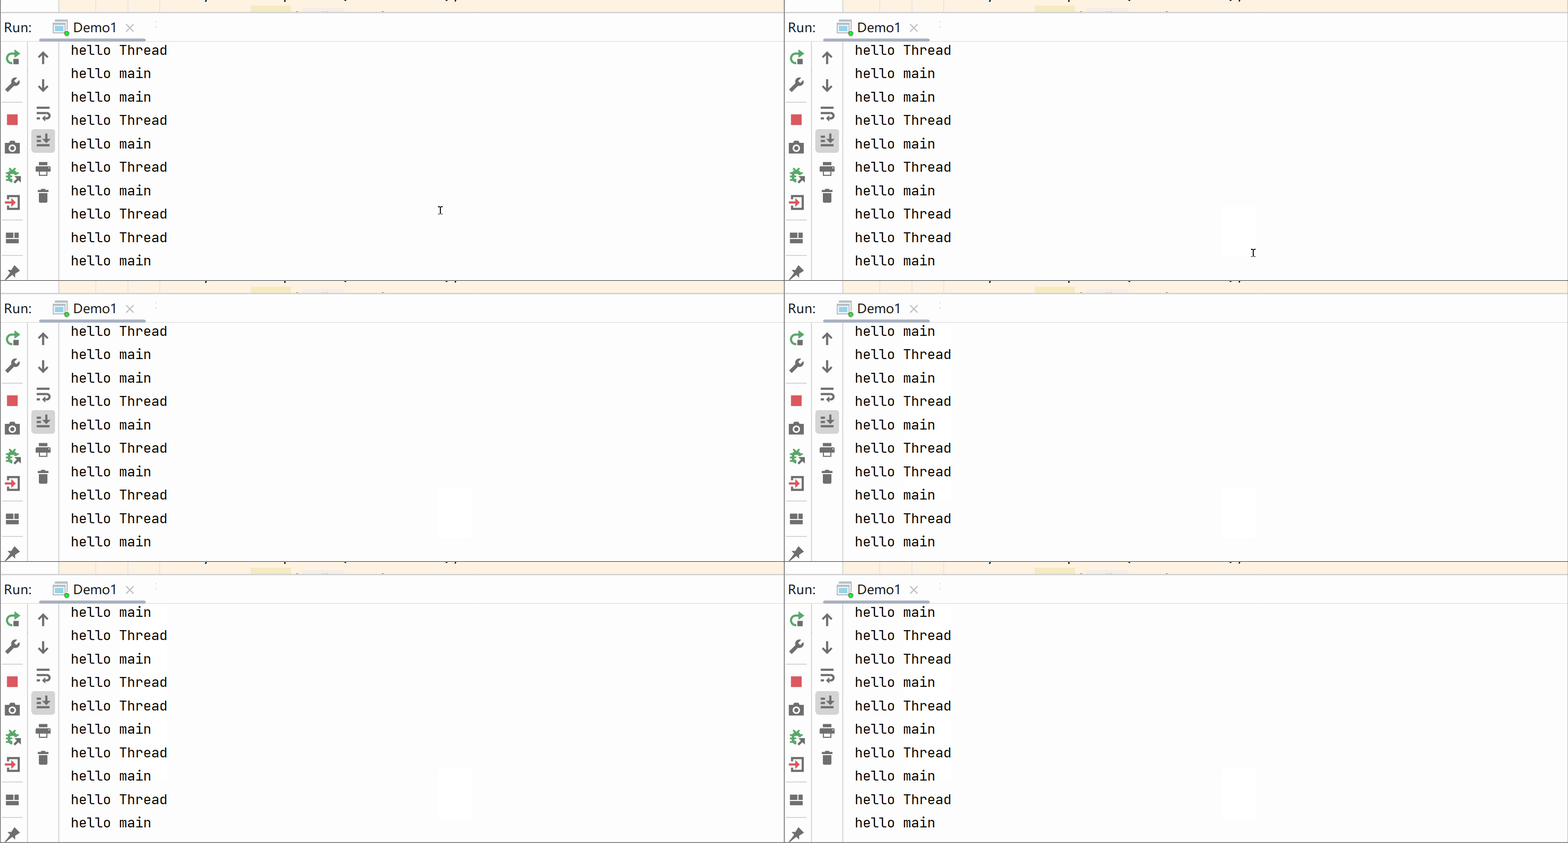
我们会发现,t1调用run()方法只会打印“hello Thread”。这是因为是main线程调用的run()方法!!代码顺序执行,同时run()方法是一直循环,所以就不会打印“hello main”。
而t1调用start()方法,则是创建一个新线程,新线程调用run,所以我们会看到 “hello Thread”和“hello main”都有打印。
四、中断线程
一般情况下,只有 run方法执行完了,线程才结束,但是有点时候我们想要线程提前结束那该怎么办呢?这就涉及到我们中断线程的方式了。
中断线程一般会设置标志位,而设置标志位分两种方式:
- 直接自己定义一个标志位,作为线程是否结束的标记
- 使用标准库里自带的一个标志位
(1)自定义标志位
自定义一个变量作为一个标志位,通过对变量的修改来结束run
public class Demo2 {
    private static boolean isQuit = false;

    public static void main(String[] args) {
        Thread t = new Thread(()->{
           while(!isQuit){
               System.out.println("hello Thread");
               try {
                   Thread.sleep(1000);
               } catch (InterruptedException e) {
                   e.printStackTrace();
               }
           }
        });

        t.start();

        try {
            Thread.sleep(3000);
        } catch (InterruptedException e) {
            e.printStackTrace();
        }

        isQuit = true;
        System.out.println("设置让 t 线程结束");
    }
}
(2)使用 Thread.currentThread().isInterrupted() 作为标志位
currentTrhead():是Thread类的静态方法,通过这个方法,可以拿到当前线程的实例
isInterrupted():调用这个方法判断标志位
在主线程中,通过 t.interrupt 来中断这个线程,设置标志位为 true!
public class Demo3 {
    public static void main(String[] args) {
        Thread t = new Thread(()->{
           while(!Thread.currentThread().isInterrupted()){
               System.out.println("hello Thread");
           }
            System.out.println("t 执行完");
        });

        t.start();

        try {
            Thread.sleep(300);
        } catch (InterruptedException e) {
            e.printStackTrace();
        }

        t.interrupt();
        System.out.println("设置让 t 线程结束");
    }
}
注意:interrupt 方法的行为,有两种情况
① 当 t 线程在运行状态时,会设置标志位(Thread.currentThread().isInterrupted())为 true.
例如上述代码。
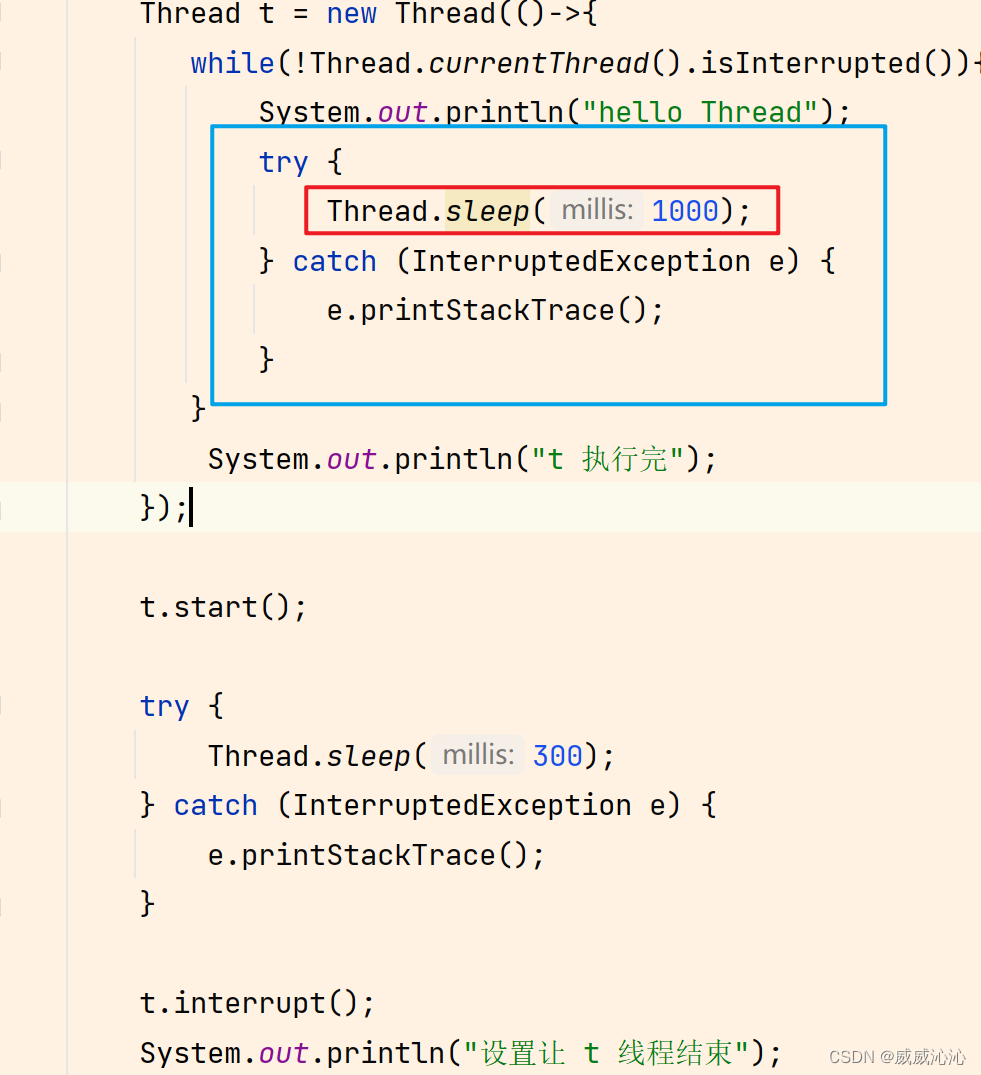
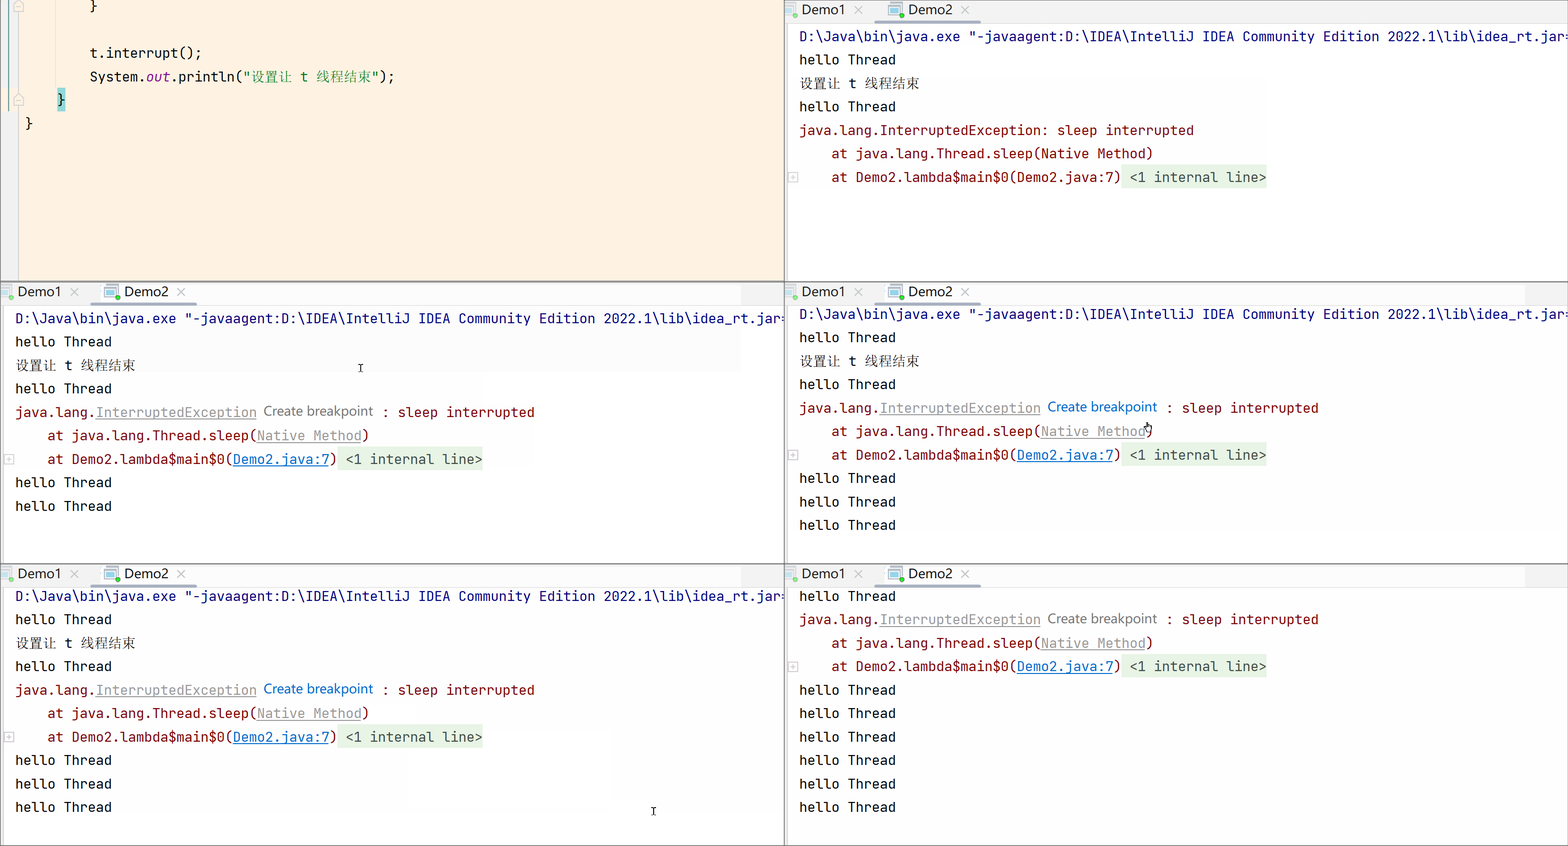
② 当 t 线程在阻塞状态时(sleep),就不会设置标志位,而是触发一个 InterruptedException,这个异常会把 sleep 提前唤醒。
上图代码中,处理异常只是打印日志,并没有结束循环。所以这种情况并不能中断线程
这时我们要想中断线程或者其他操作,我们就要在捕获异常的代码块中进程操作!
提示:在 java 中,中断线程并非强制的!!! 由线程自身的代码来进行判断处理的!!!
线程怎么处理,取决于代码怎么写!
五、线程等待
一般情况下,线程之间的调度顺序,是不确定的!但是可以通过一些特殊操作,来对线程的执行顺序做出干预。
其中 join 就是一个方法,控制线程之间的结束顺序!!
例如:
创建一个线程 t,并让他循环打印 “hello” 五次,同时在main线程中调用 t.join()。
    public static void main(String[] args) throws InterruptedException {
        Thread t = new Thread(()->{
            for (int i = 0; i < 3; i++) {
                System.out.println("hello");
                try {
                    Thread.sleep(1000);
                } catch (InterruptedException e) {
                    e.printStackTrace();
                }
            }
        });

        t.start();

        System.out.println("main 线程 join 之前");
        t.join();
        System.out.println("main 线程结束");
    }
结果如下:
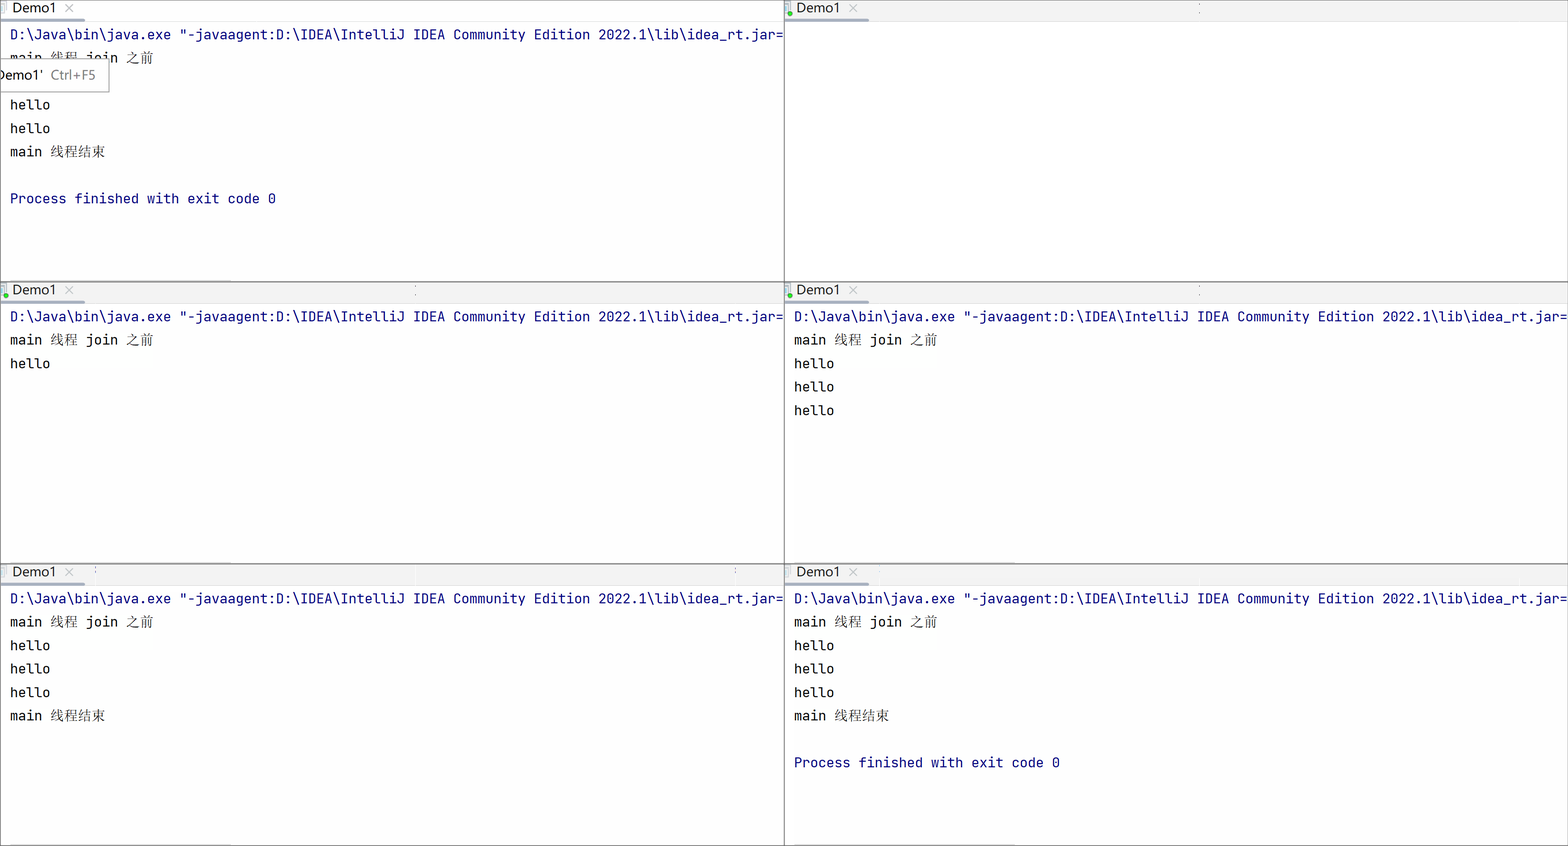
我们发现 main 线程是等待 t 线程工作结束后才继续执行,结果是确定的。
t.join() 效果就是:让 mian 线程阻塞等待,等到线程之间的结束顺利!!
而如果我们不加 t.join(),运行结果就是随机的了。如下
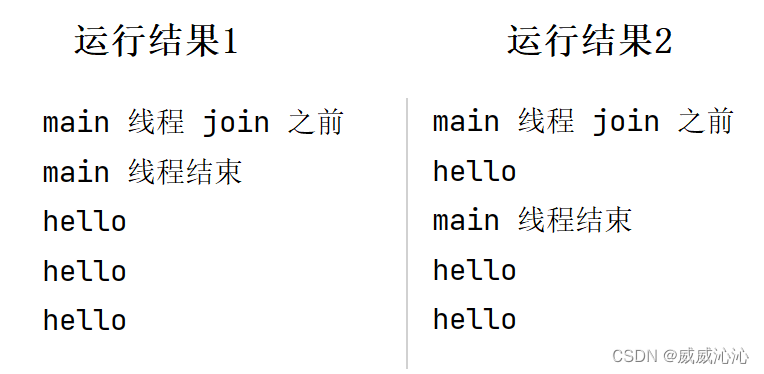
在实际开发中很少会用到 无限等待的方法,大多数都是指定了最大等待,避免程序因为死等,导致“卡死”的情况。
join() 带参数的方法如下:
| 方法 | 说明 |
| public void join(long millis) | 等待线程结束,最多等待 millis 毫秒 |
| public void join(long millis,int nanos) | 等待 millis 毫秒 + nanos 纳秒(精确版) |
六、获取当前线程引用
| 方法 | 说明 |
| public static Thread currentThread() | 返回当前线程对象的引用 |
获取当前这个线程对应 Thread 对象的引用,哪个线程里面调用,得到的就是哪个线程的引用。
    public static void main(String[] args) {
        Thread t = new Thread(()->{
            System.out.println(Thread.currentThread().getName());
        });
        t.start();

        Thread ct = Thread.currentThread();
        System.out.println(ct.getName());
    }
七、线程休眠
sleep 方法 可以指定休眠时间,让线程休息(相当于阻塞一会)
| 方法 | 说明 |
| public static void sleep(long millis) throws InterruptedException | 休眠当前线程 millis 毫秒 |
| public static void sleep(long millis,int nanos) throws InterruptedException | 休眠 millis 毫秒 + nanos 纳秒 |
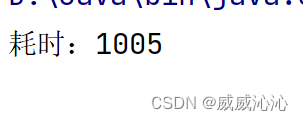
    public static void main(String[] args) throws InterruptedException {
        long start = System.currentTimeMillis();//记录开始时间(时间戳)

        Thread.sleep(1000);//让main先休眠 1000毫秒

        Long end = System.currentTimeMillis();//记录结束时间

        System.out.println("耗时:"+(end - start));
} 
sleep 的原理就是让原本在 就绪队列 中的线程,转移到 阻塞队列 中去,等 sleep 的时间到了,再转移到 就绪队列 中。
最后
以上就是负责云朵最近收集整理的关于Thread类讲解的全部内容,更多相关Thread类讲解内容请搜索靠谱客的其他文章。



发表评论 取消回复