才买了几天的linode今早突然不能访问,打开管理页,发现linode给我发了封信,把我的网络限制了,内容如下:
Hello,
We have detected an outbound denial of service attack originating from your Linode. It appears that a process internal to your Linode is sending large amounts of malicious traffic towards other servers. We ask that you investigate this matter as soon as you are able. Once you have completed your investigation, kindly reply to this ticket with the answers to the following questions:
- What was the source of the issue?
- What steps did you take to resolve this issue?
- What steps did you take to prevent this from occurring again?
Because of the serious nature of denial of service attacks, we have applied network restrictions to your Linode to mitigate this issue.
While network restrictions are in place, you can access your Linode using our out-of-band Lish console. For more information about using Lish, please take a look at the following guide:
https://www.linode.com/docs/networking/using-the-linode-shell-lish/
Please keep us updated via this ticket as you investigate.
I think my Linode is compromised. How can I tell?
If you believe that your Linode has been compromised, you can start troubleshooting by auditing the following log files and writable directories:
- /var/log/auth.log : Check this log file for signs of unauthorized access and brute-force attempts. Use the ‘last’ command to cross reference recent account logins with this file.
- /tmp : This directory is often used by malicious parties to store files
- Web server logs: There may be a vulnerable script or web application. The location of these log files depends on your web server (apache, nginx, etc.) configuration.
- ps aux : Use this command to audit running processes for foreign processes
My Linode is compromised. What do I do now?
If you discover that your Linode is compromised, we strongly suggest that you redeploy. It is often very difficult to determine the full scope of a vulnerable system. We have a guide that can assist you with redeploying your server that you can find linked below:
https://www.linode.com/docs/security/recovering-from-a-system-compromise/
During this process, please continue to keep us updated, and let us know if you have any questions.
Please let us know if you have any questions or concerns.
Regards,
Linode
我就不懂系统安全什么的,所以乘这个机会也学习了解下,有知道的大佬希望给我普及下知识。
首先要我分析问题来源,我是一头雾水,想网上搜索下可连关键词怎么写都不清楚。这个就暂且搁置吧,我打算重新安装系统,并严格按照linode的安全建议配置系统。
系统安全配置
1. 更新系统到最新版本
yum update
使用yum-cron自动更新
yum install -y yum-cron
打开 /etc/yum/yum-cron.conf
修改
apply_updates = no
为
apply_updates = yes
2. 添加受限用户帐号
添加用户example_user,并设置密码
useradd example_user && passwd example_user
将用户example_user加入whell组
usermod -aG wheel example_user
3. 使用SSH登陆
创建key-pair
使用putty生成key
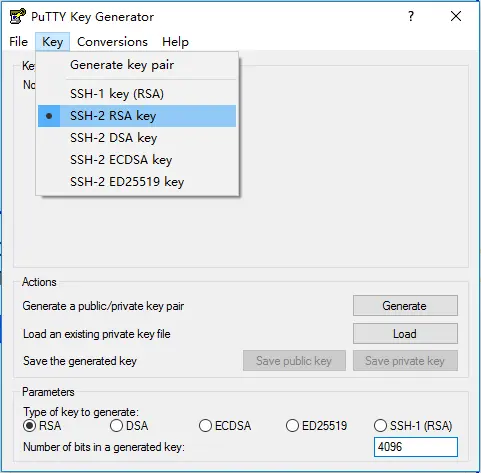
上传pub-key
保存私钥和公钥,将公钥上传追加到文件~/.ssh/authorized_keys,并修改权限:
chmod 700 -R ~/.ssh && chmod 600 ~/.ssh/authorized_keys
到这一步就可以使用ssh公钥登陆了。
禁用root ssh登陆
修改文件/etc/ssh/sshd_config,内容为:
# Authentication:
...
PermitRootLogin no
禁用ssh密码登陆
同样修改文件/etc/ssh/sshd_config,内容为:
# Change to no to disable tunnelled clear text passwords
PasswordAuthentication no
使用一个网络协议
ssh默认监听IPv4 和 IPv6,禁用掉一个不需要的,这不是全局参数,仅针对ssh
可选项:
AddressFamily inet 监听 IPv4.
AddressFamily inet6 to 监听 IPv6.
同样是修改文件/etc/ssh/sshd_config,但内容通常不在文件中,可使用命令行添加到文件结尾:
echo 'AddressFamily inet' | sudo tee -a /etc/ssh/sshd_config
重启ssh
如果你的发行版使用systemd (CentOS 7, Debian 8, Fedora, Ubuntu 15.10+)
sudo systemctl restart sshd
如果你通过SystemV or Upstart 初始化系统 (CentOS 6, Debian 7, Ubuntu 14.04):
sudo service ssh restart
4.Use Fail2Ban for SSH login protection
5.Remove unused Network-Facing services
6.Configure a Firewall only allows http , mysql and ssh port incoming。
安装nginx
sudo yum install epel-release
sudo yum install nginx
sudo systemctl start nginx
sudo systemctl enable nginx
sudo systemctl restart nginx
sudo systemctl status nginx
测试nginx配置文件
nginx -t
安装Mysql
sudo yum install wget
wget http://repo.mysql.com/mysql57-community-release-el7-10.noarch.rpm
# 全新安装
sudo rpm -ivh mysql57-community-release-el7-10.noarch.rpm
# 更新安装
sudo rpm -Uvh mysql57-community-release-el7-10.noarch.rpm
sudo yum install mysql-server
sudo systemctl start mysqld
查看监听端口
sudo netstat -tulpn
安装shadowsocks
yum -y update

yum install -y python-setuptools && easy_install pip

pip install shadowsocks

yum clean all
vi /etc/shadowsocks.json
{
    "server":"0.0.0.0",
    "server_port":55555,
    "local_port":1080,
    "password":"mysspasswd",
    "timeout":600,
    "method":"aes-256-cfb"
}
ssserver -c /etc/shadowsocks.json -d start
添加防火墙
firewall-cmd --zone=public --add-port=8989/tcp --permanent

firewall-cmd --zone=public --add-port=8989/udp --permanent

firewall-cmd --reload
查找IP地址
ip addr show eth0 | grep inet | awk '{ print $2; }' | sed 's//.*$//'
安装PHP
sudo yum install php php-mysql php-fpm
/etc/php.ini
cgi.fix_pathinfo=0
/etc/php-fpm.d/www.conf
listen = /var/run/php-fpm/php-fpm.sock
listen.owner = nobody
listen.group = nobody
user = nginx
group = nginx
systemctl start php-fpm
安装 phpMyAdmin
yum install epel-release
sudo yum install phpmyadmin
安装java
cd /opt
sudo wget --no-cookies --no-check-certificate --header "Cookie: gpw_e24=http%3A%2F%2Fwww.oracle.com%2F; oraclelicense=accept-securebackup-cookie" "http://download.oracle.com/otn-pub/java/jdk/8u121-b13/e9e7ea248e2c4826b92b3f075a80e441/jdk-8u121-linux-x64.tar.gz"


sudo tar xzf jdk-*.tar.gz
cd jdk1.8.0_121
alternatives --install /usr/bin/java java /opt/jdk1.8.0_121/bin/java 2
sudo alternatives --config java
sudo alternatives --install /usr/bin/jar jar /opt/jdk1.8.0_121/bin/jar 2
sudo alternatives --install /usr/bin/javac javac /opt/jdk1.8.0_121/bin/javac 2
sudo alternatives --set jar /opt/jdk1.8.0_121/bin/jar
sudo alternatives --set javac /opt/jdk1.8.0_121/bin/javac
wget --no-cookies --no-check-certificate --header "Cookie: gpw_e24=http%3A%2F%2Fwww.oracle.com%2F; oraclelicense=accept-securebackup-cookie" "http://download.oracle.com/otn-pub/java/jdk/8u121-b13/e9e7ea248e2c4826b92b3f075a80e441/jdk-8u121-linux-x64.rpm"

yum localinstall jdk-8u121-linux-x64.rpm
安装Tomcat
wget http://www-us.apache.org/dist/tomcat/tomcat-8/v8.5.13/bin/apache-tomcat-8.5.13.tar.gz
mkdir /opt/tomcat

groupadd tomcat

useradd -M -s /bin/nologin -g tomcat -d /opt/tomcat tomcat

tar xvf apache-tomcat-8*tar.gz -C /opt/tomcat --strip-components=1
cd /opt/tomcat
chgrp -R tomcat /opt/tomcat
chmod -R g+r conf
chmod g+x conf
chown -R tomcat webapps/ work/ temp/ logs/
/etc/systemd/system/tomcat.service
# Systemd unit file for tomcat
[Unit]
Description=Apache Tomcat Web Application Container
After=syslog.target network.target
[Service]
Type=forking
Environment=JAVA_HOME=/usr/lib/jvm/jre
Environment=CATALINA_PID=/opt/tomcat/temp/tomcat.pid
Environment=CATALINA_HOME=/opt/tomcat
Environment=CATALINA_BASE=/opt/tomcat
Environment='CATALINA_OPTS=-Xms512M -Xmx1024M -server -XX:+UseParallelGC'
Environment='JAVA_OPTS=-Djava.awt.headless=true -Djava.security.egd=file:/dev/./urandom'
ExecStart=/opt/tomcat/bin/startup.sh
ExecStop=/bin/kill -15 $MAINPID
User=tomcat
Group=tomcat
UMask=0007
RestartSec=10
Restart=always
[Install]
WantedBy=multi-user.target
systemctl daemon-reload
systemctl start tomcat
systemctl status tomcat
systemctl enable tomcat
防火墙相关
systemctl start firewalld
systemctl enable firewalld

firewall-cmd --get-service

firewall-cmd --permanent --zone=public --add-service=http
firewall-cmd --permanent --zone=public --add-service=ssh
firewall-cmd --permanent --zone=public --remove-service=ssh
firewall-cmd --permanent --zone=public --remove-service=ss

firewall-cmd --permanent --zone=public --add-port=55555/tcp

firewall-cmd --permanent --zone=public --list-services
firewall-cmd --permanent --zone=public --list-ports
BBR 加速
rpm --import https://www.elrepo.org/RPM-GPG-KEY-elrepo.org
rpm -Uvh http://www.elrepo.org/elrepo-release-7.0-2.el7.elrepo.noarch.rpm
yum -y install kernel-ml grub2

[root@linode1495332 etc]# mkdir /boot/grub
[root@linode1495332 etc]# grub2-mkconfig -o /boot/grub/grub.cfg

cat >>/etc/sysctl.conf << EOF
net.core.default_qdisc=fq
net.ipv4.tcp_congestion_control=bbr
EOF
sysctl -p
uname -r

ls -l /boot/vmlinuz*

[root@linode1495332 ~]# sysctl net.ipv4.tcp_available_congestion_control
net.ipv4.tcp_available_congestion_control = bbr cubic reno
[root@linode1495332 ~]# lsmod | grep bbr
tcp_bbr                16384  70
Syncthing 安装
wget https://github.com/syncthing/syncthing/releases/download/v0.14.26/syncthing-linux-amd64-v0.14.26.tar.gz
tar -zxvf syncthing-linux-amd64-v0.14.26.tar.gz
cd syncthing-linux-amd64-v0.14.26
cp syncthing /usr/local/bin/
firewall-cmd --permanent --zone=public --add-service=https
firewall-cmd --permanent --zone=public --add-port=8384/tcp
firewall-cmd --permanent --zone=public --add-port=22000/tcp
firewall-cmd --permanent --zone=public --remove-port=8384/tcp
firewall-cmd --permanent --zone=public --remove-port=22000/tcp
~/.config/syncthing/config.xml
    <gui enabled="true" tls="false" debugging="false">
        <address>127.0.0.1:8384</address>
        <apikey>fpP74fZeXPGRyuiCWV2Y2jQH3zF6E5Hw</apikey>
        <theme>default</theme>
    </gui>
    <gui enabled="true" tls="false" debugging="false">
        <address>0.0.0.0:8384</address>
        <apikey>fpP74fZeXPGRyuiCWV2Y2jQH3zF6E5Hw</apikey>
        <theme>default</theme>
    </gui>
SELinux
其他
1. 重启后*7 connect() to [::1]:8080 failed (13: Permission denied)
https://stackoverflow.com/questions/23948527/13-permission-denied-while-connecting-to-upstreamnginx
I’ve run into this problem too. Another solution is to toggle the SELinux boolean value for httpd network connect to on (Nginx uses the httpd label).
setsebool httpd_can_network_connect on
To make the change persist use the -P flag.
setsebool httpd_can_network_connect on -P
You can see a list of all available SELinux booleans for httpd using
getsebool -a | grep httpd
2.connect() to unix:/var/run/php-fpm/php-fpm.sock failed (2: No such file or directory)
原来php-fpm也是需要启动的:
systemctl start php-fpm
参考资料:
http://blog.csdn.net/aqzwss/article/details/50996688
http://www.tuicool.com/articles/vIbQram
https://www.digitalocean.com/community/tutorials/how-to-install-linux-nginx-mysql-php-lemp-stack-on-centos-7
https://www.jevin.org/?p=325
最后
以上就是缥缈大山最近收集整理的关于Centos 7 Outbound DoS攻击系统安全配置安装nginx安装Mysql查看监听端口安装shadowsocks添加防火墙查找IP地址安装PHP安装 phpMyAdmin安装java安装Tomcat防火墙相关BBR 加速Syncthing 安装SELinux其他参考资料:的全部内容,更多相关Centos内容请搜索靠谱客的其他文章。


发表评论 取消回复